How To Cut Plastic
Plastic cutting is a crucial process in various industries, including manufacturing, construction, and crafting. Whether you're a professional or a DIY enthusiast, cutting plastic requires precision, patience, and the right techniques. To achieve a clean and accurate cut, it's essential to understand the different methods and tools involved. In this article, we'll explore the key steps to cut plastic like a pro, starting with the importance of preparation. We'll discuss the various cutting techniques for different types of plastic, from thin sheets to thick pipes. Finally, we'll cover the post-cutting procedures necessary for a professional finish. By following these guidelines, you'll be able to tackle any plastic cutting project with confidence. So, let's begin by emphasizing the significance of preparation, as it lays the foundation for a successful cutting process. Preparation is Key.
Preparation is Key
Preparation is key to any successful project, and working with plastic is no exception. When it comes to cutting, shaping, and molding plastic, having the right tools and a safe working environment is crucial. In this article, we will discuss the importance of preparation when working with plastic, including choosing the right tool for the job, preparing a safe working environment, and selecting the correct type of plastic. By understanding these key elements, you can ensure a successful project and avoid costly mistakes. With the right tools and preparation, you can achieve professional-looking results and take your plastic working skills to the next level. So, let's start by discussing the first crucial step in preparation: choosing the right tool for the job.
Choose the Right Tool for the Job
When it comes to cutting plastic, having the right tool for the job is crucial. Different types of plastic require different cutting techniques, and using the wrong tool can lead to poor results, damage to the material, or even safety hazards. For example, cutting through thick or rigid plastics like acrylic or polycarbonate may require a power saw or a laser cutter, while thinner plastics like polyethylene or polypropylene can be cut with a utility knife or scissors. Additionally, some plastics may require specialized tools, such as a plastic cutter or a hot wire cutter, to achieve a clean and precise cut. By choosing the right tool for the job, you can ensure a safe and successful cutting process, and achieve the desired results for your project.
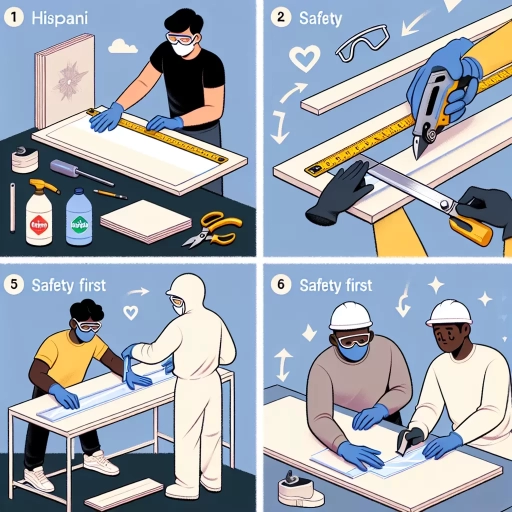
Prepare a Safe Working Environment
Preparing a safe working environment is crucial when cutting plastic to prevent accidents and ensure a smooth workflow. Start by clearing the workspace of any clutter, tripping hazards, or flammable materials. Cover the work surface with a heat-resistant material, such as a ceramic tile or a heat-resistant mat, to prevent damage from heat or sparks. Ensure good ventilation in the area to prevent the buildup of fumes from the plastic or any cleaning products used. Wear protective gear, including safety glasses, gloves, and a dust mask, to shield yourself from flying debris and inhaling particles. Keep a fire extinguisher nearby and have a first aid kit on hand in case of emergencies. Additionally, ensure that the plastic being cut is securely held in place using clamps or a vice to prevent it from moving during the cutting process. By taking these precautions, you can minimize the risk of accidents and create a safe working environment for cutting plastic.
Select the Correct Type of Plastic
When it comes to cutting plastic, selecting the correct type of plastic is crucial to ensure a successful and safe cutting process. There are several types of plastics, each with its unique characteristics, and choosing the right one can make all the difference. For instance, if you're working with a project that requires a high level of precision and accuracy, you may want to opt for a type of plastic that is known for its rigidity and stability, such as acrylic or polycarbonate. On the other hand, if you're working with a project that requires flexibility and pliability, you may want to consider a type of plastic that is known for its elasticity, such as polyethylene or polypropylene. Additionally, some types of plastics, such as PVC and ABS, are more prone to melting and deforming when cut, so it's essential to choose a type of plastic that can withstand the cutting process. By selecting the correct type of plastic, you can ensure that your project turns out as desired and that you avoid any potential safety hazards.
Cutting Techniques for Different Types of Plastic
Cutting techniques for different types of plastic are essential for various industries, including manufacturing, construction, and crafting. The type of plastic and the desired cut determine the most suitable cutting technique. For instance, thin plastics can be easily cut using a utility knife, while curved cuts require the use of a jigsaw. On the other hand, precise cuts can be achieved with a laser cutter. In this article, we will explore these cutting techniques in more detail, starting with the use of a utility knife for thin plastics. By understanding the different cutting techniques, individuals can improve their efficiency and accuracy when working with plastic materials. Whether you are a professional or a hobbyist, mastering these techniques can help you achieve high-quality results. In the following sections, we will delve into the specifics of using a utility knife, jigsaw, and laser cutter for cutting different types of plastic. First, let's take a closer look at using a utility knife for thin plastics.
Using a Utility Knife for Thin Plastics
When working with thin plastics, a utility knife is often the tool of choice due to its precision and control. To effectively use a utility knife for cutting thin plastics, start by selecting a sharp blade, as a dull blade can cause the plastic to tear or crack. Hold the knife at a 45-degree angle, with the blade facing the direction you want the cut to go. Apply gentle to moderate pressure, depending on the thickness of the plastic, and slowly draw the knife along the desired cutting line. It's essential to maintain a steady hand and consistent pressure to achieve a clean, smooth cut. For more precise cuts, consider using a ruler or straightedge as a guide to help keep the knife on track. Additionally, if the plastic is particularly thin or delicate, you may want to use a cutting mat or other protective surface to prevent the knife from slipping and causing damage. By following these tips and techniques, you can successfully use a utility knife to cut thin plastics with accuracy and precision.
Employing a Jigsaw for Curved Cuts
When it comes to making curved cuts in plastic, a jigsaw is often the best tool for the job. This versatile power tool is designed to handle a variety of cutting tasks, including curved cuts, and can be used on a range of plastic materials. To employ a jigsaw for curved cuts, start by selecting the right blade for the job. A fine-tooth blade with a curved or angled design is ideal for making smooth, precise cuts in plastic. Next, mark the curve you want to cut onto the plastic using a marker or pencil, taking care to make the line as smooth and continuous as possible. Then, set the jigsaw to a slow to medium speed and begin cutting along the marked line, using a gentle, sweeping motion to guide the blade. Apply gentle to moderate pressure, depending on the thickness and type of plastic you're working with, and take care not to apply too much pressure, which can cause the blade to bind or the plastic to crack. As you cut, use a dust mask or vacuum to minimize dust and debris, and keep the work area well-lit to ensure accuracy and safety. With a little practice and patience, you can use a jigsaw to make smooth, precise curved cuts in plastic, opening up a world of creative possibilities for your projects.
Utilizing a Laser Cutter for Precise Cuts
Utilizing a laser cutter is a highly effective method for achieving precise cuts in various types of plastic. This technology uses a high-powered laser beam to vaporize the plastic material, resulting in a clean and accurate cut. One of the primary advantages of laser cutting is its ability to produce intricate designs and complex shapes with ease. The laser cutter's precision is unmatched, allowing for cuts as small as 0.1 mm, making it an ideal choice for applications that require high accuracy. Additionally, laser cutting is a relatively fast process, with some machines capable of cutting at speeds of up to 100 mm per second. This makes it an excellent option for high-volume production runs. Furthermore, laser cutting produces minimal waste and does not require any physical contact with the material, reducing the risk of damage or contamination. To achieve optimal results, it is essential to select the correct laser settings and material parameters, taking into account the type and thickness of the plastic being cut. By doing so, users can ensure precise cuts and achieve professional-grade results. Overall, laser cutting is a versatile and efficient technique that offers unparalleled precision and accuracy, making it an invaluable tool for various industries, including manufacturing, engineering, and design.
Post-Cutting Procedures for a Professional Finish
When it comes to achieving a professional finish, post-cutting procedures are just as important as the cutting process itself. A well-executed post-cutting routine can make all the difference in the final result, transforming a rough cut into a polished and refined finish. To achieve this level of quality, it's essential to focus on three key areas: smoothing out rough edges, removing debris and residue, and applying a finishing touch. By paying attention to these details, you can ensure that your project looks and feels its best. In this article, we'll explore each of these steps in depth, starting with the crucial process of smoothing out rough edges.
Smoothing Out Rough Edges
Smoothing out rough edges is a crucial step in post-cutting procedures to achieve a professional finish. After cutting plastic, the edges can be rough, jagged, and even sharp, which can be hazardous and affect the overall appearance of the final product. To smooth out these rough edges, several methods can be employed, depending on the type of plastic and the desired level of smoothness. One common method is to use a deburring tool, which is specifically designed to remove small imperfections and burrs from the edges of cut plastic. Another method is to use a file or sandpaper to manually smooth out the edges, starting with a coarse grit and progressing to finer grits for a high-gloss finish. For more precise control, a rotary tool or a Dremel can be used to carefully smooth out the edges, especially in tight spaces or intricate designs. Additionally, chemical deburring methods can be used, which involve applying a chemical solution to the edges to dissolve and remove any imperfections. Regardless of the method chosen, it is essential to work carefully and patiently to achieve a smooth, even finish that meets the desired standards. By smoothing out rough edges, you can ensure a professional finish that enhances the overall quality and appearance of your plastic cutting project.
Removing Debris and Residue
Removing debris and residue is a crucial step in post-cutting procedures to achieve a professional finish. After cutting plastic, it's essential to remove any debris, dust, or residue left behind to prevent scratches, marks, or other imperfections. Start by gently blowing away any loose debris using compressed air or a soft-bristled brush. For more stubborn residue, use a mild detergent and warm water to wipe down the cut area. Avoid using harsh chemicals or abrasive materials that can damage the plastic. For more intricate cuts or complex shapes, use a small, soft-bristled brush to remove debris from tight spaces. Once the debris is removed, use a clean, dry cloth to wipe down the area and remove any remaining residue. For a high-gloss finish, use a plastic polish or a specialized cleaning solution to remove any remaining imperfections. Regularly cleaning and maintaining your cutting tools and workspace can also help prevent debris and residue from building up in the future. By taking the time to properly remove debris and residue, you can ensure a professional finish and extend the lifespan of your plastic materials.
Applying a Finishing Touch
Applying a finishing touch to your cut plastic is a crucial step in achieving a professional finish. This process involves removing any excess material, smoothing out rough edges, and enhancing the overall appearance of the cut plastic. To apply a finishing touch, start by inspecting the cut plastic for any excess material or debris. Use a soft-bristled brush or a lint-free cloth to gently remove any loose particles. Next, use a fine-grit sandpaper or a sanding block to smooth out any rough edges or burrs. This will help to create a smooth, even surface that is free from imperfections. For a high-gloss finish, use a plastic polish or a buffing compound to remove any scratches or marks. Apply the polish or compound to a soft cloth and rub it gently into the plastic, using a circular motion. Finally, use a clean, dry cloth to wipe away any excess polish or compound, leaving a smooth, glossy finish. By applying a finishing touch to your cut plastic, you can achieve a professional finish that is both durable and visually appealing.