How To Clean Grinder
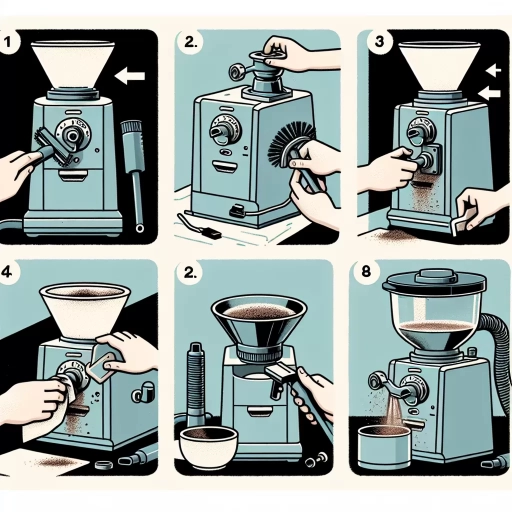
Cleaning your grinder is an essential part of maintaining its performance and longevity. A dirty grinder can lead to subpar results, clog the machine, and even harbor bacteria and mold. To ensure your grinder continues to function optimally, it's crucial to clean it regularly. In this article, we'll guide you through the process of cleaning your grinder, covering three key areas: pre-cleaning preparation, the actual cleaning process, and post-cleaning maintenance. By following these steps, you'll be able to keep your grinder in top condition and prevent any potential issues. Before we dive into the cleaning process, it's essential to prepare your grinder for cleaning. In the next section, we'll discuss the necessary steps to take before cleaning your grinder, including disassembling and inspecting the machine. This will ensure that you're able to clean all parts effectively and safely. Let's start with Pre-Cleaning Preparation.
Pre-Cleaning Preparation
Pre-cleaning preparation is a crucial step in maintaining your grinder's performance and longevity. Before you start cleaning your grinder, there are several steps you need to take to ensure a smooth and effective cleaning process. First, you need to empty the grinder to remove any remaining coffee grounds or debris. This will prevent any clogs or blockages during the cleaning process. Next, you need to remove any large debris or buildup from the grinder's exterior and interior surfaces. This will make it easier to clean the grinder and prevent any scratches or damage. Finally, you need to disassemble the grinder to access all the parts that need to be cleaned. By taking these steps, you'll be able to give your grinder a thorough cleaning and keep it in good working condition. To start, let's begin with the first step: emptying the grinder.
Empty the Grinder
When it comes to pre-cleaning preparation for your grinder, one of the most crucial steps is to empty the grinder. This involves removing any remaining coffee grounds, beans, or debris from the grinder's chamber, chute, and other parts. Start by unplugging the grinder and allowing it to cool down completely. Then, carefully remove the hopper and any other detachable parts, such as the grind container or chute. Gently tap the parts to loosen any stuck grounds, and use a soft brush or a small vacuum cleaner to remove any remaining debris. Next, use a dry cloth or paper towel to wipe down the interior of the grinder, paying particular attention to any areas with visible buildup. Be sure to also clean the grinder's blades and burrs, as these can become clogged with old coffee oils and residue. By thoroughly emptying the grinder, you'll be able to remove any lingering flavors and aromas, ensuring that your next batch of coffee is fresh and full of flavor. Additionally, emptying the grinder will also help prevent any old coffee grounds from becoming stale and affecting the taste of your future brews. By taking the time to properly empty the grinder, you'll be setting yourself up for a successful cleaning process and a better-tasting cup of coffee.
Remove Large Debris
When it comes to pre-cleaning preparation for your grinder, one of the most crucial steps is to remove large debris. This involves taking out any big chunks of food, such as bones, seeds, or pits, that may be lodged in the grinder. Start by unplugging the grinder and letting it cool down completely to avoid any accidental starts or injuries. Next, carefully disassemble the grinder, taking out the grinding chamber, blades, and any other removable parts. Use a soft-bristled brush or a small vacuum cleaner to gently sweep away any loose debris from the grinding chamber and blades. For tougher debris, you can use a small, soft-bristled brush or a toothbrush to scrub away any stuck-on particles. Be sure to rinse the brush frequently to avoid re-depositing debris back into the grinder. Once you've removed the large debris, you can proceed to the next step of cleaning, which involves soaking and sanitizing the grinder parts. By removing large debris, you'll prevent any blockages or damage to the grinder during the cleaning process, ensuring a smooth and efficient cleaning experience.
Disassemble the Grinder
To disassemble the grinder, start by unplugging it from the power source to ensure your safety while working on it. Next, locate the screws that hold the grinder's outer casing in place, usually found at the bottom or sides of the device. Remove these screws using a screwdriver, taking care not to strip them. Once the screws are removed, gently pry the casing open, working your way around the edges until it comes apart. Be careful not to touch any of the internal components, as the oils from your skin can damage them. Inside, you'll find the grinding chamber, which is typically held in place by clips or additional screws. Release these clips or remove the screws to access the grinding chamber. Remove any remaining parts, such as the grinding stones or blades, and set them aside for cleaning. Take note of the order in which you disassembled the parts, as you'll need to reassemble them in the same order later. Finally, inspect the grinder's internal components for any blockages or debris, and remove any large particles that may be obstructing the grinding process.
Cleaning the Grinder
Cleaning the grinder is an essential part of maintaining its performance and longevity. A dirty grinder can lead to poor-tasting coffee, clogged burrs, and even damage to the machine. To keep your grinder in top condition, it's crucial to clean it regularly. There are several methods to clean a grinder, including using a brush to remove residue, wiping down with a damp cloth, and soaking parts in warm soapy water. By incorporating these methods into your cleaning routine, you can ensure your grinder continues to produce high-quality coffee. One of the most effective ways to start the cleaning process is to use a brush to remove residue, which will be discussed in more detail below.
Use a Brush to Remove Residue
When it comes to cleaning your grinder, one of the most effective tools you can use is a brush. A brush is perfect for removing residue from the grinder's surfaces, especially in hard-to-reach areas. Start by selecting a brush with soft bristles, as these will be gentle on the grinder's components and won't scratch the surfaces. Dip the brush in warm soapy water, and then use it to gently scrub away any residue or debris that has accumulated on the grinder's surfaces. Be sure to get into all the nooks and crannies, including the grinding chamber, the lid, and the blades. As you brush, pay particular attention to any areas with visible buildup or staining. Once you've brushed away as much residue as possible, use a clean towel to wipe down the surfaces and remove any remaining moisture. This will help prevent water spots from forming and keep your grinder in good working order. By using a brush to remove residue, you'll be able to keep your grinder clean and functioning properly, and you'll also be able to prevent the growth of bacteria and mold that can thrive in dirty grinders. Regular brushing will also help to extend the life of your grinder, as it will reduce the risk of corrosion and wear and tear on the components. Overall, using a brush to remove residue is a simple yet effective way to keep your grinder clean and in good working order.
Wipe Down with a Damp Cloth
Cleaning the grinder is an essential part of maintaining its performance and longevity. One of the most effective ways to clean the grinder is to wipe it down with a damp cloth. This simple yet powerful technique can help remove any debris, dust, or residue that may have accumulated on the grinder's surface. To do this, start by turning off the grinder and unplugging it from the power source. Then, take a soft, lint-free cloth and dampen it with water. Wring out the cloth so that it's not soaking wet, but still damp. Gently wipe down the entire grinder, paying special attention to any areas with visible buildup or stains. Be sure to wipe in the direction of the grinder's finish to avoid scratching the surface. As you wipe, you may notice the cloth picking up dirt, dust, and other debris. This is a good sign that the cleaning process is working. Continue wiping until the cloth comes away clean, indicating that the grinder is free of any loose debris. Finally, use a dry cloth to wipe down the grinder and remove any excess moisture. This will help prevent water spots from forming and keep the grinder in good working condition. By wiping down the grinder with a damp cloth, you can keep it clean, functional, and ready for its next use.
Soak Parts in Warm Soapy Water
Cleaning the grinder is an essential part of maintaining its performance and longevity. To do this effectively, it's crucial to soak parts in warm soapy water. This step is vital in loosening any tough residue and grime that may have accumulated on the grinder's components. By submerging the parts in a solution of warm water and mild soap, you allow the grime to soften and break down, making it easier to remove during the cleaning process. It's recommended to let the parts soak for at least 30 minutes to an hour to ensure that the soap has penetrated deep into the crevices and loosened all the tough grime. After soaking, use a soft-bristled brush or a non-abrasive scrubber to gently scrub away any remaining residue, taking care not to scratch the surfaces. Once cleaned, thoroughly rinse the parts with warm water to remove any soap residue, and dry them with a soft cloth to prevent water spots. By soaking parts in warm soapy water, you'll be able to effectively clean your grinder and keep it in good working condition.
Post-Cleaning Maintenance
Proper post-cleaning maintenance is crucial to ensure the longevity and optimal performance of your grinder. After a thorough cleaning, it's essential to dry the grinder thoroughly to prevent any water spots or mineral deposits from forming. This is especially important for grinders with metal or stainless steel components, as water can cause rust or corrosion. Additionally, reassembling the grinder correctly is vital to maintain its functionality and prevent any damage to the internal components. Regularly cleaning the grinder is also necessary to prevent the buildup of old coffee oils and residue, which can affect the flavor of your coffee. By following these simple steps, you can keep your grinder in top condition and ensure it continues to perform at its best. To start, let's take a closer look at the importance of drying the grinder thoroughly.
Dry the Grinder Thoroughly
Cleaning your grinder is just the first step in maintaining its performance and longevity. To ensure your grinder continues to function optimally, it's essential to dry it thoroughly after cleaning. This step is crucial in preventing any water spots or mineral deposits from forming on the grinder's surface. Start by using a soft, dry cloth to wipe down the entire grinder, paying extra attention to any areas with visible moisture. Next, use a clean towel to dry the grinder's blades and any other removable parts. If you have a grinder with a removable grinding chamber, be sure to dry it thoroughly as well. Finally, use a dry brush or a small, dry cloth to clean out any crevices or small spaces where moisture may accumulate. By taking the time to dry your grinder thoroughly, you'll be able to prevent any damage caused by water or mineral buildup, ensuring your grinder continues to perform at its best.
Reassemble the Grinder
Here is the paragraphy: Reassembling the grinder is a crucial step in post-cleaning maintenance. After cleaning and drying all the parts, it's essential to reassemble the grinder in the correct order to ensure it functions properly. Start by attaching the grinding wheel or blade back to the grinder, making sure it's securely fastened with the retaining ring or nut. Next, reattach the guard or cover, ensuring it's properly aligned and secured with screws or clips. If your grinder has a dust collection system, reattach the dust port and hose, making sure they're securely connected. Finally, plug in the grinder and test it to ensure it's working correctly. It's also a good idea to refer to your grinder's user manual for specific reassembly instructions, as different models may have varying requirements. By reassembling the grinder correctly, you'll be able to maintain its performance and extend its lifespan.
Regularly Clean the Grinder
Regularly cleaning the grinder is an essential part of maintaining its performance and longevity. Over time, residue and buildup from coffee beans, oils, and other debris can accumulate inside the grinder, affecting the flavor and aroma of your coffee. If not cleaned regularly, the grinder can become clogged, leading to inconsistent grind sizes, reduced motor efficiency, and even complete breakdown. To prevent this, it's recommended to clean the grinder at least once a week, or more often if you use it daily. Start by unplugging the grinder and removing any large debris or coffee grounds from the exterior and interior. Then, use a soft brush or a small vacuum cleaner to remove any remaining dust and particles. For more thorough cleaning, mix equal parts water and white vinegar in the grinder and run it for a few seconds to loosen any stubborn buildup. Finally, wipe down the grinder with a damp cloth and dry it thoroughly to prevent any water spots or mineral deposits. By regularly cleaning the grinder, you'll be able to maintain its optimal performance, ensure consistent grind sizes, and enjoy a fresher, more flavorful cup of coffee.