How To Connect Beats Studio 3
Here is the introduction paragraph: Connecting your Beats Studio 3 headphones to your device can be a straightforward process, but it requires some preparation and knowledge of the steps involved. To ensure a seamless connection, it's essential to understand the basics of how to connect your Beats Studio 3 headphones to your device. In this article, we'll guide you through the process, starting with the preparation needed to connect your headphones, including checking the device's compatibility and ensuring the headphones are fully charged. We'll then walk you through the step-by-step process of connecting your Beats Studio 3 to your device, whether it's a smartphone, tablet, or computer. Finally, we'll provide troubleshooting tips to help you resolve any common connection issues that may arise. With these simple steps, you'll be able to enjoy your favorite music with crystal-clear sound and ease. Let's start by preparing for connection.
Preparation for Connection
To ensure a seamless connection between your Beats Studio 3 headphones and your device, preparation is key. Before you start enjoying your favorite tunes or taking hands-free calls, there are a few essential steps to take. First, it's crucial to charge your Beats Studio 3 headphones to ensure they have enough power to pair and function properly. Additionally, updating your device's operating system is vital to guarantee compatibility and the latest features. Lastly, downloading the Beats app can enhance your listening experience and provide you with more control over your headphones. By taking these simple steps, you'll be well on your way to a hassle-free connection. So, let's start with the first step: charging your Beats Studio 3 headphones.
Charge Your Beats Studio 3 Headphones
Here is the paragraphy: To charge your Beats Studio 3 headphones, locate the charging port on the right earcup. Plug the provided USB cable into the charging port and connect the other end to a USB power source, such as a computer or a wall adapter. The charging light on the headphones will turn red to indicate that they are charging. It's recommended to charge your Beats Studio 3 headphones for at least 10 minutes to get at least 3 hours of playback. A full charge takes around 2 hours and provides up to 22 hours of playback. Make sure to charge your headphones regularly to maintain their battery life. Additionally, you can also charge your Beats Studio 3 headphones wirelessly using a Qi-compatible charging pad, if you have the wireless charging case. Always keep your headphones charged and ready to use for a seamless listening experience.
Update Your Device's Operating System
To ensure seamless connectivity and optimal performance, it's essential to update your device's operating system (OS) before connecting your Beats Studio3 headphones. An outdated OS can lead to compatibility issues, slow data transfer, and poor audio quality. Regular updates often include bug fixes, security patches, and feature enhancements that improve the overall user experience. For instance, if you're using an iPhone, go to Settings > General > Software Update to check for any available updates. Similarly, Android users can navigate to Settings > System > System update to ensure their device is running the latest OS version. Updating your device's OS will also ensure that you have the latest Bluetooth version, which is crucial for stable and high-quality audio streaming. Additionally, an updated OS will enable you to take advantage of the latest features and improvements, such as enhanced battery life, faster pairing, and improved noise cancellation. By keeping your device's OS up-to-date, you'll be able to enjoy uninterrupted and high-quality audio streaming with your Beats Studio3 headphones.
Download the Beats App
To download the Beats app, navigate to the App Store on your iOS device or Google Play Store on your Android device. Search for "Beats" in the search bar, and select the "Beats" app from the search results. Tap the "Get" or "Install" button to begin the download process. Once the download is complete, tap the "Open" button to launch the app. You will be prompted to sign in with your Apple ID or create a new account if you don't have one. After signing in, you will be asked to pair your Beats Studio3 headphones with the app. Follow the on-screen instructions to complete the pairing process. The Beats app allows you to customize your listening experience, update your headphones' firmware, and access additional features such as noise cancellation and audio sharing. By downloading the Beats app, you can unlock the full potential of your Beats Studio3 headphones and enjoy a more immersive listening experience.
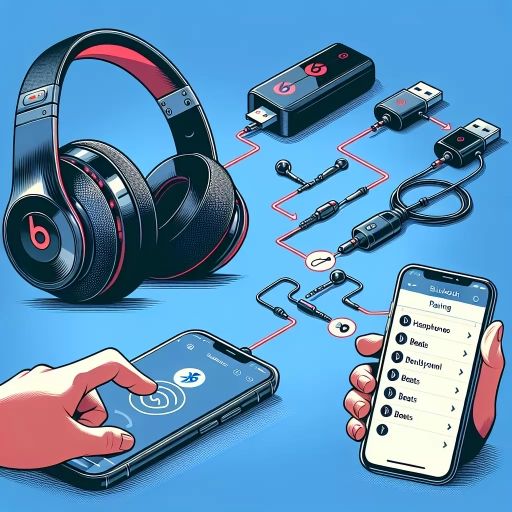
Connecting Beats Studio 3 to Your Device
Connecting your Beats Studio 3 headphones to your device is a straightforward process that can be completed in just a few steps. Whether you're using an iOS device, an Android device, or a Windows or macOS computer, the process is relatively similar. In this article, we'll walk you through the steps to pair your Beats Studio 3 with each of these devices. We'll start by exploring how to pair your headphones with an iOS device, such as an iPhone or iPad. This is a great place to begin, as many Beats Studio 3 owners use their headphones with their Apple devices. By the end of this article, you'll be able to easily connect your Beats Studio 3 to your device and start enjoying your music, podcasts, or videos with high-quality sound. First, let's take a look at how to pair your Beats Studio 3 with an iOS device.
Pairing with an iOS Device
When pairing your Beats Studio 3 with an iOS device, the process is relatively straightforward. First, ensure that your Beats Studio 3 is turned on and in pairing mode. You can do this by pressing and holding the power button until the LED light flashes. Next, open the Settings app on your iOS device and navigate to the Bluetooth section. Look for your Beats Studio 3 in the list of available devices and select it. If prompted, enter the passcode "0000" to complete the pairing process. Once paired, you'll see a checkmark next to your Beats Studio 3 in the Bluetooth settings, indicating a successful connection. You can now enjoy seamless audio streaming and hands-free calls with your Beats Studio 3 and iOS device. Additionally, if you have an iPhone or iPad with iOS 10 or later, you can also use the W1 chip to pair your Beats Studio 3. Simply open the lid of your Beats Studio 3 and hold it near your iOS device to initiate the pairing process. The W1 chip will automatically detect and pair your Beats Studio 3 with your iOS device, making the process even more convenient.
Pairing with an Android Device
To pair your Beats Studio 3 with an Android device, start by making sure your headphones are in pairing mode. You can do this by pressing and holding the power button on your Beats Studio 3 until the LED light flashes. Next, go to your Android device's Bluetooth settings and select "Beats Studio3" from the list of available devices. If prompted, enter the passcode "0000" to complete the pairing process. Once paired, you'll see a confirmation message on your Android device, and your Beats Studio 3 will be connected and ready to use. You can also use the Beats app for Android to pair your headphones and access additional features such as customized sound settings and device tracking. To pair using the app, download and install the Beats app, then follow the in-app instructions to connect your Beats Studio 3 to your Android device. With your Beats Studio 3 paired, you can enjoy high-quality audio and take advantage of features like noise cancellation and up to 22 hours of battery life.
Pairing with a Windows or macOS Computer
To pair your Beats Studio 3 with a Windows or macOS computer, follow these straightforward steps. First, ensure your headphones are turned off. Then, press and hold the power button until the Fuel Gauge flashes. Next, put your Beats Studio 3 in pairing mode by pressing and holding the power button again until the LED light flashes white. On your Windows computer, go to the Start menu and click on Settings, then Devices, and finally Bluetooth & other devices. Click on the "+" icon to add a new device and select your Beats Studio 3 from the list of available devices. If prompted, enter the passcode "0000" to complete the pairing process. For macOS users, click on the Apple menu and select System Preferences, then Bluetooth. Select your Beats Studio 3 from the list of available devices and click "Connect." If prompted, enter the passcode "0000" to complete the pairing process. Once paired, you'll be able to enjoy high-quality audio from your computer through your Beats Studio 3. Additionally, you can also use the Beats app for Windows or macOS to customize your listening experience and update your headphones' firmware. By following these simple steps, you can easily pair your Beats Studio 3 with your Windows or macOS computer and start enjoying your favorite music, videos, and more.
Troubleshooting Common Connection Issues
Here is the introduction paragraph: Are you experiencing frustrating connection issues with your Beats Studio 3 headphones? Don't worry, you're not alone. Many users have reported difficulties with pairing, dropping calls, and poor sound quality. Fortunately, troubleshooting these common connection issues is relatively straightforward. In this article, we'll explore three effective solutions to get your Beats Studio 3 headphones working smoothly again. First, we'll discuss the importance of resetting your headphones to their factory settings. We'll also examine how other devices can interfere with your connection and provide tips on how to minimize this interference. Additionally, we'll cover the process of updating your headphones' firmware to ensure you have the latest features and bug fixes. By the end of this article, you'll be equipped with the knowledge to resolve common connection issues and enjoy uninterrupted listening. Let's start by resetting your Beats Studio 3 headphones. Here is the supporting paragraph: When it comes to resolving connection issues with your Beats Studio 3 headphones, it's essential to consider the role of other devices in your environment. Interference from devices such as cordless phones, microwaves, and neighboring Wi-Fi networks can significantly impact the quality of your connection. To minimize this interference, try moving your headphones away from other devices or switching them off when not in use. You can also change the Wi-Fi channel on your router to one that is less congested. By taking these simple steps, you can reduce the likelihood of interference and improve the overall performance of your headphones. Furthermore, if you're using a device with a physical connection, such as a computer or gaming console, try using a different USB port or cable to rule out any issues with the connection. By isolating the source of the problem, you can take the necessary steps to resolve it and enjoy a more stable connection.
Resetting Your Beats Studio 3 Headphones
To reset your Beats Studio 3 headphones, start by making sure they are turned off. Next, locate the small button on the underside of the right earcup, near the charging port. Press and hold this button for about 10 seconds until the LED light on the headphones begins to flash. Release the button and immediately press and hold it again for another 10 seconds. The headphones will then enter reset mode, and the LED light will flash red. Once the reset is complete, the headphones will automatically turn off. To confirm the reset, turn the headphones back on and check that they are in pairing mode, indicated by a flashing white light. If you're still experiencing connection issues after resetting your Beats Studio 3, try restarting your device and then pairing the headphones again. It's also a good idea to check for any software updates for your headphones and device to ensure you have the latest versions. By resetting your Beats Studio 3, you'll restore the headphones to their factory settings, which can often resolve connectivity problems and get you back to enjoying your music.
Checking for Interference from Other Devices
Here is the paragraphy: When troubleshooting connection issues with your Beats Studio3 headphones, it's essential to check for interference from other devices. Other electronic devices in your vicinity can cause interference with your headphones' Bluetooth signal, leading to dropped calls, poor sound quality, or disconnections. To identify potential sources of interference, look for devices that use the same 2.4 GHz frequency band as your headphones, such as cordless phones, microwaves, and neighboring Wi-Fi routers. Additionally, physical barriers like walls, furniture, and metal objects can also disrupt the signal. To minimize interference, try moving your headphones and connected device closer together, and away from other devices that may be causing interference. You can also try switching to a different Wi-Fi channel or moving your router to a different location to reduce interference. If you're still experiencing issues, try resetting your headphones or restarting your connected device to resolve the problem. By checking for interference from other devices, you can help ensure a stable and reliable connection with your Beats Studio3 headphones.
Updating Your Beats Studio 3 Firmware
Here is the paragraphy: Updating your Beats Studio 3 firmware is a crucial step in ensuring that your headphones function properly and efficiently. To update your firmware, start by connecting your headphones to your computer using a USB cable. Next, go to the Beats website and download the Beats Updater tool. Once the tool is installed, launch it and follow the on-screen instructions to update your firmware. The update process may take a few minutes, so be patient and do not disconnect your headphones until the process is complete. It's also important to note that you should only update your firmware using the official Beats website to avoid any potential risks or compatibility issues. If you're having trouble updating your firmware, you can try resetting your headphones or contacting Beats customer support for assistance. By keeping your firmware up to date, you can ensure that your Beats Studio 3 headphones continue to provide you with the best possible listening experience. Regular firmware updates can also help to resolve any connectivity issues you may be experiencing, so it's a good idea to check for updates regularly. Additionally, updating your firmware can also help to improve the overall performance and battery life of your headphones. So, if you're experiencing any issues with your Beats Studio 3 headphones, updating your firmware is a good place to start.