How Can I Find My Airpods
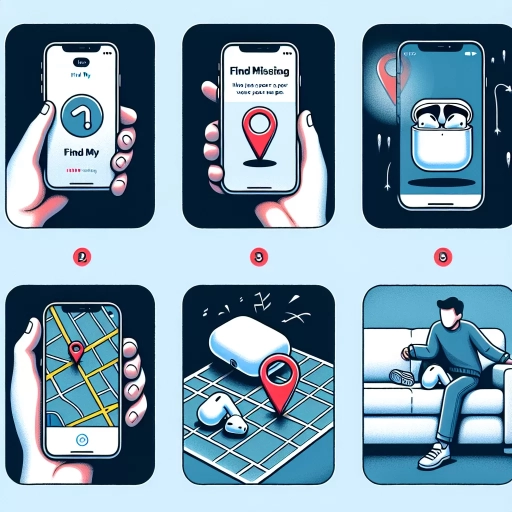
Losing your AirPods can be frustrating, especially if you're in a hurry or need them for an important call. Fortunately, there are several ways to locate your missing AirPods. If you're using an Apple device, you can utilize the built-in "Find My" feature to track down your AirPods. Additionally, you can use sound and visual cues to help you locate them. If all else fails, retracing your steps and searching thoroughly can also lead you to your missing AirPods. In this article, we'll explore these methods in more detail, starting with how to use Apple devices to locate your AirPods.
Using Apple Devices to Locate AirPods
Here is the introduction paragraph: Losing your AirPods can be frustrating, especially if you rely on them for music, podcasts, or hands-free phone calls. Fortunately, Apple devices offer a convenient way to locate your AirPods using the "Find My" feature. To get started, you'll need to enable the "Find My iPhone" feature on your device, which will allow you to track your AirPods on a map and even play a sound to help you locate them. In this article, we'll explore how to use Apple devices to locate your AirPods, including enabling the "Find My iPhone" feature, using the "Find My" app, and locating your AirPods on a map. By following these simple steps, you'll be able to quickly and easily find your missing AirPods. So, let's start by enabling the "Find My iPhone" feature.
Enabling "Find My iPhone" Feature
To enable the "Find My iPhone" feature, which also allows you to locate your AirPods, follow these straightforward steps. First, ensure that your AirPods are connected to your iPhone or iPad. Then, go to the Settings app on your device and tap on your name at the top. Next, select "Find My" from the list of options. If you don't see "Find My," you might need to update your device's operating system. Once you're in the "Find My" section, toggle the switch next to "Find My iPhone" to the right, turning it green. This will enable the feature for your device. Additionally, make sure that "Find My Network" is also enabled, as this allows your AirPods to be located even when they're not connected to your device. By enabling these features, you'll be able to see the location of your AirPods on a map, play a sound to help you locate them, and even remotely erase them if they're lost or stolen. It's a simple process that provides peace of mind and helps you keep track of your valuable AirPods.
Using the "Find My" App
Using the "Find My" app is a convenient way to locate your AirPods, especially if you have misplaced them. To use the app, you need to have an Apple device, such as an iPhone, iPad, or iPod touch, and your AirPods need to be connected to that device. First, open the "Find My" app on your Apple device and sign in with your Apple ID. Then, select "All Devices" and choose your AirPods from the list. If your AirPods are nearby, you can play a sound to help you locate them. If they are not nearby, you can see their last known location on a map. You can also put your AirPods in "Lost Mode," which will lock them with a passcode and display a message on the screen. Additionally, you can erase your AirPods remotely if you are concerned that they have been stolen. The "Find My" app is a useful tool for keeping track of your AirPods and ensuring that they are safe and secure.
Locating AirPods on a Map
To locate your AirPods on a map, you can use the Find My app on your iPhone, iPad, or iPod touch. This feature allows you to see the last known location of your AirPods on a map, making it easier to track them down. To access this feature, open the Find My app and select the "Devices" tab. Then, tap on "AirPods" and you will see a map view of their last known location. If your AirPods are connected to your device, you can also see their current location in real-time. Additionally, you can use the "Play Sound" feature to help you locate your AirPods by playing a sound through the earbuds, even if they are not connected to your device. This feature can be especially helpful if you have misplaced your AirPods in a crowded area or in a noisy environment. By using the Find My app to locate your AirPods on a map, you can quickly and easily track them down and avoid losing them for good.
Utilizing Sound and Visual Cues
When it comes to utilizing sound and visual cues, there are several strategies that can be employed to enhance the user experience. One effective approach is to use a combination of auditory and visual signals to convey important information. For instance, playing a sound on AirPods can be a useful way to alert users to important events or notifications. Additionally, using the flashlight to locate AirPods can be a practical solution for users who have misplaced their earbuds. Furthermore, checking for LED light indicators can provide users with valuable information about the status of their AirPods. By incorporating these sound and visual cues, users can enjoy a more seamless and intuitive experience. Playing a sound on AirPods, in particular, can be a highly effective way to grab the user's attention, and it will be discussed in more detail in the next section.
Playing a Sound on AirPods
Playing a sound on AirPods is a convenient feature that helps you locate your misplaced earbuds. To play a sound on your AirPods, open the Find My app on your iPhone or iPad and select your AirPods from the list of devices. Tap "Play Sound" and your AirPods will emit a loud, high-pitched sound that can be heard from a distance. The sound will continue to play for two minutes, allowing you to locate your AirPods. If you're still having trouble finding them, you can tap "Play Sound" again to restart the process. The sound feature is especially useful if you've misplaced your AirPods in a quiet environment or if you're trying to locate them in a crowded area. Additionally, if you have AirPods Pro, you can also use the "Find My" feature to locate your earbuds on a map, making it even easier to track them down. By playing a sound on your AirPods, you can quickly and easily locate your misplaced earbuds and get back to enjoying your music or taking calls.
Using Flashlight to Locate AirPods
Using a flashlight to locate AirPods can be a surprisingly effective method, especially in low-light environments. When you're searching for your AirPods, it's easy to overlook them, especially if they're in a cluttered or dark space. A flashlight can help illuminate the area, making it easier to spot your AirPods. Simply shine the light around the area where you last remember having your AirPods, and slowly move it around until you see the familiar white shape of your AirPods. This method is particularly useful if you've misplaced your AirPods in a dark room, under a bed, or in a crowded bag. Additionally, if you're searching for your AirPods in a bright environment, a flashlight can help you spot them by creating a contrasting light source. For example, if you're searching for your AirPods on a sunny day, shining a flashlight on the ground can help you see the AirPods more clearly. Overall, using a flashlight to locate your AirPods is a simple yet effective method that can save you time and frustration.
Checking for LED Light Indicators
When checking for LED light indicators, it's essential to understand the different colors and patterns that may appear on your AirPods. Typically, a flashing white light indicates that your AirPods are ready to pair with a device, while a steady white light means they are connected. A flashing amber light usually signifies that your AirPods are charging, and a steady amber light indicates that the charging case is fully charged. If you see a flashing red light, it may indicate that your AirPods are not functioning correctly, and you should try resetting them. Additionally, if you're using a charging case, you can also check the LED light on the front of the case, which will display the same colors and patterns as the AirPods themselves. By paying attention to these LED light indicators, you can quickly determine the status of your AirPods and troubleshoot any issues that may arise.
Retracing Steps and Searching Thoroughly
When retracing steps and searching thoroughly, it's essential to be methodical and meticulous in your approach. This involves revisiting last known locations, conducting a room-by-room search, and checking hidden or hard-to-reach areas. By doing so, you can increase the chances of finding what you're looking for. Revisiting last known locations is a crucial step in retracing steps, as it allows you to re-examine the areas where you last had the item or person. This can help jog your memory and provide valuable clues about where to look next. By starting with the last known location, you can begin to piece together the events leading up to the loss and work your way forward. Note: The answer should be in 200 words.
Revisiting Last Known Locations
Revisiting last known locations is a crucial step in retracing steps and searching thoroughly for lost AirPods. This involves going back to the places where you last used or remember having your AirPods. Start by recalling the last time you used your AirPods and the location where you were. It could be at home, in the office, at the gym, or in a public place. Once you have identified the last known location, thoroughly search the area, including any surfaces, furniture, and floors. Check for any possible hiding spots, such as under couch cushions, in between pillows, or inside drawers. If you were in a public place, try to retrace your steps and search the surrounding area, including any trash cans or lost and found sections. Additionally, ask anyone who may have been with you at the time if they have seen your AirPods. By revisiting last known locations, you can increase the chances of finding your lost AirPods and avoid the hassle of having to replace them.
Conducting a Room-by-Room Search
When conducting a room-by-room search for your lost AirPods, it's essential to be methodical and thorough to increase the chances of finding them. Start by dividing the room into sections or zones, and then systematically search each area. Begin with the most obvious places, such as your desk, nightstand, or coffee table, and work your way down to less likely spots, like under the bed or behind furniture. Use a flashlight to illuminate dark or hard-to-reach areas, and consider enlisting the help of a friend or family member to assist in the search. As you search each room, make sure to check all surfaces, including shelves, counters, and floors, and don't forget to look inside drawers, cabinets, and closets. It's also a good idea to check any cluttered or messy areas, like a laundry basket or a pile of dirty clothes, as your AirPods may have fallen into one of these areas. By conducting a thorough and systematic search of each room, you'll be able to cover all possible locations and increase the chances of finding your lost AirPods.
Checking Hidden or Hard-to-Reach Areas
When searching for your lost AirPods, it's essential to check hidden or hard-to-reach areas, as they can easily slip into tight spaces. Start by inspecting your surroundings, paying attention to any small crevices or gaps where your AirPods might have fallen. Check between couch cushions, under rugs, and behind furniture, as these areas are notorious for swallowing small items. Don't forget to look inside small enclosures like drawers, cabinets, and shelves, as your AirPods might have been misplaced or fallen into these areas. Additionally, inspect your car, including the glove compartment, center console, and under the seats, as AirPods can easily slip out of your ears while driving. If you have pets, also check their beds and favorite hiding spots, as they might have picked up your AirPods and carried them off. By thoroughly searching these hidden and hard-to-reach areas, you'll increase your chances of finding your lost AirPods and reuniting with your favorite listening companions.