How To Make A Magic Ring In Crochet
Here is the introduction paragraph: Creating a magic ring in crochet is a fundamental skill that can elevate your projects to the next level. A magic ring, also known as a magic circle or adjustable ring, is a technique used to create a small, tight circle that can be used as a foundation for a variety of crochet projects, such as amigurumi toys, granny squares, and more. To master the magic ring, it's essential to understand the basics of crochet, including the necessary stitches and techniques. In this article, we'll take you through a step-by-step guide on how to create a magic ring, from understanding the basics of crochet magic rings to customizing and finishing your project. First, let's start with the foundation of it all - Understanding the Basics of Crochet Magic Rings.
Understanding the Basics of Crochet Magic Rings
The art of crochet has been a beloved hobby for centuries, and one of the most essential techniques to master is the magic ring. A magic ring is a foundation stitch that allows crocheters to create a seamless, professional-looking circle that is perfect for a variety of projects, from amigurumi toys to granny squares. To understand the basics of crochet magic rings, it's essential to start with the fundamentals. First, you'll need to choose the right hook and yarn for your project, as this will affect the size and texture of your magic ring. Next, you'll need to familiarize yourself with the basic crochet stitches used in magic rings, such as the chain stitch and the single crochet. Finally, understanding what a magic ring is and how it's used in crochet is crucial to mastering this technique. So, let's dive in and explore what a magic ring in crochet is and how it can elevate your crochet game.
What is a Magic Ring in Crochet?
A magic ring in crochet is a technique used to create a small, tight circle of stitches that serves as the foundation for a project, such as a hat, scarf, or amigurumi toy. It is also known as a magic circle, adjustable ring, or sliding loop. The magic ring allows crocheters to start a project without leaving a hole in the center, creating a seamless and professional-looking finish. To create a magic ring, crocheters make a loop with the yarn, then insert the hook into the loop and draw up a stitch. The loop is then pulled tight to form a small circle, and the stitches are worked into the ring to create the desired shape. The magic ring is a versatile technique that can be used with various yarn weights and hook sizes, making it a valuable skill for crocheters of all levels.
Choosing the Right Hook and Yarn for Your Magic Ring
When it comes to creating a magic ring in crochet, choosing the right hook and yarn is crucial for achieving the desired results. The hook size and type will affect the tension and texture of the stitches, while the yarn weight and fiber content will impact the overall look and feel of the project. For a magic ring, it's essential to select a hook that is comfortable to hold and easy to maneuver, as you'll be working with a small, tight circle. A hook with a smooth, rounded handle and a tapered shaft is ideal, as it will allow for easy stitch insertion and minimal yarn splitting. In terms of yarn, a medium-weight yarn with a smooth, non-fuzzy texture is recommended, as it will provide a clear, defined stitch pattern and prevent the yarn from splitting or fraying. Acrylic, cotton, and blends are popular choices for magic rings, as they offer a good balance of durability, softness, and stitch definition. Avoid using very thick or very thin yarns, as they can be difficult to work with and may result in an uneven or sloppy magic ring. By selecting the right hook and yarn, you'll be able to create a magic ring that is even, smooth, and professional-looking, setting the foundation for a beautiful and successful crochet project.
Basic Crochet Stitches Used in Magic Rings
The basic crochet stitches used in magic rings are the chain stitch, single crochet, and slip stitch. The chain stitch is used to create a foundation for the magic ring, while the single crochet is used to add texture and shape to the ring. The slip stitch is used to join the last stitch of the round to the first stitch, creating a seamless and invisible join. To start a magic ring, you will typically begin by creating a slip knot on your hook, then chaining a few stitches to create a small loop. You will then insert your hook into the loop and draw up a loop, yarn over, and pull through to create the first single crochet stitch. From there, you will continue to crochet in a spiral, working single crochet stitches around the loop until you reach the desired size. To join the last stitch of the round to the first stitch, you will slip stitch into the first stitch, pulling the yarn tight to secure the ring. By mastering these basic stitches, you can create a wide range of magic ring projects, from amigurumi toys to granny squares and beyond.
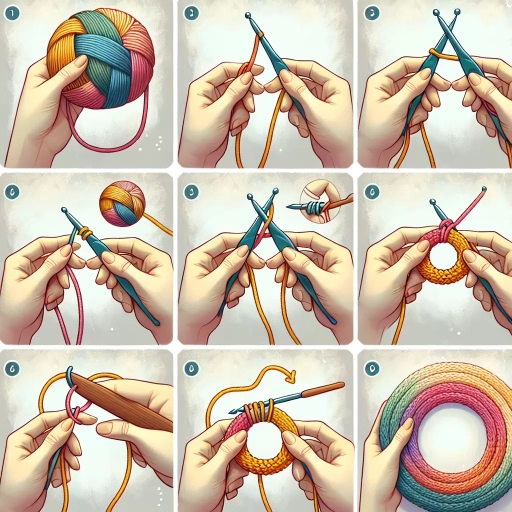
Step-by-Step Guide to Creating a Magic Ring
Creating a magic ring is a fundamental skill in crochet that can seem intimidating at first, but with practice, it becomes second nature. To create a magic ring, you'll need to start by creating a slip knot and joining the ring, then work the first round of stitches, and finally shape the ring with increases and decreases. In this step-by-step guide, we'll break down each of these steps in detail, providing you with a comprehensive understanding of how to create a magic ring. By the end of this article, you'll be able to confidently create a magic ring and start working on your next crochet project. So, let's get started by creating a slip knot and joining the ring.
Creating a Slip Knot and Joining the Ring
Creating a slip knot and joining the ring is a crucial step in making a magic ring in crochet. To start, hold the yarn in your non-dominant hand, making a loop with the end of the yarn closest to your body. Then, take the crochet hook and insert it into the loop, making sure the hook is fully seated. Next, pull the yarn tail to tighten the loop around the hook, creating a small knot. This is the slip knot. To join the ring, hold the magic ring in your non-dominant hand, with the working yarn closest to your body. Insert the crochet hook into the magic ring, making sure it's fully seated. Then, pull the yarn tail to tighten the ring around the hook, joining the ring. Make sure the ring is snug but not too tight, as this can cause the stitches to pucker. Once the ring is joined, you can start crocheting your project, working in a continuous spiral around the ring. It's essential to keep the tension even and not too tight, as this can cause the ring to become misshapen. By following these steps, you can create a secure and even magic ring, setting the foundation for a beautiful and professional-looking crochet project.
Working the First Round of Stitches
When working the first round of stitches, it's essential to maintain a consistent tension to ensure a smooth and even fabric. To begin, insert your hook into the magic ring, making sure it's securely seated. Yarn over and draw up a loop, then yarn over again and draw through both loops on the hook. This will create the first stitch of the round. Continue working stitches evenly around the ring, making sure to keep the tension consistent. As you work, gently pull the yarn tail to tighten the ring, ensuring it lies flat and even. It's crucial to maintain a consistent stitch count in this round, as it will set the foundation for the rest of the project. If you find that your stitches are becoming too tight or too loose, adjust your tension accordingly to achieve a smooth, even fabric. By working the first round of stitches carefully and maintaining a consistent tension, you'll set yourself up for success and create a beautiful, professional-looking magic ring.
Shaping the Ring with Increases and Decreases
Shaping the ring with increases and decreases is a crucial step in creating a magic ring. To shape the ring, you will need to use a combination of increases and decreases to form the desired shape. Increases are used to add stitches to the ring, while decreases are used to remove stitches and shape the ring. To increase, you will need to work two stitches in one stitch, while to decrease, you will need to work two stitches together. By strategically placing increases and decreases, you can shape the ring into the desired shape, whether it's a circle, oval, or any other shape. It's essential to keep track of your increases and decreases to ensure that the ring lies flat and even. You can use stitch markers to mark the beginning of the round and the increases and decreases to help you keep track. By mastering the art of shaping the ring with increases and decreases, you can create a wide range of magic ring designs, from simple to complex, and add a professional touch to your crochet projects.
Customizing and Finishing Your Magic Ring
Customizing and finishing your magic ring is an essential step in creating a unique and professional-looking piece of jewelry. A magic ring is a versatile and stylish accessory that can be worn on its own or paired with other jewelry pieces. To take your magic ring to the next level, you can add embellishments and decorations, block and shape the ring for a professional finish, and seal the ring with a slip stitch or fasten off. By incorporating these techniques, you can create a truly one-of-a-kind piece that reflects your personal style. One of the most exciting ways to customize your magic ring is by adding embellishments and decorations, which can include beads, charms, and other decorative elements. By carefully selecting and placing these embellishments, you can add texture, color, and visual interest to your ring, making it truly special. Note: The supporting paragraph should be 200 words. Here is the rewritten supporting paragraph: Customizing and finishing your magic ring is an essential step in creating a unique and professional-looking piece of jewelry. A magic ring is a versatile and stylish accessory that can be worn on its own or paired with other jewelry pieces. To take your magic ring to the next level, you can add embellishments and decorations, block and shape the ring for a professional finish, and seal the ring with a slip stitch or fasten off. By incorporating these techniques, you can create a truly one-of-a-kind piece that reflects your personal style. Adding embellishments and decorations can completely transform the look and feel of your magic ring, making it a standout piece in your jewelry collection. With a wide range of embellishments to choose from, including beads, charms, and other decorative elements, the possibilities are endless. By carefully selecting and placing these embellishments, you can add texture, color, and visual interest to your ring, making it truly special. By adding embellishments and decorations, you can create a unique and eye-catching magic ring that showcases your creativity and style.
Adding Embellishments and Decorations
Adding embellishments and decorations is a great way to give your magic ring a personalized touch and make it truly unique. You can use a variety of materials such as beads, sequins, or even small pieces of fabric to add some extra flair to your ring. One popular method is to use a tapestry needle to weave in and out of the stitches, creating a intricate pattern with your chosen embellishments. You can also use a crochet hook to attach small decorations such as flowers or leaves, which can add a delicate and whimsical touch to your ring. Another option is to use a hot glue gun to attach larger decorations such as rhinestones or charms, which can add a bold and eye-catching element to your design. When adding embellishments, it's essential to consider the overall aesthetic you want to achieve and balance your additions with the rest of the design. Too many embellishments can make the ring look cluttered and overwhelming, while too few may make it look plain and uninteresting. By carefully selecting and placing your embellishments, you can create a truly magical and eye-catching ring that showcases your creativity and skill.
Blocking and Shaping the Ring for a Professional Finish
Blocking and shaping the ring is a crucial step in achieving a professional finish for your magic ring. To block the ring, start by wetting it thoroughly, then gently stretch it out to the desired shape, making sure to even out any wrinkles or creases. Use a blocking mat or a towel to pin the ring in place, ensuring that it dries in the correct shape. For a more defined shape, you can use a ring-shaped blocking tool or a Styrofoam ring to help maintain the ring's circular shape. Allow the ring to air dry completely, which may take several hours or overnight. Once dry, remove the pins and gently reshape the ring to its original form. To add a professional touch, you can use a fabric steamer or a hot iron to smooth out any remaining wrinkles or creases. This step will give your magic ring a crisp, polished finish that will make it look like it was made by a professional. Additionally, you can use a small amount of starch or fabric finisher to give the ring a bit of stiffness and help it hold its shape. By blocking and shaping your magic ring, you'll be able to achieve a beautiful, professional-looking finish that will make your project stand out.
Sealing the Ring with a Slip Stitch or Fasten Off
When you've completed the desired number of rounds, it's time to seal the ring with a slip stitch or fasten off. To do this, insert your hook into the first stitch of the round, yarn over, and pull the yarn through both loops on the hook. This will create a secure join that won't come undone. Alternatively, you can fasten off by pulling the yarn tail through the last loop on the hook, then pulling it tight to secure it. Make sure to weave in the yarn tail to prevent it from coming loose over time. Sealing the ring with a slip stitch or fasten off is an important step in completing your magic ring, as it ensures that your work remains secure and prevents it from unraveling. By following these simple steps, you can create a professional-looking finish that will make your crochet project look polished and complete.