How To Take Screenshot On Samsung Phone
Taking a screenshot on a Samsung phone is a fundamental skill that every user should know. Whether you want to capture a memorable moment, share a funny conversation, or save important information, knowing how to take a screenshot is essential. In this article, we will explore the basics of taking a screenshot on Samsung phones, including the different methods available and advanced features that can enhance your screenshot experience. We will start by understanding the basics of taking a screenshot on Samsung phones, including the hardware and software requirements. Then, we will dive into the various methods for taking a screenshot, from the traditional power button and volume down combination to more advanced techniques. Finally, we will discuss advanced screenshot features and tips, such as editing and sharing options, to help you get the most out of your screenshots. By the end of this article, you will be a screenshot pro, and we will begin by understanding the basics of taking a screenshot on Samsung phones.
Understanding the Basics of Taking a Screenshot on Samsung Phones
Taking a screenshot on a Samsung phone is a straightforward process that can be mastered with a little practice. To get started, it's essential to understand the basics of screenshotting on Samsung devices. This involves locating the power and volume buttons, understanding the different screenshot modes, and familiarizing yourself with the screenshot editor. By grasping these fundamental concepts, you'll be able to capture and edit screenshots with ease. In this article, we'll delve into the specifics of each of these topics, starting with the most critical step: locating the power and volume buttons. By knowing where these buttons are and how to use them, you'll be well on your way to taking high-quality screenshots on your Samsung phone. So, let's begin by exploring the location and function of the power and volume buttons.
Locating the Power and Volume Buttons
To locate the power and volume buttons on your Samsung phone, start by looking at the right side of the device. The power button is usually located on the top right side, and it may be slightly raised or have a distinctive shape to make it easier to find by touch. The volume buttons, on the other hand, are typically located below the power button, with the volume up button on top and the volume down button on the bottom. Some Samsung phones may have the power button on the left side or at the top, so if you can't find it on the right side, try checking these alternative locations. Additionally, some newer Samsung models may have a Bixby button located below the volume buttons, which can be used to activate the Bixby virtual assistant. Once you've located the power and volume buttons, you can use them to take a screenshot by pressing the power button and the volume down button simultaneously.
Understanding the Different Screenshot Modes
When it comes to taking screenshots on Samsung phones, there are different modes to choose from, each with its own unique features and benefits. The most common mode is the standard screenshot mode, which captures the entire screen and saves it as an image file. This mode is ideal for capturing a single screen or a specific moment in time. Another mode is the scrolling screenshot mode, which allows you to capture a long screenshot of a webpage, email, or document by scrolling down the page. This mode is particularly useful for capturing content that doesn't fit on a single screen. Samsung phones also offer a feature called "Smart capture," which allows you to capture a screenshot and then edit it immediately using the built-in photo editor. Additionally, some Samsung phones come with a feature called "Palm swipe to capture," which allows you to take a screenshot by swiping the edge of your hand across the screen. This mode is convenient for those who prefer a more hands-free approach to taking screenshots. Furthermore, some Samsung phones also offer a "Screen recorder" mode, which allows you to record a video of your screen, which can be useful for creating tutorials or demonstrating how to use an app. Understanding the different screenshot modes available on your Samsung phone can help you to take more effective and efficient screenshots, and to get the most out of your device's capabilities.
Familiarizing Yourself with the Screenshot Editor
Familiarizing yourself with the screenshot editor is an essential step in enhancing your screenshot-taking experience on Samsung phones. The screenshot editor is a built-in feature that allows you to edit and customize your screenshots immediately after taking them. To access the screenshot editor, simply take a screenshot and then tap on the "Edit" or "Crop" icon that appears on the screen. This will open the screenshot editor, where you can find a range of tools and features to enhance your screenshot. The editor allows you to crop, rotate, and adjust the brightness and contrast of your screenshot, as well as add text, drawings, and other effects. You can also use the "Smart crop" feature to automatically crop out unwanted parts of the screenshot. Additionally, the screenshot editor allows you to share your edited screenshot directly to social media, messaging apps, or save it to your gallery. By familiarizing yourself with the screenshot editor, you can take your screenshot game to the next level and make the most out of this powerful feature on your Samsung phone.
Methods for Taking a Screenshot on Samsung Phones
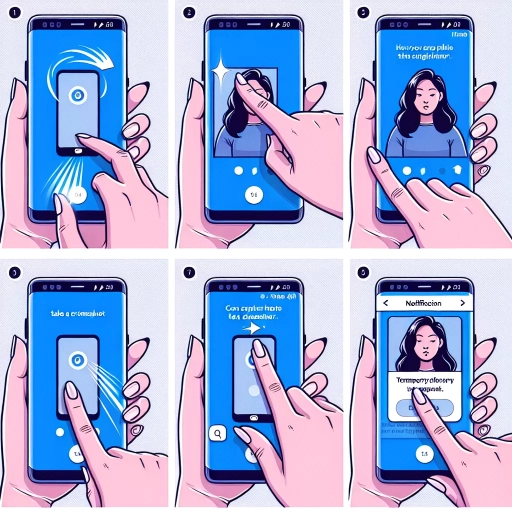
Taking a screenshot on a Samsung phone is a straightforward process that can be accomplished in several ways. Whether you want to capture a memorable moment, save a recipe, or share a funny meme with friends, knowing how to take a screenshot is an essential skill for any Samsung user. In this article, we will explore three methods for taking a screenshot on Samsung phones: using the power and volume down buttons, using the palm swipe gesture, and using the screenshot option in the quick settings panel. Each of these methods offers a unique way to capture your screen, and by the end of this article, you'll be able to choose the one that works best for you. Let's start with the most common method: using the power and volume down buttons.
Using the Power and Volume Down Buttons
Using the Power and Volume Down Buttons is a common method for taking a screenshot on Samsung phones. To do this, locate the Power button on the right side of your phone and the Volume Down button on the left side. Press and hold both buttons simultaneously for about 1-2 seconds until you hear a camera shutter sound or see a flash on the screen. This indicates that a screenshot has been taken. The screenshot will be saved in the Screenshots folder in your phone's Gallery app. You can also find it in the Screenshots album in the Samsung Gallery app. This method is quick and easy, and it works on most Samsung phones, including the latest models. However, it's worth noting that this method may not work on some older Samsung phones or phones with custom firmware. In such cases, you may need to use other methods, such as using the Palm Swipe feature or the S Pen.
Using the Palm Swipe Gesture
Using the Palm Swipe Gesture is a convenient and intuitive method for taking screenshots on Samsung phones. To use this feature, ensure that it is enabled in your phone's settings. Go to Settings, then Advanced features, and toggle on Palm swipe to capture. Once enabled, place the edge of your palm on the screen and swipe it from left to right or right to left. This gesture will capture a screenshot of your current screen. The screenshot will be saved in your Screenshots folder in the Gallery app, where you can view, edit, and share it. The Palm Swipe Gesture is a quick and easy way to capture screenshots without having to press any buttons, making it a great option for those who want a more hands-free experience.
Using the Screenshot Option in the Quick Settings Panel
Using the screenshot option in the Quick Settings panel is another convenient method for capturing screenshots on Samsung phones. To access the Quick Settings panel, simply swipe down from the top of the screen with two fingers. This will open a panel with various settings and options, including the screenshot option. Look for the "Screenshot" or "Screen capture" icon, which is usually represented by a pair of scissors or a camera. Tap on this icon to capture a screenshot of the current screen. The screenshot will be saved to your phone's gallery, where you can view, edit, and share it as needed. This method is particularly useful when you need to capture a screenshot quickly, as it eliminates the need to press multiple buttons or navigate through menus. Additionally, the Quick Settings panel provides easy access to other useful features, such as Wi-Fi, Bluetooth, and screen brightness, making it a handy tool to have at your fingertips.
Advanced Screenshot Features and Tips
Taking screenshots is a fundamental feature in any operating system, allowing users to capture and share information quickly. However, modern operating systems have evolved to include advanced screenshot features that go beyond the basic capture functionality. These features enable users to capture specific parts of the screen, edit and annotate screenshots, and share them instantly. In this article, we will explore some of the advanced screenshot features and tips that can enhance your productivity and workflow. We will delve into the scroll capture feature, which allows you to capture entire web pages and documents with a single click. Additionally, we will discuss how to edit and share screenshots, making it easy to collaborate with others. Finally, we will examine the screenshot toolbar, which provides quick access to various screenshot actions. By mastering these advanced screenshot features, you can streamline your workflow and improve your overall computing experience. Let's start by exploring the scroll capture feature, a game-changer for anyone who needs to capture long documents or web pages.
Using the Scroll Capture Feature
Using the Scroll Capture feature on your Samsung phone allows you to capture an entire webpage, document, or chat conversation with a single screenshot. To access this feature, go to Settings > Advanced features > Screenshots and screen recorder, and toggle on the "Scroll capture" option. Once enabled, take a screenshot as you normally would, and then tap the "Scroll capture" icon at the bottom of the screen. Your phone will automatically scroll down and capture the entire content, stitching the images together seamlessly. You can then edit and share the screenshot as needed. This feature is particularly useful for capturing long articles, social media conversations, or web pages that don't fit on a single screen. By using the Scroll Capture feature, you can easily share or save content without having to take multiple screenshots or manually stitch them together.
Editing and Sharing Screenshots
When it comes to editing and sharing screenshots on your Samsung phone, the possibilities are endless. With the built-in editing tools, you can crop, rotate, and adjust the brightness and contrast of your screenshot to make it look more visually appealing. You can also add text, draw shapes, and even create GIFs from your screenshots. Additionally, you can share your edited screenshots directly to social media platforms, messaging apps, or email, making it easy to communicate with others. Furthermore, you can also use third-party editing apps, such as Adobe Photoshop or Canva, to further enhance your screenshots and add more advanced features. Moreover, Samsung's built-in feature, "Smart capture", allows you to capture and edit screenshots in one go, making it a convenient option for those who want to quickly share their screenshots. Overall, editing and sharing screenshots on your Samsung phone is a seamless and intuitive process that can be done with just a few taps.
Using the Screenshot Toolbar for Quick Actions
Using the Screenshot Toolbar for Quick Actions is a convenient feature that allows you to quickly edit, share, or save your screenshots without having to navigate through multiple menus. When you take a screenshot, a toolbar will appear at the bottom of the screen, providing you with several options to choose from. You can edit the screenshot using the built-in image editor, which allows you to crop, draw, or add text to the image. You can also share the screenshot directly to social media, messaging apps, or email, making it easy to show off your latest gaming achievement or share a funny moment with friends. Additionally, you can save the screenshot to your device's gallery or a specific folder, or even delete it if you no longer need it. The Screenshot Toolbar also provides a "Scroll capture" option, which allows you to capture a screenshot of a long webpage or document by scrolling through it. This feature is particularly useful for capturing screenshots of articles, recipes, or instructions that don't fit on a single screen. Overall, the Screenshot Toolbar provides a quick and easy way to manage your screenshots, making it a valuable feature for anyone who takes screenshots regularly.