How To Install Bifold Doors
 Adding bifold doors is an affordable and practical way to alter the layout of your house, giving you ideal levels of privacy and space optimization. This article will guide you through the ins and outs of installing bifold doors like a pro. It carefully breaks down the process into three key phases, ensuring a smooth and effortless task. The first section, "Preparation is key: Before Installing Bifold Doors," underscores the importance of planning, where we will discuss the necessary tools and measurements you need to consider before you start installing. Next, we focus on the main event in "The Installation Process: A Step-by-Step Guide," providing you with a detailed walkthrough of the process. Finally, we will guide you through "Finishing Touches: Completing the Installation," which will cover critical areas such as post-installation checks, adjustments, and maintenance. Let's dive into the first section and explore why proper preparation is essential when installing bifold doors. After all, a well-installed bifold door makes all the difference in your home's overall look and functionality.
Preparation is Key: Before Installing Bifold Doors
Remodeling your home can be a rewarding yet daunting task, but with the right preparation, even the most extensive tasks can be done smoothly. When planning to install bifold doors, three key steps can make the process far simpler. First, one must ‘Measure the Opening Carefully’ to ensure the bifold doors fit appropriately. Next, it’s vital to ‘Choose the Right Type of Bifold Doors,’ as the material and style can greatly affect the installation process and final look. Lastly, like any home improvement task, it’s imperative to ‘Prepare the Necessary Tools and Materials’ before beginning the installation to avoid unnecessary interruptions or delays. By adequately planning and preparing, even the most novice homeowner can successfully install bifold doors with ease. As we delve into these steps, let’s first focus on the importance of accurately measuring the opening for your new doors.
Measure the Opening Carefully
One of the most critical steps before installing new bifold doors is ensuring the precise measurement of the opening where the doors will be placed. This seemingly simple task can have a significant impact on the smooth operation and overall aesthetic of your finished project. If the opening is not measured correctly, the doors may not fit neatly or operate smoothly. This can lead to costly or frustrating adjustments in the future. Therefore, being exact and thorough in your measurements is an absolute must. Firstly, start by measuring the height and width of the doorway. Remember to measure from the highest point as sagging or uneven floors can give incorrect results. It would be preferable to take measurements from both sides of the opening to account for any possible irregularities in size. This is an important factor to consider especially in old houses where openings might not be perfectly square or levelled. Secondly, depth is also an essential measurement to consider. The thickness of the door should align with the depth of the opening in order to sit flush with the wall when closed. Most door manufacturers provide specifications that indicate the size of the opening required for the bifold doors. However, always allow for a small tolerance within these specifications. This allows for any alteration or adjustments that might be required during the installation process. It is also worth noting that the bifold doors, when open, will stick out into the room a little. This is another factor to consider when measuring your space. You need to make sure your room can accommodate this to avoid any problems post-installation. Lastly, once you’ve taken your measurements, it is a good idea to have them checked by a professional or someone with expertise in installing bifold doors. It is always better to spend a little bit of time and money upfront to get it right, rather than spending more money correcting errors later on. Measuring the opening carefully can mean the difference between an easy installation and a complicated, time-consuming one. Once your measurements are accurate, you can confidently proceed with your order for bifold doors and know that they will fit perfectly. Proper preparation and diligent measurement phase is always the cornerstone of successful installation of the bifold doors. Remember, preparation is key when it comes to guaranteeing a successful outcome.
Choose the Right Type of Bifold Doors
Choosing the right type of Bifold Doors is a crucial part of the installing process that demands significant consideration. The selection is primarily dictated by the structural requirements, space availability, and design preferences. In essence, Bifold Doors come in different styles, materials, and finishes; each uniquely crafted to appeal to specific aesthetic tastes and functional needs. Firstly, consider the material of your Bifold Doors. They are typically available in wood, metal, and glass. Wooden Bifold Doors lend a classic, warm, and welcoming touch to your interiors. They are perfect for conventional or rustic home designs. If you are looking for a modern or industrial look, metal Bifold Doors such as aluminum versions may be an ideal choice. They are lightweight, durable, and relatively maintenance-free. Glass Bifold Doors, on the other hand, could carry a contemporary but timeless appeal. They allow maximum light penetration, creating bright and airy spaces. Secondly, consider the style of the Bifold Doors. The common styles include full glass, louvered, raised panel, flush, and French. Full glass Bifold Doors let in maximum light and provide the best view of the outside. Louvered Bifold Doors have horizontal slats that allow ventilation - a perfect choice for closets. Raised panel Bifold Doors bring in a touch of elegance and sophistication. Flush Bifold Doors offer a minimalist, clean design, while French Bifold Doors depict a traditional design having glass panels. Lastly, the design selection is critical, as the doors should neatly blend with the overall décor of your home. Bifold Doors come in different finishes – from untreated natural to varnish, paint, and even primed to fit your design needs. Additionally, the door hardware also plays a vital role in the overall appearance. You can choose from countless handle styles and finishes, like stainless steel, brass, chrome, and more. Moreover, Bifold Doors can be custom made to fit your precise measurements and requirements. It is essential to accurately measure the size of the door opening before purchasing or ordering Bifold Doors. The size is determined by the width, height, and thickness of the door opening. In conclusion, the right type of Bifold Doors can enhance the aesthetic appeal of your home while also addressing your functional needs. However, picking the most suitable option might require some effort and time spent on research about the materials, durability, styles, and designs. But, rest assured, this investment will certainly pay off in terms of increased home value and personal fulfillment.
Prepare the Necessary Tools and Materials
of successful DIY projects lies in thorough preparation, and installing bifold doors is no different. Preparing the necessary tools and materials in advance will not only streamline the installation process but also prevent potential mishaps that could occur due to lack of required equipment or materials. Firstly, haste makes waste. Thus, gather all the necessary tools before you embark on the installation procedure. The key tools required are a drill, a Phillips screwdriver, a tape measure, a pencil, a level, a hacksaw, and safety gear including gloves, safety glasses, and possibly a dust mask depending on the area being worked on. These tools will perform functions such as drilling in screws, measuring door openings for precise fit, leveling to ensure a straight installation, and cutting excess material where necessary. Meanwhile, the safety gear will protect you from potential hazards that could arise during the installation process. In terms of materials, bifold doors usually come as pre-packaged units that include the door panels, track, and hardware. However, it's important to inspect the package to confirm everything is included. The hardware should encompass hinges, pivots, a top guide, a knob or handle, and screws. If any component is missing, it could interrupt the whole procedure or affect the end result adversely. Moreover, familiarizing yourself with the materials and how they fit together is fundamental. This will streamline the process and minimize the chances of making mistakes. Sink your teeth into the user manual, study any diagrams, and check out how-to videos if available. You will gain a clear understanding of how the bifold doors should be installed correctly, thus enhancing the results of your DIY project. Additionally, ensure the working area is clean and free of any objects that could hinder your movement. It is also advisable to prepare a small toolbox or a tray where you can keep your tools to prevent misplacing them in the middle of the installation. Given the size and weight of bifold doors, you might need assistance handling and installing them. Therefore, enlisting the help of a friend or a family member could be quite beneficial. To sum all this up, a well-prepared DIY project is half done. Having all the required tools and materials, understanding their functions, and knowing how to use them effectively is paramount. By taking time to prepare for the installation of your bifold doors, you are setting yourself up for success and satisfaction with the end result.
The Installation Process: A Step-by-Step Guide
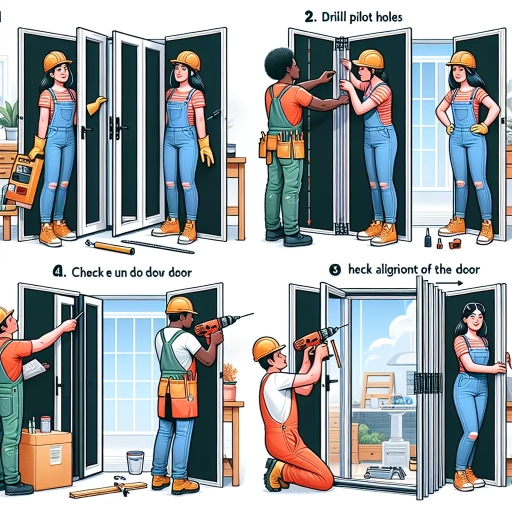
A well-executed and accurate installation process is the key to having a functional and aesthetically pleasing door. This step-by-step guide will walk you through the essentials of door installation, significantly useful for hanging bifold doors. Here, we will carefully guide you through three significant phases to bolster your understanding and further enhance your practical skills. Firstly, we will delve into the process of removing the old door and preparing the frame, which calls for precision and delicacy. This crucial first step sets the ground for your successful installation. Secondly, we will secure the bifold door track and hangers. This segment necessitates proper alignment to ensure seamless operation once the doors are hung. Lastly, we will hang the bifold doors and adjust the alignment, the finale of our comprehensive guide. Each of these phases is interconnected, requiring attention to detail. Now, let's proceed to the first, important step: effectively removing the old door and prepping the frame, paving the way for our new installation.
Remove the Old Door and Prepare the Frame
Before delving into the installation of a bifold door, the initial and indispensable step is to remove the old door and prep the frame to ensure its compatibility with the new installation. This task might seem daunting, but with a precise set of instructions and the proper tools, anyone can accomplish it with relative ease. Begin by carefully detaching the existing door from its frame. This could be done using a screwdriver or a cordless drill. Keep all the screws and pins safely as you may need these for the new installation. If the old door proves stubborn, you might have to use a hammer and a chisel to pry it loose, but ensure you do it gently to avoid damaging the door frame. Next, you need to check the door frame's status. Inspection focuses on structural soundness, integrity, level, and dimensions. It will determine how much preparation is required for the frame. Remove or repair any damaged parts and fill up any holes with wood putty, later sanding it to create a smooth surface. Once you have eliminated all the obvious impairments, use a spirit level to ensure the frame aligns correctly. This is critical as any misalignment can disrupt the bifold door operation, leading to dragging or malfunctioning. In some cases, old frames are out of plumb for reasons as varied as inconsistent house settling or previous improper installations. If it's significantly unlevel, you may need to remove and reinstall the frame entirely, ensuring it's square. However, minor adjustments can be corrected by shimming the frame. The final critical step in preparing the frame is to measure it meticulously. Bifold doors come in several sizes, and the door you bought needs to fit into this space seamlessly. Therefore, measure the width and height of the door opening accurately. These measurements will guide you on whether you need to trim the bifold door before installation or have to adjust the frame size. In conclusion, removing the old door and preparing the frame is a decisive step in installing a bifold door. This process involves meticulous detachment of the old door, a keen inspection of the frame, leveling, and precise measurement. Successfully executing this preparation stage paves a smoother path for the ensuing steps of the bifold door installation process.
Install the Bifold Door Track and Hangers
Installing the Bifold Door Track and Hangers is a crucial step in the installation process and requires utmost precision to ensure a seamless operation of the bifold doors. This step is integral as it involves establishing the foundational framework which the doors will rely on for their movements. The process commences with careful and accurate measurements of the door opening. This helps to ascertain the size of the track that needs to be cut and installed. The measurements must match the width of the door opening to guarantee a perfect fit. Once the size is determined and the track is cut accordingly, you can proceed to fix it to the top of the door opening using screws. It is important to ensure that the pivot bracket is positioned correctly at the end of the track where the doors will be hinged. Next, the hangers, which are the rolling pivot devices mounted on the top of the doors, are fitted into the track. These hangers play a vital role in the swinging motion of the doors as they allow the doors to slide along the track. Hence, it is important to fit them properly at evenly spaced intervals along the track to prevent any hitches while opening and closing the doors. You can adjust the hangers until the doors hang straight and level by using a plumb line or spirit level. A crucial tip to remember during this installation process is to ensure that the track is level. This can significantly affect the functioning of the doors. Hence, it is recommended to use a level while installing the track to ensure a perfect horizontal alignment. Moreover, it is beneficial to use a screwdriver or a power driver with a magnetic bit holder as this will hold the screws in place whilst fixing them, making the job much easier. Furthermore, using high-quality and durable components can make a significant difference in the performance and longevity of the bifold doors. Prioritize components that are corrosion-resistant and designed to withstand frequent usage, such as tracks made from aluminum or steel and hangers with ball-bearing rollers for a smoother glide. In conclusion, the installation of the Bifold Door Track and Hangers is a precise and meticulous process that sets the stage for efficient operation of the bifold doors. It exemplifies the importance of accurate maneuvering, use of quality components, and the value of precision for achieving the perfect fit and performance. With careful and accurate execution of this step, you can ensure that the bifold doors will operate flawlessly, providing a user-friendly and efficient system to divide and utilize your spaces.
Hang the Bifold Doors and Adjust the Alignment
in any interior design. Hanging bifold doors and adjusting their alignment is a key process in the overall installation. The first step involves lifting the door into the track. Start by inserting the top pivot into the bracket and then secure it. The bottom pivot should follow the same process. Ensure that these parts are inserted into the corresponding brackets in the track system. Remember, the door should hang freely and not touch the floor at any point. After you hang the doors, the next critical step is adjusting the alignment. Proper door alignment is vital for smooth and consistent operation, and it prevents premature wear and tear. To adjust the alignment, start by loosening the setscrews on both the top and bottom brackets. This will allow you to modify the door's position. Next, adjust the door within the door frame by moving the bottom pivot. Push it outward or inward until the door aligns with the jamb. To check the alignment, open and close the door several times. If it glides effortlessly without scrubbing against the jamb or the floor, then the alignment is correct. If not, re-adjust and repeat the check until the door operates seamlessly. After perfectly aligning your bifold doors, securely tighten the setscrews back in place to keep the alignment intact. A crucial part of adjusting the alignment involves ensuring that the top and bottom pivots are vertically aligned. Remember, the position of the pivot determines the door's position. Thus, having them in line guarantees the door's correct fit within its frame. Use a straight edge or a level to confirm this vertical alignment. Another crucial point to note is that the gap between the doors and the frames should be even all around. This not only aids in the smooth operation of the doors but also contributes to the overall aesthetic appeal of the door. Uneven gaps are noticeable and can detract from the appeal of your bifold doors. Ultimately, installing bifold doors involves precise steps and keen attention to detail, particularly when hanging the doors and adjusting their alignment. Always ensure that the doors hang freely and the alignment is perfect for guaranteeing a smooth operation. Maintaining an even gap around the doors also improves their appearance, making them a sleek addition to your interior spaces. Despite the process seeming technical, it is a DIY project you can accomplish with patience, the right tools, and a thorough understanding of the steps involved.
Finishing Touches: Completing the Installation
In our comprehensive guide on "Finishing Touches: Completing the Installation," we have highlighted the critical steps involved in concluding a home installation project. We will discuss the major details that contribute to a complete and professional-looking installation. To begin with, the process of fitting door handles and locks is paramount and should be done with maximum precision to ensure security. Further to this, the essence of sealing gaps and adding weatherstripping cannot be overstated. These two actions are pivotal in contributing to energy efficiency in the home, preventing drafts, and limiting the entry of insects. Finally, after all installations, a thorough examination of the doors is necessary to make any final adjustments, ensuring the doors function properly and smoothly. Learn more in the next paragraphs about each of these important stages. Now, let us transition into our first step - adding the door handles and locks.
Add the Door Handles and Locks
After the successful installation of bifold doors, one of the most essential steps you need to take is adding the door handles and locks, as these not only enhance the doors’ aesthetic appeal but also ensure security. This process, albeit being seemingly straightforward, requires careful precision, a sound understanding of how bifold door mechanisms work, and, of course, adept manual expertise. Firstly, select durable handles and locks that complement your bifold door set's design and align with your security requirements. Handle types typically include knob, pull, and lever styles, while lock systems range from simple latches to intricate multi-point systems. Next, meticulously mark the spot where you want to position your door handle, generally at a height that's accessible and is aesthetically pleasing. A standard location would be 36-inches from the floor. The installation process begins with drilling a hole at the marked spot. Prior to drilling, double-check the measurements as miscalculations can ruin the appearance of the whole door system, leading to extra repairs and expenses. Use a brad point bit to produce a clean hole through the door. Following this, depending on the type of handle bought, fix the spindle (a square metal rod connecting both handles) through the door until it protrudes from the opposite side. Attach the door handle to the spindle, making sure it's aligned properly, then secure it with screws. When screwing, be careful not to tighten them too much, as this might hamper the smooth operation of the door handles. Regarding the lock installation, several factors must be considered such as door anatomy, type of lock, and the level of security desired. Generally, you will need to create a mortise - a cavity in the door where the lock will sit. Follow the instructions given with the lock for detailed steps. Once the handle and lock are fitted, it's always crucial to test their functionality to ensure they are operating smoothly and provide the requisite level of security. If necessary, you may need to make minor adjustments to obtain the perfect fit. Thus, adding door handles and locks to your newly installed bifold doors reflects the end of your door installation process and the commencement of its functional utility. While it might seem a bit daunting, with the right tools, instructions, and a little patience, you can successfully install them, effectively taking the bifold doors from a mere decorative piece to a fully functional, secure entrance. Remember, the correct finishing touches can significantly enhance the final appearance of your bifold doors, complementing your room’s aesthetic while ensuring the utmost security. So, take your time to choose the right handles and locks that suit your preferences and install them accurately to enjoy the complete advantage of your bifold doors.
Seal the Gaps and Add Weatherstripping
The ‘seal the gaps and add weatherstripping’ phase is a crucial aspect of finalizing your bifold door installation. You must adequately seal the gaps between the door frame and rough opening to ensure heat insulation, energy efficiency, and water resistance. Indeed, unsealed gaps can negatively affect your home's thermal performance and comfort. Additionally, they can allow rainwater to infiltrate, causing potential damage to the door or surrounding walls. The sealing process begins with a suitable insulating foam or caulk. These materials are applied carefully into the gaps, ensuring every chink is filled but not overflowing. It is important to select a product that adheres strongly to both your specific door material and the building material of your home. Depending on the product, you may need to let it dry or cure. The installation instructions on the package will guide you on how to use it effectively. Once the sealant material has cured, it's time to add weatherstripping. Adding weatherstripping enhances your bifold door’s energy efficiency by preventing air leakage. It stops cold air from sneaking in and warm air from escaping. Thus, your heating and cooling systems won't have to work as hard, translating into reduced energy consumption and cost. Weatherstripping refers to a narrow piece of material (usually made from metal, vinyl, rubber or silicone) fitted around the sides and top of the bifold door. It's a simple but significant procedure to add an extra layer of insulation. When choosing weatherstripping, consider the material, durability, and how it complements your bifold door design. Likewise, account for the door usage - doors that are frequently used may require durable weatherstripping material like vinyl or metal. Apply the weatherstripping to the door jamb and header as per the manufacturer's instructions. The goal is to ensure when the doors are closed, the weatherstripping creates a strong seal, but does not interfere with the door operation. The sides should be done first, starting from the top and working your way down. Then proceed to the top or header. When done correctly, the weatherstripping should compress slightly when the door is closed, indicating a good seal. To conclude, sealing the gaps and adding weatherstripping are paramount steps in completing the bifold door installation. Care in applying these finishing touches directly contributes to the door's overall function, its thermal performance, and your home's energy efficiency. Bear in mind that, like any other part of your home, over time, the sealant and weatherstripping may wear and require replacement to maintain optimal performance. Regular inspection and maintenance, therefore, are essential in the long-term preservation of your bifold door’s condition.
Test the Doors and Make Final Adjustments
Once the bifold doors are securely installed, it is crucial to test the doors and make final required tweaks. There are few things more aggravating than installing a door only to discover it doesn't operate correctly. Therefore, conducting a thorough check is mandatory before putting in the final touches. Start by swinging open the doors, check to see whether they are opening and shutting smoothly or not. They should seamlessly slide along the track without getting stuck or showing any sign of resistance. The doors should also align properly with each other when closed. There should be no gaps when the doors are closed and they should meet evenly with the frame. If you notice any hitches or discrepancies, it means some adjustments are necessary. This could range from slightly tightening or loosening the screws to ensure the panels are accurately aligned or adjusting the positioning of the bottom pivot or guide roller. Moreover, it’s also important to ensure that the guide rollers are correctly positioned in the track to ensure the doors glide smoothly. The roller’s bracket can sometimes need a minor adjustment to prevent rubbing or scraping along the track. If you find any sagging at one end, adjust the pivot bracket to change the door's height until it's parallel with the floor and the panel's top. Another crucial thing to check is the door hardware, such as the knobs and handles. Make sure they are fixed properly and not loose. Double-check the door jamb and molding as well. Ensure they're flush with the wall and there's no gap between them and the wall. Additionally, ascertain that the doors lock accurately, providing a solid and secure closure. If the doors are ill-fitting, it might need a lot of force to shut, leading to damage over time as this puts too much pressure on the doors and the hardware. Moreover, an incorrectly installed door can be a safety hazard. Fine-tuning the details is as important as the installation itself. It is these subtleties that lend a refined and professional look. In conclusion, testing the doors and making final adjustments is not merely a point on a checklist, but a vital step that determines the longevity of the doors and ensures the overall aesthetics. The goal is not just to end the installation process but to assure the bifold doors seamlessly integrate with your room-enhancing function, design, and safety. Therefore, spend an adequate amount of time on this phase without hurriedness. Intense precision, patience, and an eye for detail are the tools you need at this moment.