How To Remove Microsoft Account From Windows 11
Here is the introduction paragraph: Removing a Microsoft account from Windows 11 can be a bit tricky, but it's a necessary step for those who want to switch to a local account or troubleshoot issues with their Microsoft account. In this article, we'll guide you through the process of removing a Microsoft account from Windows 11, covering the essential preparation steps, the straightforward method of removing the account through Windows 11 settings, and alternative methods for those who need more flexibility. Before diving into the removal process, it's crucial to prepare your account and system to avoid any potential issues or data loss. In the next section, we'll outline the necessary preparation steps to take before removing your Microsoft account from Windows 11.
Preparation Before Removing Microsoft Account
Before removing a Microsoft account, it's essential to take several crucial steps to ensure a smooth transition and prevent potential losses. One of the most critical steps is to backup your files and data, as removing the account may result in losing access to important documents, photos, and other files stored in the cloud. Additionally, it's vital to understand the consequences of removing the account, including the potential loss of access to certain features and services. Furthermore, having a local administrator account is also necessary to maintain control over your device after the Microsoft account is removed. By taking these precautions, you can avoid potential pitfalls and ensure a seamless experience. Therefore, let's start by discussing the importance of backing up your files and data before removing your Microsoft account.
Backup Your Files and Data
When it comes to removing a Microsoft account from Windows 11, one of the most crucial steps is to backup your files and data. This is because removing a Microsoft account can potentially delete all the files and data associated with that account, including documents, pictures, music, and videos. To avoid losing any important files, it's essential to backup your data before proceeding with the removal process. You can backup your files to an external hard drive, cloud storage services like OneDrive, Google Drive, or Dropbox, or even to a USB drive. Make sure to backup all the files and folders that are important to you, including your desktop, documents, pictures, and downloads folders. Additionally, if you have any important emails, contacts, or calendar events, make sure to export them from the Microsoft account before removing it. By backing up your files and data, you can ensure that you don't lose any important information and can easily restore it if needed. It's also a good idea to verify that your backups are complete and can be restored successfully before removing the Microsoft account. This will give you peace of mind and ensure that you're prepared for any potential data loss. By taking the time to backup your files and data, you can ensure a smooth and safe removal of your Microsoft account from Windows 11.
Understand the Consequences of Removing Microsoft Account
Removing a Microsoft account from Windows 11 can have significant consequences that users should be aware of before making the decision. One of the primary consequences is the loss of access to Microsoft services and features, such as OneDrive, Office Online, and Outlook.com. Users will no longer be able to sync their files, settings, and preferences across devices, and they will not be able to use Microsoft's cloud-based services. Additionally, removing a Microsoft account may also affect the functionality of certain apps and games that rely on Microsoft's services. Furthermore, users may lose access to their purchased content, such as movies, music, and apps, if they are tied to their Microsoft account. It is essential to consider these consequences before removing a Microsoft account, as it may impact the user's overall Windows 11 experience.
Ensure You Have a Local Administrator Account
To ensure a seamless transition when removing a Microsoft account from Windows 11, it's crucial to have a local administrator account set up beforehand. A local administrator account is a type of user account that allows you to manage and control your computer without relying on a Microsoft account. Having a local administrator account ensures that you can still access and manage your computer even after removing the Microsoft account. This is particularly important because removing a Microsoft account will also remove all associated user accounts, including the administrator account linked to that Microsoft account. Without a local administrator account, you may be locked out of your computer or unable to perform administrative tasks. To create a local administrator account, go to Settings > Accounts > Family & other users, and then click on "Add account." Select "I don't have this person's sign-in information" and then "Add a user without a Microsoft account." Follow the prompts to create a new local user account and make sure to select the "Administrator" option to grant the account administrative privileges. By having a local administrator account, you can ensure that you have full control over your computer and can remove the Microsoft account without any issues.
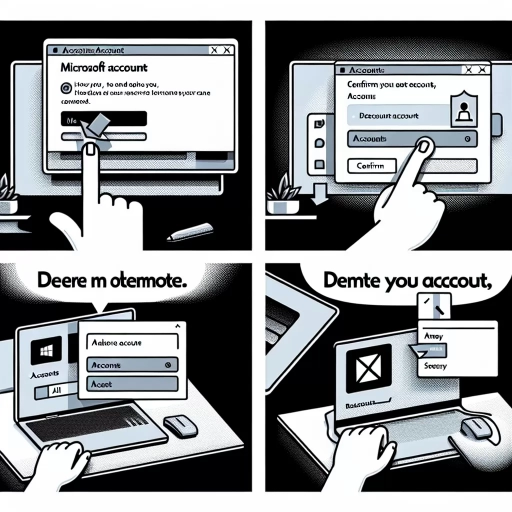
Removing Microsoft Account from Windows 11 Settings
Removing your Microsoft account from Windows 11 settings can be a straightforward process if you know the right steps to follow. This article will guide you through the process, covering the essential steps to remove your Microsoft account from your Windows 11 device. To start, you'll need to access the Accounts settings in Windows 11, where you can manage your account information and make changes as needed. From there, you'll need to sign out of your Microsoft account, which will disconnect it from your device. Finally, you'll need to confirm the removal of your Microsoft account, ensuring that it's completely removed from your Windows 11 settings. By following these steps, you'll be able to successfully remove your Microsoft account from your Windows 11 device. So, let's get started by accessing the Accounts settings in Windows 11.
Accessing the Accounts Settings in Windows 11
To access the Accounts settings in Windows 11, navigate to the Start menu and click on the "Settings" icon, which resembles a gear. Alternatively, you can press the Windows key + I on your keyboard to open the Settings app directly. Once the Settings app is open, click on the "Accounts" option from the left-hand menu. This will take you to the Accounts settings page, where you can manage various account-related settings, including your Microsoft account, email accounts, and other account settings. From here, you can also access the "Your email accounts" section, where you can add or remove email accounts, and the "Access work or school" section, where you can manage your work or school account settings. Additionally, you can also access the "Family" section, where you can manage family settings and add or remove family members. Overall, the Accounts settings page in Windows 11 provides a centralized location for managing all your account-related settings, making it easy to access and manage your accounts in one place.
Signing Out of Your Microsoft Account
When you're ready to sign out of your Microsoft account on Windows 11, you can do so by following a few simple steps. To start, click on the Start button and select the Settings app. From there, navigate to the Accounts section and click on the "Your email and accounts" option. Next, click on the "Sign out" button, which may be located under the "Account settings" or "Manage accounts" section, depending on your device. You may be prompted to confirm that you want to sign out, so click on the "Sign out" button again to complete the process. Alternatively, you can also sign out of your Microsoft account from the Lock screen or the Start menu. To do this, click on your profile picture or username, and then select the "Sign out" option from the dropdown menu. Once you've signed out, you'll be logged out of your Microsoft account on your Windows 11 device, and you'll need to sign back in to access your account settings and synced data.
Confirming the Removal of Microsoft Account
When you confirm the removal of your Microsoft account from Windows 11, you'll be prompted to review the changes that will occur. This is a crucial step, as it ensures you understand the implications of removing your account. You'll be informed that you'll no longer be able to use Microsoft services, such as OneDrive, Office Online, and Outlook.com, on your device. Additionally, you may lose access to certain apps and games that are linked to your Microsoft account. You'll also be reminded that any files, settings, and preferences associated with your account will be removed from the device. It's essential to carefully review these changes before proceeding, as they may impact your productivity and entertainment. If you're certain you want to remove your Microsoft account, you can confirm the removal, and the process will be completed. However, if you're unsure or have second thoughts, you can cancel the removal and keep your account linked to your device.
Alternative Methods to Remove Microsoft Account
If you're looking for alternative methods to remove a Microsoft account from your Windows 11 device, you're in the right place. There are several ways to achieve this, and we'll explore three effective methods in this article. Firstly, you can use the Control Panel to remove your Microsoft account, which is a straightforward and user-friendly approach. Alternatively, you can utilize the Windows 11 Registry Editor to delete your account, but this method requires some technical expertise. Lastly, if you're looking for a more drastic solution, you can perform a system reset to remove your Microsoft account, which will also restore your device to its default settings. In this article, we'll delve into each of these methods, starting with the simplest approach: Using the Control Panel to Remove Microsoft Account.
Using the Control Panel to Remove Microsoft Account
To remove a Microsoft account from Windows 11 using the Control Panel, follow these steps. First, open the Control Panel by searching for it in the Start menu or typing "control panel" in the Run dialog box (Windows key + R). Once the Control Panel is open, click on "User Accounts" and then select "Manage another account." This will take you to the "Manage Accounts" window, where you can see a list of all the user accounts on your computer, including the Microsoft account you want to remove. Click on the Microsoft account you want to remove, and then click on the "Delete the account" option. You will be prompted to confirm that you want to delete the account, and you may also be asked if you want to keep the files associated with the account or delete them as well. Once you have confirmed that you want to delete the account, Windows will remove the Microsoft account from your computer. Note that this method will only remove the Microsoft account from your local computer, and will not affect any other devices or services that are linked to the account. If you want to completely remove the Microsoft account, you will need to use the Microsoft account website to delete the account entirely.
Utilizing the Windows 11 Registry Editor
Utilizing the Windows 11 Registry Editor is a viable alternative method to remove a Microsoft account from your device. To do this, you'll need to access the Registry Editor, which can be done by pressing the Windows key + R and typing "regedit" in the Run dialog box. Once you've opened the Registry Editor, navigate to the HKEY_LOCAL_MACHINE\SOFTWARE\Microsoft\Windows NT\CurrentVersion\ProfileList key. Here, you'll find a list of profiles associated with your device, including the Microsoft account you want to remove. Look for the profile with the Microsoft account's email address and delete the entire key. Be cautious when editing the registry, as incorrect changes can cause system instability. After deleting the key, restart your device and the Microsoft account should be removed. Note that this method may not completely remove all account data, so it's recommended to use this method in conjunction with other removal methods for a thorough cleanup. Additionally, be aware that editing the registry can be a complex process, and it's recommended that only advanced users attempt this method.
Performing a System Reset to Remove Microsoft Account
Performing a system reset is a more drastic approach to removing a Microsoft account from Windows 11, but it can be effective if other methods fail. This process will erase all personal files, settings, and applications, so it's essential to back up any important data before proceeding. To perform a system reset, go to the Start menu and click on the "Settings" icon, then select "Update & Security" and click on "Recovery" from the left menu. Under the "Reset this PC" section, click on the "Get started" button. You will be prompted to choose between "Keep my files" and "Remove everything." Since you want to remove the Microsoft account, select "Remove everything." Windows will then guide you through the reset process, which may take some time to complete. Once the reset is finished, you will be prompted to set up your Windows 11 installation again, and you can choose to create a new local account or sign in with a different Microsoft account. Keep in mind that this method will also remove any installed applications, so you will need to reinstall them after the reset. Additionally, if you have any BitLocker-encrypted drives, you will need to decrypt them before performing the system reset. Overall, performing a system reset is a more extreme approach to removing a Microsoft account, but it can be a viable option if other methods are unsuccessful.