How To Embed Video In Powerpoint
In today's dynamic presentations, video content has become an indispensable tool for engaging audiences and conveying complex information effectively. PowerPoint, a staple in the world of digital presentations, offers robust features for embedding videos seamlessly into your slides. This article will guide you through the process of incorporating video content into your PowerPoint presentations, elevating your storytelling and captivating your viewers. We'll begin by exploring the fundamentals of video embedding in PowerPoint, providing you with a solid understanding of the technology and its capabilities. Next, we'll walk you through a comprehensive step-by-step guide, ensuring you can confidently add videos to your presentations regardless of your technical expertise. For those looking to push the boundaries, we'll delve into advanced techniques and troubleshooting tips, empowering you to overcome common challenges and optimize your video-enhanced slides. By mastering these skills, you'll be able to create more impactful, professional, and memorable presentations that resonate with your audience. Let's start by Understanding Video Embedding in PowerPoint, laying the groundwork for your journey into multimedia-rich presentations.
Understanding Video Embedding in PowerPoint
In today's digital age, presentations have evolved far beyond static slides and bullet points. PowerPoint, a stalwart in the world of presentation software, has kept pace with these changes by offering robust multimedia integration capabilities. Among these features, video embedding stands out as a powerful tool for enhancing the impact and engagement of your presentations. This article delves into the intricacies of understanding video embedding in PowerPoint, exploring three key aspects that every presenter should know. First, we'll examine the numerous benefits of incorporating videos into your presentations, from capturing audience attention to conveying complex information more effectively. Next, we'll provide a comprehensive overview of the video formats supported by PowerPoint, ensuring you can seamlessly integrate your chosen media. Lastly, we'll clarify the important distinctions between embedding and linking videos, helping you make informed decisions about how to include video content in your slides. By mastering these elements, you'll be well-equipped to harness the full potential of video embedding in PowerPoint, transforming your presentations into dynamic, memorable experiences that resonate with your audience. Let's dive into the world of video embedding and unlock new possibilities for your PowerPoint presentations.
Benefits of embedding video in presentations
Benefits of embedding video in presentations
Embedding videos in PowerPoint presentations has become an increasingly popular and powerful tool for presenters across various fields. This dynamic approach to content delivery offers numerous benefits that can significantly enhance the overall impact and effectiveness of your presentation. One of the primary advantages is the ability to capture and maintain audience attention. In today's fast-paced, multimedia-driven world, audiences are accustomed to engaging with diverse content formats. By incorporating videos, you can break up the monotony of traditional text and static images, creating a more immersive and captivating experience for your viewers. Videos also provide an excellent opportunity to convey complex information in a more digestible format. Abstract concepts or intricate processes that might be challenging to explain through text or still images can be easily demonstrated through animated visuals or real-life footage. This visual representation can lead to improved comprehension and retention of the information presented, making your message more memorable and impactful. Furthermore, embedding videos allows you to leverage the power of storytelling, which can evoke emotions and create a stronger connection with your audience. Whether it's a customer testimonial, a product demonstration, or a compelling narrative, video content can help you forge a deeper emotional bond with your viewers, increasing the likelihood of your message resonating with them long after the presentation ends. Another significant benefit of embedding videos in PowerPoint is the versatility it offers in terms of content types. You can include a wide range of video formats, such as interviews, animations, tutorials, or even live demonstrations, to support your key points and add depth to your presentation. This flexibility allows you to cater to different learning styles and preferences within your audience, ensuring that your message reaches a broader spectrum of viewers effectively. Additionally, embedded videos can serve as powerful supporting evidence for your arguments or claims, lending credibility and authority to your presentation. From a practical standpoint, embedding videos directly into your PowerPoint slides eliminates the need for switching between different applications or browser windows during your presentation. This seamless integration not only saves time but also reduces the risk of technical glitches that can disrupt the flow of your delivery. Moreover, by embedding videos, you ensure that your presentation is self-contained and can be easily shared or presented offline without relying on an internet connection. This feature is particularly valuable when presenting in environments with limited or unreliable internet access. In conclusion, the benefits of embedding videos in PowerPoint presentations are numerous and far-reaching. From enhancing audience engagement and improving information retention to providing versatility in content delivery and streamlining the presentation process, video embedding has become an indispensable tool for creating compelling and effective presentations in today's multimedia-driven world.Supported video formats in PowerPoint
PowerPoint supports a wide range of video formats, allowing users to seamlessly integrate various types of video content into their presentations. This versatility ensures that presenters can incorporate engaging multimedia elements regardless of the source or format of their video files. The most commonly supported video formats in PowerPoint include MP4, WMV, MOV, and AVI. MP4 (MPEG-4) is particularly popular due to its excellent compression and high-quality playback, making it ideal for presentations that need to balance file size with visual appeal. WMV (Windows Media Video) is another widely used format, especially in Windows environments, offering good compatibility across different versions of PowerPoint. MOV files, primarily associated with Apple's QuickTime, are also supported, allowing users to easily integrate videos created on Mac devices. AVI (Audio Video Interleave) files, while slightly older, remain compatible with PowerPoint, providing a legacy option for users with older video content. In recent versions of PowerPoint, support has been extended to include more modern and web-friendly formats such as WebM and OGV. This expansion reflects the growing trend of online video content and ensures that presentations can incorporate videos from a variety of web sources. Additionally, PowerPoint now supports embedded YouTube videos, allowing presenters to stream content directly from the internet during their presentations, provided they have an active internet connection. It's important to note that while PowerPoint supports these formats, the actual playback capability may depend on the codecs installed on the computer used for the presentation. To ensure maximum compatibility, especially when presenting on different machines, it's often recommended to use MP4 files with H.264 video encoding and AAC audio encoding. This combination provides a good balance of quality, file size, and broad compatibility across various systems and PowerPoint versions. For users working with less common video formats, PowerPoint offers built-in conversion tools in newer versions, allowing videos to be optimized for presentations. This feature not only ensures compatibility but also helps in managing file sizes, which is crucial for presentations that need to be shared or transported. Understanding the supported video formats and their implications is key to creating smooth, professional presentations that effectively leverage video content to engage and inform audiences.
Differences between embedding and linking videos
Embedding and linking videos in PowerPoint are two distinct methods of incorporating video content into your presentations, each with its own advantages and considerations. Understanding the differences between these approaches is crucial for creating effective and efficient presentations that seamlessly integrate multimedia elements. Embedding a video involves inserting the actual video file directly into your PowerPoint presentation. This method ensures that the video is always available, even when you're presenting without an internet connection. Embedded videos become an integral part of the PowerPoint file, which means you can easily share the presentation with others without worrying about broken links or missing files. However, embedding videos can significantly increase the file size of your presentation, potentially making it more challenging to share or transfer, especially for larger video files. Additionally, embedded videos may result in longer loading times when opening the presentation or transitioning between slides. On the other hand, linking a video involves creating a connection to an external video file or online source. This method keeps your PowerPoint file size smaller, as the video content is not stored within the presentation itself. Linked videos are ideal for presentations that rely on online resources or when you need to frequently update the video content without modifying the entire presentation. However, linked videos require a stable internet connection or access to the linked file location during the presentation. If the link breaks or the source file is moved or deleted, the video will not play, potentially disrupting your presentation. When deciding between embedding and linking, consider factors such as file size limitations, presentation environment, and the need for frequent updates. Embedding is generally preferable for standalone presentations or when internet access is unreliable, while linking is better suited for collaborative environments or when working with frequently updated content. Some presenters opt for a hybrid approach, embedding critical videos and linking to supplementary content to balance file size and reliability. It's worth noting that PowerPoint offers different embedding options depending on the video source. For local files, you can choose to insert the video as an embedded object or as a linked file. For online videos, such as those from YouTube or Vimeo, PowerPoint typically creates a linked connection to the video's online source. However, some third-party add-ins and tools can help you download and embed online videos directly into your presentation for offline use. Understanding these distinctions allows you to make informed decisions about how to incorporate videos into your PowerPoint presentations effectively. By choosing the appropriate method for your specific needs, you can create engaging, multimedia-rich presentations that captivate your audience while maintaining optimal performance and reliability.
Step-by-Step Guide to Embedding Video in PowerPoint
In today's digital age, presentations have evolved far beyond simple text and static images. PowerPoint, Microsoft's powerful presentation software, offers a dynamic way to engage your audience through the integration of multimedia elements, particularly videos. Whether you're crafting a business proposal, delivering an educational lecture, or showcasing a creative project, embedding videos can significantly enhance the impact and effectiveness of your presentation. This comprehensive guide will walk you through the process of embedding videos in PowerPoint, covering three essential aspects: inserting videos from your computer, adding videos from online sources, and adjusting video playback options and timing. By mastering these techniques, you'll be able to create more engaging, informative, and professional presentations that captivate your audience and effectively convey your message. From local files to YouTube clips, and from auto-play settings to precise timing controls, we'll explore the various methods and options available for seamlessly incorporating video content into your slides. As we delve into the world of video embedding in PowerPoint, you'll gain a deeper understanding of how this feature can transform your presentations and elevate your communication skills to new heights.
Inserting video from your computer
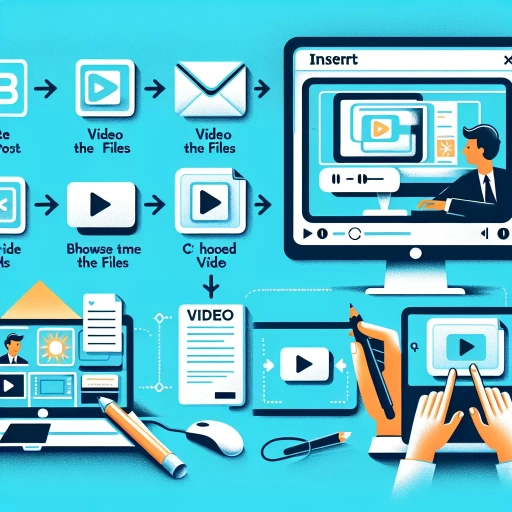
Inserting a video from your computer into a PowerPoint presentation is a straightforward process that can significantly enhance your slides' impact and engagement. This method is particularly useful when you have locally stored videos that you want to incorporate seamlessly into your presentation. To begin, ensure that your video file is in a compatible format, such as MP4, WMV, or AVI, as these are widely supported by PowerPoint. To insert a video, navigate to the slide where you want the video to appear. Then, click on the "Insert" tab in the PowerPoint ribbon and select "Video" from the media options. Choose "Video on My PC" from the dropdown menu. This action will open a file explorer window, allowing you to browse your computer's folders and locate the desired video file. Once you've found the video, select it and click "Insert" to add it to your slide. After insertion, you'll notice that PowerPoint provides various tools to customize how the video appears and plays within your presentation. You can resize the video by dragging its corners or edges, and reposition it on the slide by clicking and dragging. The "Video Format" and "Playback" tabs will appear in the ribbon, offering options to adjust the video's appearance, add a poster frame (a still image that displays before the video plays), set start and end times, add fade effects, and more. One important consideration when inserting videos from your computer is file size. Large video files can significantly increase your presentation's overall size, potentially making it difficult to share or email. To mitigate this, PowerPoint offers an option to compress media, which can be found in the File menu under "Info" and then "Compress Media." This feature allows you to reduce the file size while maintaining acceptable video quality. Another crucial aspect to remember is that when you share your presentation with others or move it to a different computer, you'll need to ensure that the video file is included. By default, PowerPoint creates a link to the video on your computer rather than embedding it directly into the presentation. To guarantee that your video travels with your presentation, go to File > Options > Advanced, and under the "Save" section, check the box that says "Embed media in the file when saving." By following these steps and considering these factors, you can effectively insert videos from your computer into your PowerPoint presentations, creating a more dynamic and engaging experience for your audience. This method gives you full control over the video content and quality, ensuring that your presentation delivers the intended impact regardless of internet connectivity or external hosting services.
Adding video from online sources
Adding video from online sources can significantly enhance your PowerPoint presentations, making them more dynamic and engaging. This method allows you to incorporate a vast array of content from popular video-sharing platforms without the need to download or store large video files on your device. PowerPoint supports embedding videos from various online sources, with YouTube being the most commonly used. To begin, you'll need to ensure you have an active internet connection, as the video will stream directly from the source during your presentation. Start by navigating to the slide where you want to insert the video. Click on the "Insert" tab in the PowerPoint ribbon, then select "Video" and choose "Online Video" from the dropdown menu. This action will open a dialog box where you can search for videos or paste a link from a supported online video platform. For YouTube videos, you have two options: you can search directly within PowerPoint using keywords, or you can copy the video's URL from YouTube and paste it into the provided field. If you're using the search function, type in relevant keywords, and PowerPoint will display a selection of videos to choose from. Once you've found the desired video, select it and click "Insert" to embed it in your slide. When embedding videos from other platforms, you'll typically need to copy the video's embed code from the source website and paste it into PowerPoint. This process may vary slightly depending on the platform, but most video-sharing sites provide an easy way to obtain the embed code. After inserting the online video, you can resize and position it on your slide just like any other PowerPoint object. You can also apply video styling options, such as adding a border or video effects, to make it blend seamlessly with your presentation design. It's important to note that some formatting options may be limited compared to locally stored videos. One significant advantage of embedding online videos is that they're automatically updated if the source video is modified. This ensures that your presentation always displays the most current version of the content. However, be aware that this method requires an internet connection during your presentation, so it's wise to have a backup plan in case of connectivity issues. When using online videos, it's crucial to consider copyright and usage rights. Ensure you have permission to use the video in your presentation, especially in professional or educational contexts. Many online videos are subject to Creative Commons licenses or other usage restrictions, so always verify the terms before incorporating them into your work. By mastering the technique of adding videos from online sources, you can create more compelling and informative PowerPoint presentations that captivate your audience and effectively convey your message through multimedia content.
Adjusting video playback options and timing
Adjusting video playback options and timing in PowerPoint allows you to create a more polished and professional presentation by controlling how and when your embedded videos appear and play. This level of customization ensures that your video content seamlessly integrates with your slides and narrative, enhancing the overall impact of your presentation. To begin adjusting your video's playback options, select the embedded video on your slide. This will activate the "Video Tools" contextual tabs in the PowerPoint ribbon. Navigate to the "Playback" tab, where you'll find a variety of options to fine-tune your video's behavior. One of the most useful features is the ability to set your video to start automatically or on click. Automatic playback can be ideal for seamless transitions, while click-to-play gives you more control over timing during your presentation. You can also choose to play the video full screen, which can be particularly effective for high-impact moments or when showcasing detailed visual content. Trimming your video is another valuable tool, allowing you to focus on the most relevant portions of your footage. Use the "Trim Video" button to set precise start and end points, eliminating any unnecessary content and keeping your presentation concise and on-topic. For more advanced control, explore the "Fade In" and "Fade Out" options. These subtle transitions can soften the video's entry and exit, creating a more polished look. You can also adjust the video's volume directly within PowerPoint, ensuring it's at an appropriate level relative to your narration or other audio elements. PowerPoint also offers looping options, which can be useful for background visuals or repetitive demonstrations. Additionally, you can set your video to rewind after playing, preparing it for the next viewing without manual intervention. Timing is crucial in presentations, and PowerPoint provides tools to synchronize your video with other elements. In the "Animations" tab, you can precisely control when your video starts in relation to other slide elements or animations. This feature allows you to create complex, timed sequences that can significantly enhance your storytelling capabilities. For those who need even more precise control, the "Timeline" feature in the animations pane allows you to visually adjust the timing and duration of your video alongside other slide elements. This can be particularly useful when coordinating multiple media elements or creating intricate animated sequences. By mastering these playback and timing options, you can elevate your PowerPoint presentations from simple slideshows to dynamic, multimedia experiences. The key is to experiment with these features, finding the right balance that supports your content and engages your audience effectively. Remember, the goal is to use video to enhance your message, not overshadow it, so always consider how each adjustment serves your overall presentation objectives.
Advanced Techniques and Troubleshooting
Embedding videos in PowerPoint presentations has become an essential skill for creating engaging and dynamic content. As presenters seek to captivate their audiences with multimedia elements, mastering advanced techniques and troubleshooting common issues is crucial. This article delves into the world of advanced video embedding in PowerPoint, exploring three key areas that can elevate your presentations to new heights. First, we'll examine how to customize video appearance using PowerPoint's powerful formatting tools, allowing you to seamlessly integrate videos into your slide designs. Next, we'll explore the creative possibilities of using triggers and animations with embedded videos, enabling you to create interactive and engaging presentations that respond to user input. Finally, we'll address common issues that arise when embedding videos and provide practical solutions to ensure smooth playback and optimal performance. By mastering these advanced techniques and troubleshooting skills, you'll be well-equipped to create professional-quality presentations that effectively incorporate video content. Whether you're a seasoned presenter or just starting out, this guide will help you take your PowerPoint skills to the next level. To lay the foundation for these advanced topics, let's begin by revisiting the fundamentals of Understanding Video Embedding in PowerPoint.
Customizing video appearance with formatting tools
Customizing video appearance with formatting tools is a powerful way to enhance your PowerPoint presentations and create a more polished, professional look. PowerPoint offers a variety of formatting options that allow you to adjust the visual aspects of your embedded videos, ensuring they seamlessly integrate with your slide design and overall presentation theme. One of the most useful formatting tools is the Video Format tab, which appears when you select an embedded video. This tab provides access to a wide range of customization options, including video styles, video shape, and video effects. Video styles offer pre-designed formatting combinations that can instantly transform the look of your video, adding borders, shadows, or reflections with a single click. These styles can be further modified to suit your specific needs, allowing for a high degree of personalization. The video shape tool enables you to change the outline of your video frame, transforming it from a standard rectangle to various geometric shapes or even custom shapes. This can be particularly effective when trying to create a unique visual impact or when integrating the video with other design elements on your slide. Additionally, you can adjust the border color, weight, and style to further enhance the video's appearance and make it stand out. Video effects provide even more advanced customization options, such as adding 3D rotations, perspective changes, or artistic effects like paint strokes or glass blurs. These effects can help create depth and visual interest, drawing attention to your video content in creative ways. The brightness, contrast, and color saturation of the video can also be adjusted, allowing you to fine-tune the video's appearance to match your presentation's color scheme or to correct any visual inconsistencies. Another important aspect of customizing video appearance is the ability to set poster frames. A poster frame is the static image displayed when the video is not playing, and it can be customized to show a specific frame from the video or an entirely different image. This feature is particularly useful for creating a cohesive look across your slides or for displaying key information before the video begins. For those seeking even more control over their video's appearance, PowerPoint's layering tools allow you to place other objects in front of or behind the video. This opens up possibilities for creative compositions, such as framing the video with text or graphics or creating the illusion of the video emerging from behind other elements on the slide. It's worth noting that while these formatting tools offer extensive customization options, it's important to use them judiciously. Overuse of effects or drastic changes to the video's appearance can distract from your content and potentially impact the video's playback performance. Always test your formatted videos thoroughly to ensure they play smoothly and appear as intended across different devices and display settings.
Using triggers and animations with embedded videos
Using triggers and animations with embedded videos in PowerPoint can elevate your presentation to new heights, creating a truly interactive and engaging experience for your audience. This advanced technique allows you to control when and how your videos play, seamlessly integrating them into your slides and enhancing the overall flow of your presentation. Triggers are powerful tools that enable you to initiate specific actions, such as playing a video, when a particular object on the slide is clicked. This feature gives you precise control over the timing of your video playback, allowing you to synchronize it with your spoken content or other visual elements. For example, you can set up a trigger that starts a video when you click on an icon or image, creating a more natural and intuitive way to introduce video content during your presentation. Animations, when combined with embedded videos, can create stunning visual effects that capture your audience's attention and reinforce your message. You can use entrance animations to smoothly bring your video onto the slide, exit animations to transition it out, and emphasis animations to draw attention to specific parts of the video. For instance, you might use a zoom animation to focus on a particular section of the video frame, highlighting important details or data points. One particularly effective technique is to use motion path animations with your embedded videos. This allows you to move the video around the slide, creating dynamic layouts that change as you progress through your presentation. You can have the video slide in from off-screen, move to different positions to make room for text or images, or even follow a custom path that complements your content. When implementing these advanced techniques, it's important to consider the overall design and flow of your presentation. Use triggers and animations judiciously to enhance your content rather than distract from it. Ensure that the timing of your video playback aligns with your narrative and that any animations complement rather than compete with the video content. Troubleshooting is an essential aspect of using these advanced features. Common issues include videos not playing when triggered or animations not executing as expected. To address these problems, double-check that your video files are compatible with PowerPoint and properly embedded. Verify that your triggers are correctly set up and linked to the right objects. For animations, ensure that the timing and duration are appropriate and that they don't interfere with other elements on the slide. By mastering the use of triggers and animations with embedded videos, you can create PowerPoint presentations that are not only informative but also visually compelling and interactive. This approach can significantly enhance audience engagement, making your content more memorable and impactful. With practice and attention to detail, you'll be able to seamlessly integrate these advanced techniques into your presentations, taking your PowerPoint skills to the next level.
Common issues and solutions when embedding videos
Embedding videos in PowerPoint presentations can greatly enhance the viewer's experience, but it's not without its challenges. Common issues often arise, ranging from compatibility problems to playback errors, which can disrupt the flow of your presentation. One frequent problem is videos failing to play due to codec incompatibility. This occurs when the video format isn't supported by the version of PowerPoint or the computer being used. To address this, consider converting your video to a widely supported format like MP4 or WMV before embedding. Another common issue is large file sizes, which can make presentations cumbersome to share or slow to load. Compressing videos or using lower resolution versions can help mitigate this problem without significantly compromising quality. Additionally, broken links are a persistent concern, especially when videos are hosted online. To avoid this, consider downloading and embedding the video directly into your presentation, ensuring it plays regardless of internet connectivity. Audio problems are also frequent, such as videos playing without sound or at an inappropriate volume. This can often be resolved by checking the audio settings within PowerPoint and on your computer. Sometimes, videos may appear distorted or poorly sized within your slides. Adjusting the video's dimensions and positioning can usually correct this issue, ensuring it fits seamlessly into your slide design. For those using older versions of PowerPoint, limited video editing capabilities can be frustrating. Newer versions offer more robust editing tools, but if upgrading isn't an option, consider editing your video externally before embedding it. Performance issues, such as lag or freezing during playback, can also occur, especially with high-resolution videos or on less powerful computers. Reducing the video quality or breaking longer videos into smaller segments can help alleviate these problems. When troubleshooting, it's crucial to test your presentation on different devices and versions of PowerPoint to ensure compatibility. Utilizing PowerPoint's built-in troubleshooting tools can also help identify and resolve issues. For persistent problems, consulting online forums or Microsoft's support resources can provide additional solutions. Remember, staying updated with the latest version of PowerPoint can prevent many common embedding issues, as newer versions typically offer improved video support and features. By anticipating these common issues and knowing how to address them, you can ensure your embedded videos play smoothly, enhancing rather than detracting from your presentation. With careful preparation and troubleshooting, video embedding can become a powerful tool in your PowerPoint arsenal, allowing you to create more dynamic and engaging presentations.