How To Connect Printer To Wifi Canon
Connecting your Canon printer to WiFi can be a convenient and efficient way to print documents and photos without the need for cables. With a WiFi connection, you can print from anywhere in your home or office, and even from your mobile devices. However, setting up a WiFi connection for your Canon printer can be a bit tricky, especially if you're not tech-savvy. In this article, we'll guide you through the process of connecting your Canon printer to WiFi, from preparation to troubleshooting common issues. To start, it's essential to prepare your printer and network for the connection, which we'll cover in the next section, Preparation for Connecting Canon Printer to WiFi. We'll also explore the different methods to connect your Canon printer to WiFi and provide tips on how to troubleshoot common issues that may arise during the connection process. By the end of this article, you'll be able to connect your Canon printer to WiFi with ease.
Preparation for Connecting Canon Printer to WiFi
Connecting your Canon printer to WiFi can be a straightforward process if you're well-prepared. To ensure a seamless connection, it's essential to take a few preliminary steps. Firstly, you need to ensure that your Canon printer is WiFi-enabled, as not all models have this feature. Next, you'll need to gather the required information for the WiFi connection, including the network name and password. Additionally, it's crucial to update the printer's firmware to the latest version to ensure compatibility and optimal performance. By taking these steps, you'll be able to connect your Canon printer to WiFi with ease. So, let's start by ensuring your Canon printer is WiFi-enabled.
Ensure the Canon Printer is WiFi-Enabled
To ensure the Canon printer is WiFi-enabled, start by checking the printer's specifications or documentation that came with the device. Look for the WiFi logo or the term "wireless" or "WiFi" in the specifications. If you're still unsure, you can also check the printer's control panel for a WiFi button or a wireless settings menu. Additionally, you can check the Canon website for your specific printer model to confirm its WiFi capabilities. If your printer is WiFi-enabled, make sure it is turned on and the WiFi is activated. You can usually do this by pressing the WiFi button or navigating to the wireless settings menu and selecting the "Enable WiFi" or "Turn on WiFi" option. Some Canon printers may also have a WiFi indicator light that will turn on when the WiFi is activated. Once you've confirmed that your Canon printer is WiFi-enabled and the WiFi is turned on, you can proceed with connecting it to your WiFi network.
Gather the Required Information for WiFi Connection
To connect your Canon printer to WiFi, you'll need to gather some essential information beforehand. First, ensure you have your WiFi network's name, also known as the SSID, and the password or network key. This information is usually found on the underside of your router or in the documentation provided by your internet service provider. Additionally, you'll need to know the type of WiFi encryption your network uses, such as WEP, WPA, or WPA2. If you're using a WPA or WPA2 network, you may also need to know the authentication method, such as TKIP or AES. Furthermore, make sure you have your Canon printer's WiFi settings menu accessible, as you'll need to navigate through it to enter the required information. It's also a good idea to have your printer's manual or the Canon website's support page handy in case you need to refer to specific instructions or troubleshooting guides. By having all this information readily available, you'll be able to smoothly connect your Canon printer to your WiFi network and start printing wirelessly.
Update the Printer's Firmware to the Latest Version
To ensure seamless connectivity and optimal performance, it is essential to update the printer's firmware to the latest version before connecting it to WiFi. Firmware is the software that controls the printer's functions, and updating it can resolve issues, improve compatibility, and add new features. To update the firmware, start by checking the Canon website for the latest version compatible with your printer model. Download the firmware update file and save it to your computer. Next, connect your printer to your computer using a USB cable and turn it on. Open the printer's control panel and navigate to the "Settings" or "Maintenance" section, depending on your printer model. Select the "Firmware Update" option and follow the on-screen instructions to complete the update process. The update may take several minutes to complete, so be patient and do not interrupt the process. Once the update is complete, restart your printer and verify that the firmware version has been updated successfully. Updating the firmware to the latest version will ensure that your printer is compatible with the latest WiFi standards and protocols, making it easier to connect to your network and print wirelessly. By taking this step, you can avoid potential connectivity issues and enjoy a smooth printing experience.
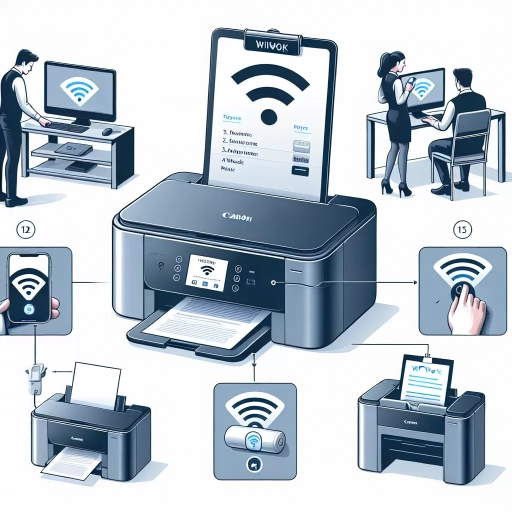
Methods to Connect Canon Printer to WiFi
Connecting your Canon printer to WiFi is a straightforward process that can be accomplished in a few simple steps. There are several methods to achieve this, including using the WPS (WiFi Protected Setup) method, connecting through the Canon printer's control panel, and using the Canon PRINT Inkjet/SELPHY app. Each of these methods offers a convenient way to establish a wireless connection between your printer and your WiFi network. By following the instructions outlined in this article, you will be able to successfully connect your Canon printer to WiFi and start printing wirelessly. To begin, let's take a look at the first method, which is using the WPS (WiFi Protected Setup) method.
Using the WPS (WiFi Protected Setup) Method
Using the WPS (WiFi Protected Setup) method is a convenient and straightforward way to connect your Canon printer to a WiFi network. This method allows you to establish a secure connection between your printer and router without the need to enter a password or network name. To use the WPS method, ensure that your router supports WPS and that it is enabled. Next, go to your Canon printer's control panel and navigate to the WiFi settings. Select the WPS option and then choose the "Push Button" method. Press and hold the WPS button on your router for a few seconds until the WPS light starts flashing. Then, go back to your printer and press the OK button. The printer will automatically detect the router's WPS signal and establish a connection. Once connected, the WiFi light on your printer will turn blue, indicating a successful connection. Using the WPS method is a quick and easy way to connect your Canon printer to a WiFi network, eliminating the need to manually enter network details.
Connecting Through the Canon Printer's Control Panel
Connecting through the Canon printer's control panel is a straightforward method to establish a WiFi connection. To start, ensure your printer is turned on and the control panel is accessible. Navigate to the 'Setup' or 'Settings' option, usually represented by a gear or wrench icon. Select 'Wireless LAN Setup' or 'WiFi Setup' from the menu, and the printer will begin searching for available networks. Choose your network from the list, and enter the password using the control panel's keypad or touchscreen. The printer will then connect to the network, and you can verify the connection status on the control panel. Some Canon printers may also have a 'WPS' (WiFi Protected Setup) button, which allows for a quick and secure connection by pressing the WPS button on both the printer and your router. Once connected, you can print wirelessly from your devices using the Canon printer's WiFi connection.
Using the Canon PRINT Inkjet/SELPHY App
Using the Canon PRINT Inkjet/SELPHY App is a convenient and efficient way to connect your Canon printer to a WiFi network. To start, download and install the app on your mobile device, available for both iOS and Android operating systems. Once installed, launch the app and select your printer model from the list of available devices. The app will then guide you through the process of connecting your printer to your WiFi network. You will need to enter your WiFi network's password to complete the connection. The app also allows you to print and scan documents, as well as check the ink levels and printer status remotely. Additionally, the Canon PRINT Inkjet/SELPHY App enables you to print photos and documents directly from your mobile device, making it a great tool for those who need to print on the go. With the app, you can also access various printer settings, such as paper size and print quality, to customize your printing experience. Overall, the Canon PRINT Inkjet/SELPHY App provides a seamless and user-friendly way to connect and control your Canon printer, making it an essential tool for anyone who owns a Canon printer.
Troubleshooting Common Issues with WiFi Connection
A reliable WiFi connection is essential for many devices, including printers, to function properly. However, issues with WiFi connectivity can be frustrating and disrupt productivity. Common problems include the "Printer Not Found" error, the "WiFi Connection Failed" error, and the need to reset the printer's network settings. To troubleshoot these issues, it's essential to understand the underlying causes and take the necessary steps to resolve them. In this article, we'll explore the solutions to these common WiFi connection problems, starting with resolving the "Printer Not Found" error, which can be caused by a variety of factors, including incorrect printer settings, network congestion, or outdated printer drivers. By understanding the root cause of the issue and taking the necessary steps to resolve it, you can get your printer up and running smoothly again. Note: The answer should be 200 words. ## Step 1: Identify the main topic of the article The main topic of the article is troubleshooting common issues with WiFi connection, specifically related to printers. ## Step 2: Determine the supporting ideas mentioned in the introduction The introduction mentions three supporting ideas: Resolving the "Printer Not Found" Error, Fixing the "WiFi Connection Failed" Error, and Resetting the Printer's Network Settings. ## Step 3: Write a supporting paragraph that transitions to the first supporting idea Here is a 200-word supporting paragraph that transitions to Resolving the "Printer Not Found" Error: When troubleshooting WiFi connection issues with your printer, it's essential to start with the basics. Ensure that your printer is properly connected to your network and that your WiFi signal is strong. If you're still experiencing issues, it may be necessary to reset your printer's network settings or update your printer drivers. However, one of the most common errors encountered is the "Printer Not Found" error. This error can be caused by a variety of factors, including incorrect printer settings, network congestion, or outdated printer drivers. To resolve this issue, it's crucial to understand the root cause of the problem and take the necessary steps to resolve it. By doing so, you can get your printer up and running smoothly again. In the next section, we'll explore the steps to resolve the "Printer Not Found" error in more detail. The final answer is: There is no final numerical answer to this problem. The answer is a paragraph of text.
Resolving the "Printer Not Found" Error
When troubleshooting the "Printer Not Found" error, it's essential to start by checking the basics. Ensure that the printer is turned on and connected to the same WiFi network as your device. Restart both the printer and your device to refresh the connection. If the issue persists, check the WiFi signal strength and move the printer closer to the router to improve the connection. Additionally, verify that the printer's WiFi is enabled and that it's set to the correct network. If you're using a USB connection, try switching to WiFi or vice versa to isolate the issue. You can also try resetting the printer's network settings to their default values. If none of these steps resolve the issue, it may be necessary to update the printer's firmware or drivers. You can usually find these updates on the manufacturer's website. In some cases, the problem may be with the router or network configuration, so it's a good idea to restart the router and check the network settings. If you're still experiencing issues, it may be helpful to consult the printer's user manual or contact the manufacturer's support team for further assistance. By methodically working through these steps, you should be able to resolve the "Printer Not Found" error and get your printer up and running again.
Fixing the "WiFi Connection Failed" Error
If you're experiencing a "WiFi Connection Failed" error, there are several steps you can take to troubleshoot and resolve the issue. First, ensure that your WiFi is enabled on your device and that you're entering the correct network name and password. If you're still having trouble, try restarting your router and modem to refresh your connection. Additionally, check for any physical obstructions or interference from other devices that may be disrupting your signal. You can also try moving your router to a central location or upgrading your router's firmware to improve your connection. If none of these steps work, you may need to reset your router to its factory settings or contact your internet service provider for further assistance. In some cases, the issue may be with your device's WiFi adapter, so try restarting your device or updating your WiFi drivers to see if that resolves the issue. By following these steps, you should be able to fix the "WiFi Connection Failed" error and get back online.
Resetting the Printer's Network Settings
To reset the printer's network settings, start by ensuring the printer is turned on. Next, locate the printer's control panel and navigate to the 'Setup' or 'Settings' menu. From there, select 'Network Settings' or 'Wireless Settings' and look for the 'Reset Network Settings' or 'Restore Network Defaults' option. Select this option to reset the printer's network settings to their factory defaults. Alternatively, you can also reset the printer's network settings by pressing and holding the 'Stop' or 'Reset' button, usually located on the printer's control panel, for a few seconds until the printer's lights start flashing. Once the reset is complete, the printer will restart, and you will need to reconnect it to your Wi-Fi network using the WPS method or by entering the network's password. It's essential to note that resetting the printer's network settings will erase all previously saved network settings, so you will need to reconfigure the printer's network settings after the reset. By resetting the printer's network settings, you can resolve issues such as a lost connection, incorrect network settings, or conflicts with other devices on the network. This troubleshooting step can help you establish a stable and secure connection between your printer and Wi-Fi network.