How To Delete Photos On Mac
Here is the introduction paragraph: Deleting photos on a Mac can be a straightforward process, but it's essential to understand the basics, methods, and best practices to manage and organize your photos effectively. Whether you're looking to free up storage space, declutter your photo library, or simply remove unwanted images, this article will guide you through the process. We'll start by understanding the basics of deleting photos on Mac, including the different types of photo files and how they're stored. From there, we'll explore the various methods to delete photos on Mac, including using the Photos app, Finder, and other third-party tools. Finally, we'll discuss how to manage and organize your photos after deletion, including tips on how to keep your photo library tidy and easily accessible. By the end of this article, you'll be equipped with the knowledge and skills to delete photos on your Mac with confidence. Let's start by understanding the basics of deleting photos on Mac.
Understanding the Basics of Deleting Photos on Mac
When it comes to managing photos on a Mac, deleting unwanted images is a crucial part of maintaining a clutter-free and organized digital library. However, before you start deleting photos, it's essential to understand the basics of the process. This includes knowing what happens when you delete a photo on Mac, where your photos are stored, and the precautions you should take to avoid accidental deletions. By understanding these fundamental concepts, you can ensure that your photo management process is efficient and safe. So, let's dive into the first crucial aspect: what happens when you delete a photo on Mac.
What Happens When You Delete a Photo on Mac
When you delete a photo on Mac, it doesn't immediately disappear from your computer. Instead, the operating system moves the deleted photo to the Trash, a temporary storage location where deleted files are held until they are permanently erased. The Trash is essentially a safety net that allows you to recover deleted files if you change your mind or realize you've made a mistake. When a photo is in the Trash, it still occupies space on your hard drive, and you can restore it to its original location by right-clicking on the photo and selecting "Put Back." However, if you empty the Trash, the photo is permanently deleted, and you won't be able to recover it unless you have a backup or use specialized data recovery software. It's worth noting that if you're using iCloud Photo Library, deleting a photo on your Mac will also delete it from all your other devices connected to the same iCloud account, unless you've enabled the "Download Originals to this Mac" option, in which case the original photo will remain on your Mac even after it's been deleted from iCloud.
Where Are Photos Stored on Mac
When you take a photo or import one onto your Mac, it gets stored in the Photos app. The Photos app is the default photo management application on Macs, and it's where all your photos are stored. The Photos app stores your photos in a library, which is a database that contains all your photos, videos, and other media. The library is stored in a file called "Photos Library.photoslibrary" and is usually located in the Pictures folder of your Mac's user account. This file contains all the metadata associated with your photos, such as captions, keywords, and ratings, as well as the actual image files themselves. When you view your photos in the Photos app, you're actually viewing the contents of this library file. Additionally, if you have iCloud Photo Library enabled, your photos are also stored in iCloud and can be accessed from any device connected to your iCloud account.
Precautions to Take Before Deleting Photos
When deleting photos on your Mac, it's essential to take certain precautions to avoid losing precious memories or causing unintended consequences. Before hitting the delete button, make sure you have backed up your photos to an external hard drive, cloud storage, or both. This ensures that you have a copy of your photos in case you accidentally delete them or need to restore them later. Additionally, consider creating a separate folder or album for the photos you want to delete, so you can review them one last time before permanently removing them. It's also a good idea to check if the photos you're about to delete are synced with other devices or services, such as your iPhone or iCloud, to avoid deleting them from multiple locations. Furthermore, be cautious when using the "Empty Trash" feature, as it will permanently delete all items in the Trash, including photos. To avoid accidental deletions, consider setting up a "Recently Deleted" folder or using a third-party app that allows you to recover deleted photos. By taking these precautions, you can ensure a safe and stress-free photo deletion process on your Mac.
Methods to Delete Photos on Mac
When it comes to managing photos on a Mac, deleting unwanted images is an essential task to free up storage space and keep your photo library organized. There are several methods to delete photos on a Mac, and the approach you take will depend on where the photos are stored and how you want to manage them. In this article, we will explore three effective methods to delete photos on a Mac: deleting photos from the Photos app, deleting photos from the Finder app, and deleting photos from the Trash. By understanding these methods, you can efficiently manage your photo collection and keep your Mac running smoothly. Let's start by exploring the first method: deleting photos from the Photos app.
Deleting Photos from the Photos App
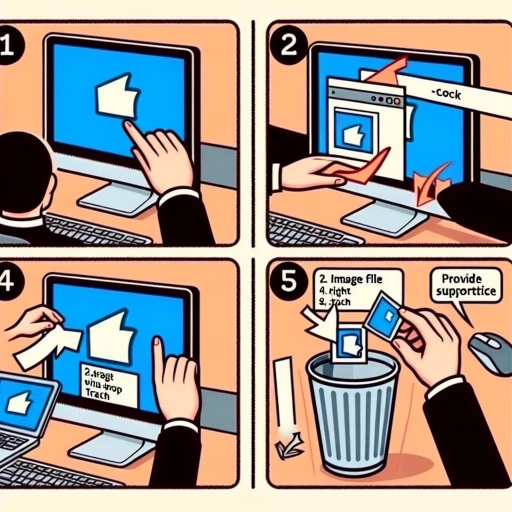
Deleting photos from the Photos app on a Mac is a straightforward process that can be accomplished in a few simple steps. To start, open the Photos app and select the photos you want to delete by clicking on them. You can select multiple photos by holding down the Command key while clicking on each one. Once you've selected the photos, click on the "Delete" button in the top right corner of the screen or press the "Delete" key on your keyboard. Alternatively, you can also right-click on the selected photos and choose "Delete Photos" from the context menu. If you want to delete all the photos in a particular album or folder, you can select the album or folder and then click on the "Delete" button. The Photos app will ask you to confirm that you want to delete the selected photos, and once you confirm, they will be moved to the "Recently Deleted" album. From there, they will be permanently deleted after 30 days, unless you choose to delete them immediately by going to the "Recently Deleted" album and clicking on the "Delete All" button.
Deleting Photos from the Finder App
Deleting photos from the Finder app on a Mac is a straightforward process that can be completed in a few simple steps. To start, open the Finder app and navigate to the folder or album where the photos you want to delete are located. You can do this by clicking on the "Pictures" folder in the sidebar, or by searching for the specific folder or album in the search bar. Once you've located the photos, select the ones you want to delete by holding down the Command key and clicking on each photo. You can also select multiple photos by holding down the Shift key and clicking on the first and last photo in the group. Once you've selected the photos, right-click on one of the selected photos and choose "Move to Trash" from the dropdown menu. Alternatively, you can also use the keyboard shortcut Command + Delete to move the selected photos to the Trash. If you want to permanently delete the photos, you can empty the Trash by right-clicking on the Trash icon in the dock and selecting "Empty Trash." Note that once you've emptied the Trash, the photos will be permanently deleted and cannot be recovered.
Deleting Photos from the Trash
When you delete a photo on your Mac, it doesn't immediately disappear. Instead, it's moved to the Trash, a temporary storage location where deleted files are held until you empty the Trash. This allows you to recover deleted photos if you change your mind or realize you need them again. However, if you're sure you want to get rid of the photo permanently, you'll need to delete it from the Trash. To do this, open the Trash by clicking on its icon in the Dock or by pressing Command + Shift + Delete. Then, select the photo you want to delete and right-click (or control-click) on it. Choose "Delete Immediately" from the context menu. Alternatively, you can also select the photo and press Command + Delete. This will permanently delete the photo from your Mac, and it will no longer be recoverable. If you want to delete all photos from the Trash at once, you can right-click (or control-click) on the Trash icon and select "Empty Trash." This will delete all files in the Trash, including photos, so be sure you're ready to get rid of everything before doing so.
Managing and Organizing Your Photos After Deletion
Managing and organizing your photos after deletion can be a daunting task, especially if you have a large collection of images. However, with the right strategies, you can keep your photos tidy and easily accessible. One effective way to manage your photos is by using albums and folders to categorize and store them. This approach allows you to group similar photos together, making it easier to find specific images when you need them. Additionally, backing up your photos to iCloud or an external drive can provide an extra layer of security and ensure that your memories are safe in case of accidental deletion or device loss. Furthermore, if you do accidentally delete a photo, there are ways to recover it from the trash or iCloud. By implementing these strategies, you can take control of your photo collection and enjoy peace of mind. To get started, let's explore how using albums and folders can help you organize your photos.
Using Albums and Folders to Organize Photos
Using albums and folders is an effective way to organize your photos on a Mac, making it easier to locate and manage your images. To create an album, open the Photos app, click on "File" in the top menu bar, and select "New Album." Give your album a name, and then start adding photos by dragging and dropping them into the album. You can also create folders to further categorize your albums. To create a folder, click on "File" and select "New Folder." Name your folder, and then drag and drop albums into it. This hierarchical structure allows you to easily find specific photos by navigating through your folders and albums. Additionally, you can use the "Smart Albums" feature to automatically organize your photos based on criteria such as date, location, or camera type. By using albums and folders, you can keep your photos organized and easily accessible, making it simpler to manage and delete photos on your Mac.
Backing Up Your Photos to iCloud or External Drive
Backing up your photos is an essential step in managing and organizing your photo library, especially after deleting photos on your Mac. There are two primary options for backing up your photos: iCloud and external drives. iCloud is a convenient and automatic way to back up your photos, as long as you have an iCloud account and enough storage space. You can access your iCloud photos from any device with an internet connection, making it easy to share and view your photos across multiple devices. On the other hand, external drives offer a more traditional and secure way to back up your photos. You can use a USB drive or an external hard drive to store your photos, and it's a good idea to keep multiple copies of your backups in different locations. This way, you can ensure that your photos are safe even if one of your backups is lost or damaged. Additionally, external drives can store large amounts of data, making them ideal for backing up large photo libraries. Regardless of which method you choose, it's essential to back up your photos regularly to prevent data loss and ensure that your memories are safe. By backing up your photos to iCloud or an external drive, you can have peace of mind knowing that your photos are secure and easily accessible.
Recovering Deleted Photos from the Trash or iCloud
If you've accidentally deleted photos from your Mac, don't panic. There are ways to recover them from the Trash or iCloud. If you've deleted photos from the Photos app, they are moved to the Trash, where they remain for 30 days. To recover deleted photos from the Trash, simply open the Trash, select the photos you want to recover, and drag them back to the Photos app or a folder on your Mac. Alternatively, you can right-click on the selected photos and choose "Put Back" to restore them to their original location. If you've emptied the Trash or the 30-day period has expired, you can try recovering deleted photos from iCloud. If you have iCloud Photos enabled, your photos are stored in iCloud and can be recovered from there. To do this, go to the iCloud website, sign in with your Apple ID, and select the "Photos" option. From there, you can browse your iCloud photos and select the ones you want to recover. You can then download them to your Mac or access them from the Photos app. Additionally, if you have a Time Machine backup, you can also recover deleted photos from there. Simply connect your Time Machine backup disk, open the Time Machine app, and navigate to the date and time when the photos were deleted. From there, you can select the photos you want to recover and restore them to your Mac. By following these steps, you can recover deleted photos from the Trash or iCloud and restore them to your Mac.