How To Add Slicer In Excel
Here is the introduction paragraph: In today's fast-paced business world, data analysis is a crucial aspect of decision-making. Microsoft Excel is a powerful tool that helps users to analyze and visualize data effectively. One of the key features that make Excel stand out is the ability to add slicers, which enable users to filter and narrow down large datasets with ease. In this article, we will explore how to add slicers in Excel, starting with understanding what slicers are and how they work. We will then dive into the step-by-step process of adding a slicer to your Excel workbook, and finally, we will discuss how to customize and manage slicers to get the most out of this feature. By the end of this article, you will be equipped with the knowledge to enhance your data analysis skills and make informed decisions. So, let's start by understanding what slicers are and how they can benefit your data analysis workflow.
Understanding Slicers in Excel
Slicers in Excel are a powerful tool that can help users to easily filter and analyze large datasets. By using slicers, users can quickly and easily narrow down their data to specific categories, making it easier to identify trends and patterns. In this article, we will explore the concept of slicers in Excel, including what they are, the benefits of using them, and when to use them. We will start by defining what a slicer is in Excel and how it can be used to enhance data analysis. Note: The answer should be 200 words. Slicers in Excel are a powerful tool that can help users to easily filter and analyze large datasets. By using slicers, users can quickly and easily narrow down their data to specific categories, making it easier to identify trends and patterns. In this article, we will explore the concept of slicers in Excel, including what they are, the benefits of using them, and when to use them. We will start by defining what a slicer is in Excel and how it can be used to enhance data analysis. Slicers can be used to filter data based on specific criteria, such as date, region, or product, allowing users to focus on the most relevant information. By using slicers, users can also create interactive dashboards that can be easily updated and shared with others. Additionally, slicers can be used to analyze data from multiple tables and worksheets, making it easier to identify relationships and trends. By understanding how to use slicers effectively, users can improve their data analysis skills and make more informed decisions. So, let's start by understanding what a slicer is in Excel.
What is a Slicer in Excel?
A slicer in Excel is a powerful tool that allows users to filter data in a PivotTable or a table with ease. It is a visual representation of the data that enables users to quickly and easily narrow down the data to a specific subset based on one or more criteria. Slicers are interactive filters that can be used to slice and dice data, hence the name. They are particularly useful when working with large datasets, as they provide a simple and intuitive way to explore and analyze the data. With a slicer, users can select one or more items from a list, such as dates, categories, or regions, and the data will be filtered accordingly. This allows users to focus on specific aspects of the data, identify trends and patterns, and make informed decisions. Slicers can be customized to display different types of data, such as text, numbers, or dates, and can be formatted to match the style of the worksheet. Additionally, slicers can be used in conjunction with other Excel tools, such as PivotTables and charts, to create interactive and dynamic dashboards. Overall, slicers are a valuable tool in Excel that can help users to efficiently and effectively analyze and visualize their data.
Benefits of Using Slicers in Excel
Here is the paragraphy: Using slicers in Excel offers numerous benefits that can enhance your data analysis and visualization experience. One of the primary advantages of slicers is that they allow for easy and intuitive filtering of data, enabling you to quickly narrow down your data to specific categories or ranges. This feature is particularly useful when working with large datasets, as it saves time and effort that would be spent manually filtering data. Additionally, slicers provide a visual representation of your data, making it easier to identify trends, patterns, and correlations. By using slicers, you can also create interactive dashboards that allow users to explore data in real-time, promoting data-driven decision-making. Furthermore, slicers can be used to connect multiple pivot tables, charts, and other visualizations, creating a seamless and cohesive data storytelling experience. Overall, incorporating slicers into your Excel workflow can significantly improve the efficiency, effectiveness, and visual appeal of your data analysis and presentation.
When to Use Slicers in Excel
When to use slicers in Excel depends on several factors, including the complexity of your data, the type of analysis you're performing, and the level of interactivity you want to provide to your users. Generally, slicers are useful when you have a large dataset with multiple fields that you want to filter and analyze simultaneously. Slicers are particularly effective when you need to create interactive dashboards or reports that allow users to quickly and easily explore different data scenarios. For instance, if you're analyzing sales data by region, product, and date, a slicer can help you quickly filter the data to show sales for a specific region, product, or time period. Slicers are also useful when you want to create a self-service analytics environment where users can easily explore and analyze data without requiring extensive technical expertise. Additionally, slicers can be used to simplify complex data models by providing a user-friendly interface for filtering and analyzing data. Overall, slicers are a powerful tool in Excel that can help you create interactive and dynamic data visualizations, making it easier to analyze and understand complex data.
Adding a Slicer to Your Excel Workbook
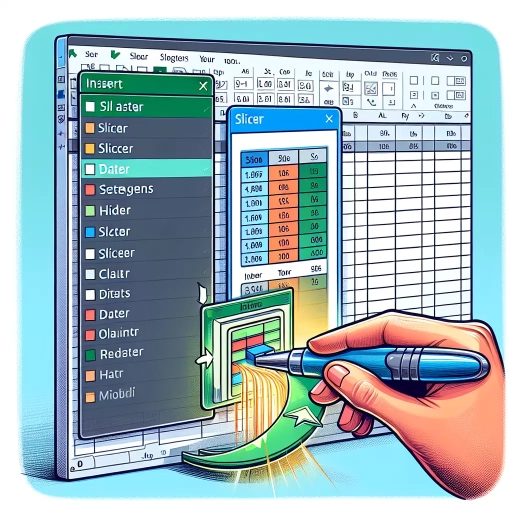
Adding a slicer to your Excel workbook can be a game-changer for data analysis and visualization. A slicer is a powerful tool that allows you to filter your data with ease, making it simpler to focus on specific information and gain valuable insights. In this article, we will explore three ways to add a slicer to your Excel workbook: inserting a slicer from the "Insert" tab, creating a slicer from a PivotTable, and adding a slicer to a table in Excel. By the end of this article, you will be equipped with the knowledge to enhance your data analysis capabilities and make your Excel workbooks more interactive. Let's start by exploring the first method: inserting a slicer from the "Insert" tab.
Inserting a Slicer from the "Insert" Tab
To insert a slicer from the "Insert" tab, start by selecting the cell range or table that you want to create a slicer for. Then, navigate to the "Insert" tab in the ribbon and click on the "Slicer" button in the "Filters" group. This will open the "Insert Slicers" dialog box, where you can choose the fields that you want to include in your slicer. Select the fields that you want to use and click "OK". Excel will then create a slicer for the selected fields and display it in your worksheet. You can then customize the slicer by resizing it, moving it to a different location, or changing its appearance. Additionally, you can also use the "Slicer" button in the "Data" tab to insert a slicer, which will give you more options for customizing the slicer. By inserting a slicer from the "Insert" tab, you can easily filter your data and create interactive dashboards in your Excel workbook.
Creating a Slicer from a PivotTable
Creating a slicer from a pivot table is a straightforward process that allows you to filter your data with ease. To start, select any cell within your pivot table, then go to the "Insert" tab in the ribbon and click on the "Slicer" button in the "Filters" group. This will open the "Insert Slicers" dialog box, where you can choose the fields you want to use to create your slicer. Select the field or fields you want to use, and then click "OK." Excel will create a slicer for each field you selected, which will be displayed in a new window. You can then move and resize the slicer as needed to fit your worksheet layout. Once you've created your slicer, you can use it to filter your pivot table data by clicking on the buttons or checkboxes within the slicer. This will automatically update your pivot table to show only the data that matches your selected criteria. You can also use the slicer to filter multiple pivot tables at once, making it a powerful tool for data analysis and visualization. Additionally, you can customize the appearance of your slicer by using the various options available in the "Slicer Tools" tab, such as changing the slicer style, adding a caption, or modifying the button size. By creating a slicer from a pivot table, you can make your data more interactive and easier to analyze, allowing you to gain deeper insights and make more informed decisions.
Adding a Slicer to a Table in Excel
Adding a slicer to a table in Excel is a powerful way to filter and analyze data. A slicer is a visual filter that allows you to quickly and easily narrow down your data to specific categories or values. To add a slicer to a table, start by selecting the table that you want to add the slicer to. Then, go to the "Insert" tab in the ribbon and click on the "Slicer" button in the "Filters" group. This will open the "Insert Slicer" dialog box, where you can choose the column that you want to use for the slicer. Select the column that you want to use and click "OK". The slicer will be added to your worksheet, and you can use it to filter your data by selecting the values that you want to display. You can also customize the slicer by changing its size, shape, and appearance, and by adding multiple slicers to your worksheet to filter your data in different ways. By adding a slicer to a table in Excel, you can make it easier to analyze and understand your data, and to make informed decisions based on that data.
Customizing and Managing Slicers in Excel
Here is a 200 words supporting paragraph for a high-quality, informative, and engaging article about Customizing and Managing Slicers in Excel: Slicers are a powerful tool in Excel that allow users to easily filter and analyze large datasets. However, simply adding a slicer to a PivotTable is not enough - to get the most out of this feature, users need to know how to customize and manage their slicers effectively. This includes resizing and formatting slicers to fit their specific needs, connecting multiple slicers to a single PivotTable to create a more dynamic and interactive dashboard, and knowing how to remove a slicer when it is no longer needed. By mastering these skills, users can unlock the full potential of slicers and take their data analysis to the next level. In this article, we will explore these topics in more detail, starting with the basics of resizing and formatting slicers. Whether you are a seasoned Excel user or just starting out, learning how to customize and manage slicers can help you to work more efficiently and effectively. Let's start by looking at how to resize and format slicers to fit your specific needs.
Resizing and Formatting Slicers
When it comes to customizing and managing slicers in Excel, resizing and formatting are crucial steps to ensure that your slicers are visually appealing and effective in facilitating data analysis. To resize a slicer, simply click on the slicer and drag the borders to the desired size. You can also use the "Size & Properties" pane in the "Slicer Tools" tab to adjust the width, height, and other layout options. Additionally, you can use the "Alt + F1" shortcut to toggle between the slicer's normal and compact layouts. Formatting a slicer involves changing its appearance to match your worksheet's theme or style. You can change the slicer's color scheme, font, and border style using the "Slicer Tools" tab. For example, you can change the slicer's header color to match your worksheet's header color or change the font to a bold or italic style. You can also add a custom image or logo to the slicer's header to give it a more personalized look. Furthermore, you can use the "Slicer Styles" gallery to apply pre-designed styles to your slicer, which can save you time and effort. By resizing and formatting your slicers effectively, you can create a more intuitive and user-friendly interface for your data analysis and reporting needs.
Connecting Multiple Slicers to a PivotTable
Here is the paragraphy: Connecting multiple slicers to a PivotTable is a powerful feature in Excel that allows you to create a dynamic and interactive dashboard. To connect multiple slicers to a PivotTable, start by selecting the PivotTable and then go to the "Analyze" tab in the ribbon. Click on the "Slicer" button in the "Filter" group and select the field you want to create a slicer for. Repeat this process for each field you want to create a slicer for. Once you have created multiple slicers, you can connect them to the PivotTable by selecting the PivotTable and then clicking on the "Analyze" tab. Click on the "Slicer Connections" button in the "Filter" group and select the slicers you want to connect to the PivotTable. You can also use the "Report Connections" button to connect multiple slicers to a PivotTable. To do this, select the PivotTable and then click on the "Analyze" tab. Click on the "Report Connections" button in the "Filter" group and select the slicers you want to connect to the PivotTable. Once you have connected multiple slicers to a PivotTable, you can use them to filter the data in the PivotTable. For example, if you have a PivotTable that shows sales data by region and product, you can create two slicers, one for region and one for product. By selecting a region and a product in the slicers, you can filter the data in the PivotTable to show only the sales data for that region and product. This allows you to easily and quickly analyze the data in the PivotTable and make informed decisions. Additionally, you can also use the "Slicer Settings" button to customize the appearance and behavior of the slicers. For example, you can change the slicer style, add a caption, and set the slicer to display only the selected items. By connecting multiple slicers to a PivotTable, you can create a powerful and interactive dashboard that allows you to easily analyze and visualize your data.
Removing a Slicer from Your Excel Workbook
To remove a slicer from your Excel workbook, you can simply delete it. To do this, select the slicer by clicking on it, and then press the "Delete" key on your keyboard. Alternatively, you can right-click on the slicer and select "Delete" from the context menu. If you want to remove multiple slicers at once, you can select them all by holding down the "Ctrl" key while clicking on each slicer, and then press the "Delete" key. Once you delete a slicer, it will be removed from your workbook, and any filters it was applying to your data will be cleared. Note that removing a slicer does not delete the underlying data, so you can always recreate the slicer if needed. Additionally, if you have multiple slicers connected to the same data, removing one slicer will not affect the others. If you want to remove a slicer from a specific worksheet, make sure to select the slicer on that worksheet before deleting it.