How To Wrap A Car
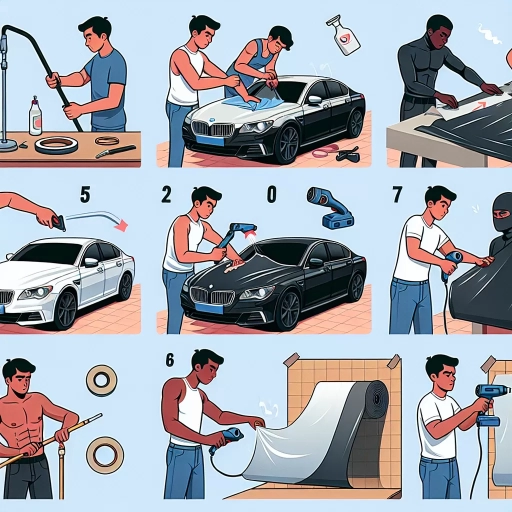
Wrapping a car is a complex process that requires careful planning, attention to detail, and a bit of creativity. Whether you're looking to give your vehicle a fresh new look, promote your business, or simply express your personality, a well-designed car wrap can make a lasting impression. However, with so many options and techniques available, it can be overwhelming to know where to start. In this article, we'll break down the car wrapping process into three essential steps: preparation, application, and maintenance. First, we'll explore the importance of preparation, including choosing the right materials, designing your wrap, and preparing your vehicle's surface. A well-prepared surface is crucial for a successful wrap, so let's dive into the first step: Preparation is Key.
Preparation is Key
When it comes to applying a vinyl wrap to your vehicle, preparation is key to achieving a professional-looking finish. A well-prepared surface, the right tools, and a suitable vinyl wrap are essential for a successful installation. To ensure a smooth and even application, it's crucial to choose the right vinyl wrap for your vehicle, taking into account factors such as the color, finish, and material. Additionally, preparing the vehicle's surface is vital to prevent any imperfections or bubbles from forming during the application process. Furthermore, gathering the necessary tools and materials beforehand will save you time and frustration in the long run. By taking the time to prepare properly, you'll be able to achieve a high-quality finish that will make your vehicle stand out. With the right preparation, you can ensure a successful vinyl wrap installation, starting with the first step: choosing the right vinyl wrap.
Choose the Right Vinyl Wrap
When it comes to choosing the right vinyl wrap for your car, there are several factors to consider. First and foremost, you need to think about the color and design of the wrap. With so many options available, it can be overwhelming to decide on just one. Consider the color of your car's trim, wheels, and other exterior features to ensure the wrap complements them. You should also think about the style of your car and the message you want to convey. For example, a bold, bright color may be perfect for a sports car, while a more subdued tone may be better suited for a luxury vehicle. Additionally, consider the finish of the wrap, such as glossy, matte, or satin, to add an extra layer of depth and visual interest. Another important factor to consider is the material of the wrap. There are several types of vinyl wraps available, including cast vinyl, calendared vinyl, and specialty vinyl. Cast vinyl is the most popular choice, offering a conformable and durable finish. Calendared vinyl is a more affordable option, but it may not be as conformable or long-lasting. Specialty vinyl, on the other hand, is designed for specific applications, such as reflective or metallic finishes. It's also essential to consider the warranty and durability of the wrap. Look for a wrap with a minimum of 5-7 years of outdoor durability and a warranty that covers fading, cracking, and other forms of damage. Finally, be sure to choose a reputable manufacturer and installer to ensure a high-quality wrap that will last for years to come. By considering these factors, you can choose the right vinyl wrap for your car and achieve a unique, head-turning look that reflects your personality and style.
Prepare the Vehicle's Surface
Here is the paragraphy: Preparing the vehicle's surface is a crucial step in the car wrapping process. A clean and smooth surface is essential for a successful wrap installation. Start by washing the vehicle thoroughly with a mild soap and water to remove any dirt, dust, or debris. Use a soft-bristled brush to gently scrub away any stubborn dirt or grime, paying particular attention to areas with heavy buildup such as the wheels and wheel wells. Next, use a degreaser to remove any grease, oil, or wax from the surface. This will ensure a strong bond between the wrap and the vehicle. Use a lint-free cloth or microfiber towel to dry the surface, paying extra attention to any crevices or grooves where moisture may collect. Finally, use a surface cleaner or prep solution to remove any remaining contaminants or residue. This will leave the surface clean, smooth, and ready for the wrap installation. It's also important to remove any emblems, trim, or moldings that may interfere with the wrap. Use a heat gun or a hair dryer to gently remove any stubborn adhesives or residue. By taking the time to properly prepare the vehicle's surface, you'll ensure a successful wrap installation that will last for years to come.
Gather the Necessary Tools and Materials
To successfully wrap a car, it is essential to gather all the necessary tools and materials beforehand. This includes a high-quality vinyl wrap specifically designed for vehicles, a cutting plotter or craft knife, a squeegee, a heat gun, a measuring tape, a level, and a pencil. Additionally, a well-lit workspace, a clean and dust-free environment, and a willing assistant can make the process smoother. The vinyl wrap should be compatible with the car's paint finish and should be chosen in the desired color and design. It is also crucial to have a comprehensive instruction manual or online tutorial to guide you through the wrapping process. Furthermore, having a backup plan and extra materials on hand can help mitigate any unexpected issues that may arise during the wrapping process. By gathering all the necessary tools and materials, you can ensure a successful and stress-free car wrapping experience.
Step-by-Step Wrapping Process
The process of wrapping a vehicle with vinyl is a meticulous and time-consuming task that requires patience, attention to detail, and a steady hand. To achieve a professional-looking finish, it's essential to follow a step-by-step approach. The wrapping process can be broken down into several key stages, including applying the vinyl wrap to the hood and roof, wrapping the side panels and trunk, and finishing with the bumpers and trim. By following these stages, you'll be able to achieve a seamless and high-quality finish that showcases your vehicle's unique design. In this article, we'll take a closer look at each of these stages, starting with the first step: applying the vinyl wrap to the hood and roof.
Apply the Vinyl Wrap to the Hood and Roof
Apply the vinyl wrap to the hood and roof by starting at the center and working your way outward. Begin by peeling the backing off the vinyl and aligning it with the hood's center crease. Use a squeegee or credit card to smooth out any air bubbles or wrinkles, working from the center outwards. Apply even pressure to ensure the vinyl adheres to the hood's surface. Once the vinyl is applied to the hood, move on to the roof, starting at the center and working your way outward. Use a squeegee or credit card to smooth out any air bubbles or wrinkles, making sure to apply even pressure to ensure the vinyl adheres to the roof's surface. Use a heat gun or torch to heat the vinyl and conform it to the roof's curves and contours. Use a squeegee or credit card to smooth out any air bubbles or wrinkles, making sure to apply even pressure to ensure the vinyl adheres to the roof's surface. Trim the excess vinyl around the edges of the hood and roof using a utility knife or trimming tool. Apply a post-heating process to the vinyl to ensure it conforms to the hood and roof's surface, and to remove any air bubbles or wrinkles. Inspect the vinyl wrap for any air bubbles, wrinkles, or imperfections, and make any necessary adjustments.
Wrap the Side Panels and Trunk
Wrapping the side panels and trunk of a car requires precision and patience. Start by cleaning the area thoroughly to ensure a smooth application process. Next, measure the side panels and trunk to determine the amount of vinyl needed, taking into account any obstacles such as door handles, trim, and emblems. Cut the vinyl into manageable sections, leaving a little extra material around the edges for trimming. Apply the vinyl to the side panels, starting from the center and working your way outwards, using a squeegee or credit card to remove any air bubbles or wrinkles. Use a heat gun to conform the vinyl to complex curves and contours. For the trunk, apply the vinyl in sections, starting from the top and working your way down, making sure to align the vinyl with the trunk's edges and curves. Use a trim tool to remove excess vinyl from around the edges and emblems, and apply a sealant to protect the vinyl from the elements. Finally, inspect the wrapped side panels and trunk for any imperfections or air bubbles, and make any necessary adjustments to ensure a smooth, professional finish.
Finish with the Bumpers and Trim
Finish with the Bumpers and Trim: Once you've wrapped the main body of the car, it's time to focus on the bumpers and trim. Start by wrapping the bumpers, making sure to align the vinyl with the edges of the bumper. Use a heat gun to conform the vinyl to the complex curves of the bumper. Next, move on to the trim, wrapping each piece individually. Use a trim removal tool to gently pry the trim away from the car, and then wrap the vinyl around it. Make sure to smooth out any air bubbles or wrinkles as you go. Finally, reattach the trim to the car, making sure it's securely in place. With the bumpers and trim wrapped, your car is now fully wrapped and ready to hit the road.
Post-Wrapping Care and Maintenance
Proper post-wrapping care and maintenance is crucial to ensure the longevity and appearance of your vehicle wrap. A well-maintained wrap not only looks great but also protects the underlying paint and surface. To keep your wrap in top condition, it's essential to follow a few simple steps. Firstly, it's vital to allow the wrap to cure and settle properly after installation. This involves avoiding exposure to harsh chemicals, direct sunlight, and extreme temperatures. Regular washing and maintenance are also crucial to prevent dirt and debris from accumulating and causing damage. Additionally, regular inspections can help identify any issues or damage, allowing for prompt repairs to prevent further deterioration. By following these simple steps, you can enjoy a vibrant and durable wrap that enhances your vehicle's appearance and protects its surface. To start, let's take a closer look at the importance of allowing the wrap to cure and settle.
Allow the Wrap to Cure and Settle
When it comes to post-wrapping care and maintenance, one of the most crucial steps is to allow the wrap to cure and settle. This process is essential to ensure that the vinyl wrap adheres properly to the vehicle's surface and lasts for a long time. After the wrapping process is complete, it's recommended to keep the vehicle away from direct sunlight, water, and extreme temperatures for at least 24 to 48 hours. This allows the adhesive to fully bond with the surface, creating a strong and durable seal. During this time, it's also important to avoid washing the vehicle or exposing it to any cleaning products, as this can interfere with the curing process. Additionally, it's recommended to avoid driving the vehicle at high speeds or exposing it to extreme weather conditions, as this can cause the wrap to stretch or distort. By allowing the wrap to cure and settle, you can ensure that it looks great and lasts for a long time, making it a worthwhile investment for your vehicle.
Wash and Maintain the Wrap Regularly
To keep your car wrap looking its best, it's essential to wash and maintain it regularly. A well-maintained wrap not only enhances the appearance of your vehicle but also prolongs its lifespan. Start by washing your wrapped car at least once a week, or more often if it's exposed to harsh weather conditions or heavy use. Use a mild soap and avoid using high-pressure washes, abrasive materials, or strong detergents, as these can damage the vinyl or cause it to lift. Instead, opt for a soft, microfiber cloth and a gentle cleaning solution specifically designed for car wraps. When washing, avoid using circular motions, which can create scratches, and instead use straight, overlapping strokes to clean the surface. Additionally, avoid washing your car in direct sunlight or when the surface is hot, as this can cause the vinyl to become brittle and prone to cracking. For tougher stains or dirt buildup, use a specialized cleaning product and follow the manufacturer's instructions. Regular waxing can also help protect the wrap from the elements and maintain its glossy finish. By following these simple washing and maintenance tips, you can keep your car wrap looking vibrant and fresh for years to come.
Inspect and Repair the Wrap as Needed
Inspect and repair the wrap as needed. Regularly inspect the wrap for any signs of damage, such as tears, scratches, or fading. If you notice any damage, address it promptly to prevent it from spreading and causing further damage. For minor scratches, you can use a scratch remover or a touch-up paint to repair the damage. For more extensive damage, such as tears or large scratches, you may need to replace the damaged panel or seek the help of a professional. Additionally, if you notice any air bubbles or wrinkles, you can use a heat gun or a squeegee to smooth out the wrap. By regularly inspecting and repairing the wrap, you can extend its lifespan and keep it looking its best.