How To Set Reminder On Iphone
 Here is the introduction paragraph:
Staying organized and on top of tasks is crucial in today's fast-paced world. One of the most effective ways to do this is by setting reminders on your iPhone. With the ability to set reminders, you can ensure that you never miss an important event, appointment, or deadline. But how do you set reminders on your iPhone? In this article, we will explore the different ways to set reminders on your iPhone, including using Siri, managing and editing reminders, and a step-by-step guide to setting reminders. Whether you're a busy professional or a student, setting reminders on your iPhone can help you stay on track and achieve your goals. So, let's dive in and start with the basics - Setting Reminders on iPhone: A Step-by-Step Guide.
Here is the introduction paragraph:
Staying organized and on top of tasks is crucial in today's fast-paced world. One of the most effective ways to do this is by setting reminders on your iPhone. With the ability to set reminders, you can ensure that you never miss an important event, appointment, or deadline. But how do you set reminders on your iPhone? In this article, we will explore the different ways to set reminders on your iPhone, including using Siri, managing and editing reminders, and a step-by-step guide to setting reminders. Whether you're a busy professional or a student, setting reminders on your iPhone can help you stay on track and achieve your goals. So, let's dive in and start with the basics - Setting Reminders on iPhone: A Step-by-Step Guide.Setting Reminders on iPhone: A Step-by-Step Guide
Here is the introduction paragraph: Staying organized and on top of tasks is crucial in today's fast-paced world. One of the most effective ways to manage your time and increase productivity is by setting reminders on your iPhone. With the Reminders app, you can easily create and customize reminders to suit your needs. In this article, we will guide you through the process of setting reminders on your iPhone, covering essential steps such as accessing the Reminders app, creating a new reminder, and customizing reminder settings. By the end of this article, you will be able to efficiently use the Reminders app to stay on track and achieve your goals. To get started, let's begin by accessing the Reminders app on your iPhone.
Accessing the Reminders App
. To access the Reminders app on your iPhone, navigate to the home screen and locate the Reminders icon, which resembles a white list on a blue background. Tap on the icon to open the app. Alternatively, you can use Siri to access the Reminders app by saying "Hey Siri, open Reminders" or "Hey Siri, remind me to [task]." If you have multiple pages of apps on your home screen, you can also use the Spotlight search feature to find the Reminders app quickly. Simply swipe down from the middle of the screen, type "Reminders" in the search bar, and tap on the app icon to open it. Once you're in the Reminders app, you'll see a list of your existing reminders, as well as the option to create new ones. You can also switch between different lists, such as "All Reminders" or "Scheduled," to view your reminders in different ways. If you're using iOS 14 or later, you can also access the Reminders app from the Today View by swiping right from the home screen or lock screen. From there, you can quickly view and manage your reminders without having to open the full app.
Creating a New Reminder
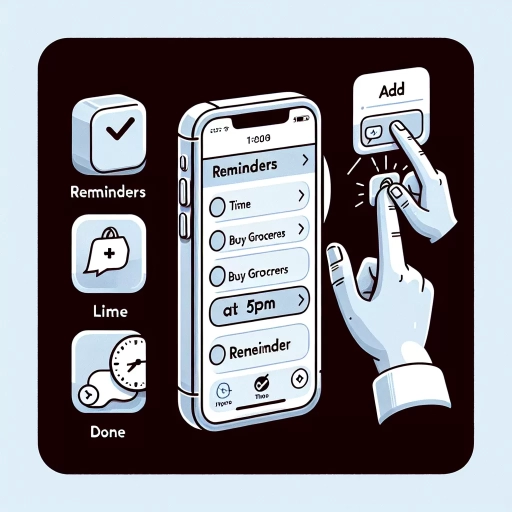
. To create a new reminder on your iPhone, start by opening the Reminders app, which can be found on your home screen or in a folder. Once the app is open, tap the "+" icon in the top right corner of the screen to create a new reminder. This will bring up a blank reminder template where you can enter the details of your reminder. Start by typing in the title of your reminder in the "Reminder" field, making sure to be as specific as possible so you can easily identify the reminder later. Next, set the date and time for the reminder by tapping the "Date" field and selecting the desired date and time from the calendar. You can also choose to set a recurring reminder by tapping the "Repeat" field and selecting from options such as daily, weekly, or monthly. Additionally, you can add a location to your reminder by tapping the "Location" field and selecting a specific location from your Maps app. This feature is particularly useful for reminders that are tied to a specific location, such as picking up groceries on your way home from work. Once you've entered all the details, tap "Add" to save the reminder. Your new reminder will now be added to your Reminders list, where you can view and manage all of your reminders in one place.
Customizing Reminder Settings
. Customizing reminder settings on your iPhone allows you to tailor the notification experience to your preferences, ensuring you stay on top of your tasks and appointments without unnecessary distractions. To access the reminder settings, navigate to the Settings app, then tap on "Reminders." Here, you can adjust various options to suit your needs. For instance, you can choose the default list for new reminders, which can be a specific list you've created or the "Reminders" list that comes pre-installed on your iPhone. Additionally, you can toggle on or off the "Show Reminders" option, which determines whether reminders appear in the Notification Center. If you prefer a more discreet approach, you can also opt to show reminders only in the Reminders app. Furthermore, you can customize the notification style, choosing between a banner that appears at the top of the screen or an alert that requires your attention. You can also set the reminder sound to a specific tone or opt for no sound at all. By fine-tuning these settings, you can create a reminder system that seamlessly integrates into your daily routine, providing you with timely notifications that help you stay organized and focused.
Using Siri to Set Reminders on iPhone
Here is the introduction paragraph: Setting reminders on your iPhone can be a game-changer for staying organized and on top of tasks. One of the most convenient ways to do this is by using Siri, Apple's virtual assistant. With Siri, you can quickly and easily set reminders without having to physically interact with your device. To get started, you'll need to activate Siri, which can be done with just a few simple steps. Once activated, you can dictate the details of your reminder, including the task, due date, and time. Finally, Siri will confirm the creation of your reminder, ensuring that you're on track to stay organized. In this article, we'll walk you through the process of using Siri to set reminders on your iPhone, starting with the first step: activating Siri.
Activating Siri
. To activate Siri on your iPhone, you can use one of two methods, depending on your device and preferences. If you have an iPhone 6s or later, you can say "Hey Siri" to activate the virtual assistant, even when your phone is locked. This feature is enabled by default, but you can also turn it off in the Settings app if you prefer. Alternatively, you can press and hold the Home button (or the Side button on iPhone X and later) to activate Siri. This method works on all iPhone models, and you can use it to ask Siri a question, send a message, or perform any other task. Once you've activated Siri, you can ask her to set a reminder for you, and she'll guide you through the process. For example, you can say "Hey Siri, remind me to pick up milk at 5pm" and Siri will create a reminder for you. You can also ask Siri to show you your reminders, and she'll display a list of all your upcoming reminders. By activating Siri and using her to set reminders, you can stay organized and on top of your tasks with ease.
Dictating Reminder Details
. When it comes to setting reminders on your iPhone using Siri, you have the flexibility to dictate reminder details with precision. This feature allows you to provide specific information about the reminder, ensuring that you receive the right notification at the right time. To dictate reminder details, start by activating Siri, either by saying "Hey Siri" or by holding down the Home button (or the side button on iPhone X and later models). Once Siri is activated, you can provide the details of your reminder, such as the task you need to complete, the date and time you want to be reminded, and any additional information that's relevant to the task. For example, you can say "Hey Siri, remind me to pick up milk at 5 PM today" or "Hey Siri, remind me to call John at 2 PM tomorrow." Siri will then create a reminder with the specified details, which will be stored in the Reminders app on your iPhone. You can also use Siri to add additional details to an existing reminder, such as a location or a specific time. By dictating reminder details, you can ensure that your reminders are accurate and effective, helping you stay organized and on top of your tasks.
Confirming Reminder Creation
. When you ask Siri to set a reminder, she will confirm the reminder creation by repeating back the details of the reminder. This confirmation is an essential step in ensuring that the reminder is set correctly and that you are aware of the details. For instance, if you ask Siri to "Remind me to pick up milk at 5 pm," she will respond with something like "Okay, I've set a reminder for you to pick up milk at 5 pm." This confirmation serves as a verification that the reminder has been successfully created and that Siri has understood your request accurately. Additionally, the confirmation also gives you an opportunity to review the details of the reminder and make any necessary adjustments before the reminder is saved. If you notice any errors or discrepancies in the reminder details, you can simply ask Siri to modify the reminder accordingly. By confirming the reminder creation, Siri ensures that you are on the same page and that the reminder is set up correctly, providing you with peace of mind and helping you stay organized and on track.
Managing and Editing Reminders on iPhone
Here is the introduction paragraph: Managing and editing reminders on your iPhone can be a game-changer for staying organized and on top of your tasks. With the Reminders app, you can easily keep track of your to-do lists, appointments, and deadlines. But, did you know that you can also customize and refine your reminders to make them even more effective? In this article, we'll explore the various ways you can manage and edit reminders on your iPhone, including viewing and organizing your reminders, editing and updating them, and deleting unwanted ones. By the end of this article, you'll be a pro at using the Reminders app to boost your productivity. So, let's dive in and start by exploring how to view and organize your reminders. Here is the 200 words supporting paragraph: Viewing and Organizing Reminders The first step in managing your reminders is to view and organize them. The Reminders app allows you to view your reminders in a list or calendar view, making it easy to see what's coming up and what's due soon. You can also organize your reminders into lists, such as "Work" or "Personal," to help you quickly find the reminders that are most relevant to you. Additionally, you can use the "Smart Lists" feature to automatically organize your reminders into categories like "Today" or "Scheduled." This feature uses machine learning to identify patterns in your reminders and group them together in a way that makes sense for you. By viewing and organizing your reminders in a way that works for you, you'll be able to quickly and easily find the information you need to stay on top of your tasks. With your reminders organized, you'll be able to focus on the tasks at hand and make the most of your time.
Viewing and Organizing Reminders
. Viewing and organizing reminders on your iPhone is a straightforward process that allows you to stay on top of your tasks and appointments. To view your reminders, open the Reminders app, which is typically found on the home screen. Once you're in the app, you'll see a list of all your reminders, organized by category or list. You can scroll through the list to view each reminder, and tap on one to see more details, such as the due date and any notes you've added. If you have multiple reminders due on the same day, they'll be grouped together under a single heading, making it easy to see what you need to accomplish. You can also use the search function to quickly find a specific reminder by typing in a keyword or phrase. To organize your reminders, you can create new lists or categories, and move reminders between them by tapping the "Edit" button and then dragging the reminder to its new location. You can also prioritize your reminders by tapping the "Priority" button and selecting a level of importance, such as "High" or "Low". Additionally, you can use the "Scheduled" tab to view all your reminders in a calendar view, making it easy to see what's coming up in the days and weeks ahead. By regularly viewing and organizing your reminders, you can stay on top of your tasks and appointments, and make sure you never miss an important deadline or event.
Editing and Updating Reminders
. Editing and updating reminders on your iPhone is a straightforward process that allows you to refine and customize your reminders to better suit your needs. To edit a reminder, simply open the Reminders app, select the list that contains the reminder you want to edit, and then tap on the reminder itself. This will open the reminder in edit mode, where you can modify the reminder's title, due date, time, and priority level. You can also add or remove tags, which can be useful for categorizing and filtering your reminders. Additionally, you can update the reminder's notification settings, such as choosing whether to receive a notification when the reminder is due or setting a custom notification time. If you need to make more significant changes, you can also delete the reminder and recreate it from scratch. Furthermore, if you have multiple reminders that need similar updates, you can use the "Edit" button at the top right corner of the screen to enter bulk edit mode, allowing you to make changes to multiple reminders at once. By editing and updating your reminders, you can ensure that they remain relevant and effective in helping you stay organized and on track.
Deleting Unwanted Reminders
. Deleting unwanted reminders on your iPhone is a straightforward process that helps you declutter your reminders list and avoid unnecessary notifications. To delete a reminder, open the Reminders app and navigate to the list that contains the reminder you want to delete. Swipe left on the reminder, and a "Delete" button will appear. Tap on this button to remove the reminder from your list. Alternatively, you can also tap on the "Edit" button in the top right corner of the screen, select the reminders you want to delete by tapping on the circle next to each one, and then tap on the "Delete" button at the bottom of the screen. If you want to delete an entire list of reminders, you can do so by tapping on the "Edit" button, selecting the list, and then tapping on the "Delete List" button. It's also worth noting that if you have shared reminders with others, deleting a reminder will remove it from their lists as well. By regularly deleting unwanted reminders, you can keep your reminders list organized and focused on the tasks and events that are truly important to you.