How To Connect Controller To Ps4
 Here is the introduction paragraph:
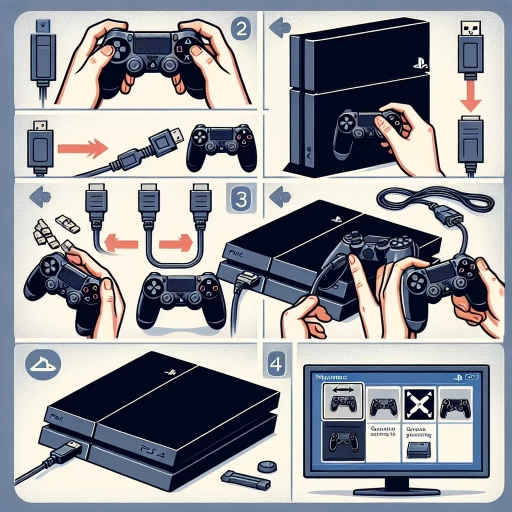
Connecting your controller to your PS4 is a straightforward process that can be completed in a few simple steps. Whether you're a seasoned gamer or just starting out, having a reliable connection between your controller and console is essential for an immersive gaming experience. In this article, we'll explore three different methods for connecting your controller to your PS4: via Bluetooth, USB cable, and wireless adaptor. Each method has its own advantages and disadvantages, and we'll break down the steps for each one. First, we'll start with the most convenient and widely used method: connecting your controller to your PS4 via Bluetooth. This method allows for wireless connectivity and is easy to set up, making it a great option for those who want to play games without being tethered to their console. In the next section, we'll dive into the step-by-step process of connecting your controller to your PS4 via Bluetooth.
Here is the introduction paragraph:
Connecting your controller to your PS4 is a straightforward process that can be completed in a few simple steps. Whether you're a seasoned gamer or just starting out, having a reliable connection between your controller and console is essential for an immersive gaming experience. In this article, we'll explore three different methods for connecting your controller to your PS4: via Bluetooth, USB cable, and wireless adaptor. Each method has its own advantages and disadvantages, and we'll break down the steps for each one. First, we'll start with the most convenient and widely used method: connecting your controller to your PS4 via Bluetooth. This method allows for wireless connectivity and is easy to set up, making it a great option for those who want to play games without being tethered to their console. In the next section, we'll dive into the step-by-step process of connecting your controller to your PS4 via Bluetooth.Connecting Your Controller to PS4 via Bluetooth
Connecting your controller to your PS4 via Bluetooth is a straightforward process that can enhance your gaming experience. To establish a seamless connection, you'll need to follow a few simple steps. First, you'll need to enable Bluetooth on your PS4, which will allow it to detect and connect to your controller. Once Bluetooth is enabled, you can pair your controller with the PS4, which will establish a secure and stable connection. However, if you encounter any issues during the pairing process, don't worry - we've got you covered with some troubleshooting tips to help you resolve any Bluetooth connection issues. In this article, we'll guide you through the process of connecting your controller to your PS4 via Bluetooth, starting with the first step: enabling Bluetooth on your PS4.
Enabling Bluetooth on Your PS4
. To enable Bluetooth on your PS4, navigate to the Settings menu, which is represented by a toolbox icon on your console's home screen. Once you're in the Settings menu, scroll down to the "Devices" option and select it. Within the Devices menu, you'll find a sub-menu labeled "Bluetooth Devices." Select this option to access your PS4's Bluetooth settings. Here, you'll see a list of all the Bluetooth devices that are currently paired with your console. If you're looking to connect a new device, such as your controller, select the "Add Device" option. Your PS4 will then enter pairing mode, allowing you to connect your controller or other Bluetooth device. Make sure your controller is in pairing mode as well, usually indicated by a flashing light on the device. Once your controller is detected by your PS4, select it from the list of available devices to complete the pairing process. With Bluetooth enabled and your controller paired, you'll be able to enjoy wireless gaming on your PS4. It's worth noting that you can also use the PS4's Bluetooth capabilities to connect other devices, such as headphones or speakers, to enhance your gaming experience. By following these simple steps, you can easily enable Bluetooth on your PS4 and start enjoying the convenience of wireless gaming.
Pairing Your Controller with the PS4
. To pair your controller with the PS4, start by ensuring that your controller is fully charged or has enough battery life to complete the pairing process. Next, locate the PS button on your controller and press it until the lights on the controller start flashing. This indicates that the controller is in pairing mode. On your PS4, navigate to the Settings menu and select "Devices" followed by "Bluetooth Devices." Your PS4 will then search for nearby Bluetooth devices, including your controller. Once your controller appears in the list of available devices, select it to initiate the pairing process. You may be prompted to enter a passcode, which is usually "0000" by default. If prompted, enter the passcode and select "OK" to complete the pairing process. Your controller should now be paired with your PS4, and you can test it by pressing the PS button again to see if the lights on the controller stop flashing. If you encounter any issues during the pairing process, try restarting your controller and PS4, and then repeat the pairing process. Additionally, ensure that your controller is not paired with any other device, as this can prevent it from pairing with your PS4. By following these steps, you should be able to successfully pair your controller with your PS4 and enjoy a seamless gaming experience.
Troubleshooting Bluetooth Connection Issues
. Here is the paragraphy: Troubleshooting Bluetooth Connection Issues If you're having trouble connecting your controller to your PS4 via Bluetooth, there are several steps you can take to troubleshoot the issue. First, ensure that your controller is properly paired with your PS4. If you're using a DualShock 4 controller, you can do this by going to the PS4's Settings menu, selecting "Devices," and then "Bluetooth Devices." If your controller is not listed, try restarting both your controller and your PS4, and then try pairing them again. If you're still having trouble, try resetting your controller by pressing and holding the PS button and the Share button at the same time until the lights on the controller start flashing. You can also try deleting the controller from your PS4's Bluetooth device list and then re-pairing it. Additionally, make sure that your controller is fully charged, as a low battery can cause connectivity issues. If none of these steps resolve the issue, you may want to try using a USB cable to connect your controller to your PS4, or resetting your PS4's Bluetooth settings to their default values. By following these troubleshooting steps, you should be able to resolve any Bluetooth connection issues and get back to gaming with your controller.
Connecting Your Controller to PS4 via USB Cable
Connecting your controller to your PS4 via a USB cable is a straightforward process that offers several benefits. Not only does it provide a reliable connection, but it also allows you to charge your controller, ensuring you never run out of battery in the middle of a gaming session. Additionally, connecting your controller via USB enables you to update its firmware, which is essential for maintaining optimal performance and accessing new features. In this article, we will explore the different ways you can utilize a USB connection with your PS4 controller, starting with the basics of using a USB cable to connect the controller. By the end of this article, you will be well-versed in the various uses of a USB connection, from charging and updating to simply enjoying a lag-free gaming experience. So, let's dive in and start with the fundamentals of using a USB cable to connect the controller.
Using a USB Cable to Connect the Controller
. To connect your controller to your PS4 using a USB cable, start by locating the USB ports on the front of your console. You'll typically find two or three ports, depending on the model of your PS4. Next, take the USB cable that came with your controller and plug one end into the controller's charging port, usually located on the top. The other end of the cable should be plugged into one of the PS4's USB ports. Make sure the controller is turned off before making the connection. Once connected, turn on your controller by pressing the PS button. The PS4 should automatically recognize the controller and prompt you to register it. If you're using a new controller, you may need to pair it with your PS4 by going to the Settings menu and selecting "Devices" followed by "Bluetooth Devices." From there, select the controller's name and follow the on-screen instructions to complete the pairing process. If you're using a previously paired controller, it should connect automatically. You can verify the connection by checking the controller's light bar, which should be illuminated. With your controller connected via USB, you can enjoy playing games on your PS4 without worrying about battery life or wireless interference. Additionally, using a USB cable can provide a more stable connection, which is ideal for competitive gaming or playing games that require precise controls. Overall, connecting your controller to your PS4 using a USB cable is a simple and reliable way to ensure a seamless gaming experience.
Charging the Controller via USB
. To charge your controller via USB, simply plug the smaller end of the USB cable into the controller's charging port, located at the top of the device. The charging port is usually marked with a USB icon, making it easy to identify. Next, plug the larger end of the USB cable into a free USB port on your PS4 console or a USB wall adapter. Make sure the PS4 is turned on or in rest mode, as this will allow the controller to charge. You can also charge your controller using a PC or laptop, as long as it has a USB port. It's recommended to use the original USB cable that came with your controller, as third-party cables may not provide the same level of charging efficiency. Once the controller is plugged in, the charging light will turn on, indicating that the charging process has begun. The charging time may vary depending on the level of battery depletion, but it usually takes around 2-3 hours to fully charge a depleted controller. It's also worth noting that you can continue to use your controller while it's charging, but it's recommended to let it charge for at least 30 minutes to an hour before using it for extended periods. By following these simple steps, you can keep your controller charged and ready to go, ensuring a seamless gaming experience on your PS4.
Updating the Controller's Firmware via USB
. To update the controller's firmware via USB, start by connecting your controller to your PS4 using a USB cable. Ensure that the controller is turned on and the PS4 is in the settings menu. Navigate to the "Devices" section and select "Bluetooth Devices." If your controller is not listed, select "Add Device" and follow the prompts to pair it. Once paired, return to the "Devices" section and select "DualShock 4" or the name of your controller. Click on "Update" and then "Update Now" to begin the firmware update process. The PS4 will automatically download and install the latest firmware for your controller. This process may take a few minutes, so be patient and do not disconnect the controller during the update. Once the update is complete, your controller will restart, and you can test it to ensure that it is functioning properly. It is essential to keep your controller's firmware up to date to ensure optimal performance and to take advantage of any new features or improvements. Regularly checking for firmware updates can help to resolve any connectivity issues and ensure a seamless gaming experience. By following these simple steps, you can easily update your controller's firmware via USB and enjoy uninterrupted gaming on your PS4.
Connecting Your Controller to PS4 via Wireless Adaptor
Here is the introduction paragraph: Connecting your controller to your PS4 via a wireless adaptor can be a convenient and liberating experience, allowing you to play your favorite games without the constraints of a wired connection. To achieve this, you'll need to set up the wireless adaptor, pair it with your controller, and optimize its performance for a seamless gaming experience. In this article, we'll guide you through the process of connecting your controller to your PS4 wirelessly, starting with the initial setup of the wireless adaptor. By following these steps, you'll be able to enjoy a more flexible and enjoyable gaming experience. So, let's get started with setting up the wireless adaptor, a crucial step in connecting your controller to your PS4 wirelessly.
Setting Up the Wireless Adaptor
. Here is the paragraphy: To set up the wireless adaptor, start by plugging it into a free USB port on your PS4. Make sure the console is turned on and the controller is turned off. Next, insert the wireless adaptor into the PS4's USB port, and the console will automatically detect it. You will see a notification on the screen indicating that the wireless adaptor has been detected. Now, turn on your controller by pressing the PS button. The controller will start searching for the wireless adaptor, and once connected, the lights on the controller will stop flashing. You can now use your controller wirelessly with your PS4. It's essential to note that the wireless adaptor can only be used with one controller at a time, so if you have multiple controllers, you'll need to purchase additional adaptors. Additionally, the wireless adaptor has a range of around 30 feet, so make sure you're within that range for optimal performance. If you experience any issues with the connection, try restarting your PS4 and controller, or resetting the wireless adaptor. By following these simple steps, you can enjoy a seamless gaming experience with your PS4 and controller using the wireless adaptor.
Pairing the Controller with the Wireless Adaptor
. Here is the paragraphy: To pair the controller with the wireless adaptor, start by plugging the wireless adaptor into your computer's USB port. Next, turn on your controller by pressing and holding the PS button until the lights on the controller start flashing. Then, locate the wireless adaptor on your computer and click on it to open the settings menu. From there, select the option to pair a new device and follow the on-screen instructions to complete the pairing process. Once paired, the lights on your controller should stop flashing and remain steady, indicating a successful connection. You can now use your controller to play games on your computer or stream content from your PS4 to your PC. Note that you may need to restart your computer or controller if you encounter any issues during the pairing process. Additionally, make sure that your controller is fully charged before attempting to pair it with the wireless adaptor, as a low battery can prevent the pairing process from completing successfully. By following these steps, you should be able to pair your controller with the wireless adaptor and enjoy a seamless gaming experience.
Optimizing the Wireless Adaptor's Performance
. Here is the paragraphy: To optimize the wireless adaptor's performance, ensure it is placed in a central location, away from walls and other obstructions. This will help to minimize interference and ensure a strong, stable connection between the controller and the PS4. Additionally, keep the wireless adaptor at least 3 feet away from other wireless devices, such as routers and cordless phones, to reduce interference. You can also try updating the wireless adaptor's firmware to the latest version, as this can often improve performance and stability. Furthermore, if you're experiencing issues with your wireless connection, try restarting both the PS4 and the wireless adaptor, as this can often resolve connectivity problems. By following these tips, you can help to ensure a fast, reliable, and lag-free gaming experience with your PS4 controller.