How To Make Background Transparent In Canva
 Designing with flair and precision often requires mastering the use of various graphic design tools, and Canva is a popular choice for many professionals and novices alike. An essential technique in graphic design is rendering images with a transparent background - a seemingly complex task that Canva effectively simplifies. This enlightening and comprehensive article will walk you through the process of creating transparent backgrounds in Canva. It will begin by helping you understand the basics of transparency in Canva, ensuring you comprehend the importance of this feature and how it enhances your designs. Following that, the article will guide you on how to prepare your design for transparency, equipping you with the necessary pre-requisites to begin the transparency process. Finally, the article will walk you through a step-by-step guide on applying transparency in Canva. This crucial knowledge will enable you to add a professional touch to your designs, all by yourself. Ready to elevate your design skillset? Let's dive in, starting with understanding the basics of transparency in Canva.
Understanding the Basics of Transparency in Canva
of every art form, graphic design is not an exception in placing significant importance on the concept of transparency. At a glance, Canva, a popular online graphic design tool, has dedicated an impressive effort to address this critical subject. In this article, not only will we dissect what transparency in Canva truly means, but we will also delve into why transparency holds such a pivotal role within the realm of graphic design. Lastly, for those eager to understand Canva's unique approach to transparency, we will provide an enlightening discussion on how Canva efficiently handles transparency. These insights will help to expand an artist's toolbox in Canva and utilize transparency to create impactful and visually appealing designs. To truly comprehend this complex feature, we will first start by breaking down the essence of transparency within Canva's intuitively built design interface.
What is Transparency in Canva?
Transparency in Canva refers to the degree of opaqueness or visibility of an object, image, or element within a design. The feature allows users to decrease or increase the visibility of an image or graphic, creating an overlay or watermark effect. Transparency directly impacts how a graphic blends with the background or interacts with other elements in the composition. Increasing transparency makes the image more see-through, allowing other design elements to show through, whereas decreasing transparency results in a more solid image. By default, every new element, image, or text added to a Canva design has 100% transparency, meaning it is fully visible and blocks any content beneath it. In the context of Canva, transparency can be customized using the 'Transparency' tool on the top right corner of the screen when an object or element is selected. This tool is represented by a checkerboard icon. The transparency level can be adjusted on a sliding scale from 0 to 100 percent. A setting of 0% transparency means the element is completely invisible, while 100 percent means it's completely opaque. Mastering transparency in Canva can drastically improve the aesthetics of your designs, enabling you to create layers and depth, manipulate emphasis, and achieve unique effects. Whether it's about playing around with background transparency, adjusting the transparency of photos, or creating semi-transparent text, understanding how to use this feature expands the creative potential of your designs in Canva.
Why is Transparency Important in Graphic Design?
of visual communications, transparency plays an essential role in the realm of graphic design. Understanding its importance allows designers to add depth, add layers, and create seamless blends in a design. Transparency in graphic design refers to the effect that allows an image or a portion of the image to partially or fully reveal the layers beneath it. However, its significance extends way beyond this; it is concurrently pivotal in enhancing the interpretability, honesty and credibility of your designs. Why is transparency so crucial in graphic design? Firstly, it's instrumental in generating attention-revoking visual effects. By playing around with the transparency and opacity of various elements, graphic designers can ignite emotions, induce illusions of depth or mass, or emphasize specific components of the design. For instance, a subdued background layer could amplify the prominence of the focal point or allow smoother transitions between the different components. Transparency is also an avenue for creativity and innovation. In a design world overloaded with standard, flat designs, the creative use of transparency can set a project apart, bidding a unique visual language that captivates and generally leaves a lasting impression on viewers. It facilitates the creation of trendy modern designs like flat design with material properties, glassmorphism and more. Moreover, transparency as a graphic design element mirrors the ethical principle of transparency - the quality of being easily seen through. In a world where authenticity and honesty are becoming increasingly desirable and sought-after traits in brands, transparency encapsulates these values. It gives a feel of openness, clarity and honesty, thereby helping to nurture trust among the audience. This in turn, reinforces a brand’s credibility and enhances its marketability. Further, transparency plays a crucial role in redesigning tasks. Often when updating or revamping designs, having transparent versions of the logo, graphic assets or text would make the process seamless, more efficient and consistent. Therefore, mastering the techniques associated with transparency in platforms such as Canva can empower designers to create visually rich, trustworthy and alluring graphics that resonates with their audience. Whether it's making a background transparent, or subtly merging images, the understanding and application of transparency can significantly enhance a designer's potential in creating engaging compositions.
How Does Canva Handle Transparency?
Canva's transparency handling mechanism is a quintessential aspect of its robust design framework, enabling users to bring their design imagination to fruition. At the core of Canva's transparency feature is the ability for users to manipulate the opacity level of multiple design features, which includes images, texts, elements, etc. This key function can transform the visibility or 'transparency' effect of these elements either from being wholly translucent to being substantially opaque, and this varies on a scale from 0% to 100%. For every image, graphics or text added from the Canva library or uploaded from the user's device, there's a transparency slider, often known as the 'opacity level tool,' situated in the upper right editing panel. To refine visibility, users are required to click on this tool and adjust to the desired level of opacity. The significant value here is that one isn't constricted to a single transparency level for all the elements in a particular design. On the contrary, varying transparency levels can be imposed on different design elements creating a strategic depth and visual interest. Text transparency is yet another remarkable feature of Canva, where the transparency of letterings can be manipulated to create visually attractive typography. Users can click on a text box and use the aforementioned transparency slider to adjust the opacity of the text. This can also be done in Canva's mobile application, where you tap on the text box and select transparency, then swipe left or right to regulate the opacity level. Canva also extends this transparency option to overlays in designs. Users can overlay images and shape elements on the main graphics, adjusting the transparency levels to create an effective gradient or a decorative filter effect. This way, Canva empowers users to change the visual dynamics of their designs completely, making it more visually appealing and engaging. Notably, Canva offers a free background remover tool that intelligently detects the subject in an image and eradicates the background. Users can adjust the transparency of this standalone subject without affecting the overall opacity of the design. In conclusion, Canva's ability to handle transparency paves the way for design versatility and artistic creativity. It provides a seamless, user-friendly interface that allows even a beginner to harness the power of transparency, creating an opportunity for everyone to design like a pro.
Preparing Your Design for Transparency
It's integral for designers to master the art of using transparency effectively, as it offers boundless possibilities to enrich the design’s visual appeal. The process, though simple, entail some considerations discussed in this article, they are: choosing the right image format for transparency, ensuring your image is in the correct color mode, and finally, learning how to swiftly remove backgrounds using Canva's built-in tools. It starts with choosing the suitable image format for transparency as it forms the foundation of the exercise. Different image formats support different degrees of transparency, making it crucial to make an informed decision. Then, you need to ensure your image is in the right color mode as it significantly impacts the transparency effect of your design. Lastly, removing backgrounds becomes more seamless with Canva's built-in tools, further simplifying the process of achieving perfect transparencies. To embark on this enlightening journey, let's first delve into understanding how to choose the right image format for achieving desired transparencies.
Choosing the Right Image Format for Transparency
Choosing the right image format for transparency is crucial when preparing your design for transparency, especially in user-friendly platforms like Canva. For a transparent background, the PNG (Portable Network Graphics) format is often the best choice. Introduced as an improvement over GIF (Graphic Interchange Format), PNG supports the transparency of your images and works well with complex images, online graphics or photographs, allowing areas of the image to be invisible while maintaining the integrity and sharpness of the visible portions. It also handles detailed, high-contrast images better than the JPEG format, providing a more distinct, unfuzzy edge against backgrounds when being placed atop another image or graphic. However, remember that the two PNG subtypes, PNG-8 and PNG-24, handle transparency differently. For simpler graphics, such as logos and icons with limited colors, PNG-8 is often sufficient. It supports binary (on-off) transparency, meaning pixels are either fully transparent or fully opaque. Meanwhile, PNG-24 is recommended when dealing with complex images or photographs as it supports alpha channel transparency. This feature allows you to control the degree of transparency for each pixel, hence creating a smooth, highly detailed transparent effect on the image when superimposed on another. In Canva, exporting your design in PNG format with transparency turned on is straightforward. Just ensure that you've chosen the correct option when downloading your final work. Opt for the transparent background, and remember that this feature is available for Canva Pro users or one-time users with paid options. While it seems confusing at first, understanding the appropriate image format for transparency will level up your design, boosting its professional look, flexibility, and overall visual appeal. It is all about utilizing the format's capabilities to draw attention to your design elements and letting your creativity shine through. However, bear in mind that not all image viewing software or browsers support PNG transparency. Unsupported platforms might display your transparent background as a white or gray background. Also, it's worth noting that excessive use of PNG-24 images on your website might make your website slower due to the file size. Hence, when possible, use a mix of various formats, and don't just rely on one for all your images. In conclusion, the image format you choose for transparency in your design has a significant influence on the image's quality, portrayal, and usability. As such, understanding and selecting the right format, whether it's PNG-8 or PNG-24, is an essential part of preparing your ideal design for transparency.
Ensuring Your Image is in the Correct Color Mode
Effective design transcends just creating an appealing image; it also encompasses ensuring that the image aligns with the necessary technical requirements. One of the significant factors to consider in designing for transparency is ensuring your image is in the correct color mode. This is vital in preparing your design for a transparent background as it influences the overall appearance of your graphics and contributes to the seamless integration of your image on multiple platforms. The two primary color modes used in digital graphics are RGB (Red, Green, Blue) and CMYK (Cyan, Magenta, Yellow, and Key/Black). While RGB is mainly used for digital display because screens emit red, green and blue lights, CMYK is used for print because it represents the colors printers use in ink. Using the wrong color mode can severely affect your design's appearance. For example, if you design in RGB mode and print in CMYK, the colors may appear duller because the CMYK color palette is not as extensive as the RGB. Misalignment between RGB and CMYK modes can impact the consistency of your images, particularly when they have transparent backgrounds. When creating a transparent background in Canva, you may need to download your design as a PNG with a transparent background. It is notable that PNGs mainly use the RGB color mode. Therefore, if you are designing for digital use, you should keep your color mode in RGB to maintain the vibrancy and consistency of your colors. On the other hand, if you're creating designs meant for print, align with the CMYK color mode - even though PNGs primarily use RGB. But remember, if your goal is to print your design, then you'll need to convert RGB to CMYK later, either in a software like Adobe Photoshop or even some printers performing this conversion directly. In conclusion, when preparing your design for a transparent background, consider carefully where your design will be viewed or printed, and select the correct color mode accordingly in order to achieve the best result. Following this process will ensure your design maintains its original vibrancy and is compatibly presented on different platforms. It is not just about creating a image with transparent background, it is about ensuring that your design's quality and integrity remain consistent, no matter where it is viewed.
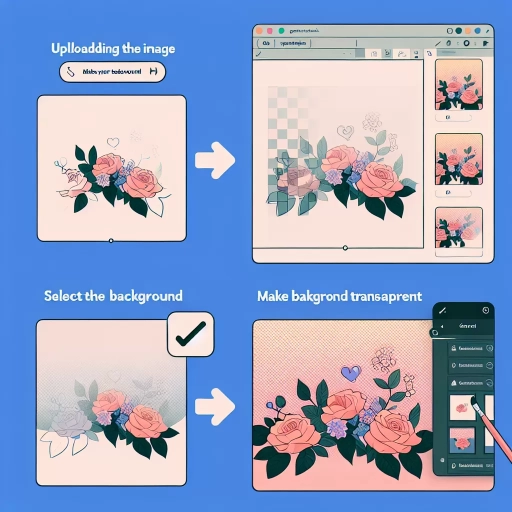
Removing Backgrounds with Canva's Built-in Tools
Removing backgrounds from your design can potentially enhance the overall visual appeal and professional look. This is one crucial part of preparing your design for transparency. Canva, a popular online graphic design tool, can make this task significantly easy and fast even for beginners. The built-in background remover in Canva efficiently enables you to create a transparent background, allowing your creative elements to shine. One of the distinct advantages of using Canva's built-in tools is that they are user-friendly and don't require any advanced technical know-how. If an image you're using has an unwanted background, you don't have to worry. The "background remover" tool's unique algorithms can accurately identify and eliminate the background automatically, leaving only the primary subject of the image intact. This feature is highly beneficial in creating a clearer and more precise design representation, putting all the focus on your key elements. Moreover, using the background remover saves time and effort as opposed to manually cropping or erasing parts of the image. This feature is highly beneficial, especially when working on intricate images with many details or when you need to expedite the design process. To use it, you only need to upload your image, click on the effects button, and select 'Background Remover.' In a matter of seconds, the background will vanish, and you can proceed to place your subject against a transparent or a different background according to your preference. Importantly, the removal of backgrounds can also optimize the versatility of your design. With a transparent background, you can overlay your design onto any desired backdrop seamlessly. This way, you can adapt your design to fit various formats and contexts without the constraints of an incompatible background. Lastly, bear in mind that while removing backgrounds with Canva's built-in tools is relatively easy, the quality of the outcome heavily depends on the original image. High-resolution images will typically produce better results compared to low-quality images. Therefore, to get the best from Canva's background remover, choose images with clear contrast between the subject and the background. In summation, preparing your design for transparency using Canva involves effectively utilizing the platform's built-in background removing tool. The process is easy, efficient, and can significantly enhance the adaptability and aesthetic appeal of your design.
Applying Transparency in Canva
Canva's commitment to user-friendly design is perfectly reflected in its wide range of features aimed at enhancing image aesthetics, such as applying transparency. Three key tools enable users to do this: the Magic Eraser Tool for background removal, the Shape Tool for creating transparent backgrounds, and the Opacity Slider for adjusting transparency levels. The first, the Magic Eraser Tool, is the perfect solution if you're dealing with an undesired background that needs to be eliminated. It's akin to a magic wand that sweeps away everything that you don't want, leaving only what's needed. If a clear, transparent background is your ultimate goal, then using the Shape Tool makes that goal a piece of cake - a few clicks here and there and voila! But that's not all, Canva also leaves the door open for you to control how transparent your image should be through the Opacity Slider. Now, let's delve more into the Magic Eraser Tool and see how it effortlessly transforms your images with a few simple clicks.
Using the Magic Eraser Tool for Background Removal
The Magic Eraser tool is a remarkable feature in the realm of graphics and photo editing that simplifies the process of background removal, making it ideal for Apply Transparency in Canva. This tool, considered to be one of the least complicated yet highly effective tools, allows users to automatically eliminate the backgrounds of images, creating a cleaner, more focused outlook on the preferred foreground. The usefulness lies in its ability to quickly and precisely detect and remove pixels that correspond to a particular color range in a photo. For instance, if you have a picture with a solid or semi-solid background, you'll find the Magic Eraser to be immense. By just clicking on the background color, the Magic Eraser tool will instantly remove it, leaving only the primary object. It is also adaptable to more complex background hues and patterns, proving its versatility and robustness. Moreover, it's worth noting the aspect of tolerance in the Magic Eraser tool, which adds a layer of finesse to the background eradication process. Tolerance refers to the range of color that the Magic Eraser tool will erase in relation to the color that was clicked. A low number means a more narrow range, thus preserving more of the nuanced shades in the image, while a high number signifies a broader range, which may wash out more colors but also ensures a more complete background removal. This technique is particularly critical when you're applying transparency in Canva. The transparency effect can't work to its full potential if the image's background hinders the see-through vibe. The Magic Eraser tool polishes the image by removing obstructions and enhancing the transparent feel, making it a vital asset in optimizing the transparency feature in Canva. After removing the background, it becomes much easier to execute the transparency effect in Canva to further enhance graphic designs. In essence, the Magic Eraser tool is virtually the digital equivalent of a magic wand, capable of seamlessly cleaning an image by cutting out the unwanted background. When applied with proficiency, it ensures that your transparency in Canva is visually effective and professionally refined. Understanding and harnessing the power of tools such as the Magic Eraser can transform your designing experience, enabling you to create exquisite graphics with the perfect blend of focus and finesse. So, take advantage of this tool to add a dash of magic to your designs. Thus, using the Magic Eraser tool for background removal is instrumental in applying transparency in Canva, making your designs stand out.
Creating a Transparent Background with the Shape Tool
Canva is a fantastic tool for designing engaging and professional graphics, and one of its most dynamic capabilities is the ability to create transparent backgrounds with the shape tool. Learning this skill opens up endless creative possibilities, and it can be a significant game-changer in how you approach and execute your designs in Canva. Using the shape tool to create a transparent background begins by selecting the shape that best suits your design needs. There is a wide array of shapes available in Canva, ranging from basics like rectangles and circles to more whimsical options like stars and hearts. The selected shape will serve as the frame where your desired image or design will be displayed. Once the shape is chosen, you can then adjust its size to fit your design layout. This is where the magic happens. With the shape selected, locate the transparency icon, which resembles a checkerboard pattern, in the top right corner of your toolbar. This tool allows you to determine the level of transparency for your selected shape, which will then influence how visible the underlying layers or images are. By sliding the transparency lever right or left, you can increase or decrease the opacity of your shape. The farther right you move the slider, the more opaque your shape becomes, which would make your background less visible. On the other hand, moving the slider towards the left increases the transparency of your shape, allowing more of your background to shine through. This method is particularly useful when you want your text or other design elements to stand out against a busy or colorful background. A transparent shape can serve as a subtle backdrop that helps your content 'pop' without overshadowing the rest of your design. Experimenting with different shapes, sizes, positions, and transparency levels can result in a myriad of effects. From soft and subtle to bold and dramatic, the outcome is entirely in your hands. With a bit of practice, you'll quickly learn how to fine-tune the transparency settings to achieve your desired effect for any given project. Canva's transparency features add a significant layer of flexibility and customization to your designs. By mastering these techniques, you'll be able to create designs that are not only visually pleasing but also incredibly unique. All it takes is the capacity to experiment and learn, and soon enough, you'll be producing designs that leap off the screen and command attention. Applying transparency in Canva, particularly using the shape tool, is an exciting and rewarding skill to learn. It's a potent weapon in a designer's arsenal that can bring depth, drama, and dimension to your creations. Whether you are a seasoned professional or a design novice, using a transparent background with the shape tool will undoubtedly elevate your design game and help you create standout visuals every time.
Adjusting Transparency Levels with the Opacity Slider
In Canva, you could remarkably adjust the transparency of your elements, text, and images, making your designs captivatingly stand out. And one of the trusted allies you have in this feature is the Opacity Slider. It's a remarkable tool that allows you to easily manipulate the transparency level of your design components. To access this feature, all you need to do is to select the element you wish to adjust, then head to the toolbar on top of your page, and you will notice the checkerboard icon labeled 'transparency.' Upon clicking it, you will see a slider with a range of 0-100. This range in numbers indicates the level of opacity. The lower the number, the more transparent your element becomes. Therefore, if you want your elements to be fully visible, slid it up high to 100, but if you want your elements to faintly appear in the background, drop it down low near 0. From blog posts to social media contents, from wedding invitations to business presentations, the use of the opacity slider tool can greatly enhance the aesthetic charm and the alluring transparency effect on your designs. Lightening the opacity level could allow you to create a more layered look, you can superimpose text over images without overpowering them or even allows you to overlay photos or shapes to achieve a mystic, intriguing effect. It's a great visual technique to draw attention, highlight important elements, enhance readability, or simply create a visually interesting design. Moreover, it’s important to consider color contrasts and legibility while playing with transparency levels. Refrain from using similar color shades for your text and background while reducing opacity, for it may cause your text to get lost in the background. Make sure your design maintains its readability no matter how you choose to adjust the opacity levels. Experiment with different transparency levels until you find what works best for your design. Remember, Canva's simplicity and straightforward tools like the opacity slider encourage users of all levels to turn their creative ideas into magnificent and professional designs. The opacity slider offers full control over each design element's transparency, providing individuals the freedom to ensure their design speaks volumes. Whether you are an established designer or only beginning your journey in the world of design, Canva’s opacity slider tool makes everything simple, intuitive, and most of all, fun. Conclusion: The opacity slider is more than just a tool, it’s an outlet for creativity, an opportunity to create memorable designs that help your ideas shine through.