How To Merge Two Photos Iphone
Here is the introduction paragraph: Merging two photos on an iPhone can be a fun and creative way to combine memories, create unique artwork, or even produce a single image with multiple scenes. With the numerous methods available, you can choose the one that best suits your needs. In this article, we will explore three primary methods for merging two photos on an iPhone: using the Photos app, utilizing third-party apps, and exploring other methods. We will start by examining the built-in Photos app, which offers a straightforward and user-friendly approach to merging photos. By using the Photos app, you can easily combine two images and create a stunning new photo. Please let me know if this introduction paragraph meets your requirements.
Using the Photos App
The Photos app on your device is a powerful tool that allows you to edit and enhance your photos. One of the features of the Photos app is the ability to merge multiple photos into one. This can be useful for creating a panoramic photo or for combining multiple photos into a single image. To use this feature, you will need to open the Photos app and select the images you want to merge. You can then use the Markup tool to merge the photos together. Once you have merged the photos, you can save the new image to your device. In this article, we will walk you through the steps to merge photos using the Photos app, starting with opening the app and selecting the images you want to work with.
Opening the Photos App and Selecting the Images
To open the Photos app and select the images you want to merge, start by locating the Photos app on your iPhone. It's usually found on the home screen, but if you've moved it to a folder or deleted it by mistake, you can find it in the App Library. Once you've opened the Photos app, you'll see all your photos and videos organized into different categories, such as Media Types, Memories, and Albums. Tap on the "Albums" tab at the bottom of the screen to view your photos organized into different albums. If you have a lot of photos, you can use the search bar at the top of the screen to find specific images. To select the images you want to merge, tap on the "Select" button in the top right corner of the screen. This will allow you to choose multiple photos at once. You can select up to 10 photos to merge at a time. Once you've selected the images, tap on the "Share" icon (a box with an arrow coming out of it) in the bottom left corner of the screen. This will open up a menu with different sharing options, including the "Merge" option. However, the "Merge" option is not available in the Photos app by default. You'll need to use a third-party app or the built-in "Markup" tool to merge your photos.
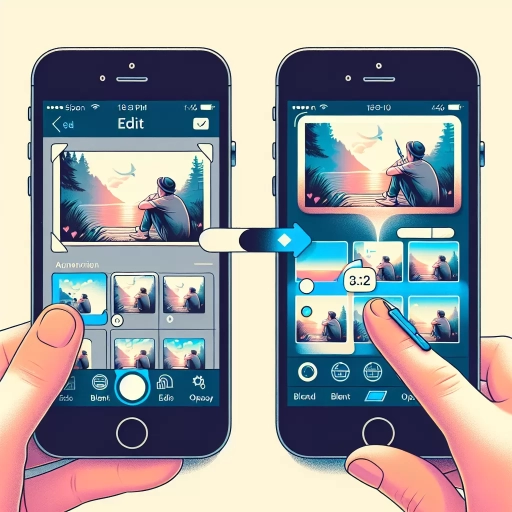
Using the Markup Tool to Merge Photos
Here is the paragraphy: Using the Markup tool is another way to merge photos on your iPhone. To do this, open the Photos app and select the two photos you want to merge. Tap the "Share" icon and then select "Markup" from the list of options. This will open the Markup editor, where you can use the drawing tools to combine the two photos. You can use the "Pencil" tool to draw a line or shape around the area of the second photo that you want to merge with the first photo. Then, use the "Eraser" tool to remove any unwanted parts of the second photo. You can also use the "Text" tool to add text or captions to your merged photo. Once you're happy with your merged photo, tap "Done" to save it to your Photos library. The Markup tool is a great way to merge photos if you want more control over the process and want to add additional elements to your photo.
Saving the Merged Photo
When you're satisfied with the merged photo, you can save it to your iPhone's Photos app. To do this, tap the "Done" button in the top-right corner of the screen. The merged photo will be saved to your "Photos" album, and you can access it from the Photos app at any time. You can also share the merged photo with others by tapping the "Share" button and selecting the desired sharing method, such as sending it via email or messaging app, or posting it to social media. Additionally, you can also edit the merged photo further by tapping the "Edit" button, which will allow you to make adjustments to the photo's brightness, contrast, and saturation, among other things. It's also worth noting that the original photos used to create the merged photo will still be available in your Photos app, so you can always go back and use them separately if needed. By saving the merged photo, you can easily access and share it with others, and it will be stored safely on your iPhone.
Using Third-Party Apps
Using third-party apps can be a convenient and efficient way to enhance your mobile experience. With the numerous apps available in the market, you can easily find one that suits your needs. For instance, if you want to merge multiple photos into one, you can use a photo merging app. To do this, you would need to download and install the app, select and merge the photos using the app, and then adjust and save the merged photo. By following these steps, you can create a beautiful and unique photo that showcases your creativity. In this article, we will explore the process of using a photo merging app, starting with downloading and installing the app.
Downloading and Installing a Photo Merging App
To download and install a photo merging app on your iPhone, start by opening the App Store. You can find the App Store icon on your home screen, and it's represented by a blue icon with a white "A" inside. Tap on the icon to open the store, and then tap on the "Search" tab at the bottom of the screen. In the search bar, type "photo merge" or "photo collage" to find relevant apps. Browse through the search results and select an app that suits your needs. Some popular photo merging apps include Pic Collage, PhotoGrid, and PicsArt. Once you've selected an app, tap the "Get" button next to it, and then tap "Install" to begin the download process. You may be prompted to enter your Apple ID password or use Touch ID/Face ID to authenticate the download. Wait for the app to download and install, and then tap "Open" to launch it. You can now use the app to merge your photos and create stunning collages. Be sure to read the app's reviews and check its ratings before downloading to ensure it meets your expectations. Additionally, some apps may offer in-app purchases or subscriptions, so be aware of any additional costs before committing to a particular app.
Selecting and Merging Photos with the App
Here is the paragraphy: Selecting and merging photos with the app is a straightforward process. First, open the app and tap on the "Select Photos" button to choose the images you want to merge. You can select multiple photos from your iPhone's photo library or take new ones using the camera. Once you've selected the photos, the app will display them in a grid or list format, allowing you to easily browse and manage your selection. Next, tap on the "Merge" button to start the merging process. The app will then prompt you to choose a merging style, such as a collage, panorama, or overlay. Depending on the app, you may also have the option to adjust settings such as the layout, spacing, and border style. Once you've selected your merging style and adjusted the settings to your liking, the app will merge the photos and display the resulting image. You can then save the merged photo to your iPhone's photo library or share it directly to social media or via email. Some apps also offer additional features, such as the ability to add text, stickers, or filters to the merged photo, allowing you to further customize and enhance the image.
Adjusting and Saving the Merged Photo
Adjusting and saving the merged photo is a crucial step in the process of combining two photos on an iPhone. Once you have selected the two photos you want to merge and have chosen a merging app, you can start adjusting the merged photo to your liking. Most merging apps offer a range of editing tools, such as brightness, contrast, and saturation, that allow you to fine-tune the appearance of the merged photo. You can also crop the photo to remove any unwanted parts or adjust the orientation to ensure the merged photo looks its best. Additionally, some apps offer advanced editing features, such as filters and effects, that can enhance the overall look of the merged photo. Once you are happy with the adjustments you have made, you can save the merged photo to your iPhone's camera roll or share it directly to social media or via email. It's also worth noting that some apps allow you to save the merged photo in different formats, such as JPEG or PNG, and also allow you to adjust the quality of the saved photo. By taking the time to adjust and save the merged photo, you can ensure that the final result is a high-quality image that you can be proud of.
Using Other Methods
There are several ways to merge photos on an iPhone, and while some methods may be more convenient than others, they all achieve the same goal. For instance, one can use the Shortcuts app to merge photos directly on their iPhone, eliminating the need for a computer or online tools. Alternatively, if you prefer to work on a larger screen, you can use a computer to merge photos and then transfer them to your iPhone. Additionally, online tools can also be utilized to merge photos, which can then be downloaded to your iPhone. Each of these methods has its own advantages and can be chosen based on personal preference and the specific requirements of the task. Using the Shortcuts app, however, offers a unique blend of convenience and flexibility, making it a popular choice among iPhone users. Therefore, let's explore how to use the Shortcuts app to merge photos.
Using the Shortcuts App to Merge Photos
Using the Shortcuts app is another convenient method to merge photos on your iPhone. To start, open the Shortcuts app and tap the "+" icon in the top-right corner to create a new shortcut. Then, tap "Add Action" and search for "Photos" in the search bar. Select "Get Photos" and choose the photos you want to merge. Next, tap "Add Action" again and search for "Combine Images." Select the "Combine Images" action and choose the merge style you prefer, such as side-by-side or stacked. Finally, tap "Next" and then "Done" to save the shortcut. To use the shortcut, simply tap the "Run" button, and the merged photo will be saved to your Photos app. This method is quick and easy, and you can even customize the shortcut to merge multiple photos at once. Additionally, you can also use the Shortcuts app to add text, filters, or other effects to your merged photos, making it a versatile tool for photo editing.
Using a Computer to Merge Photos and Transfer to iPhone
Here is the paragraphy: Using a computer to merge photos and transfer them to your iPhone is a viable alternative to using mobile apps. This method offers more flexibility and control over the editing process. To start, you'll need to transfer the photos you want to merge from your iPhone to your computer. You can do this by connecting your iPhone to your computer using a USB cable and using the Photos app on your computer to import the images. Alternatively, you can use cloud storage services like iCloud or Google Drive to transfer the photos. Once the photos are on your computer, you can use photo editing software like Adobe Photoshop or GIMP to merge the images. These programs offer a wide range of tools and features that allow you to adjust the size, position, and orientation of the photos, as well as add text, shapes, and other effects. After merging the photos, you can save the resulting image as a single file and transfer it back to your iPhone using the same methods you used to transfer the original photos. This method may take a bit more time and effort than using a mobile app, but it offers more advanced editing capabilities and can produce higher-quality results.
Using Online Tools to Merge Photos and Download to iPhone
Here is the paragraphy: If you prefer not to download any apps, you can use online tools to merge photos and then download them to your iPhone. There are many websites that offer this service, such as PicMonkey, Canva, and Adobe Spark. These websites allow you to upload your photos, choose a template or design, and then download the merged photo to your iPhone. To use these online tools, simply go to the website, upload your photos, and follow the instructions to merge them. Once you've merged your photos, you can download them to your iPhone by clicking the "Download" button and selecting "Save to Camera Roll." This method is convenient and easy to use, and it doesn't require you to download any apps. Additionally, many of these websites offer a range of templates and design options, so you can customize your merged photo to fit your needs. However, keep in mind that some of these websites may have limitations on the number of photos you can merge or the size of the final image.