How To Uninstall Reshade
Here is the introduction paragraph: Reshade is a popular graphics modification tool that allows users to enhance the visual quality of their games and applications. However, there may come a time when you need to uninstall Reshade, whether it's due to compatibility issues, performance problems, or simply because you no longer need it. In this article, we will guide you through the process of uninstalling Reshade, covering the essential steps and considerations to ensure a smooth removal. To begin, it's crucial to understand what Reshade is and how it interacts with your system, which will be discussed in the next section, Understanding Reshade and Its Uninstallation.
Understanding Reshade and Its Uninstallation
Reshade is a popular graphics modification tool used by gamers to enhance their gaming experience. However, some users may find it necessary to uninstall Reshade due to various reasons. In this article, we will explore the world of Reshade, its purpose, and the process of uninstalling it. We will start by understanding what Reshade is and its purpose, followed by discussing why one would want to uninstall it, and finally, we will look at the precautions to take before uninstalling Reshade. By the end of this article, you will have a comprehensive understanding of Reshade and how to remove it from your system if needed. So, let's dive in and start with the basics - what is Reshade and its purpose?
What is Reshade and its purpose?
Reshade is a popular, open-source, post-processing injector that allows users to enhance the visual quality of their games and applications. Its primary purpose is to provide a wide range of customizable effects, such as ambient occlusion, depth of field, and color correction, which can significantly improve the overall visual fidelity of a game or application. Reshade achieves this by injecting its effects into the game's or application's rendering pipeline, allowing users to fine-tune the visual settings to their liking. With Reshade, users can add a new layer of depth and realism to their gaming experience, making it an essential tool for gamers and graphics enthusiasts alike.
Why would you want to uninstall Reshade?
You may want to uninstall Reshade for several reasons. Firstly, you may have installed it for a specific game or application, but no longer need it, or the game may not be compatible with Reshade. Additionally, Reshade can sometimes cause performance issues, such as lag, crashes, or freezes, especially if your computer's hardware is not powerful enough to handle the additional graphics processing. In some cases, Reshade may also conflict with other graphics software or drivers, leading to compatibility problems. Furthermore, if you're experiencing issues with Reshade, such as incorrect color rendering or poor image quality, uninstalling it may be the best solution. Lastly, you may simply want to try a different graphics enhancement tool or revert to the original graphics settings of your game or application.
Precautions before uninstalling Reshade
When considering uninstalling Reshade, it is essential to take certain precautions to avoid any potential issues or complications. Firstly, ensure that you have saved any important game settings or configurations, as uninstalling Reshade may reset these settings to their default values. Additionally, if you have made any customizations to your game's graphics or shaders, it is recommended that you create a backup of these files before proceeding with the uninstallation process. This will allow you to easily restore your customizations if needed. Furthermore, if you are using any other graphics or shader mods in conjunction with Reshade, it is crucial to uninstall these mods first to avoid any conflicts or compatibility issues. It is also important to note that uninstalling Reshade may affect the performance of your game, so it is recommended that you monitor your game's performance after uninstallation and make any necessary adjustments. Finally, if you are unsure about any aspect of the uninstallation process, it is recommended that you seek guidance from the Reshade community or a gaming expert to ensure a smooth and trouble-free uninstallation experience.
Methods for Uninstalling Reshade
Reshade is a popular graphics modification tool used by gamers to enhance their gaming experience. However, there may come a time when you need to uninstall Reshade from your computer. Whether you're experiencing compatibility issues or simply want to try a different graphics modification tool, uninstalling Reshade can be a bit tricky. Fortunately, there are several methods you can use to uninstall Reshade, including uninstalling it through the Control Panel, manually deleting Reshade files and folders, and using a third-party uninstaller. In this article, we will explore these methods in more detail, starting with uninstalling Reshade through the Control Panel. This method is the most straightforward and recommended way to uninstall Reshade, as it allows you to easily remove the program and its associated files from your computer.
Uninstalling Reshade through the Control Panel
Uninstalling Reshade through the Control Panel is a straightforward process that can be completed in a few steps. To begin, open the Control Panel on your computer, which can be found in the Start menu or by searching for it in the search bar. Once the Control Panel is open, click on the "Programs and Features" option, which may also be labeled as "Uninstall a program" or "Programs" depending on your operating system. This will bring up a list of all the programs installed on your computer, including Reshade. Locate Reshade in the list and click on it to select it. You will then see an "Uninstall" or "Uninstall/Change" button, which you should click to initiate the uninstallation process. Follow the prompts to complete the uninstallation, and Reshade will be removed from your computer. It's worth noting that you may be asked to restart your computer to complete the uninstallation process. Additionally, if you have installed Reshade through a third-party installer, you may need to use the uninstaller provided by the installer to remove Reshade.
Manually deleting Reshade files and folders
To manually delete Reshade files and folders, you'll need to locate and remove the relevant files from your computer. Start by closing any games or applications that may be using Reshade. Then, navigate to the game's installation directory, usually found in the "Program Files" or "Program Files (x86)" folder on your C: drive. Look for a folder named "reshade" or "reshade-shaders" and delete it. You may also need to delete any Reshade-related files with the ".dll" or ".ini" extension, such as "dxgi.dll" or "reshade.ini". Be cautious when deleting files, as removing the wrong ones can cause issues with your game or system. If you're unsure, consider creating a backup of the files before deleting them. Additionally, you may need to delete Reshade files from other locations, such as the "AppData" folder or the "Documents" folder, depending on how Reshade was installed. Once you've deleted all the relevant files and folders, restart your computer to ensure that Reshade is fully uninstalled.
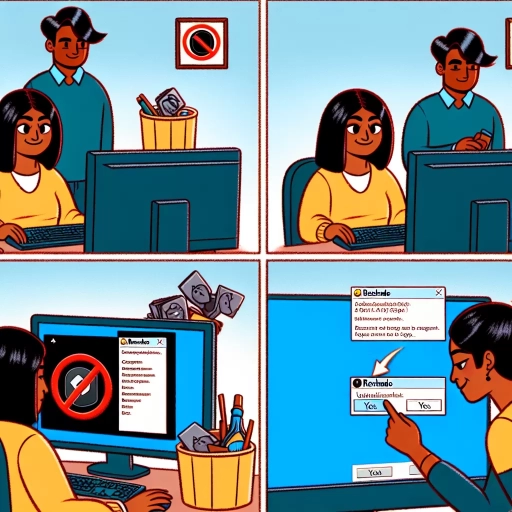
Using a third-party uninstaller for Reshade
Using a third-party uninstaller is another effective method for uninstalling Reshade. This approach is particularly useful when the standard uninstallation methods fail or when you want to ensure that all Reshade-related files and registry entries are completely removed from your system. A third-party uninstaller is a specialized software tool designed to safely and thoroughly remove unwanted programs, including Reshade. These tools scan your system for all files, folders, and registry entries associated with Reshade and delete them, leaving no residual files or data behind. Some popular third-party uninstallers that you can use to uninstall Reshade include CCleaner, Revo Uninstaller, and IObit Uninstaller. To use a third-party uninstaller, simply download and install the software, launch it, and select Reshade from the list of installed programs. The uninstaller will then guide you through the removal process, which typically involves a few clicks and a system restart. One of the benefits of using a third-party uninstaller is that it can also remove any leftover files or registry entries that may have been missed by the standard uninstallation methods. This helps to free up disk space and prevent any potential conflicts with other programs. Additionally, third-party uninstallers often include additional features, such as disk cleaning and registry optimization, which can help to improve your system's overall performance and stability. Overall, using a third-party uninstaller is a reliable and efficient way to uninstall Reshade and ensure that your system is completely free of any Reshade-related files and data.
Post-Uninstallation Steps and Troubleshooting
After uninstalling Reshade, it's essential to take a few additional steps to ensure a smooth transition and troubleshoot any potential issues that may arise. This article will guide you through the necessary post-uninstallation steps and troubleshooting techniques to get your system back to its original state. First, we'll cover the importance of verifying that Reshade has been completely uninstalled, as any remaining files or registry entries can cause conflicts with other applications. Next, we'll discuss how to restore your original game or application settings, which may have been altered during the Reshade installation process. Finally, we'll delve into troubleshooting common issues that may occur after uninstalling Reshade, such as graphics glitches or performance problems. By following these steps, you'll be able to ensure a successful uninstallation and get back to enjoying your games or applications without any issues. To start, let's begin with verifying that Reshade has been completely uninstalled.
Verifying Reshade has been completely uninstalled
To verify that ReShade has been completely uninstalled, follow these steps. First, check the installation directory where ReShade was initially installed. Ensure that the ReShade folder and all its contents have been removed. If any files or folders remain, delete them manually. Next, check the game's directory where ReShade was installed. Look for any ReShade-related files, such as ReShade.ini, ReShade.fx, or dxgi.dll, and delete them if found. Additionally, check the game's configuration files, such as the game's .ini or .cfg files, for any ReShade-related entries and remove them. It's also essential to check the Windows registry for any remaining ReShade entries. Press the Windows key + R to open the Run dialog, type "regedit," and press Enter. Navigate to the HKEY_CURRENT_USER\Software and HKEY_LOCAL_MACHINE\SOFTWARE directories and search for any ReShade-related entries. If found, right-click and delete them. Finally, restart your computer to ensure that all changes take effect. By following these steps, you can verify that ReShade has been completely uninstalled from your system.
Restoring original game or application settings
Restoring original game or application settings is a crucial step after uninstalling ReShade. This process ensures that the game or application returns to its default state, free from any modifications made by ReShade. To restore original settings, start by locating the game's configuration file, usually found in the game's installation directory or in the user's documents folder. Look for files with extensions such as .ini, .cfg, or .xml, as these often contain game settings. Open the file in a text editor, such as Notepad, and search for any lines of code that reference ReShade. Delete or comment out these lines to remove ReShade's influence on the game's settings. Next, check the game's graphics settings menu, usually found in the game's options or settings menu. Look for any settings that were modified by ReShade, such as anti-aliasing, texture filtering, or shader settings. Reset these settings to their default values or adjust them to your liking. Additionally, some games may have a "reset to default" or "restore original settings" option in their settings menu. If available, use this option to quickly restore the game's original settings. It's also a good idea to verify the game's files through the game's launcher or platform, such as Steam, to ensure that all files are intact and not modified by ReShade. By following these steps, you can successfully restore your game or application's original settings, ensuring a smooth gaming experience without any lingering effects from ReShade.
Troubleshooting common issues after uninstalling Reshade
After uninstalling Reshade, some users may encounter issues that can be frustrating and challenging to resolve. To troubleshoot common problems, start by checking if any Reshade-related files or folders are still present on your system. Look for files with the ".ini" or ".dll" extension in the game's directory or the Reshade installation folder. If you find any, delete them manually. Next, verify that your game's configuration files have been restored to their original state. Check the game's settings and ensure that any Reshade-specific options have been removed. If you're experiencing issues with your graphics card or display settings, try resetting them to their default values. Additionally, check for any conflicting software or drivers that may be interfering with your system. If none of these steps resolve the issue, try reinstalling the game or seeking assistance from the game's community or support forums. In some cases, a system restore point may be necessary to revert your system to a previous state before the uninstallation. By following these troubleshooting steps, you should be able to resolve common issues that arise after uninstalling Reshade.