How To Insert Section Break In Word
Here is the introduction paragraph: When working with Microsoft Word, organizing your document into sections can be incredibly useful for managing content, formatting, and layout. One of the key features that enables this organization is the section break. A section break allows you to divide your document into separate sections, each with its own unique formatting and layout options. But how do you insert a section break in Word, and what are the benefits of doing so? In this article, we'll explore the ins and outs of section breaks, including how to insert them, how to manage and format them, and what they can do for your document. First, let's start by understanding what section breaks are and how they work in Word.
Understanding Section Breaks in Word
When working with Microsoft Word, it's essential to understand the concept of section breaks to effectively manage and organize your document. Section breaks are a crucial feature in Word that allows you to divide your document into separate sections, each with its own unique formatting and layout. In this article, we'll delve into the world of section breaks, exploring what they are and their purpose, the different types of section breaks available in Word, and why you should use them in your document. By understanding section breaks, you'll be able to create complex documents with ease, control the layout and formatting of your content, and enhance the overall readability of your work. So, let's start by understanding the basics of section breaks and their purpose.
What are Section Breaks and Their Purpose
Section breaks are a feature in Microsoft Word that allows users to divide a document into separate sections, each with its own formatting and layout. The purpose of section breaks is to enable users to apply different formatting, such as headers, footers, margins, and page numbering, to specific sections of a document without affecting the rest of the document. Section breaks are particularly useful when creating long documents, such as reports, theses, or books, that require different formatting for different sections. For example, a user may want to apply a different header or footer to a specific section of a document, or change the margin settings for a particular section. Section breaks make it easy to do this without having to create separate documents or manually adjust the formatting for each section. There are four types of section breaks in Word: Next Page, Continuous, Even Page, and Odd Page. Each type of section break serves a specific purpose, such as starting a new section on a new page or continuing a section on the same page. By using section breaks, users can create complex documents with ease and precision, and make formatting changes quickly and efficiently. Overall, section breaks are a powerful tool in Microsoft Word that can help users create professional-looking documents with ease.
Types of Section Breaks Available in Word
In Word, there are four types of section breaks available: Next Page, Continuous, Even Page, and Odd Page. A Next Page section break starts the new section on the next page, which is useful for separating chapters or sections that need to begin on a new page. A Continuous section break, on the other hand, starts the new section on the same page, allowing for a seamless transition between sections. An Even Page section break starts the new section on the next even-numbered page, while an Odd Page section break starts the new section on the next odd-numbered page. These last two types of section breaks are particularly useful for creating mirrored layouts or for ensuring that certain sections always begin on a specific type of page. By using these different types of section breaks, users can have greater control over the layout and organization of their documents.
Why Use Section Breaks in Your Document
Using section breaks in your document is essential for several reasons. Firstly, section breaks allow you to change the layout, formatting, and design of different sections within a single document. This is particularly useful when creating long documents, such as reports, theses, or books, where different sections may require different formatting, margins, or headers and footers. By inserting section breaks, you can apply unique formatting to each section without affecting the rest of the document. Additionally, section breaks enable you to restart page numbering, change the orientation of pages, or switch between portrait and landscape layouts, giving you more control over the overall structure and appearance of your document. Furthermore, section breaks make it easier to manage and organize your content, allowing you to create separate sections for different topics, chapters, or appendices. This, in turn, enhances the readability and navigability of your document, making it more user-friendly for your audience. Overall, using section breaks in your document is a simple yet effective way to add flexibility, organization, and visual appeal to your content.
Inserting Section Breaks in Word
When working with Microsoft Word, organizing your document into sections can be incredibly useful for managing different formatting styles, layouts, and content. One of the key features that enables this organization is the section break. A section break allows you to divide your document into separate sections, each of which can have its own unique formatting, headers, and footers. To effectively utilize section breaks, it's essential to know how to insert them. There are several methods to do this, including using the Layout tab, the Page Layout tab, and keyboard shortcuts. Each of these methods offers a convenient way to insert section breaks, depending on your workflow and preferences. By mastering these techniques, you can efficiently manage your document's structure and appearance. Let's start by exploring how to insert section breaks using the Layout tab, a straightforward and commonly used approach.
Using the Layout Tab to Insert Section Breaks
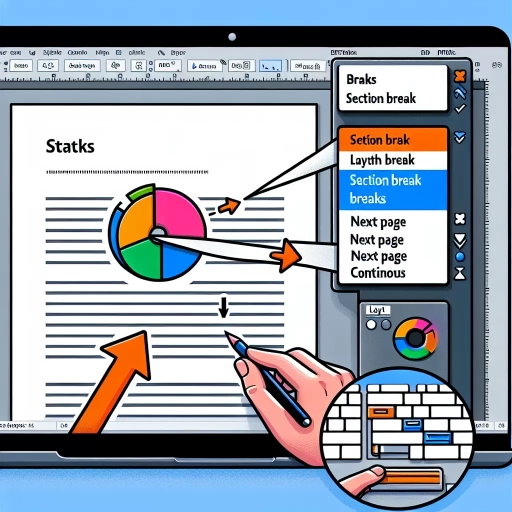
Using the Layout tab to insert section breaks in Word is a straightforward process that allows you to divide your document into separate sections, each with its own formatting and layout. To access the Layout tab, click on the "Layout" tab in the ribbon at the top of the Word window. Once you're in the Layout tab, click on the "Breaks" button in the "Page Setup" group. This will open a drop-down menu with several options, including "Section Break (Next Page)", "Section Break (Continuous)", and "Section Break (Even Page)" and "Section Break (Odd Page)". Select the type of section break you want to insert, and Word will automatically insert the break at the current cursor position. You can also use the "Section Break" button to insert a section break at the beginning or end of a section. Additionally, you can use the "Layout" tab to adjust the section break settings, such as the section break type, section start, and section layout. By using the Layout tab to insert section breaks, you can easily manage and organize your document's layout and formatting.
Inserting Section Breaks Using the Page Layout Tab
When working with long documents in Microsoft Word, it's often necessary to divide the content into sections to apply different formatting, such as changing the layout, margins, or headers and footers. One way to achieve this is by inserting section breaks using the Page Layout tab. To do this, first, place your cursor where you want to insert the section break. Then, go to the Page Layout tab in the ribbon and click on the "Breaks" button in the "Page Setup" group. A drop-down menu will appear, offering four types of section breaks: "Next Page," "Continuous," "Even Page," and "Odd Page." Choose the type of section break you need, and Word will insert it at the cursor position. The "Next Page" section break starts the new section on the next page, while the "Continuous" section break starts the new section on the same page. The "Even Page" and "Odd Page" section breaks are useful for creating sections that start on either an even or odd page, respectively. Once you've inserted a section break, you can apply different formatting to each section, such as changing the page orientation, margins, or headers and footers. This allows you to create complex documents with varying layouts and designs, making it easier to organize and present your content effectively.
Keyboard Shortcuts for Inserting Section Breaks
When it comes to inserting section breaks in Word, using keyboard shortcuts can save you a significant amount of time and effort. To insert a next page section break, press "Ctrl + Enter" on your keyboard. This will automatically insert a section break and move the cursor to the next page. If you want to insert a continuous section break, press "Alt + Ctrl + Enter" on your keyboard. This will insert a section break without moving the cursor to the next page. To insert an even page section break, press "Alt + Ctrl + Shift + Enter" on your keyboard. This will insert a section break and move the cursor to the next even-numbered page. Finally, to insert an odd page section break, press "Alt + Ctrl + Shift + Enter" on your keyboard, and then press "F5" to move the cursor to the next odd-numbered page. By mastering these keyboard shortcuts, you can quickly and easily insert section breaks in your Word document, giving you more control over the layout and formatting of your content.
Managing and Formatting Section Breaks
Effective document management is crucial in today's fast-paced business environment. One often overlooked aspect of document management is the proper use of section breaks. Section breaks are essential in dividing a document into distinct sections, making it easier to navigate and understand. However, if not managed correctly, section breaks can lead to formatting issues and confusion. In this article, we will explore the importance of managing and formatting section breaks, including how to view and delete them, format them for better readability, and troubleshoot common issues that may arise. By mastering the art of section break management, you can improve the overall quality and professionalism of your documents. So, let's start by exploring how to view and delete section breaks, a crucial step in maintaining a well-organized document.
Viewing and Deleting Section Breaks
Viewing and deleting section breaks in Microsoft Word is a straightforward process that can help you manage and format your document more efficiently. To view section breaks, go to the "Home" tab and click on the "Paragraph" group dialog box launcher, which is located at the bottom right corner of the group. This will open the "Paragraph" dialog box, where you can check the box next to "Section Breaks" under the "Pilcrow" section. This will display all section breaks in your document, making it easier to identify and manage them. Alternatively, you can also press "Ctrl+Shift+8" to toggle the display of section breaks on and off. To delete a section break, simply place your cursor before the break and press the "Delete" key. You can also select the section break and press the "Delete" key to remove it. Note that deleting a section break will merge the two sections it separates, so make sure to review your document's formatting before making any changes. Additionally, you can also use the "Find and Replace" feature to delete multiple section breaks at once. To do this, go to the "Home" tab and click on the "Find" group dialog box launcher, then select "Go To" and choose "Section Break" from the list. This will take you to the first section break in your document, where you can delete it and then repeat the process to find and delete subsequent section breaks. By mastering the art of viewing and deleting section breaks, you can take control of your document's formatting and ensure that your content flows smoothly and logically.
Formatting Section Breaks for Better Readability
When it comes to formatting section breaks for better readability, there are several techniques you can employ to enhance the overall flow and organization of your document. One effective approach is to use section breaks to separate distinct sections or topics within your document, making it easier for readers to navigate and understand the content. To achieve this, you can insert section breaks at strategic points, such as between chapters, sections, or subsections, to create clear visual divisions. Additionally, you can adjust the formatting of section breaks to match your document's style, such as changing the font, size, or color to create a clear visual distinction. Another technique is to use section breaks to control the layout of your document, such as forcing a page break or a column break, to ensure that your content is presented in a logical and readable manner. By carefully formatting section breaks, you can significantly improve the readability and overall appearance of your document, making it more engaging and easier to understand for your readers. Furthermore, using section breaks can also help you to create a consistent layout throughout your document, which is particularly important for long documents or those that require a high level of professionalism. By mastering the art of formatting section breaks, you can take your document to the next level and make a lasting impression on your readers.
Common Issues with Section Breaks and How to Resolve Them
When working with section breaks in Microsoft Word, users may encounter several common issues that can disrupt the formatting and layout of their document. One of the most frequent problems is the appearance of unwanted section breaks, which can cause inconsistent formatting and make it difficult to manage the document's layout. To resolve this issue, users can try deleting the unnecessary section breaks by selecting the break and pressing the "Delete" key. Another common issue is the inability to delete a section break, which can be caused by the break being anchored to a specific paragraph or object. In this case, users can try selecting the paragraph or object and then deleting the section break. Additionally, users may experience issues with section breaks not being displayed correctly, which can be resolved by checking the "Show/Hide" option in the "Home" tab to ensure that section breaks are visible. Furthermore, users may encounter problems with section breaks affecting the formatting of headers and footers, which can be resolved by checking the "Link to Previous" option in the "Header & Footer" tab to ensure that the headers and footers are not linked to the previous section. By being aware of these common issues and knowing how to resolve them, users can effectively manage and format section breaks in their Word documents.