How To Apply Blush
Understanding Blush Application Basics
Finding Your Perfect Shade
Not all blush colors are created equally. Your skin tone, undertone, natural coloring, and personal style all play a role in determining which blush shade will look best on you. Warmer skin tones often look stunning in rich blush colors like apricot or burnt orange, while cooler skin tones glow in rosy pink or lavender hues. Individuals with neutral skin tones may enjoy experimenting with a variety of blush hues from both the cool and warm color schemes. Undertone plays a critical role; it can make a blush stand out, blend in, or change hue entirely. Finally, personal style should never be overlooked. An individual who loves bold, dramatic makeup looks might feel utterly out of sorts if their blush is too subtle for their liking. Therefore, finding the perfect blush shade takes time, patience, and a willingness to experiment.
Proper Blush Placement
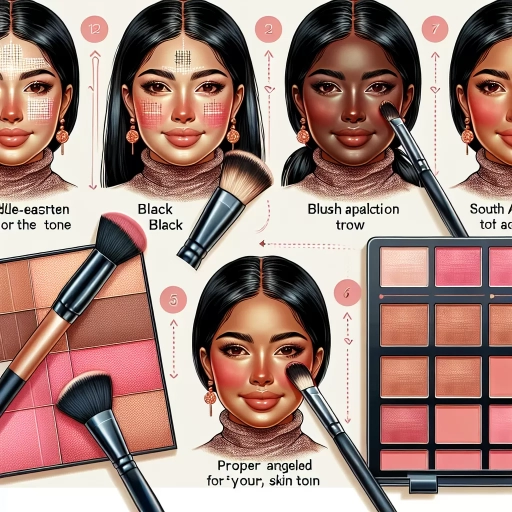
Applying blush correctly isn’t just about dusting it across the apples of your cheeks. In many cases, that technique can leave you looking more like a clown than a beauty queen. Instead, it is important to consider your face shape before you apply your blush. Round faces typically benefit from blush placement along the cheekbones and near the hairline, while heart-shaped faces look fabulous with blush applied underneath the apples of the cheeks to create balance. Meanwhile, for those who have an oval face, a little blush on the apples of the cheeks can add a youthful, fresh glow. Similarly, individuals with square face shapes should focus the blush on the apples of the cheeks and blend it towards the temples to soften the face contours. Thus, taking your unique face shape into account allows for a more flattering blush application.
Mastering The Right Blush Technique
How you apply your blush can make all the difference when it comes to achieving a natural, flushed look. First and foremost, remember to tap off any excess powder before applying – overdoing it with blush is a common makeup mistake that is best avoided. Next, use a gentle sweeping motion to apply your blush in the direction that best suits your face shape. While a common application method involves brushing upwards from the apples towards the temples, this isn’t universal. Instead, take your face shape and blush goals into account when deciding on your application technique. Last but not least, make sure to blend, blend, blend! Nobody wants harsh lines or blotchy patches, and blending is the solution. By blending your blush edges, you create a softer, more natural look that will leave you looking fresh and fabulous.
Nailing Blush Selection, Placement And Technique
Blush Selection
Choosing the right blush can sometimes feel like a minefield. Cream, powder, gel, or tint – what does it all mean? And which one is right for you? Powder blushes are great for individuals with oily or combination skin, as they help reduce shine and last longer than many other types. Cream blushes, on the other hand, are ideal for those with dry or mature skin - they blend easily and have a hydrating formula. Gels and tints add a sheer wash of color that looks incredibly natural and are excellent for humid climates. The choice depends on your skin type, the climate you live in, and the look you're going for.
Blush Placement
The correct placement of the blush can make all the difference to your final look. For a natural-looking blush, try sweeping it high up on the apples of your cheeks and then extending it out to the temples. To make your cheekbones pop, brush your blush directly underneath your cheekbone, in the hollow of your cheeks. For a sun-kissed, natural-looking radiance, dust the blush lightly on the bridge of your nose, your forehead, and your chin. It's all about trying different techniques and figuring out what works best for you.
Blush Technique
Mastering the perfect blush technique takes practice, and don’t be afraid to make mistakes along the way. It’s all part of learning. The ‘smile and swipe’ technique is a tried and tested method for finding the apples of your cheeks. Several makeup artists swear by the ‘draping’ technique, where blush is brushed upward from the apples, along the cheekbones, and to the temples, akin to creating a soft 'C' on each side of the face. Alternatively, try the 'blush sandwich' for a natural flush. This involves applying your base, a layer of blush, another layer of foundation, and then a final touch of blush. Remember to blend well and dust off any excess powder for a natural, nosier-free finish.
Common Blush Application Mistakes And How To Avoid Them
Choosing The Right Tools
The tools you choose for blush application are every bit as important as the blush itself. A big, fluffy brush may feel nice against the skin, but it won’t deliver precision or even coverage. Smaller, angled brushes are a popular choice for their ability to fit the natural curve of the cheeks while providing a smooth, even blush application. Synthetic brushes work exceptionally well with cream and liquid blushes, whereas natural brushes pick and deposit powder blushes evenly. So, choose your tool wisely depending on the blush type and your application preference.
Fixing Harsh Blush Lines
A common blush mistake is leaving behind harsh lines or obvious borders. This usually happens when blush isn't blended properly. To avoid this, always remember to blend your blush thoroughly using a brush or beauty sponge. Make circular motions to ensure the blush blends smoothly with your foundation, creating a seamless natural look. If you realize that you've already overdone it, don't fret. You can always tone down too much blush by dusting translucent powder on top or by patting it gently with a clean makeup sponge.
Too Much Or Too Little Blush
Another common blush mistake is applying too much or too little product. A clown-like flush or invisible blush is not what we're striving for. If you've applied too much, simply dust a little translucent powder over the blush to mute it. Alternatively, press a tissue against your cheeks to remove some of the excess. If you've applied too little blush, or it isn't showing up well, feel free to add more. Remember, it's easier to add more blush than to remove excess. Therefore, when applying blush, it's a good idea to start with a small amount and gradually build it up to your desired level of vibrancy.