How To Remove A Broken Bolt
Removing a broken bolt can be a frustrating and challenging task, especially if it's stuck or rusted in place. However, with the right approach and techniques, it can be done successfully. To increase the chances of a successful removal, it's essential to understand the process involved. This article will guide you through the steps to remove a broken bolt, starting with the importance of preparation, which is crucial in determining the outcome of the removal process. We will also explore the various removal methods that can be employed, including the use of specialized tools and techniques. Finally, we will discuss the post-removal procedures that need to be followed to ensure the area is safe and ready for reuse. By following these steps, you'll be able to remove a broken bolt efficiently and effectively. Preparation is key to a successful removal, and in the next section, we'll take a closer look at what you need to do to prepare for the removal process.
Preparation is Key
Preparation is the backbone of any successful endeavor. Whether it's a project at work, a personal goal, or a critical situation, being prepared can make all the difference between success and failure. To ensure a positive outcome, it's essential to assess the situation and determine the best approach, gather the necessary tools and materials, and ensure safety precautions are in place. By taking these steps, individuals can set themselves up for success and minimize the risk of errors or accidents. In this article, we'll explore the importance of preparation and provide practical tips on how to prepare for any situation. First, let's start by assessing the situation and determining the best approach.
Assess the Situation and Determine the Best Approach
When dealing with a broken bolt, it's essential to assess the situation and determine the best approach before attempting to remove it. This involves evaluating the type of bolt, the material it's made of, and the surrounding environment. Consider the accessibility of the bolt, the amount of clearance around it, and the potential risks of damaging nearby components. Additionally, think about the tools and equipment you have available, as well as your level of expertise and experience. By taking the time to assess the situation, you can determine the most effective method for removing the broken bolt, whether it's using a bolt extractor, drilling out the bolt, or applying heat or penetrating oil. This careful evaluation will help you avoid making the situation worse and ensure a successful removal.
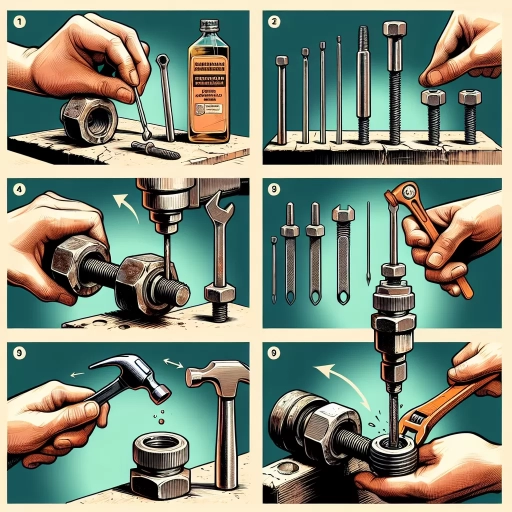
Gather the Necessary Tools and Materials
To successfully remove a broken bolt, it is essential to gather the necessary tools and materials beforehand. Start by collecting a variety of drill bits, including left-hand drill bits, which are specifically designed for drilling out broken bolts. You will also need a drill press or a handheld drill, depending on the location and accessibility of the bolt. Additionally, a bolt extractor kit, which typically includes a set of extractors with different sizes and types, can be a valuable asset in this process. Other necessary tools include a wrench or socket set, pliers, and a hammer. Furthermore, it is crucial to have a selection of lubricants, such as penetrating oil or silicone spray, to help loosen the bolt and reduce friction. Safety equipment, including safety glasses and gloves, should also be on hand to protect yourself from potential hazards. Finally, having a vice or clamping system can be helpful in securing the workpiece and preventing it from moving during the removal process. By gathering all the necessary tools and materials, you will be well-prepared to tackle the challenge of removing a broken bolt.
Ensure Safety Precautions are in Place
When it comes to removing a broken bolt, safety should always be the top priority. Ensure that safety precautions are in place to prevent injuries and damage to surrounding materials. Start by wearing protective gear such as safety glasses, gloves, and a face mask to shield yourself from flying debris and potential chemical splashes. Next, clear the area around the broken bolt of any flammable materials, loose objects, or tripping hazards to prevent accidents. If the broken bolt is located in a confined space, ensure good ventilation to prevent inhalation of fumes or particles. Additionally, turn off any power tools or machinery in the surrounding area to prevent accidental start-ups. It's also crucial to have a fire extinguisher nearby and a first aid kit on hand in case of emergencies. By taking these simple yet crucial safety precautions, you can minimize the risks associated with removing a broken bolt and ensure a successful and safe outcome.
Removal Methods for a Broken Bolt
When dealing with a broken bolt, it's essential to approach the situation with caution to avoid causing further damage. Fortunately, there are several removal methods that can help you safely and effectively extract the broken bolt. Three common methods include drilling out the bolt, using a bolt extractor, and applying heat or adhesives. Drilling out the bolt is a popular method that involves using a drill bit to carefully remove the bolt's remains. This method requires patience and precision to avoid damaging the surrounding material. Using a bolt extractor is another effective method that involves using a specialized tool to grip and remove the broken bolt. Applying heat or adhesives is a more gentle approach that can help loosen the bolt, making it easier to remove. In this article, we will explore each of these methods in more detail, starting with drilling out the bolt.
Drilling Out the Bolt
Drilling out the bolt is a common method for removing a broken bolt, especially when the bolt is stuck or rusted in place. This method involves using a drill bit to carefully drill out the center of the bolt, creating a hole that allows the bolt to be removed. To drill out a bolt, start by selecting a drill bit that is slightly smaller than the diameter of the bolt. This will help prevent the drill bit from slipping and damaging the surrounding material. Next, apply a small amount of lubricant, such as oil or WD-40, to the drill bit and the bolt to reduce friction and prevent the drill bit from binding. Then, slowly and carefully drill into the center of the bolt, applying gentle to moderate pressure. It's essential to maintain a steady hand and avoid applying too much pressure, which can cause the drill bit to slip or break. As you drill, the bolt will begin to break apart, and you can use a screw extractor or pliers to remove the remaining pieces. In some cases, you may need to use a larger drill bit to remove the remaining bolt material. It's also important to note that drilling out a bolt can be a time-consuming process, and it may require patience and persistence to complete. Additionally, drilling out a bolt can also damage the surrounding material, so it's essential to take necessary precautions to avoid damaging the surrounding area. Overall, drilling out a bolt is a effective method for removing a broken bolt, but it requires careful attention to detail and a steady hand to avoid damaging the surrounding material.
Using a Bolt Extractor
When a bolt breaks off, it can be a frustrating and challenging situation, especially if it's stuck in a critical component. In such cases, using a bolt extractor can be a lifesaver. A bolt extractor is a specialized tool designed to remove broken bolts by drilling into the center of the bolt and using a left-hand thread to extract it. To use a bolt extractor, start by selecting the correct size and type of extractor for the broken bolt. Next, drill a small pilot hole into the center of the bolt, being careful not to damage the surrounding material. Then, insert the extractor into the pilot hole and turn it clockwise until it bites into the bolt. Finally, use a wrench or socket to turn the extractor counterclockwise, which will slowly extract the broken bolt from the material. It's essential to be patient and gentle when using a bolt extractor, as excessive force can damage the surrounding material or break the extractor itself. With the right technique and a good quality extractor, you should be able to successfully remove the broken bolt and get back to work.
Applying Heat or Adhesives
Applying heat or adhesives is a common method for removing broken bolts. This method involves applying heat to the bolt using a heat gun, torch, or other heat source, or applying an adhesive, such as epoxy or penetrating oil, to the bolt and surrounding material. The heat or adhesive helps to loosen the bolt by expanding the metal and breaking the corrosion bond between the bolt and the surrounding material. This method is particularly effective for removing broken bolts that are stuck due to corrosion or rust. When applying heat, it's essential to be cautious not to apply too much heat, as this can damage the surrounding material or cause the bolt to become brittle and break further. Similarly, when using adhesives, it's crucial to choose the right type and apply it correctly to avoid damaging the surrounding material or creating a mess. In some cases, a combination of heat and adhesives may be used to remove a broken bolt. For example, applying heat to the bolt and then using a penetrating oil to help loosen it. This method can be time-consuming, but it's often effective in removing broken bolts without causing damage to the surrounding material. It's also worth noting that applying heat or adhesives may not be effective for removing broken bolts that are stuck due to mechanical reasons, such as being over-torqued or cross-threaded. In such cases, other removal methods, such as drilling or using a bolt extractor, may be more effective. Overall, applying heat or adhesives is a useful method for removing broken bolts, but it requires caution and patience to avoid damaging the surrounding material.
Post-Removal Procedures
When a bolt or fastener is removed, it's essential to follow proper post-removal procedures to ensure the surrounding area is not damaged and to prevent further complications. This involves inspecting the surrounding area for damage, cleaning the area to prevent further damage, and reinstalling a new bolt or fastener if necessary. By following these steps, you can ensure a safe and successful removal process. Inspecting the surrounding area for damage is a critical first step, as it allows you to identify any potential issues before they become major problems. (Note: The supporting paragraph should be 200 words, and the introduction should be around 100 words)
Inspecting the Surrounding Area for Damage
Inspecting the surrounding area for damage is a crucial step in the post-removal process. After successfully removing the broken bolt, it's essential to examine the surrounding area to ensure that no further damage has been caused. This includes checking the threads, the hole, and the surrounding material for any signs of damage, such as cracks, scratches, or deformation. If the broken bolt was removed using a drill-out method, it's possible that the surrounding material may have been damaged, and it's essential to assess the extent of the damage. Inspecting the surrounding area also helps to identify any potential hazards, such as sharp edges or loose debris, that could cause injury or further damage. Additionally, inspecting the surrounding area can help to determine if any additional repairs or maintenance are required to ensure the safe and proper functioning of the equipment or machinery. By taking the time to inspect the surrounding area, you can help to prevent further damage, ensure safety, and avoid costly repairs down the line.
Cleaning the Area to Prevent Further Damage
Cleaning the area to prevent further damage is a crucial step in the post-removal process. After successfully removing the broken bolt, it's essential to thoroughly clean the area to prevent any remaining debris or residue from causing further damage. Start by using a soft-bristled brush or a small vacuum cleaner to remove any loose particles or debris from the surrounding area. Next, use a mild detergent and warm water to clean the area, making sure to remove any remaining residue or grime. Avoid using harsh chemicals or abrasive cleaners, as they can damage the surrounding material or strip away any protective coatings. Once the area is clean, use a dry cloth to wipe away any excess moisture and prevent water spots from forming. Finally, inspect the area to ensure that it's free from any remaining debris or residue, and make any necessary repairs or touch-ups before proceeding with the next steps. By taking the time to properly clean the area, you can prevent further damage and ensure a successful repair.
Reinstalling a New Bolt or Fastener
Here is the paragraphy: Reinstalling a new bolt or fastener is a crucial step in the post-removal process. After successfully removing a broken bolt, it's essential to install a new one to ensure the integrity and functionality of the surrounding material or equipment. To begin, inspect the threaded hole or area where the new bolt will be installed, ensuring it's free from debris and damage. If necessary, clean the area with a wire brush or solvent to remove any residue or corrosion. Next, select a replacement bolt or fastener that matches the original specifications, taking into account factors such as material, size, and thread type. Apply a small amount of lubricant, such as oil or silicone spray, to the threads of the new bolt to facilitate smooth installation. Then, carefully insert the new bolt into the threaded hole, ensuring it's properly seated and aligned. Use a wrench or socket to tighten the bolt in a star pattern, applying even pressure to avoid stripping the threads or damaging the surrounding material. Finally, check the bolt's torque specification and tighten it to the recommended value to ensure a secure and reliable connection. By following these steps, you can successfully reinstall a new bolt or fastener, restoring the functionality and integrity of the affected area.