How To Update Davinci Resolve
Here is the introduction paragraph: Updating DaVinci Resolve is a straightforward process that can breathe new life into your video editing workflow. With each new version, Blackmagic Design introduces exciting features, performance enhancements, and bug fixes that can significantly improve your editing experience. However, to ensure a seamless update process, it's essential to prepare your system, update the software correctly, and troubleshoot any potential issues that may arise. In this article, we'll guide you through the process of updating DaVinci Resolve, covering pre-update preparation, the update process itself, and post-update troubleshooting. By following these steps, you'll be able to take advantage of the latest features and improvements in DaVinci Resolve. So, let's start by preparing your system for the update, and we'll begin with the essential steps to take before updating DaVinci Resolve.
Pre-Update Preparation
To ensure a seamless and successful update, it's essential to take the necessary steps to prepare your project beforehand. This involves several critical tasks that will safeguard your data, ensure compatibility, and prevent potential issues. First, backing up your project files is a crucial step that will provide a safety net in case anything goes wrong during the update process. Additionally, checking the system requirements for the update is vital to ensure that your system can handle the new changes. Furthermore, disabling any third-party plugins will prevent potential conflicts and ensure a smooth transition. By taking these precautions, you can minimize the risk of errors and ensure a successful update. In this article, we will explore each of these steps in more detail, starting with the importance of backing up your project files.
Backup Your Project Files
Before updating DaVinci Resolve, it's essential to backup your project files to prevent any potential data loss. This step is crucial in ensuring that your hard work and creative efforts are safeguarded. To backup your project files, start by locating the project folder, which is usually found in the DaVinci Resolve project directory. Next, copy the entire project folder and paste it into an external hard drive or a cloud storage service like Google Drive, Dropbox, or OneDrive. Make sure to include all the project files, including the database, media files, and any other relevant data. It's also a good idea to create a backup of your project at different stages of completion, so you can easily revert to a previous version if needed. Additionally, consider using a version control system like Git to track changes and collaborate with team members. By taking the time to backup your project files, you can ensure a smooth update process and avoid any potential data loss or corruption.
Check System Requirements
Before updating DaVinci Resolve, it's essential to check the system requirements to ensure a smooth and successful installation process. This involves verifying that your computer meets the minimum hardware and software specifications required to run the latest version of DaVinci Resolve. Start by checking the official Blackmagic Design website for the system requirements, which typically include the operating system, processor, memory, graphics card, and storage requirements. Make sure your computer's operating system is compatible with the latest version of DaVinci Resolve, and that your processor meets the minimum clock speed and number of cores required. Additionally, ensure that your computer has sufficient memory (RAM) and storage space to handle the demands of the software. It's also crucial to check the graphics card requirements, as DaVinci Resolve relies heavily on GPU acceleration. If your computer doesn't meet the minimum system requirements, you may need to upgrade your hardware or consider using an older version of the software. By checking the system requirements beforehand, you can avoid potential installation issues and ensure that DaVinci Resolve runs smoothly and efficiently on your computer.
Disable Any Third-Party Plugins
When updating DaVinci Resolve, it's essential to disable any third-party plugins to ensure a smooth transition. Third-party plugins can sometimes cause conflicts with the new version of the software, leading to errors, crashes, or instability. By disabling these plugins, you can prevent any potential issues and ensure that the update process completes successfully. To disable third-party plugins, go to the "Preferences" menu in DaVinci Resolve, then select "System" and click on the "Plugins" tab. From there, you can toggle off any third-party plugins that are currently enabled. Additionally, you may also want to consider uninstalling any plugins that are no longer supported or compatible with the new version of DaVinci Resolve. This will help prevent any potential conflicts and ensure that your system remains stable and efficient. By taking this precautionary step, you can ensure a successful update and continue to work on your projects without any interruptions.
Updating DaVinci Resolve
To update DaVinci Resolve, it's essential to follow a step-by-step process to ensure a smooth transition to the latest version. First, you'll need to download the latest version from the official website, which will provide you with the most up-to-date features and bug fixes. Once you've downloaded the software, you'll need to run the installer and follow the prompts to install the update. After installation, you'll need to activate the software with your license key to unlock all the features. By following these steps, you'll be able to update DaVinci Resolve and take advantage of its latest features and improvements. To get started, download the latest version from the official website.
Download the Latest Version from the Official Website
To ensure a seamless and efficient updating process, it is essential to download the latest version of DaVinci Resolve from the official website. This approach guarantees that you receive the most recent features, bug fixes, and performance enhancements. By visiting the official Blackmagic Design website, you can be confident that you are downloading a legitimate and virus-free version of the software. Simply navigate to the website, click on the "Download" button, and select the correct version of DaVinci Resolve that suits your needs. The website provides clear instructions and system requirements to ensure a smooth installation process. Moreover, downloading from the official website allows you to access the latest tutorials, user manuals, and other resources to help you get the most out of the software. By taking this approach, you can ensure that your DaVinci Resolve is always up-to-date and running at its best.
Run the Installer and Follow the Prompts
Here is the paragraphy: To update DaVinci Resolve, run the installer and follow the prompts. This is the most straightforward method, and it will ensure that you have the latest version of the software installed on your computer. First, download the latest version of DaVinci Resolve from the Blackmagic Design website. Once the download is complete, run the installer and follow the on-screen instructions. The installer will guide you through the process of updating the software, and it will automatically remove any older versions of DaVinci Resolve that may be installed on your computer. You will be prompted to agree to the terms and conditions of the software license, and you may also be asked to choose the installation location and other preferences. Once you have completed these steps, the installer will begin the update process, and you will be able to start using the latest version of DaVinci Resolve as soon as it is complete.
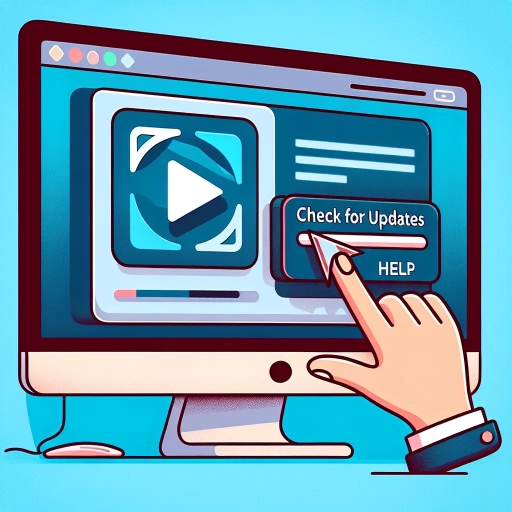
Activate the Software with Your License Key
To activate the software with your license key, follow these steps: First, launch DaVinci Resolve and click on the "Help" menu at the top. From the drop-down menu, select "Activate License." A new window will appear, prompting you to enter your license key. Enter the 16-digit license key provided to you when you purchased the software, and click "Activate." If you're using a free version, you won't need to enter a license key, and you can skip this step. Once you've activated the software, you'll have access to all the features and tools included in your version of DaVinci Resolve. If you're upgrading from a previous version, your license key will be automatically recognized, and you won't need to re-enter it. It's essential to note that you can only activate the software on a limited number of computers, depending on the type of license you purchased. Make sure to check your license agreement for specific details on activation and usage. By activating the software with your license key, you'll be able to take full advantage of DaVinci Resolve's powerful editing, color grading, and audio post-production tools.
Post-Update Troubleshooting
When updating software, it's not uncommon to encounter issues that can hinder your workflow. In the case of DaVinci Resolve, a popular video editing software, troubleshooting post-update problems is crucial to getting back to work quickly. To resolve these issues, it's essential to follow a structured approach. First, check for any compatibility issues with third-party plugins, as updates can sometimes disrupt their functionality. Additionally, verify that all project files are intact and functional, ensuring that no data has been corrupted during the update process. Finally, consulting the official DaVinci Resolve documentation can provide valuable solutions to common problems. By following these steps, you can quickly identify and resolve any post-update issues, minimizing downtime and getting back to editing your project efficiently. To start, let's dive into the first step: checking for any compatibility issues with third-party plugins.
Check for Any Compatibility Issues with Third-Party Plugins
When updating DaVinci Resolve, it's essential to check for any compatibility issues with third-party plugins. These plugins can sometimes cause conflicts with the new version of the software, leading to errors, crashes, or unexpected behavior. To avoid these issues, it's recommended to disable all third-party plugins before updating DaVinci Resolve. This will prevent any potential conflicts and ensure a smooth update process. Once the update is complete, you can re-enable the plugins one by one to test for compatibility. If you encounter any issues, you can try updating the plugin to the latest version or contacting the plugin developer for support. Additionally, you can also check the DaVinci Resolve forums and community resources for any known compatibility issues with specific plugins. By taking these precautions, you can minimize the risk of compatibility issues and ensure that your third-party plugins continue to work seamlessly with the updated version of DaVinci Resolve.
Verify That All Project Files Are Intact and Functional
After updating DaVinci Resolve, it's essential to verify that all project files are intact and functional to ensure a seamless editing experience. Start by checking the project's media pool to confirm that all clips, images, and audio files are still linked and accessible. Next, review the project's timeline to ensure that all edits, transitions, and effects are still in place and functioning as expected. Check for any errors or warnings in the project's console or log files, which can indicate issues with specific files or plugins. Additionally, test the project's audio and video playback to ensure that it's smooth and uninterrupted. If you've used any third-party plugins or scripts, verify that they're still compatible with the updated version of DaVinci Resolve. Finally, save a backup of your project file to prevent any potential data loss in case of future issues. By thoroughly verifying the integrity of your project files, you can quickly identify and address any problems that may have arisen during the update process, ensuring that your editing workflow remains uninterrupted.
Consult the Official DaVinci Resolve Documentation for Solutions
If you're experiencing issues after updating DaVinci Resolve, the first place to look for solutions is the official documentation provided by Blackmagic Design. The official DaVinci Resolve documentation is a comprehensive resource that covers a wide range of topics, including troubleshooting, system requirements, and software updates. By consulting the official documentation, you can find detailed instructions and solutions to common problems, such as installation issues, software crashes, and compatibility problems. The documentation is regularly updated to reflect the latest software updates and features, ensuring that you have access to the most up-to-date information. Additionally, the official documentation often includes step-by-step guides, tutorials, and FAQs that can help you resolve issues quickly and efficiently. By referring to the official documentation, you can save time and effort, and get back to editing and color grading your projects with confidence. Furthermore, the official documentation is available in multiple languages, making it accessible to users from around the world. Overall, consulting the official DaVinci Resolve documentation is an essential step in troubleshooting and resolving issues after updating the software.