How To Use Dog Nail Clippers
Keeping your dog's nails trimmed is an essential part of their grooming and overall health. Long nails can cause discomfort, health problems, and even lead to behavioral issues. However, many dog owners are unsure about how to properly clip their dog's nails, which can lead to anxiety and stress for both the dog and the owner. To ensure a safe and effective nail clipping experience, it's crucial to choose the right dog nail clippers, prepare your dog for the process, and learn the proper technique for clipping their nails. In this article, we will guide you through the process of using dog nail clippers, starting with the first step: choosing the right dog nail clippers.
Choosing the Right Dog Nail Clippers
When it comes to choosing the right dog nail clippers, there are several factors to consider to ensure a safe and effective nail trimming experience for your furry friend. With so many options available in the market, it can be overwhelming to decide which one is best suited for your dog's needs. To make an informed decision, it's essential to consider the size and breed of your dog, understand the types of dog nail clippers available, and look for clippers with safety features. By taking these factors into account, you can choose the right clippers that cater to your dog's specific needs. For instance, if you have a small breed dog, you'll want to opt for clippers specifically designed for their delicate nails. Consider the Size and Breed of Your Dog to determine the right clippers for your pet.
Consider the Size and Breed of Your Dog
When choosing the right dog nail clippers, it's essential to consider the size and breed of your dog. Different breeds have varying nail sizes, shapes, and hardness levels, which can affect the type of clippers needed. For example, larger breeds like Labradors and German Shepherds have thicker, harder nails that require stronger clippers with a curved blade to accommodate their nail shape. On the other hand, smaller breeds like Chihuahuas and Poodles have thinner, more delicate nails that require clippers with a straight blade and a smaller cutting surface to prevent crushing or splitting. Additionally, some breeds, such as Bulldogs and Pugs, have nails that are more prone to cracking and breaking, requiring clippers with a specialized nail guard to prevent over-cutting. By considering the size and breed of your dog, you can select the right clippers that will make the nail-cutting process safer, more efficient, and less stressful for both you and your pet.
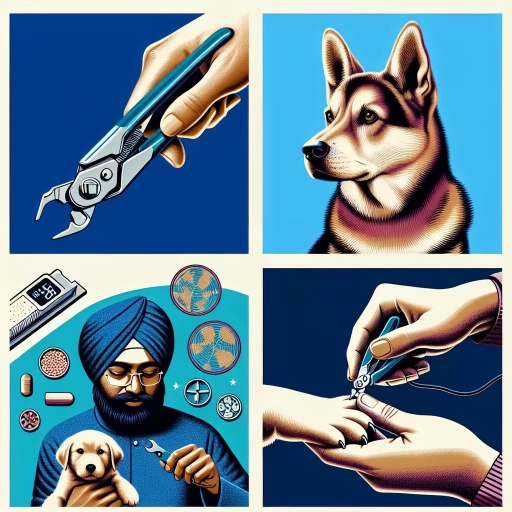
Understand the Types of Dog Nail Clippers Available
Here is the paragraphy: When it comes to choosing the right dog nail clippers, it's essential to understand the different types available. There are four main types of dog nail clippers: scissor-style, guillotine-style, nail trimmers, and nail grinders. Scissor-style clippers are the most common type and are suitable for most dog breeds. They have a curved blade that allows for easy cutting and are available in different sizes. Guillotine-style clippers are designed for larger breeds and have a hole in the center that the nail is placed in before cutting. Nail trimmers are designed for smaller breeds and have a smaller, more precise blade. Nail grinders, also known as Dremels, are electric tools that use a rotating stone to grind down the nail rather than cutting it. They are ideal for dogs with thick or hard nails and can be less stressful for dogs that don't like the sound of clippers. Understanding the different types of dog nail clippers available will help you choose the right one for your dog's specific needs.
Look for Clippers with Safety Features
When choosing the right dog nail clippers, it's essential to look for clippers with safety features to prevent accidents and ensure a safe nail trimming experience for both you and your dog. Clippers with safety features can help prevent over-trimming, which can be painful for your dog and lead to bleeding. One of the most critical safety features to look for is a safety stop or a quick sensor, which prevents the clippers from cutting too short and hitting the quick, the sensitive part of the nail. This feature is especially important for dogs with dark-colored nails, where it's harder to see the quick. Another safety feature to consider is a nail guard or a nail catcher, which catches the clippings and prevents them from flying everywhere, making the trimming process neater and more efficient. Additionally, look for clippers with comfortable, non-slip handles that provide a secure grip, reducing the risk of accidental cuts or slips. Some clippers also come with a locking mechanism that prevents the blades from opening too wide, which can help prevent over-trimming. By choosing clippers with these safety features, you can ensure a safe and stress-free nail trimming experience for both you and your dog.
Preparing Your Dog for Nail Clipping
Preparing your dog for nail clipping is a crucial step in maintaining their overall health and well-being. Long, unclipped nails can cause discomfort, pain, and even lead to health issues such as arthritis. To ensure a stress-free and safe nail clipping experience for your dog, it's essential to prepare them in advance. This can be achieved by getting your dog accustomed to having their paws handled, choosing the right time for nail clipping, and using positive reinforcement techniques. By following these steps, you can help your dog feel more comfortable and relaxed during the nail clipping process. To start, getting your dog accustomed to having their paws handled is a vital first step in preparing them for nail clipping.
Get Your Dog Accustomed to Having Their Paws Handled
Get your dog accustomed to having their paws handled by starting with gentle, short sessions, ideally when they're most relaxed, such as after a walk or playtime. Begin by simply touching their paws, then gradually introduce light massage and manipulation, making it a positive experience with treats and praise. As they become more comfortable, you can progress to holding their paws and toes, simulating the sensation of nail clipping. Be patient and go at your dog's pace, as some may take longer than others to adjust. It's also essential to handle their paws in different positions, such as when they're standing, sitting, or lying down, to help them become desensitized to the touch. By doing so, you'll help your dog feel more at ease when it's time for nail clipping, reducing the risk of anxiety and stress. Additionally, consider incorporating paw handling into your daily routine, such as during grooming or before bedtime, to make it a familiar and enjoyable experience for your dog.
Choose the Right Time for Nail Clipping
Choosing the right time for nail clipping is crucial to ensure a safe and stress-free experience for your dog. The ideal time for nail clipping depends on several factors, including your dog's age, breed, and individual temperament. For puppies, it's best to start nail clipping early, ideally between 3 to 4 months old, to get them accustomed to the process. For adult dogs, it's recommended to clip their nails every 4 to 6 weeks, or as needed. However, if your dog is anxious or stressed, it's best to clip their nails in short sessions, taking breaks in between to avoid overwhelming them. Additionally, consider clipping your dog's nails after exercise or playtime, when they are most relaxed. Avoid clipping your dog's nails after a meal or when they are excited or energetic, as this can make them more prone to squirming and making the process more challenging. By choosing the right time for nail clipping, you can help your dog feel more comfortable and secure, making the experience more enjoyable for both of you.
Use Positive Reinforcement Techniques
When it comes to preparing your dog for nail clipping, using positive reinforcement techniques is a game-changer. By associating nail clipping with rewards and praise, you can help your dog feel more comfortable and relaxed during the process. Start by getting your dog accustomed to having their paws touched and handled. Gently massage their paws and toes, rewarding them with treats and affection when they remain calm. Gradually introduce the nail clippers, allowing your dog to become familiar with the sight and sound of them. As you progress, begin to touch the clippers to their nails, rewarding them for remaining still. The key is to move at your dog's pace, never pushing them beyond their comfort zone. By doing so, you'll build trust and create a positive association with nail clipping, making the experience much less stressful for both you and your dog.
Clipping Your Dog's Nails Safely and Effectively
Clipping your dog's nails is an essential part of their grooming and health care. Long nails can cause discomfort, health problems, and damage to your home. However, clipping your dog's nails can be a daunting task, especially if you're new to dog ownership. To clip your dog's nails safely and effectively, it's crucial to identify the quick and avoid cutting it, clip a little at a time to avoid over-clipping, and use a styptic powder or pet nail glue to stop bleeding. By following these steps, you can ensure a safe and stress-free nail clipping experience for both you and your dog. In this article, we'll dive deeper into the world of dog nail clipping, starting with the most critical step: identifying the quick and avoiding cutting it.
Identify the Quick and Avoid Cutting It
Here is the paragraphy: Identifying the quick and avoiding cutting it is crucial when clipping your dog's nails. The quick is the pinkish-colored part of the nail that contains nerves and blood vessels. Cutting the quick can be painful for your dog and cause bleeding. To avoid cutting the quick, start by gently pressing on your dog's paw pad to extend the nail. Then, look for a slight curve or a change in color, which indicates the beginning of the quick. For dogs with black nails, it's more challenging to see the quick, so it's essential to be cautious and take your time. You can also use a nail grinder or Dremel to smooth out the edges and shorten the nails without cutting the quick. If you do accidentally cut the quick, apply styptic powder or a pet nail clotting gel to stop the bleeding. It's also a good idea to have a styptic powder or clotting gel on hand before you start clipping your dog's nails, just in case. By being careful and patient, you can avoid cutting the quick and make nail clipping a safe and stress-free experience for both you and your dog.
Clip a Little at a Time to Avoid Over-Clipping
When it comes to clipping your dog's nails, it's essential to avoid over-clipping, which can be painful and even lead to bleeding. To prevent this, it's recommended to clip a little at a time, taking breaks in between to give your dog a chance to relax and process what's happening. This approach also allows you to monitor your dog's reaction and adjust your clipping technique accordingly. Start by clipping just one or two nails at a time, and then take a break before moving on to the next ones. This will help you avoid cutting the quick, which is the sensitive part of the nail that contains nerves and blood vessels. By clipping a little at a time, you can also help your dog become more comfortable with the nail clipping process, making it a less stressful experience for both of you. Additionally, taking breaks will give you a chance to reward your dog with treats and praise, making the experience more positive and enjoyable. By clipping a little at a time, you can ensure a safe and effective nail clipping experience for your dog.
Use a Styptic Powder or Pet Nail Glue to Stop Bleeding
If you accidentally cut the quick while clipping your dog's nails, it's essential to stop the bleeding immediately to prevent infection and promote healing. One effective way to do this is by using a styptic powder or pet nail glue. Styptic powder is a topical treatment that contains substances like ferric subsulfate or aluminum chloride, which help to constrict the blood vessels and promote clotting. To use styptic powder, simply apply a small amount to the nail, making sure to cover the entire affected area. You can also use a cotton ball or swab to gently press the powder onto the nail. Hold the powder in place for a few seconds to allow it to take effect. If the bleeding doesn't stop after a few minutes, you can reapply the powder as needed. Alternatively, you can use pet nail glue, which works by sealing the nail and stopping the bleeding. To use pet nail glue, apply a small amount to the nail and hold it in place for a few seconds to allow it to dry. It's essential to follow the instructions provided with the product and to use it only as directed. In some cases, you may need to combine styptic powder or pet nail glue with other methods, such as applying gentle pressure to the nail or using a cold compress, to stop the bleeding effectively. By acting quickly and using the right products, you can help to prevent infection and promote healing in your dog's nail.