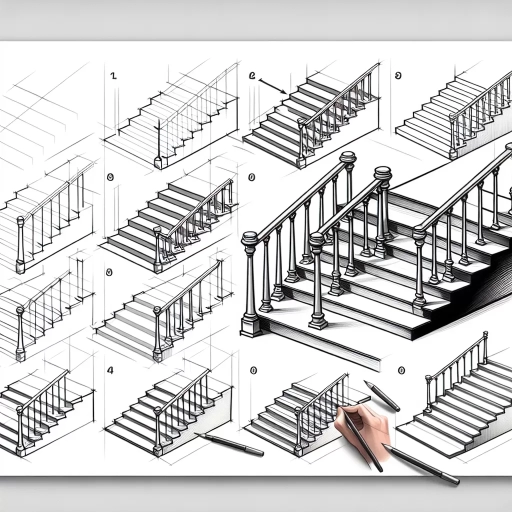
How To Draw Stairs
 Artistic expression is a form of communication that transcends any language barrier, and learning to skillfully craft realistic drawings is a powerful way to express oneself. One such learning milestone is mastering the art of drawing stairs; this seemingly simple structure can actually pose a challenging feat for many. This article should serve as your guide, aiming to progressively walk you through the process; starting with understanding the basic concepts, moving on to mastering the techniques, and finally, helping you to continually practice and refine your skills. Each section builds upon the previous one, ensuring a gradual yet solid reinforcement of knowledge and skills. As we dive into this journey, we'll first explore 'Understanding the Basic of Drawing Stairs'- a foundational step that is instrumental in crafting accurate and aesthetically pleasing depictions of stairs.
Understanding the Basics of Drawing Stairs
Drawing stairs is a fundamental skill in any artist’s toolbox, no matter your specific field of interest. In interior design, architectural design, and even in the creation of comic strips or cartoons, stair drawings play a crucial role in illustrating a scene or a design plan. However, the process of drawing stairs might not be as easy as it looks. To master this skill, three key areas must be explored fully: breaking down the components of a staircase, identifying different types of stairs, and understanding the perspective and scale of stairs. Once these areas are completely understood, you'll be drawing all types of stairs with ease, achieving the desired aesthetic, scale, and perspective effectively. Our first step will be delving into the components of a staircase, where we will discuss each part separately and show how to illustrate them correctly.
Breaking Down the Components of a Staircase
Staircases, both in reality and in drawing, are complicated structures with multiple components that can be challenging to depict accurately. Understanding these components can greatly facilitate the process of drawing stairs. First up is the "tread," the horizontal part that foot traffic steps onto. Each individual step on a staircase possesses a tread. That's followed by the "riser," which is the vertical element between each tread. It essentially 'rises' up to meet the next tread. Combined, an array of treads and risers forms what's known as a "flight of stairs" or simply a "run.” It's also essential to understand the concept of "nosing," which refers to the edge of the tread that protrudes over the riser beneath. Additionally, the sides of a staircase where the ends of the tread and riser get fixed are known as “stringers.” The "handrail" or balustrade is an also an integral part of a staircase. The handrail is the component that provides a grip to individuals using the stairs and helps prevent stumbles or falls. Balustrading includes handrails, balusters, and newel posts. "Balusters" are essentially tiny vertical columns that support the handrail, whilst a "newel post" serves as a larger, more stable support that's particularly crucial at the foot, top, or turnings of a staircase. Lastly, the "landing" is the flat area at the top or bottom of a flight, providing a rest spot or enabling a change in direction for the staircase. Each of these components plays a significant role in defining the appearance and functionality of the staircase. Knowing these key components and how they work together will be instrumental in accurate staircase depictions in your drawings. Also, by understanding the terminologies associated with the staircase, one can greatly enhance their stair-drawing abilities, making it easier to execute detailed, complex, accurate, and engaging staircase drawings. After all, drawing, like building, is all about translating each separate piece into a coherent whole.
Identifying the Different Types of Stairs
While engaging with the preliminary steps of drawing stairs, it's essential to identify the various types of stairs. The very first type is the Straight stairs, the simplest form, which runs in a straight line and is easiest to build and draw due to its uncomplicated structure. Second are the Return stairs, also known as U-shaped stairs, which have a 180-degree turn, creating a switchback effect, making this design great for those wanting a totally different perspective in drawing. They contain a landing at the switchback, thus adding complexity to your sketching process. Next, we talk about Spiral stairs, characterized by a tight helical upward movement, mostly found in old lighthouses or modern minimalistic designs. Drawing these can be a bit demanding due to their continuous curved path but at the same time offers an excellent opportunity for artists to showcase their skills. L-Shaped or Quarter-Turn stairs are another category to consider when drawing stairs. They take a 90-degree turn at some point, adding an interesting visual element to the stair design. While this can add difficulty to your drawing process due to the angle perspective, it also contributes dynamic depth, making the design more appealing. The Winder stairs are similar to the L-shaped stairs but with a slight difference; instead of a flat landing, they have pie-shaped or triangular steps at the corner transition, making the drawing process additionally nuanced. Another unique type is the Split stairs- they begin as a straight flight but then split into two flights going in different directions. If you wish to challenge your drawing capabilities, this type can add a kind of variety to your sketches. Flared and Curved stairs are two further types distinctive due to their elegance. While curved stairs bend upward with an elegant, sweeping curve, flared ones start with a wider flare and then follow a straight or curved design. Both require a higher understanding of perspectives and depth, making them a bit challenging to draw. Lastly, there are Compact stairs, practical space savers, ideal for minimalistic designs. Drawing these demands comprehensive detail focus due to their compact nature. Each type of stair has its unique charm, enhancing the designer's or artist's creativity while understanding and drawing them. Hence, distinguishing these different types and their unique traits are a fundamental step before diving into the actual drawing process. Furthermore, incorporating these styles accurately into your architectural or artistic drawing not only displays your wide-ranging skills but also remarkably enriches your drawings, thus leveling up your portfolio.
Understanding the Perspective and Scale of Stairs
Understanding the perspective and scale of stairs is a crucial component in rendering them effectively in drawings. The first step is to gain a comprehensive understanding of a staircase's three-dimensional structure in the real world. Imagine a flight of stairs is like a series of small platforms or boxes progressively stacked on top of one another. From this geometric mental model, we can begin a rough sketch using basic shapes. In a two-point perspective drawing of stairs, one end of the stair is closer to the viewer, therefore appearing larger, while the other end trails off into the distance, appearing smaller. This effect creates an illusion of depth and space on a two-dimensional surface making the stairs seem more realistic. Scale plays a significant role in achieving this. The scale refers to the comparative measurement of the stairs, ensuring the correct proportion and accurate representation in terms of perspective. Correct scale will allow the height, width, and depth of each stair to be portrayed factually. Failure to get the scale right can result in stairs appearing distorted and unproportional, compromising the overall realism of your drawing. Each step should gradually decrease in size and ascend towards a vanishing point located on the horizon line. The concept of a vanishing point is fundamental in perspective drawing. It refers to the point where the lines of an object converge and slightly diminish as they extend into the distance. For stairs drawing, often two vanishing points are created: one for the risers (vertical part of the stair) and one for the treads (horizontal part). Techniques such as overlapping, shading, and detailed rendering can also be used to create more convincing depth and three-dimensionality in the staircase drawing. Overlapping involves drawing the stairs behind one another to give the impression that they are stacked upwards or downwards. Shading helps to create a sense of depth by adding darker tones to the sides of the stairs that receive less light, making them seem further away. Detailed rendering requires meticulously adding lines and refining shapes for a more polished and convincing representation. In conclusion, understanding and incorporating perspective, scale, and other drawing techniques are essential in creating realistic and proportionate stairs. These are not just foundational to the practice of drawing stairs, but also form the bedrock of a wide variety of perspective drawing tasks. Just remember, accurate representation requires training the eye to see what it often dismisses. With time and practice, you'll perfect the art of drawing stairs from any perspective and in any scale.
Mastering the Techniques of Drawing Stairs
Mastering the art of drawing stairs offers a step-by-step solution to the challenge of perspective in architecture and interior Design sketches. This article delves into the complexities of this task, offering practical insights into how one can master it efficiently and effectively, breaking down the process into manageable components that are easy to understand and implement. There are three integral aspects this article will elaborate on to help you achieve this. The first is creating realistic stair treads and risers by using precision and careful measurements. The second focuses on rendering the details of stair railings and balusters, where we explore the use of lines and spaces to bring these elements into life. Lastly, we will dive into the techniques of shading and texturing stairs to add depth and dimension, providing a three-dimensional visual effect on your flat canvas. With practice and patience, these skills will empower you to craft captivating and realistic illustrations of stairs that exhibit depth and detail. To begin, let's delve into the details of creating realistic stair treads and risers.
Creating Realistic Stair Treads and Risers
Drawing is a multifaceted skill that encompasses a wide range of techniques, including mastering the art of creating realistic stair treads and risers. This skill underpins drawing stairs in various perspectives and designs, ensuring a high degree of verisimilitude and sophistication in your artwork, which is key to professional success. By perfecting how to depict stair treads and risers, artists can accurately render one of the basic architectural elements often encountered in different scenes, bringing your art to life with every perfectly-drawn riser and tread. To start with, it is crucial to understand the fundamental structure and styling of stair treads and risers. A 'riser' is the vertical provision between each step, while a 'tread' is the horizontal surface upon which we step. As you draw, related measures should be consistent to create a realistic repetition, while line depth and shading techniques can be used to convey perspective. Ensuring an understanding of their definition and function guides you in determining what to highlight and emphasize when you're sketching, hence building a firm foundation for portraying realistic stairs. Mapping out the treads and risers accurately is another approach to consider. This entails marking out each stair's dimensions, inculcating the right spatial relationship between each tread and riser. For a realistic depiction, bear in mind that wider treads and shorter risers generally compose more comfortable stairs. Using either 1 or 2 point perspectives, you can enhance the accuracy of your drawing. One point perspective is suitable for drawing stairs straight on, while two-point perspective is ideal for drawings where stairs are viewed at an angle. Meanwhile, mastering light and shadow application is pivotal to mimic the real world's sphericity. To capture the 3D form, you might want to shade the risers depending on how the light falls on them. Treads, depending on the material and light direction, may also cast a shadow on the riser below. Considering these features would result in an illusion of depth that makes the stairs appear believable and inviting the viewer into the artwork. Mastering the techniques of drawing stair treads and risers is a process that requires consistent practice and a discerning eye for detail. The more experience you gain sketching these features, the better you grasp how to present each component accurately. An effective way to sharpen these skills is by drawing from real life, observing how stair treads and risers interact with light, how they relate to each other, and how they inhabit space. This will help you explore the various expressions of stairs and significantly amplify your skills. In summary, the artistry involved in portraying realistic stair treads and risers underlines the complexities of drawing stairs successfully. It requires a proper understanding of these components, accurate mapping, light and shadow application, patience, and a good deal of practice. But with time and perseverance, your ability to capture the unique character of each set of stairs you encounter will become second nature. Become a master of this fundamental art technique and watch as your ability to create compelling and realistic architectural elements takes your artwork to the next level.
Rendering the Details of Stair Railings and Balusters
Stair Railings and Balusters are significant details often overlooked when drawing stairs, despite playing a pivotal role in the staircase's overall aesthetic and functionality. Mastering the techniques to render these elements accurately can intensify the visual perspective and authenticity of your drawing, giving an intricate, personalized touch to your staircase. First, let's understand what these elements are. Stair railings, also known as handrails, offer support as one ascends or descends the stairs. They are typically mounted onto the wall or on the balusters. Balusters, on the other hand, often referred to as stair sticks or spindles, are supporting elements that uphold the handrail, imparting safety and visual appeal to the stairs. In the world of art and design, the devil is in the details. Hence, getting the rendering of these features right is essential. Begin by sketching the stair railing and balusters with light, smooth strokes to establish their basic outline. Since stair railings are typically attached at a slight angle for ergonomic grip, make sure to represent this angle accurately. Balusters can be a bit tricky to portray, given their repetitive nature and varying designs. Grasping the principles of perspective will help you render the balusters accurately. They should gradually diminish in size as they recede in distance, adhering to the rules of one-point and two-point perspective. Incorporate this into your drawing to lend a sense of depth and realism. Next comes the detailing. Add in shades and shadows to give your stair railings and balusters a three-dimensional feel. Be attentive to the light source and ensure that the shading aligns with it. Consider the materials of the railings and balusters as well, as different materials reflect light differently, which can significantly affect the overall visual texture of your drawing. For instance, wooden balusters might absorb more light resulting in darker shadows, while iron balusters may reflect more light and thus have lighter shading. Lastly, do not forget to add in the tiny yet significant details – the grain of the wood or scratches on the metal, the ornate details of the balusters design, or the worn-out patches that indicate constant use. These subtle details can enhance the realistic feel of your staircase, thus adding life and personality to your drawing. Mastering these techniques of rendering stair railings and balusters can remarkably elevate the aesthetics of your staircase drawing. It demands a keen eye, a controlled hand, and a lot of practice; but once mastered, it can indeed give your drawings a professional, refined touch that stands out.
Shading and Texturing Stairs for Depth and Dimension
Mastering the Techniques of Drawing Stairs involves a multitude of methods, with one of the most important, and often challenging, aspects being the shading and texturing of stairs for depth and dimension. The process of accurately rendering these facets on a flat drawing surface requires a deep understanding of light, shadow, and perspective, turning an elementary stair drawing into a realistic three-dimensional portrayal. Implementing shading to stairs adds volumetric dimension and makes them appear more real and tangible. As one is gradually moving upwards or downwards, each stair block casts a shadow depending on the light's direction and the angle of observer's view. Typically, the part of the stair that is directly hit by light will be the lightest, while the areas in shadow will appear darker. The transition between the light and shadow areas on a stair block is called the "core shadow". Creating this core shadow with various gradients will provide the stair blocks a rounded feel, giving them a stark depth and three-dimensionalism on a flat drawing surface. Meanwhile, texturing the stairs on your drawing contributes a unique character and feel to it. The texture pertains to the rough or smooth feel of a surface that can be represented visually. For instance, wooden stairs will have a different texture compared to marble ones. The wooden stairs may exhibit a rougher look, showing grain lines and perhaps, some knots here and there. On the contrary, marble stairs will have a sleek and polished appearance, exhibiting veins and unique color patterns. Adding proper texture creates authentic material representation, making your stair drawing more engaging and accurate. Implementing shading and texturing in your stair drawings involves meticulous observation and the skillful application of these insights with your drawing tools. You may need to explore different shading techniques, such as cross-hatching, stippling, and blending, to achieve the desired effect. For texturing, you might have to test various methods using different lines, dots, and smudging techniques. It should be noted that the mastery of these techniques doesn't come instantly but requires continuous practice, experimenting, and refining your skills over time. In conclusion, to give your stair drawings a depth and dimension, shading and texturing are foundational techniques that should not be overlooked. They don't just make your stairs appear more realistic, but also add a captivating level of detail that piques viewer's interest and brings your artistry to another level. Mastering these skills will definitely enhance your overall drawing competence and take you a step further in your artistic journey.
Practicing and Refining Your Skills in Drawing Stairs
Drawing stairs is quite challenging, but with dedicated practices and refining your skills, one can master this art with finesse. The ability to illustrate stairs in various perspectives or styles adds depth and realism to your architectural sketches or landscape illustrations. This article delves into three key areas - improving measurement and proportion skills, practical exercises in drawing different types of stairs and their variations, and the importance of feedback and refinement in mastering this skill. Initially, paramount importance is placed on honing your measurement and proportion skills, as they form the foundation in drawing any object, including stairs. Next, we will leap into an in-depth exploration of drawing various types of stairs, guiding you through several exercises to practice and perfect. Then, getting constructive feedback is a significant part of the learning process. It helps in identifying weaknesses and refining your techniques accordingly. So, embark on this artistic voyage to master the skill of drawing stairs. Let's begin with the first step and delve into exercises designed to improve your measurement and proportion skills.
Exercises to Improve Your Measurement and Proportion Skills
Mastering the skill of drawing stairs requires a comprehensive understanding of measurement and proportion, and there are exercises you can undertake to enhance these skills. Becoming proficient in creating accurate measurements and proportions not only contributes to the perfect staircase representation but also lends a hand in creating overall harmony and balance in your art. First off, one simple yet effective exercise to enhance your measurement and proportion skills would involve dividing line segments into equal parts. Draw a straight line and mark its end points, then try to evenly divide the segment into multiple sections. Challenge yourself by increasing the number of sections you intend on dividing the segment into. This exercise may seem plain, but it eventually sharpens your intuition for figuring out distances in your drawing. Drawing basic geometric shapes is another helpful exercise. Start with shapes like circles, squares, and triangles. Progress into more complex shapes as you gain comfort. With time, this practice will assist you in better visualizing the basic structure and proportions of more complex subjects like stairs. Understanding the concept of scale is crucial in drawing stairs and can be improved by drawing the same subject at different sizes. Try to pick an object and draw it in various sizes, keeping the proportions intact. This activity will train your eye to maintain consistency in proportions even when the overall size changes. Another exercising involves horizontal and vertical alignment. In a sketch, draw different objects and find their horizontal and vertical alignments. This skill particularly comes in handy when drawing stairs, especially when you have a vanishing point or when aligning the different elements of the staircase. Perspective drawing is also crucial when drawing stairs. Draw a horizon line and train yourself to draw shapes that are above, on, and below the line. Practice one, two, and three-point perspectives and how things closer to the point appear smaller. Drawing stairs from different angles is the most related exercise to your goal. Start by drawing a basic staircase in front view, side view, and from an angle. Make sure to consider the aspects of height, width, depth, and the number of stairs. In conclusion, these exercises focus on honing your measurement and proportion skills by challenging your spatial awareness and comprehension of scale. Incorporate them into your regular practice sessions to enhance your overall skills and specifically improve your ability to draw stairs. Keep in mind that consistency is key, and with time, your drawing skills, including creating a realistic and proportionate set of stairs, will improve significantly. Mastery happens gradually, so with every squiggly line and every tiny circle, remember that you are a step closer to refining your art skills. Practice makes perfect after all!
Practice Drawing Different Types of Stairs and Their Variations
A crucial facet in refining your skills in drawing stairs is to practice sketching various types of stairs and their variations constantly. Diverse styles of stairs provide an artist with a plethora of creative opportunities to explore depth, perspective, and shading. For instance, the straight stair is the most common type. These are uncomplicated and relatively easy to draw as their steps are all in line with each other. Spiral stairs, with their curved lines and ornate balustrades, pose a significant challenge and are excellent for practicing how shadows change with the steps' curved position and rotation. L-shaped or quarter-turn stairs give an excellent opportunity to work on the viewer's perspective and understanding how to portray depth accurately. U-shaped or half-turn stairs allow a different viewpoint, enabling the artist to focus on drawing descending or ascending perspective lines. Next, you have the winder stairs, whose triangular or trapezoid shape on the turn differs from regular stairs and also complicates the perspective. Then there are bifurcated stairs, characterized by a broader flight at the bottom, splitting into two narrower flights at a landing. These grand staircases present the added challenge of symmetrical drawing while dealing with multiple perspectives. Moreover, each type of stairs has its sub-varieties, such as the floating stairs, often seen in modern architecture, which present a unique challenge with their visible undersides. Or the dog legged stairs, similar to the L-shaped but having two flights parallel to each other, adding further complexity. Lastly, there's the spine beam stairs that seem to defy gravity and offer an exciting twist for the artist to capture. Bearing in mind the intricacies of architectural styles, one must also consider the material of the stairs, such as wood, concrete, glass, or metal, requiring different shading and texturing techniques. For instance, depicting a carpeted stair will involve drawing and shading the carpet's texture, and a glass stairway will deal more with reflection and transparency. Practicing these various stair types and their variations will enhance your understanding of perspective and improve your ability to draw complex structures. It allows for practicing and refining skills such as depth perception, shading variations, and the accurate portrayal of different materials. This practice also catapults your overall understanding of space, form, and design elements that are integral to drawing and art in general. The mastery achieved in drawing stairs will enable better rendering of architectural elements, considerably upgrading your overall drawing ability.
Getting Feedback and Refining Your Techniques
The foundation of rapid progress and polished skills not only lies in consistent practice, but also on the ability to assimilate feedback and refine one's technique. This principle holds true when it comes to improving your skills in drawing stairs. Every artist, regardless of their level of experience, should be open to constructive criticism and advice. This is because different perspectives can provide unique insights that have the potential to elevate the quality of the artwork and also stimulate creativity. Provided the feedback is objective and constructive, it allows the artist to see beyond their perspective and challenge their way of doing things. If, for instance, you have been using a particular technique to present depth and shadows on your stairs, feedback can help you explore other techniques that could render your drawing in a more realistic or dynamic perspective. Evaluating the feedback received and applying it does not mean completely deviating from one's distinctive style, but rather, integrating new ideas in a way that complements and enhances the artist’s original style. One practical method of receiving feedback is through consultation with other artists or peers, who can impart their knowledge of different techniques and provide a fresh perspective. Additionally, online platforms and drawing communities can be a rich source of feedback and inspiration. They offer a global audience that can leave comments and advice based on their diverse experiences and viewpoints. It's essential to remember that refining your techniques is a gradual process that requires patience and resilience. It's about making small modifications each time based on the feedback received and observing how it influences the final outcome. When refining your technique in drawing stairs, you might want to focus on one element at a time— such as the lines, the angles, the shading, or the perspective. This allows you to gain deep mastery of each element before moving on to the next. It's also beneficial to periodically review your past drawings to see how much advancement you have made, which can be a great morale booster and reaffirmation of your progress. Practice alone might lead to improvement, but practice combined with continual feedback and refinements based on that feedback can lead to excellence and a marked difference in your drawing ability. Cultivating an attitude of learning and growth is indispensable for this process. This means accepting that there's always room for improvement, even if you have been drawing for many years and feel that you have achieved a high degree of proficiency. Ultimately, the journey of drawing is about constant evolution, with each feedback and refinement leading to a higher level of mastery. Embrace the process, persist in your practice, and continue refining your skills, and in time, you'll be drawing stairs with exactitude and flair.