How To Clean Water Softener
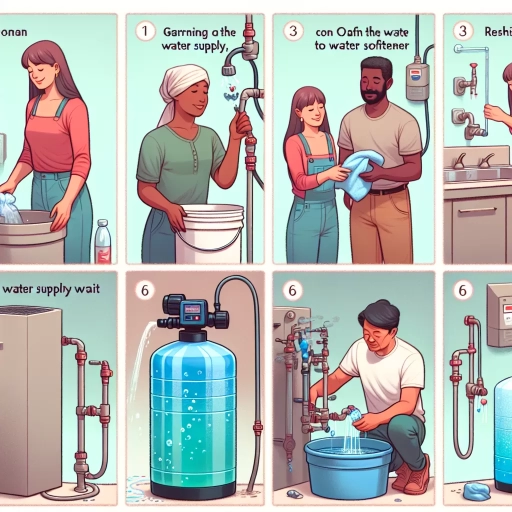
Here is the introduction paragraph: Cleaning a water softener is an essential maintenance task that ensures the system continues to function effectively and efficiently. Over time, mineral buildup and debris can accumulate in the system, reducing its ability to remove hard minerals from the water. To keep your water softener in top condition, it's crucial to clean it regularly. In this article, we'll guide you through the process of cleaning your water softener, covering pre-cleaning steps, the actual cleaning process, and post-cleaning maintenance. Before you start cleaning, it's essential to take some preliminary steps to prepare your system. Let's begin with the pre-cleaning steps.
Pre-Cleaning Steps
Before starting any cleaning process, it's essential to take some pre-cleaning steps to ensure a safe and effective cleaning experience. These steps are crucial in preventing any accidents, damage, or injuries. In this article, we will discuss three critical pre-cleaning steps that you should follow before cleaning your home or office. Firstly, shutting off the water supply is vital to prevent any water damage or flooding. Secondly, disconnecting the power source is necessary to avoid any electrical shocks or accidents. Lastly, draining the system is essential to remove any dirt, debris, or contaminants that may be present. By following these pre-cleaning steps, you can ensure a safe and successful cleaning process. Let's start with the first step, shutting off the water supply.
Shut Off the Water Supply
To clean your water softener effectively, it's essential to shut off the water supply before starting the process. Locate the shut-off valves that control the water flow to the softener, usually found near the water supply lines or at the back of the unit. Turn the valves clockwise to shut off the water supply completely. Verify that the water supply is indeed off by checking the water flow at the softener's inlet and outlet. If you're unsure about the location of the shut-off valves or how to turn them off, consult your water softener's user manual or contact a professional plumber for assistance. Shutting off the water supply is crucial to prevent any water from flowing into the softener during the cleaning process, which could interfere with the cleaning agents or cause damage to the unit. By shutting off the water supply, you'll ensure a safe and effective cleaning process, allowing you to remove any built-up minerals, debris, and contaminants from the softener.
Disconnect the Power Source
When it comes to cleaning your water softener, safety should always be your top priority. Before you start the cleaning process, it's essential to disconnect the power source to prevent any accidental start-ups or electrical shocks. Locate the power cord and unplug it from the electrical outlet. If your water softener is hardwired, switch off the circuit breaker or remove the fuse that controls the power supply. Verify that the system is completely shut down and there are no lights or sounds indicating that it's still operational. Additionally, turn off the water supply valves to prevent any water from flowing into the system while you're cleaning it. By disconnecting the power source and shutting off the water supply, you'll be able to clean your water softener safely and efficiently.
Drain the System
Drain the system by opening the bypass valve, which is usually located near the water softener. This valve allows you to divert water flow around the softener, effectively shutting it off. Next, locate the drain valve, typically found at the bottom of the softener tank, and open it to release any remaining water. You may need to use a wrench or pliers to loosen any corrosion or mineral buildup that may be obstructing the valve. As the water drains, you may hear a hissing sound or see air escaping from the valve, which is a normal part of the process. Once the water has stopped flowing, close the drain valve and proceed to the next step in the cleaning process. It's essential to drain the system thoroughly to prevent any residual water from interfering with the cleaning agents or causing mineral buildup during the cleaning process.
Cleaning the Water Softener
Cleaning the water softener is an essential maintenance task that ensures the system continues to function efficiently and effectively. Over time, the resin tank can become clogged with dirt, debris, and mineral buildup, reducing the system's ability to remove hard minerals from the water. To clean the water softener, it's necessary to remove and clean the resin tank, soak the resin in a cleaning solution, and reassemble and recharge the system. By following these steps, homeowners can restore their water softener to its optimal performance and enjoy soft, clean water throughout their home. To begin the cleaning process, the first step is to remove and clean the resin tank, which will be discussed in the next section.
Remove and Clean the Resin Tank
Cleaning the resin tank is a crucial step in maintaining your water softener's efficiency and effectiveness. To remove and clean the resin tank, start by shutting off the water supply to the softener and disconnecting the electrical power. Next, locate the resin tank and remove any clips or straps holding it in place. Carefully lift the tank out of the softener and set it aside. If the tank is stuck, do not force it, as this can damage the softener or the tank. Instead, use a gentle rocking motion to loosen it. Once the tank is removed, inspect it for any debris or sediment that may have accumulated. Use a soft-bristled brush or a cleaning cloth to gently scrub away any dirt or grime. Rinse the tank thoroughly with warm water to remove any remaining debris. If the tank is heavily clogged, you may need to soak it in a mixture of warm water and vinegar for several hours before cleaning. After cleaning the tank, reassemble the softener and reconnect the electrical power. Turn on the water supply and check for any leaks. It's also a good idea to run a few cycles of the softener to ensure it's working properly. Regular cleaning of the resin tank can help extend the life of your water softener and ensure it continues to provide soft, clean water for your home.
Soak the Resin in a Cleaning Solution
Soak the Resin in a Cleaning Solution. After removing the resin from the tank, soak it in a cleaning solution to remove any remaining dirt, debris, and contaminants. Mix a solution of 1 cup of household bleach with 1 gallon of water, and submerge the resin in the solution. Let it soak for 2-3 hours or overnight, depending on the level of contamination. This step is crucial in restoring the resin's effectiveness and ensuring the water softener functions properly. The cleaning solution will help break down and remove any mineral deposits, dirt, and debris that may have accumulated on the resin, allowing it to regenerate and soften water efficiently. After soaking, rinse the resin thoroughly with clean water to remove any remaining cleaning solution and debris. This step is essential in preparing the resin for reinstallation and ensuring the water softener operates at its best.
Reassemble and Recharge the System
Reassembling and recharging the system is a crucial step in the water softener cleaning process. After cleaning the resin tank and other components, it's essential to reassemble the system correctly to ensure it functions properly. Start by reconnecting the resin tank to the brine tank and the control valve. Make sure all connections are secure and tightened properly to prevent leaks. Next, recharge the system by adding the recommended amount of salt or potassium chloride to the brine tank. The type and amount of recharge material will depend on the type of water softener you have, so be sure to consult your user manual for specific instructions. Once the recharge material is added, allow the system to recharge for the recommended amount of time, usually several hours or overnight. During this time, the system will regenerate the resin and prepare it for use. After the recharging process is complete, turn on the water supply and check the system for leaks and proper function. It's also a good idea to run a few gallons of water through the system to flush out any debris or sediment that may have accumulated during the cleaning process. By following these steps, you can ensure your water softener is properly reassembled and recharged, and ready to provide soft, clean water for your home.
Post-Cleaning Maintenance
After a thorough cleaning, it's essential to perform post-cleaning maintenance to ensure the longevity and efficiency of your equipment and systems. This involves a series of checks and tasks that help prevent damage, maintain water quality, and ensure everything runs smoothly. To start, it's crucial to check for leaks and damage, as even the smallest issue can lead to significant problems down the line. Additionally, testing the water quality is vital to ensure it's safe for use and free from contaminants. Finally, performing regular maintenance schedules helps prevent unexpected breakdowns and extends the lifespan of your equipment. By incorporating these tasks into your post-cleaning routine, you can rest assured that your systems are running at their best. So, let's dive into the first step: checking for leaks and damage.
Check for Leaks and Damage
After cleaning your water softener, it's essential to check for leaks and damage to ensure the system continues to function properly. Inspect the resin tank, brine tank, and all connections for any signs of damage or wear. Check the O-rings and gaskets for any signs of deterioration or cracks, and replace them if necessary. Also, inspect the pipes and fittings for any signs of corrosion or mineral buildup, and clean or replace them as needed. Additionally, check the system's valves and controls to ensure they are functioning correctly and not leaking. If you find any leaks or damage, address them promptly to prevent further damage and maintain the system's efficiency. Regularly checking for leaks and damage can help extend the lifespan of your water softener and ensure it continues to provide soft water for your household.
Test the Water Quality
After cleaning your water softener, it's essential to test the water quality to ensure it's safe for consumption and meets your desired standards. Testing the water quality will help you determine if the cleaning process was effective in removing contaminants and minerals that can affect the taste, odor, and overall quality of the water. You can purchase a water testing kit or hire a professional to conduct the test. The test should include parameters such as pH levels, total dissolved solids, hardness, and presence of bacteria, viruses, and other microorganisms. If the test results show that the water quality is still not up to par, you may need to repeat the cleaning process or consider replacing the water softener. Regular testing of water quality is crucial to maintain the effectiveness of the water softener and ensure the water is safe for drinking, cooking, and other household uses.
Perform Regular Maintenance Schedules
Regular maintenance schedules are crucial to ensure the optimal performance and longevity of your water softener system. By performing routine checks and maintenance tasks, you can prevent issues such as clogged valves, worn-out parts, and reduced water flow. It is recommended to check the system's salt levels, brine tank, and drain line every 1-3 months, depending on usage and water hardness. Additionally, inspect the system's valves, pipes, and fittings for signs of corrosion, mineral buildup, or damage. Every 6-12 months, clean the brine tank and drain line, and replace the resin bed if necessary. Furthermore, consider scheduling annual professional maintenance to inspect and clean the system's internal components, such as the control valve and distributor. By following a regular maintenance schedule, you can ensure your water softener system runs efficiently, effectively, and safely, providing you with soft, clean water for years to come.