How To Make A Lever In Minecraft
In the world of Minecraft, levers are an essential component for creating complex contraptions and circuits. They allow players to control the flow of power and activate various mechanisms, making them a crucial element in any redstone build. However, for those new to Minecraft or unfamiliar with redstone, creating and using levers can seem daunting. In this article, we will break down the process of making a lever in Minecraft, starting with the basics of how levers work and their role in redstone circuits. We will also cover the materials and crafting requirements necessary to create a lever, as well as provide guidance on how to use and place them effectively in your builds. By understanding the fundamentals of levers, gathering the necessary materials, and learning how to use them, you'll be well on your way to creating complex and innovative redstone contraptions. Let's start by understanding the basics of levers in Minecraft.
Understanding the Basics of Levers in Minecraft
In Minecraft, levers are a fundamental component of redstone contraptions, allowing players to control and manipulate various aspects of their game world. To fully utilize levers, it's essential to understand their basics, including what they are, how they work, and their importance in the game. In this article, we'll delve into the world of levers, starting with the basics of what a lever is in Minecraft. We'll explore how levers function, including their role in redstone circuits and how they can be used to create complex contraptions. Additionally, we'll discuss the significance of levers in Minecraft, highlighting their uses and benefits. By grasping these fundamental concepts, players can unlock the full potential of levers and take their Minecraft experience to the next level. So, let's begin by examining the question: what is a lever in Minecraft?
What is a Lever in Minecraft?
A lever in Minecraft is a redstone component that allows players to control the flow of power in their contraptions and circuits. It is a simple, yet versatile tool that can be used to activate or deactivate various redstone devices, such as doors, pistons, and dispensers. When a lever is flipped, it changes its state from on to off or vice versa, sending a redstone signal to any connected devices. This signal can then be used to trigger a wide range of actions, from opening doors to activating complex machines. Levers can be placed on walls, floors, or ceilings, and can be connected to other redstone components, such as redstone dust, repeaters, and comparators, to create complex circuits and contraptions. Overall, levers are an essential component in Minecraft's redstone system, allowing players to create intricate and interactive devices that can enhance their gameplay experience.
How Do Levers Work in Minecraft?
In Minecraft, levers are a type of redstone component that allow players to control the flow of power in their contraptions. A lever is essentially a switch that can be flipped on or off, enabling or disabling the flow of power to adjacent blocks. When a lever is flipped, it changes its state from on to off or vice versa, and this change in state is what allows players to control the behavior of their redstone creations. Levers can be used to power a wide range of devices, including doors, pistons, and dispensers, making them a fundamental component of any complex redstone circuit. By understanding how levers work, players can create intricate and sophisticated contraptions that can be controlled with ease, adding a new level of depth and complexity to their Minecraft worlds.
Why Do You Need Levers in Minecraft?
You need levers in Minecraft for several reasons. Firstly, levers are used to control redstone contraptions, which are essential for creating complex circuits and machines. By using levers, you can turn on and off redstone devices, such as lights, doors, and pistons, allowing you to create interactive and automated systems. Secondly, levers are necessary for creating hidden doors and secret passages, which can add an extra layer of excitement and adventure to your Minecraft world. Levers can be used to trigger hidden doors, revealing secret rooms or areas that would otherwise be inaccessible. Additionally, levers can be used to create traps and puzzles, which can challenge other players or mobs, adding a fun and interactive element to your game. Finally, levers are also used in redstone music and art, allowing you to create complex and beautiful designs that can be controlled and manipulated using levers. Overall, levers are a crucial component in Minecraft, enabling you to create complex and interactive systems, hidden doors, traps, and puzzles, and even art and music.
Materials and Crafting Requirements for Levers
Crafting a lever in Minecraft is a straightforward process that requires specific materials. To get started, you'll need to gather the necessary resources, which we'll outline in the section "What Materials Do You Need to Craft a Lever?" below. Once you have the required materials, you can follow the simple steps outlined in "How to Craft a Lever in Minecraft?" to create your lever. Additionally, if you're looking for alternative options, we'll explore "Alternative Materials for Crafting Levers" to give you more flexibility in your crafting process. By understanding the materials and crafting requirements, you'll be able to create levers with ease and enhance your Minecraft gameplay. So, let's dive into the specifics of what materials you'll need to craft a lever.
What Materials Do You Need to Craft a Lever?
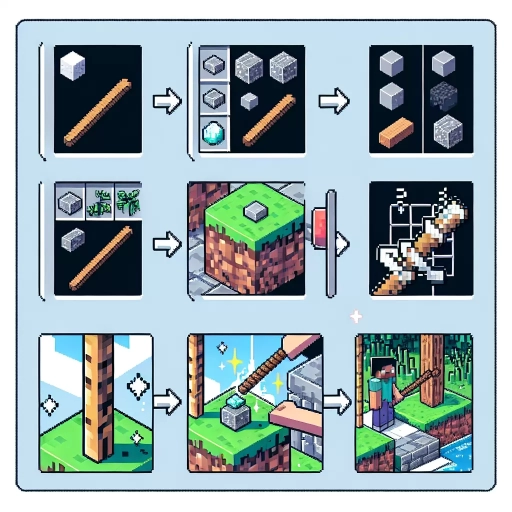
To craft a lever in Minecraft, you will need a Cobblestone or Stone block and a Stick. These two materials are the essential components required to create a lever. The Cobblestone or Stone block serves as the base of the lever, providing the structural foundation, while the Stick acts as the handle, allowing players to activate the lever. You can obtain Cobblestone or Stone blocks by mining them from the game's terrain, and Sticks can be crafted from Wooden Planks, which are derived from Trees. With these two materials in hand, you can proceed to craft a lever using the game's crafting grid.
How to Craft a Lever in Minecraft?
Here is the paragraphy: To craft a lever in Minecraft, you will need to gather the required materials and follow a simple crafting process. First, you will need to obtain 3 Cobblestone blocks, which can be found by mining stone or by crafting them from stone blocks. Once you have the Cobblestone blocks, open your crafting table and arrange the blocks in a diagonal pattern, with one block in the top-left corner, one in the middle, and one in the bottom-right corner. This will create a lever that you can use to activate redstone contraptions, open doors, and more. The lever is a versatile tool that can be used in a variety of ways, and it's a great addition to any Minecraft project. By following these simple steps, you can craft a lever and start using it to enhance your Minecraft experience.
Alternative Materials for Crafting Levers
While traditional materials like wood, stone, and metal are commonly used to craft levers in Minecraft, there are alternative materials that can be used to create functional and unique levers. For instance, players can use bamboo, which is a highly renewable resource, to craft levers that are not only eco-friendly but also have a distinct aesthetic. Another option is to use glowstone, which can create a lever that emits a soft, ethereal glow, adding a touch of mysticism to any build. Players can also experiment with using obsidian, which can create a sleek and modern-looking lever that adds a touch of sophistication to any design. Additionally, using mossy stone or mossy cobblestone can create a lever that blends seamlessly into natural environments, making it perfect for builds that aim to blend into the surrounding landscape. These alternative materials can add a new level of creativity and diversity to lever crafting, allowing players to express their unique style and vision.
Using and Placing Levers in Minecraft
In Minecraft, levers are a crucial component of redstone contraptions, allowing players to control and activate various devices. To effectively utilize levers, it's essential to understand how to place them, use them to activate redstone devices, and strategically position them for maximum efficiency. In this article, we'll delve into the world of levers, exploring the basics of placement, activation, and optimization. We'll start by examining the fundamental process of placing a lever in Minecraft, including the necessary materials and steps involved. By mastering the art of lever placement, you'll be well on your way to creating complex and innovative redstone contraptions. So, let's begin by learning how to place a lever in Minecraft.
How to Place a Lever in Minecraft?
To place a lever in Minecraft, start by equipping the lever in your hotbar. Then, find a suitable location for the lever, such as a wall or a block. Next, face the block you want to attach the lever to and right-click on it. The lever will be placed on the block, and you can adjust its orientation by right-clicking on it again. You can also place levers on the side of blocks, such as on a wall or a fence post, by right-clicking on the side of the block. Additionally, you can place levers on the top of blocks, such as on a table or a chest, by right-clicking on the top of the block. Once the lever is placed, you can use it to control redstone contraptions, such as opening doors or activating traps. You can also use levers to control other redstone components, such as pistons, dispensers, and note blocks. By placing levers strategically, you can create complex redstone circuits and automate various tasks in your Minecraft world.
How to Use a Lever to Activate Redstone Devices?
To use a lever to activate Redstone devices, start by placing the lever on a solid block, such as stone or dirt, adjacent to the device you want to control. Make sure the lever is facing the direction you want the signal to travel. Next, right-click on the lever to toggle it on or off. When the lever is in the "on" position, it will send a Redstone signal to the adjacent device, activating it. You can use levers to control a variety of Redstone devices, including doors, gates, and pistons. To connect the lever to the device, place Redstone dust or a Redstone torch on the block adjacent to the lever, and then extend the dust or torch to the device. This will create a Redstone circuit that allows the lever to control the device. You can also use levers in combination with other Redstone components, such as buttons and pressure plates, to create more complex circuits. By using levers to activate Redstone devices, you can create a wide range of automated systems and contraptions in Minecraft.
Tips for Efficient Lever Placement in Minecraft
When it comes to efficient lever placement in Minecraft, there are several tips to keep in mind. First, consider the layout of your contraption or redstone circuit. Try to place levers in a way that minimizes the amount of redstone dust or repeaters needed to connect them to the rest of the circuit. This will not only save resources but also reduce the overall complexity of the design. Another tip is to use levers to control multiple components at once, rather than having separate levers for each one. This can be achieved by using a single lever to power a series of pistons or doors, for example. Additionally, consider using levers in combination with other redstone components, such as buttons or pressure plates, to create more complex and efficient circuits. Finally, don't be afraid to experiment and try out different lever placements to see what works best for your specific design. With a little practice and patience, you can master the art of efficient lever placement and take your Minecraft creations to the next level.