How To Insert Text Box In Word
Here is the introduction paragraph: When working with Microsoft Word, adding a text box can be a great way to enhance the visual appeal and organization of your document. Whether you're creating a brochure, flyer, or report, text boxes can help you draw attention to important information, add visual interest, and break up large blocks of text. But before you can start using text boxes effectively, it's essential to understand the basics of how they work in Word. In this article, we'll take you through the process of inserting a text box in Word, from understanding the basics of text boxes to customizing and formatting them to suit your needs. First, let's start with the fundamentals - what are text boxes, and how do they work in Word? This will lay the groundwork for the rest of the article, which will cover the steps for inserting a text box and customizing its appearance. By the end of this article, you'll be able to confidently use text boxes to elevate your Word documents. Let's begin by understanding the basics of text boxes in Word.
Understanding the Basics of Text Boxes in Word
When working with Microsoft Word, it's essential to understand the basics of text boxes to enhance the visual appeal and organization of your documents. A text box is a powerful tool that allows you to add text, images, and other elements to your document in a flexible and customizable way. In this article, we'll delve into the world of text boxes in Word, exploring what they are, the different types available, and why you should use them in your documents. By the end of this article, you'll be equipped with the knowledge to create professional-looking documents that effectively communicate your message. So, let's start by answering the fundamental question: What is a Text Box in Word?
What is a Text Box in Word?
A text box in Word is a graphical element that allows you to insert text into a document in a separate container, which can be moved, resized, and formatted independently of the surrounding text. It is a useful feature for adding captions, labels, or other types of text that need to be displayed prominently or in a specific location on the page. Text boxes can be used to create a variety of visual effects, such as adding a quote or a call-out to a document, highlighting important information, or creating a sidebar or a pull quote. They can also be used to add text to images, charts, or other graphics, making it easier to annotate and explain complex information. In Word, text boxes can be created using the "Text Box" tool in the "Insert" tab, and can be customized using a range of formatting options, including font, color, size, and alignment. Overall, text boxes are a powerful tool for adding visual interest and clarity to documents, and can be used in a wide range of contexts, from business reports and academic papers to newsletters and marketing materials.
Types of Text Boxes Available in Word
In Word, there are several types of text boxes available to suit different needs and purposes. The most common type is the **Simple Text Box**, which is a basic rectangular box that can be used to add text to a document. Another type is the **Vertical Text Box**, which is ideal for adding text that needs to be displayed vertically, such as in a sidebar or a narrow column. The **Linked Text Box** allows users to link multiple text boxes together, creating a continuous flow of text that can be easily edited and updated. The **Wrapped Text Box** is designed to wrap text around other objects, such as images or shapes, creating a more dynamic and visually appealing layout. Additionally, Word also offers **SmartArt Text Boxes**, which are pre-designed text boxes that can be used to create professional-looking diagrams, flowcharts, and other visual elements. Furthermore, users can also create **Custom Text Boxes** by drawing their own shapes and adding text to them, providing endless possibilities for creative expression. Each type of text box has its own unique features and benefits, and by understanding the different options available, users can effectively use text boxes to enhance the design and functionality of their Word documents.
Why Use Text Boxes in Word Documents?
Using text boxes in Word documents can greatly enhance the visual appeal and organization of your content. Text boxes allow you to add text to your document in a way that is separate from the main body of text, making it easier to highlight important information, create visual interest, and add emphasis to specific points. By using text boxes, you can also improve the readability of your document by breaking up large blocks of text and creating a more dynamic layout. Additionally, text boxes can be used to add captions to images, create pull quotes, and even build custom graphics and illustrations. With the ability to customize the size, shape, color, and font of text boxes, you can tailor them to fit your specific needs and style. Overall, incorporating text boxes into your Word documents can help you create more engaging, informative, and professional-looking content.
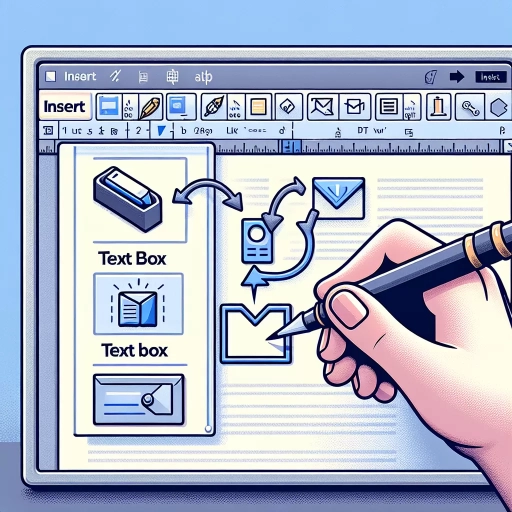
Inserting a Text Box in Word
When working with Microsoft Word, there are several ways to insert a text box into your document. A text box is a useful tool for adding blocks of text that need to be separated from the rest of the content, such as captions, sidebars, or pull quotes. In this article, we will explore three methods for inserting a text box in Word: using the Insert tab, creating a text box from a shape, and adding a text box from the Drawing Tools tab. Each of these methods offers a unique set of features and benefits, allowing you to customize your text box to suit your needs. By the end of this article, you will be able to choose the method that works best for you and insert a text box with ease. Let's start by exploring the first method: using the Insert tab to add a text box.
Using the Insert Tab to Add a Text Box
Using the Insert Tab to Add a Text Box is a straightforward process that allows you to add a text box to your Word document. To start, click on the "Insert" tab in the ribbon at the top of the screen. This tab provides various options for adding different elements to your document, including text boxes. Once you have clicked on the "Insert" tab, look for the "Text" group, which is usually located on the right-hand side of the ribbon. Within this group, you will see a button labeled "Text Box." Click on this button to open the "Text Box" gallery, which offers a range of pre-designed text box styles and layouts. You can browse through the gallery and select a style that suits your needs. Alternatively, you can click on the "Draw Text Box" option, which allows you to create a custom text box from scratch. Once you have selected a text box style or created a custom one, click and drag the mouse to draw the text box on your document. You can then type your text into the box and format it as needed. The Insert Tab provides a quick and easy way to add a text box to your Word document, giving you more flexibility and creativity in your document design.
Creating a Text Box from a Shape
To create a text box from a shape in Word, start by selecting the shape you want to use as a text box. You can choose from a variety of shapes, such as rectangles, circles, or triangles, depending on the design you want to achieve. Once you've selected the shape, right-click on it and choose "Add Text" from the context menu. This will convert the shape into a text box, allowing you to type text directly into it. Alternatively, you can also use the "Text Box" tool in the "Insert" tab to create a text box from a shape. Simply select the shape, go to the "Insert" tab, and click on the "Text Box" button. Then, choose "Draw Text Box" and select the shape you want to use. The shape will be converted into a text box, and you can start typing your text. You can also customize the text box by changing its size, color, and font style to match your document's design. Additionally, you can move the text box around the page by dragging it to the desired location. By creating a text box from a shape, you can add visual interest to your document and make your text stand out.
Adding a Text Box from the Drawing Tools Tab
To add a text box from the Drawing Tools tab, start by clicking on the "Insert" tab in the ribbon and then select the "Text Box" option from the "Text" group. This will open the "Text Box" gallery, where you can choose from a variety of pre-designed text box styles. Select the style that suits your needs, and a text box will be inserted into your document. Alternatively, you can also click on the "Draw Text Box" option, which allows you to create a text box from scratch by dragging your mouse to define the size and shape of the box. Once the text box is inserted, you can type your text inside it, and use the various tools and options available in the Drawing Tools tab to customize its appearance, such as changing the font, color, and alignment. You can also resize the text box by dragging its borders or corners, and move it around your document by clicking and dragging it. Additionally, you can use the "Wrap Text" option to control how the text wraps around the text box, and the "Send to Back" or "Bring to Front" options to adjust the text box's position in relation to other objects in your document. By using the Drawing Tools tab, you can add a professional touch to your text boxes and make them stand out in your Word document.
Customizing and Formatting Text Boxes in Word
When working with text boxes in Microsoft Word, customization and formatting are key to creating visually appealing and effective documents. One of the primary ways to customize a text box is by changing its size and position on the page. This allows you to tailor the layout of your document to fit your specific needs. Additionally, applying styles and effects to a text box can enhance its appearance and draw attention to important information. Furthermore, editing the text within a text box is crucial to ensuring that the content is accurate and engaging. By mastering these techniques, you can take your Word documents to the next level. In this article, we will explore these customization options in more detail, starting with the basics of changing the size and position of a text box.
Changing the Size and Position of a Text Box
To change the size and position of a text box in Word, you can use the various tools and options available in the program. To resize a text box, select it and then drag one of the handles, which are the small squares located at the corners and sides of the text box. You can also use the "Size" group in the "Format" tab to enter specific dimensions for the text box. Additionally, you can use the "Scale" option to proportionally resize the text box. To move a text box, select it and then drag it to the desired location. You can also use the "Align" options in the "Format" tab to align the text box with other objects on the page. Furthermore, you can use the "Wrap Text" option to control how text wraps around the text box. By using these tools and options, you can easily change the size and position of a text box in Word to suit your needs.
Applying Styles and Effects to a Text Box
Applying styles and effects to a text box in Word can elevate the visual appeal of your document and draw attention to important information. To apply a style to a text box, select the text box and navigate to the "Text Box Tools" tab in the ribbon. In the "Styles" group, click on the "Quick Styles" dropdown menu and choose from a variety of pre-designed styles, such as "Subtle Emphasis" or "Intense Emphasis." You can also create your own custom style by clicking on the "New Style" button and defining the font, color, and other attributes. Additionally, you can apply effects to a text box, such as shadows, reflections, or 3D effects, by clicking on the "Effects" button in the "Text Box Tools" tab. This allows you to add depth and dimension to your text box, making it stand out from the rest of the document. Furthermore, you can also use the "Shape Effects" feature to apply effects to the text box itself, such as a glow or a bevel. By combining styles and effects, you can create a unique and eye-catching text box that enhances the overall design of your document.
Editing the Text Within a Text Box
When editing the text within a text box in Word, you have a range of options to customize the content to suit your needs. To start editing, simply click inside the text box to activate it, and the cursor will appear, allowing you to type or paste text. You can format the text using the tools in the Home tab, such as changing the font, size, color, and alignment. Additionally, you can use the Mini Toolbar that appears when you select text within the text box, providing quick access to common formatting options. If you need to make more extensive changes, you can also use the Font and Paragraph groups in the Home tab to adjust settings such as line spacing, indentation, and text effects. Furthermore, you can use the Text Box Tools tab, which appears when a text box is selected, to access additional formatting options, such as text wrapping, margins, and column settings. By using these tools, you can refine the text within your text box to achieve the desired look and feel for your document.