How To Fix Christmas Lights Half Out
The holiday season is upon us, and with it comes the joy of decorating our homes with festive lights. However, nothing can dampen the holiday spirit like a string of Christmas lights that are half out. But fear not, dear reader, for we have got you covered. In this article, we will guide you through the process of fixing those pesky lights and getting your holiday display back to its former glory. To start, it's essential to understand that preparation is key when it comes to fixing Christmas lights. Before you begin, make sure you have all the necessary tools and materials at hand. This will save you time and frustration in the long run. We will explore this idea further in the next section, Preparation is Key, where we will discuss the importance of having the right equipment and a clear plan of action.
Preparation is Key
Preparation is key to a successful and stress-free holiday decorating experience. Before you start hanging your Christmas lights, it's essential to take a few steps to ensure everything goes smoothly. First, you'll want to check the lights before hanging them to avoid any last-minute surprises. Additionally, gathering all the necessary tools and materials beforehand will save you time and frustration. It's also crucial to identify the type of Christmas lights you have, as this will determine the best way to hang them. By taking these simple steps, you'll be well on your way to creating a beautiful and festive holiday display. So, let's start with the first step: Check the Lights Before Hanging.
Check the Lights Before Hanging
Before hanging your Christmas lights, it's essential to check them for any damage or issues to ensure they're working properly and safely. Start by plugging in the lights and checking for any blown fuses or broken bulbs. If you find any, replace them with new ones to avoid any electrical hazards. Next, inspect the cords and plugs for any signs of wear, fraying, or damage. If you notice any damage, it's best to replace the entire string of lights to prevent any accidents. Additionally, check the lights' certification and make sure they're designed for outdoor or indoor use, depending on where you plan to hang them. It's also a good idea to check the manufacturer's instructions for any specific recommendations or guidelines for use. By taking the time to check your lights before hanging them, you can ensure a safe and enjoyable holiday season.
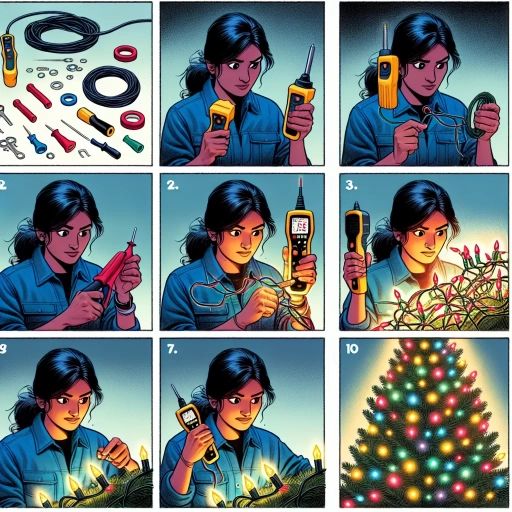
Gather Essential Tools and Materials
To fix Christmas lights that are half out, it's crucial to gather essential tools and materials beforehand. Start by collecting a variety of replacement bulbs, including spare incandescent or LED bulbs that match the type and voltage of your Christmas lights. You'll also need a bulb tester to identify which bulbs are faulty and a replacement fuse if your lights have one. A non-contact voltage tester is another vital tool to ensure your safety while working with electrical components. Additionally, have some electrical tape or wire nuts on hand to repair any damaged wires or connections. A ladder or step stool may also be necessary to access hard-to-reach areas, and a pair of needle-nose pliers can come in handy for gripping small bulbs or wires. Furthermore, consider investing in a Christmas light repair kit, which usually includes a variety of replacement parts and tools specifically designed for fixing holiday lights. By having all these tools and materials ready, you'll be well-prepared to tackle the task of fixing your Christmas lights and get them shining brightly again.
Identify the Type of Christmas Lights
When it comes to fixing Christmas lights, it's essential to identify the type of lights you're working with. There are several types of Christmas lights, including incandescent, LED, net lights, icicle lights, and fairy lights. Incandescent lights are the traditional type of Christmas lights that use a filament to produce light. They are often less energy-efficient and more prone to burning out than other types of lights. LED lights, on the other hand, use light-emitting diodes to produce light and are energy-efficient and long-lasting. Net lights are designed to cover large areas, such as bushes or trees, and are often used to create a uniform lighting effect. Icicle lights are long, thin lights that are designed to resemble icicles and are often used to decorate eaves and gutters. Fairy lights are small, delicate lights that are often used to add a whimsical touch to Christmas decorations. By identifying the type of Christmas lights you're working with, you can determine the best course of action for fixing them. For example, if you're working with incandescent lights, you may need to replace the entire string if one bulb burns out, while LED lights can often be repaired by replacing a single bulb. Understanding the type of lights you're working with will help you to fix them efficiently and effectively.
Troubleshooting Common Issues
Troubleshooting common issues can be a daunting task, especially when it comes to complex systems or unfamiliar problems. However, by breaking down the process into manageable steps, anyone can become proficient in identifying and resolving common issues. The key to successful troubleshooting is to approach the problem in a methodical and systematic way, considering all possible causes and solutions. In this article, we will explore three essential steps to help you troubleshoot common issues: identifying the source of the problem, replacing fuses or bulbs, and checking for tangles and knots. By following these steps, you will be able to diagnose and fix a wide range of problems, from faulty electrical systems to tangled cords. Let's start by identifying the source of the problem, the first and most critical step in the troubleshooting process.
Identifying the Source of the Problem
When troubleshooting Christmas lights that are half out, it's essential to identify the source of the problem to ensure a quick and effective fix. The first step is to inspect the entire string of lights, checking for any visible signs of damage, such as frayed cords, broken bulbs, or loose connections. If the issue is isolated to a specific section of the string, it's likely that the problem lies within that section. Check the bulbs in the affected area to see if any are loose or damaged, and replace them if necessary. If the bulbs appear to be in good condition, the next step is to check the wiring and connections. Look for any signs of wear or damage, such as cuts, frays, or corrosion, and repair or replace the affected areas as needed. If the issue persists, it may be necessary to use a voltage tester to identify any electrical issues, such as a short circuit or faulty wiring. By methodically identifying the source of the problem, you can quickly and effectively fix your Christmas lights and get them shining brightly again.
Replacing Fuses or Bulbs
Replacing fuses or bulbs is a relatively simple process that can help resolve issues with your Christmas lights. If a section of your lights is not working, it's likely due to a blown fuse or a faulty bulb. To replace a fuse, start by locating the fuse box, usually found near the plug. Open the fuse box and remove the blown fuse, taking note of its amperage rating. Replace it with a new fuse of the same rating, making sure it's securely seated. If the issue persists, it may be a sign of a more serious problem. To replace a bulb, identify the type of bulb used in your lights, such as incandescent, LED, or net lights. Turn off the power to the lights and let them cool down. Remove the bulb by gently grasping it and twisting it counterclockwise. Dispose of the old bulb and replace it with a new one of the same type and wattage. Make sure it's securely seated and the lights are turned off before testing. If you're still having trouble, it may be worth consulting the manufacturer's instructions or seeking professional help. Regularly checking and replacing fuses and bulbs can help prevent future issues and ensure your Christmas lights continue to shine brightly.
Checking for Tangles and Knots
When checking for tangles and knots, it's essential to be patient and meticulous. Start by unplugging the lights from the power source to avoid any accidental electrical shocks. Next, lay out the entire string of lights on a flat surface, such as a table or countertop. Begin at one end of the string and work your way down, gently teasing out any tangles or knots as you go. Use a pair of needle-nose pliers or a small comb to help detangle any particularly stubborn knots. As you work, inspect each bulb and socket for any signs of damage or wear. If you find any damaged bulbs, replace them with new ones to ensure the entire string functions properly. Additionally, check the cord and plug for any signs of fraying or damage, and replace them if necessary. By taking the time to carefully check for tangles and knots, you can help prevent future issues and ensure your Christmas lights shine brightly throughout the holiday season.
Advanced Repair Techniques
When it comes to advanced repair techniques, there are several methods that can be employed to fix complex issues. One of the most effective ways to diagnose and repair problems is by using a multimeter to detect issues. This handy tool allows technicians to measure electrical currents, voltages, and resistances, making it easier to identify the root cause of the problem. In addition to using a multimeter, repairing or replacing the plug can also be a crucial step in the repair process. This involves identifying and fixing any damage to the plug or its connections, which can be a common cause of malfunction. Furthermore, soldering broken connections is another advanced technique that requires skill and precision. By mastering these techniques, technicians can effectively repair and restore equipment to its optimal functioning state. By understanding how to use a multimeter to detect issues, technicians can take the first step towards resolving complex problems.
Using a Multimeter to Detect Issues
Using a multimeter to detect issues in Christmas lights is a valuable skill for any homeowner. A multimeter is a versatile tool that can measure various electrical properties, including voltage, current, and resistance. To use a multimeter to detect issues in Christmas lights, start by setting the device to the DC voltage function, usually denoted by a "V" symbol with a straight line above it. Next, touch the multimeter's leads to the wires or terminals of the Christmas lights, making sure to observe proper safety precautions to avoid electrical shock. If the multimeter reads a voltage close to the expected value, usually around 3-4 volts for incandescent lights or 5-6 volts for LED lights, it indicates that the power source is functioning correctly. However, if the reading is significantly lower or higher, it may indicate a problem with the power source, wiring, or a faulty component. Additionally, a multimeter can also be used to measure the resistance of a circuit, which can help identify issues such as a short circuit or an open circuit. By using a multimeter to detect issues in Christmas lights, homeowners can quickly and accurately diagnose problems and make the necessary repairs to get their lights shining brightly again.
Repairing or Replacing the Plug
Repairing or replacing the plug is a crucial step in fixing Christmas lights that are half out. If the plug is damaged, it can prevent the entire string of lights from functioning properly. To repair the plug, start by unplugging the lights from the power source and inspecting the plug for any signs of damage, such as frayed cords, broken prongs, or burn marks. If the damage is minor, you can try to repair the plug by replacing the damaged prongs or rewiring the cord. However, if the damage is extensive, it's best to replace the plug entirely. To replace the plug, you'll need to purchase a new plug that matches the original one in terms of voltage and amperage rating. Once you have the new plug, simply cut the old plug off the cord and strip the insulation from the wires. Then, connect the wires to the new plug, making sure to match the correct wires to the correct terminals. Finally, screw the new plug together and test the lights to make sure they're working properly. By repairing or replacing the plug, you can ensure that your Christmas lights are safe and functional, and that they'll continue to shine brightly throughout the holiday season.
Soldering Broken Connections
Soldering broken connections is a delicate yet effective technique for repairing Christmas lights. When a connection is broken, it can be challenging to fix, but with the right tools and a bit of patience, you can restore your lights to their former glory. To begin, you'll need a soldering iron, solder, and a pair of wire strippers. Start by stripping the insulation from the ends of the wires, exposing the copper beneath. Next, heat the soldering iron to the correct temperature, and apply a small amount of solder to the tip. Carefully touch the solder to the exposed wire, allowing it to flow into the connection. Hold the iron in place for a few seconds to ensure the solder sets properly. Once the solder has cooled, inspect the connection to ensure it's secure and free of any shorts. With a little practice, soldering broken connections can become a valuable skill for repairing your Christmas lights and keeping them shining bright for years to come.