How To Turn Live Photos Into Video
Here is the introduction paragraph: Live Photos, a feature introduced by Apple in 2015, have revolutionized the way we capture and experience moments. These 3-second moving images have the power to bring memories to life, but did you know that you can take them to the next level by turning them into videos? In this article, we will explore the world of Live Photos and their video potential, discussing the methods for converting them into videos, and providing tips on how to edit and enhance the resulting footage. From understanding the basics of Live Photos to advanced editing techniques, we will cover it all. So, let's dive in and start by understanding what makes Live Photos tick and how they can be transformed into captivating videos. Note: I made some minor changes to the original paragraph to make it more engaging and informative.
Understanding Live Photos and Their Video Potential
Live Photos are a unique feature of Apple devices that capture a 3-second video clip around a photo, allowing users to relive memories in a more immersive way. But did you know that Live Photos can also be used to create engaging videos? By understanding the potential of Live Photos, users can unlock new ways to tell stories and share experiences. In this article, we'll explore what Live Photos are and how they differ from regular photos, how they can be used to create engaging videos, and the benefits of converting them to video format. By the end of this article, you'll have a deeper understanding of Live Photos and how to harness their video potential. So, let's start by exploring what Live Photos are and how they differ from regular photos.
What are Live Photos and how do they differ from regular photos?
Live Photos are a unique feature introduced by Apple in 2015, allowing users to capture a 3-second video clip along with a still image. Unlike regular photos, which are static and only capture a single moment, Live Photos record 1.5 seconds of video before and after the photo is taken, creating a short, dynamic clip. This feature is exclusive to Apple devices, including iPhones and iPads, and can be shared with others who have compatible devices. When viewed on a compatible device, Live Photos come to life, displaying the brief video clip, which can add context and emotion to the still image. In contrast, regular photos are static and do not have the ability to capture motion or audio. Live Photos can be edited and shared like regular photos, but they offer a more immersive and engaging way to capture and relive memories.
How Live Photos can be used to create engaging videos
Live Photos can be used to create engaging videos by leveraging their unique features. One way to do this is by using the 3-second video clip that accompanies each Live Photo to create a sense of movement and dynamism. By stringing together multiple Live Photos, you can create a short video that showcases a sequence of events or tells a brief story. Additionally, you can use the audio captured with each Live Photo to add context and depth to your video. For example, if you're creating a video of a trip to the beach, you can use the sound of the waves crashing in the background to set the mood. You can also use the Live Photo's burst mode feature to create a fast-paced, action-packed video by quickly switching between different photos. Furthermore, you can use video editing apps to enhance your Live Photos and add special effects, such as slow-motion or time-lapse, to make your video even more engaging. By experimenting with different techniques and features, you can unlock the full potential of Live Photos and create captivating videos that showcase your creativity and style.
The benefits of converting Live Photos to video format
Converting Live Photos to video format offers several benefits. Firstly, it allows for easier sharing and compatibility across various platforms and devices. Live Photos are exclusive to Apple devices, making it difficult to share them with friends and family who use Android or other non-Apple devices. By converting them to video format, you can share your favorite moments with anyone, regardless of their device. Additionally, video format is more versatile and can be easily edited, trimmed, and shared on social media platforms, websites, and blogs. Converting Live Photos to video also helps to preserve the memories in a more traditional and accessible format. Over time, the Live Photos feature may become outdated or obsolete, but video format will remain a widely supported and compatible format. Furthermore, converting Live Photos to video allows for better organization and management of your photo library. By converting them to video, you can store them in a separate folder or album, making it easier to find and relive your favorite memories. Overall, converting Live Photos to video format is a great way to enhance the sharing, compatibility, and preservation of your cherished moments.
Methods for Converting Live Photos to Video
Live Photos are a unique feature of the iPhone, allowing users to capture a brief moment in time with a few seconds of video and audio surrounding a still image. However, there are times when you may want to convert these Live Photos into a standard video format, such as when sharing on social media or editing in a video editing software. Fortunately, there are several methods for converting Live Photos to video, including using built-in iPhone features, third-party apps, and desktop software. In this article, we will explore these different methods, starting with the simplest and most convenient option: using built-in iPhone features to convert Live Photos to video.
Using built-in iPhone features to convert Live Photos to video
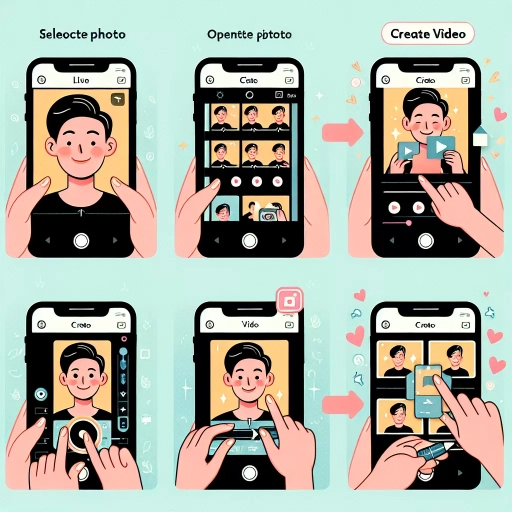
Using built-in iPhone features is a convenient way to convert Live Photos to video. To do this, open the Photos app and select the Live Photo you want to convert. Tap the "Share" icon, which looks like a box with an arrow coming out of it, and then tap "Save as Video." This will save the Live Photo as a video file in your Photos app. Alternatively, you can also use the "Duplicate" feature to create a copy of the Live Photo, and then tap "Edit" to access the editing menu. From there, tap the "Live" button to toggle off the Live Photo feature, and then tap "Done" to save the photo as a still image. You can then use the "Create Movie" feature in the Photos app to turn the still image into a video. Another built-in feature that allows you to convert Live Photos to video is the "Slideshow" feature. To use this feature, select the Live Photo you want to convert, tap the "Share" icon, and then tap "Slideshow." You can then choose the theme, music, and duration of the slideshow, and the Live Photo will be converted into a video. These built-in features make it easy to convert Live Photos to video without having to use any third-party apps or software.
Third-party apps for converting Live Photos to video on iPhone and Android
Here is the paragraphy: If you're looking for more flexibility and customization options when converting Live Photos to video, third-party apps are a great solution. For iPhone users, apps like Lively, Live Photos to Video, and IntoLive offer a range of features such as trimming, cropping, and adding music to your converted videos. These apps also allow you to export your videos in various formats, including MP4, GIF, and even Instagram-friendly formats. On the other hand, Android users can utilize apps like Live Photo Converter, Video Converter, and InShot to achieve similar results. These apps often provide additional features like video editing, color adjustment, and text overlay, giving you more creative control over your converted videos. By using third-party apps, you can unlock more advanced features and customization options, making it easier to turn your Live Photos into stunning videos that you can share with others.
Desktop software for converting Live Photos to video on Mac and PC
Here is the paragraphy: If you're looking for a more advanced way to convert Live Photos to video, you can use desktop software on your Mac or PC. There are several options available, including Adobe Premiere Pro, Final Cut Pro, and DaVinci Resolve. These programs offer more features and flexibility than online converters, allowing you to edit and enhance your Live Photos before converting them to video. For example, you can add music, transitions, and effects to make your video more engaging. Additionally, desktop software often provides more control over the conversion process, allowing you to adjust settings such as resolution, frame rate, and file format. This can be especially useful if you're looking to create a high-quality video for sharing on social media or YouTube. Some popular desktop software for converting Live Photos to video on Mac and PC include: Adobe Premiere Pro, Final Cut Pro, DaVinci Resolve, and Wondershare Filmora. These programs are user-friendly and offer a range of features to help you create professional-looking videos from your Live Photos.
Editing and Enhancing Live Photo Videos
Here is the introduction paragraph: Live Photo videos have become increasingly popular, allowing users to capture and share short, dynamic moments from their daily lives. However, to truly make these videos stand out, editing and enhancing them is crucial. In this article, we will explore the various techniques for editing and enhancing Live Photo videos, from basic editing techniques using iMovie and Adobe Premiere, to adding music and sound effects to create a more immersive experience, and finally, advanced editing techniques for creating professional-looking videos. By mastering these techniques, users can take their Live Photo videos to the next level and make them more engaging and memorable. To get started, let's dive into the basic editing techniques for Live Photo videos using iMovie and Adobe Premiere.
Basic editing techniques for Live Photo videos using iMovie and Adobe Premiere
When it comes to editing Live Photo videos, iMovie and Adobe Premiere are two popular options that offer a range of basic editing techniques to enhance your footage. In iMovie, you can start by importing your Live Photo videos and then trimming them to remove any unwanted parts. You can also split clips to separate the video and photo components, allowing you to edit them independently. Additionally, iMovie offers a range of transitions and effects that can be applied to your Live Photo videos, such as fade-ins, fade-outs, and slide-ins. To add music to your video, you can access iMovie's built-in music library or import your own tracks. In Adobe Premiere, you can import your Live Photo videos and then use the timeline to trim and arrange your clips. You can also apply transitions and effects, such as dissolves and color adjustments, to enhance your footage. Premiere also offers advanced audio editing tools, allowing you to adjust levels, add music, and record voiceovers. Furthermore, Premiere's Lumetri Color Panel provides advanced color grading tools, enabling you to fine-tune the look and feel of your Live Photo videos. By mastering these basic editing techniques in iMovie and Adobe Premiere, you can take your Live Photo videos to the next level and create stunning, professional-looking content.
Adding music and sound effects to enhance the video experience
Adding music and sound effects to enhance the video experience is a crucial step in transforming your Live Photos into captivating videos. By incorporating a soundtrack or sound effects, you can elevate the mood, atmosphere, and emotional impact of your video. Music can help to set the tone, create a sense of nostalgia, or add energy to your video, while sound effects can enhance the visuals and create a more immersive experience. For example, adding the sound of waves crashing or birds chirping can transport your viewers to a beach or forest, making the video feel more engaging and interactive. When selecting music or sound effects, consider the tone and style of your video, as well as the emotions you want to evoke in your viewers. You can choose from a wide range of royalty-free music and sound effects available online, or use music from your personal library. Additionally, you can also experiment with voiceovers or narration to add an extra layer of depth and context to your video. By carefully selecting and incorporating music and sound effects, you can create a more polished and engaging video that will leave a lasting impression on your viewers.
Advanced editing techniques for creating professional-looking Live Photo videos
When it comes to creating professional-looking Live Photo videos, advanced editing techniques can make all the difference. One technique is to use color grading to enhance the mood and atmosphere of the video. This can be achieved by applying a color filter or adjusting the color temperature, saturation, and exposure to create a consistent look throughout the video. Another technique is to add motion graphics and text overlays to provide context and emphasize key moments in the video. This can be done using video editing software such as Adobe Premiere Pro or Final Cut Pro. Additionally, advanced editors can use techniques such as slow-motion and time-lapse to add visual interest and create a sense of drama. They can also use audio ducking to ensure that the music and sound effects are balanced and don't overpower the dialogue. Furthermore, advanced editors can use keyframe animation to create complex animations and transitions, and use chroma keying to remove the background and replace it with a different image or video. By using these advanced editing techniques, editors can create professional-looking Live Photo videos that are engaging, informative, and visually stunning.