How To Audio Record On Iphone
The iPhone is a powerful tool for capturing high-quality audio recordings, whether you're a musician, podcaster, or simply looking to record a voice note. With its advanced microphone technology and user-friendly interface, the iPhone makes it easy to record and edit audio on the go. In this article, we'll take you through the process of audio recording on iPhone, from preparation to sharing. First, we'll cover the essential steps to prepare for audio recording on iPhone, including choosing the right app and setting up your device for optimal sound quality. Next, we'll dive into the recording process itself, exploring the different options and features available on the iPhone. Finally, we'll show you how to edit and share your audio recordings, making it easy to distribute them to others or use them in your next project. By the end of this article, you'll be ready to start recording high-quality audio on your iPhone, so let's get started with the first step: preparation for audio recording on iPhone.
Preparation for Audio Recording on iPhone
When it comes to preparation for audio recording on an iPhone, there are several key factors to consider in order to achieve high-quality results. First and foremost, it's essential to choose the right app for audio recording, as different apps offer varying levels of functionality and sound quality. Additionally, investing in a good quality microphone can make a significant difference in the clarity and depth of your recordings. Furthermore, finding a quiet and suitable recording environment is crucial in minimizing background noise and distractions. By taking the time to consider these factors, you can ensure that your audio recordings are professional-sounding and effective. With the right app, you'll be well on your way to capturing high-quality audio, so let's take a closer look at how to choose the right app for audio recording.
Choose the Right App for Audio Recording
When it comes to audio recording on an iPhone, choosing the right app is crucial to ensure high-quality recordings. With numerous options available, selecting the best app can be overwhelming. Here are some factors to consider when choosing an audio recording app: sound quality, user interface, file format, and additional features. For beginners, the built-in Voice Memos app is a great starting point, offering simplicity and decent sound quality. However, for more advanced users, apps like ShurePlus MOTIV, Tascam Portastudio, or Rode Reporter offer higher sound quality, more features, and better file format options. ShurePlus MOTIV, for instance, allows for 24-bit/48kHz recordings and supports multiple file formats, including WAV and MP3. Tascam Portastudio, on the other hand, offers a more comprehensive set of features, including EQ and compression. Rode Reporter, designed specifically for journalists, provides high-quality recordings and easy file sharing. Ultimately, the right app for you will depend on your specific needs and preferences. Consider what you'll be using the recordings for, the level of sound quality you require, and the features that are essential to you. By choosing the right app, you'll be able to capture high-quality audio recordings on your iPhone with ease.
Invest in a Good Quality Microphone
Investing in a good quality microphone is essential for achieving professional-sounding audio recordings on your iPhone. While the built-in microphone on your iPhone is decent, it can pick up background noise and may not capture the full range of your voice or instrument. A dedicated microphone can help to reduce noise, increase clarity, and provide a more accurate representation of your sound. There are many types of microphones available, including lavalier, shotgun, and USB microphones, each with its own unique characteristics and advantages. When choosing a microphone, consider the type of recording you'll be doing, the environment you'll be in, and your budget. For example, if you'll be recording in a noisy environment, a directional microphone like a shotgun mic may be a good choice. If you'll be recording vocals or instruments, a condenser microphone may be a better option. Some popular microphone options for iPhone include the Shure MVL, the Rode SmartLav+, and the Blue Yeti. These microphones are all high-quality, easy to use, and compatible with your iPhone. By investing in a good quality microphone, you'll be able to take your audio recordings to the next level and achieve professional-sounding results.
Find a Quiet and Suitable Recording Environment
When it comes to recording high-quality audio on your iPhone, one of the most crucial factors to consider is the environment in which you're recording. A quiet and suitable recording environment can make all the difference in capturing clear and crisp audio. To find the perfect spot, start by looking for a room with minimal background noise. This means avoiding areas with loud traffic, construction, or other distracting sounds. If you're recording at home, consider using a room with thick walls or soundproofing materials to reduce echo and outside noise. Additionally, turn off any fans, air conditioners, or other appliances that could generate unwanted noise. If you're recording in a public space, try to find a quiet corner or area with minimal foot traffic. You can also use noise-reducing materials like acoustic panels or sound-absorbing fabrics to create a makeshift recording studio. Another important factor to consider is the acoustics of the room. A room with a lot of hard surfaces, such as wood or tile, can create a lot of echo and reverberation, which can negatively impact your recording. On the other hand, a room with soft surfaces, such as carpet or upholstered furniture, can help to absorb sound and reduce echo. By taking the time to find a quiet and suitable recording environment, you can ensure that your audio recordings sound professional and polished.
Recording Audio on iPhone
Recording high-quality audio on an iPhone is easier than ever, thanks to the device's advanced technology and user-friendly interface. To capture professional-sounding recordings, it's essential to understand the basics of recording audio on an iPhone. First, you'll need to launch the Voice Memos app, which is a built-in feature that allows you to record and edit audio files. Before you start recording, consider using the iPhone's built-in microphone or investing in an external microphone to enhance sound quality. Additionally, monitoring and adjusting the recording levels is crucial to ensure that your audio is clear and distortion-free. By following these simple steps, you can create high-quality audio recordings on your iPhone. To get started, let's dive into the first step: launching the Voice Memos app and starting your recording.
Launch the Voice Memos App and Start Recording
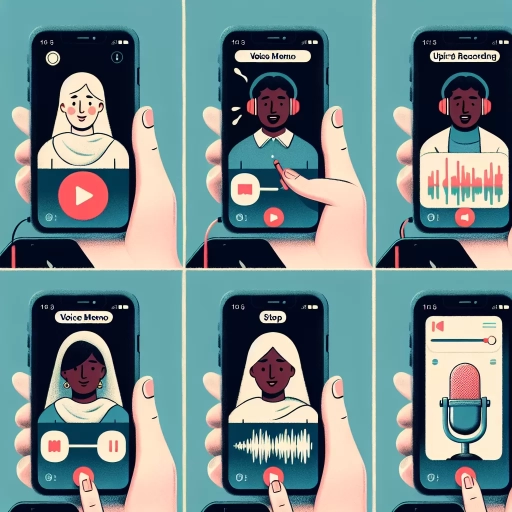
To launch the Voice Memos app and start recording on your iPhone, navigate to the home screen and locate the Voice Memos icon, which resembles a waveform. Tap on the icon to open the app. Once the app is open, you will see a simple and intuitive interface with a red record button at the center. To start recording, tap the red record button. You will know that the recording has started when you see the waveform moving and the timer counting up. You can pause the recording at any time by tapping the red button again, which will turn into a pause button. To resume recording, tap the pause button, and the recording will continue from where you left off. You can also add a title to your recording by tapping the "Done" button, which will bring up a screen where you can enter a name for your recording. Once you have finished recording and added a title, your recording will be saved to the Voice Memos app, where you can listen to it, share it, or delete it as needed.
Use the iPhone's Built-in Microphone or an External Microphone
When it comes to recording audio on your iPhone, you have two options: using the built-in microphone or an external microphone. The built-in microphone is a convenient option, as it's always available and doesn't require any additional equipment. However, it may not provide the best sound quality, especially in noisy environments or when recording from a distance. On the other hand, an external microphone can provide higher sound quality and more flexibility, but it requires a separate device and may add bulk to your recording setup. If you're looking for a more professional-grade recording, an external microphone is the way to go. Some popular options include the Shure MVL, Rode SmartLav+, and Sennheiser ClipMic Digital. These microphones connect to your iPhone via the Lightning port and offer improved sound quality, noise reduction, and wind protection. Additionally, some external microphones come with additional features such as adjustable gain, EQ settings, and built-in pop filters. When choosing an external microphone, consider the type of recording you'll be doing, the environment you'll be in, and the level of sound quality you need. Ultimately, whether you use the built-in microphone or an external microphone, the key to getting the best sound quality is to position the microphone correctly and minimize background noise.
Monitor and Adjust the Recording Levels
When recording audio on your iPhone, it's essential to monitor and adjust the recording levels to ensure that your audio is clear and distortion-free. To do this, you can use the built-in metering feature in the Voice Memos app or other third-party recording apps. The metering feature displays a visual representation of the audio levels, allowing you to see if the levels are too high or too low. If the levels are too high, you may hear distortion or clipping, which can ruin your recording. On the other hand, if the levels are too low, your recording may be too quiet and difficult to hear. To adjust the recording levels, you can move closer to or farther away from the sound source, or adjust the gain settings in the app. Some apps also allow you to set a limiter, which automatically reduces the gain if the levels get too high. By monitoring and adjusting the recording levels, you can ensure that your audio is recorded at the optimal level, resulting in a high-quality recording. Additionally, some apps also provide features like noise reduction, EQ, and compression, which can further enhance the quality of your recording. By taking the time to monitor and adjust the recording levels, you can achieve professional-sounding results, even with a smartphone.
Editing and Sharing Audio Recordings on iPhone
The iPhone offers a range of features that make it easy to edit and share audio recordings. With the Voice Memos app, users can capture high-quality audio and then edit and trim the recording to remove any unwanted parts. Additionally, users can add tags and descriptions to the audio recording, making it easier to organize and find specific recordings later. Once edited and organized, users can share the audio recording via email, message, or cloud storage, making it easy to collaborate with others or share with friends and family. In this article, we will explore these features in more detail, starting with how to edit and trim the audio recording.
Edit and Trim the Audio Recording
Once you've captured the perfect audio recording on your iPhone, it's time to refine it by editing and trimming the audio. To do this, open the Voice Memos app and select the recording you want to edit. Tap the "Edit" button, which looks like a pair of scissors, to enter editing mode. Here, you can trim the recording by dragging the edges of the waveform to remove any unwanted parts. You can also tap the "Play" button to listen to the recording and make sure you're trimming the right section. If you want to remove a specific part of the recording, you can tap the "Split" button, which looks like a pair of scissors with a line through it, to divide the recording into two separate parts. You can then delete the part you don't want by tapping the "Delete" button. Additionally, you can also use the "Undo" and "Redo" buttons to experiment with different edits and revert back to the original recording if needed. Once you're happy with your edits, tap "Done" to save the changes. Your edited recording will be saved as a new file, and the original recording will remain intact. By editing and trimming your audio recordings, you can remove any mistakes, unwanted noise, or unnecessary parts, and create a polished and professional-sounding recording that's perfect for sharing with others.
Add Tags and Descriptions to the Audio Recording
When editing and sharing audio recordings on your iPhone, adding tags and descriptions can significantly enhance the organization and accessibility of your recordings. To add tags and descriptions, open the Voice Memos app and select the recording you want to edit. Tap the "Edit" button, and then tap the "Tags" option. Here, you can choose from a list of pre-defined tags or create your own custom tags. Assigning relevant tags to your recordings allows you to easily search and categorize them later. Additionally, you can add a description to your recording by tapping the "Description" field and typing in a brief summary or note. This description will be displayed below the recording title, providing context and making it easier to identify the content of the recording. By adding tags and descriptions, you can efficiently manage your audio recordings, making it simpler to locate specific recordings and share them with others. Furthermore, when sharing your recordings, the tags and descriptions will be included, providing the recipient with valuable context and information about the recording. Overall, adding tags and descriptions to your audio recordings is a simple yet effective way to enhance their organization, accessibility, and shareability.
Share the Audio Recording via Email, Message, or Cloud Storage
Once you've edited your audio recording to your liking, it's time to share it with others. Fortunately, the Voice Memos app on your iPhone makes it easy to share your recordings via email, message, or cloud storage. To share a recording, open the Voice Memos app and select the recording you want to share. Tap the "Share" icon, which looks like a box with an arrow coming out of it. From there, you can choose to share the recording via email, message, or a variety of cloud storage services like iCloud, Google Drive, or Dropbox. If you choose to share via email or message, the recording will be attached to the email or message as an audio file. If you choose to share via cloud storage, the recording will be uploaded to your chosen service and you'll be given a link to share with others. You can also use the "Share" menu to save the recording to your iPhone's Files app, where you can access it later or share it with others using a different method. Overall, the Voice Memos app makes it easy to share your audio recordings with others, whether you're sending them to a friend or colleague, or uploading them to a cloud storage service for later use.