How To Freeze Corn On The Cob In The Husk
Freezing corn on the cob in the husk is a simple and effective way to preserve the sweet, juicy flavor of fresh corn throughout the year. To achieve this, it's essential to follow a few key steps. First, preparation is crucial, as it sets the stage for successful freezing. This involves selecting the right corn, removing any debris, and blanching the corn to inactivate enzymes that can cause spoilage. Next, the freezing method used can significantly impact the quality of the frozen corn. There are several methods to choose from, each with its own advantages and disadvantages. Finally, understanding how to properly thaw and cook frozen corn on the cob in the husk is vital to bringing out its natural sweetness and texture. By mastering these three key aspects, you'll be able to enjoy delicious, frozen corn on the cob in the husk all year round. So, let's start with the first step: preparation for freezing corn on the cob in the husk.
Preparation for Freezing Corn on the Cob in the Husk
Freezing corn on the cob in the husk is a great way to preserve the sweet and tender flavor of fresh corn. To ensure that your frozen corn is of the highest quality, it's essential to follow a few simple steps in preparation. First, you'll need to choose the right corn variety, one that is specifically bred for freezing and has a high moisture content. Next, you'll need to remove the silk and excess husk from the corn, as these can cause freezer burn and affect the texture of the corn. Finally, you'll need to wash and dry the corn thoroughly to remove any dirt or debris that may be present. By following these steps, you can enjoy delicious and nutritious frozen corn on the cob all year round. Choosing the right corn variety is the first and most critical step in this process, and it's essential to get it right to ensure the best results.
Choosing the Right Corn Variety
Choosing the right corn variety is crucial for achieving the best results when freezing corn on the cob in the husk. Not all corn varieties are suitable for freezing, and some are better than others. Look for varieties that are high in moisture content, have a high sugar content, and are bred specifically for freezing or canning. These varieties tend to have a sweeter and more tender kernel than others. Some popular varieties for freezing include Silver Queen, Golden Bantam, and Honey & Cream. Avoid using popcorn or ornamental corn varieties, as they are not suitable for freezing and will not yield the best results. Additionally, choose ears of corn that are freshly picked and have not been stored for too long, as this can affect the quality and texture of the frozen corn. By selecting the right variety and choosing fresh ears, you can ensure that your frozen corn on the cob in the husk is sweet, tender, and delicious.
Removing the Silk and Excess Husk
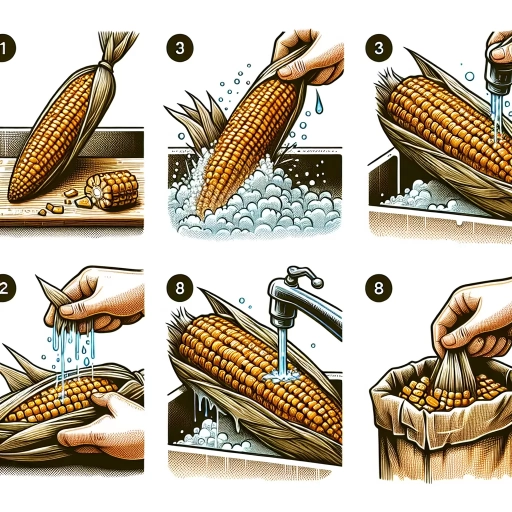
Removing the silk and excess husk from the corn on the cob is a crucial step in preparing it for freezing. Start by gently pulling back the husk, taking care not to remove it completely, and then remove as much of the silk as possible. You can use a soft-bristled brush or a clean cloth to gently sweep away the remaining silk strands. Next, trim the top of the cob, removing any excess husk or tassels. Be careful not to cut too much of the cob, as this can cause the kernels to become exposed and dry out. Finally, use a damp cloth to wipe down the cob, removing any remaining dirt or debris. This step helps to prevent the growth of bacteria and mold during the freezing process. By removing the silk and excess husk, you'll be able to achieve a better texture and flavor when you thaw and cook your frozen corn on the cob.
Washing and Drying the Corn
Washing and drying the corn is a crucial step in preparing it for freezing. Start by gently removing the corn from the husks, taking care not to touch the kernels to prevent moisture from transferring to the corn. Next, rinse the corn under cold running water to remove any dirt, debris, or bacteria that may be present. Use a soft-bristled brush or a clean cloth to gently scrub away any stubborn dirt or debris. After rinsing, use a clean towel or salad spinner to dry the corn thoroughly, paying extra attention to the crevices between the kernels. It's essential to remove as much moisture as possible to prevent the growth of bacteria and other microorganisms during the freezing process. Once the corn is dry, you can proceed with the next step in preparing it for freezing.
Freezing Methods for Corn on the Cob in the Husk
Freezing is an excellent way to preserve corn on the cob in the husk, allowing you to enjoy this delicious and nutritious vegetable year-round. There are several freezing methods that can be employed to achieve optimal preservation, each with its own set of benefits and considerations. Flash freezing, individual quick freezing (IQF), and standard freezer storage are three common methods used to freeze corn on the cob in the husk. Flash freezing is a popular choice for commercial producers, as it helps preserve the corn's natural sweetness and texture. IQF is ideal for those who want to store frozen corn in a compact and convenient manner. Meanwhile, standard freezer storage is a simple and cost-effective method suitable for home use. In this article, we will delve into the details of these freezing methods, starting with flash freezing, which is widely regarded as the gold standard for preserving corn on the cob in the husk.
Flash Freezing for Optimal Preservation
Flash freezing is a method of preserving food that involves rapidly freezing the product to a temperature of 0°F (-18°C) or lower within a short period, typically 30 minutes or less. This technique is particularly effective for preserving the texture, flavor, and nutrients of food, especially for delicate products like corn on the cob. When corn is flash frozen, the water molecules inside the cells are quickly converted into ice crystals, which helps to prevent the formation of large ice crystals that can cause damage to the cell walls. As a result, the texture and structure of the corn remain intact, and the natural sweetness and flavor are preserved. Additionally, flash freezing helps to inactivate enzymes that can cause spoilage and degradation, ensuring that the frozen corn remains fresh and nutritious for a longer period. Overall, flash freezing is an excellent method for preserving corn on the cob, and it is widely used in the food industry to produce high-quality frozen corn products.
Individual Quick Freezing (IQF) for Easy Storage
Individual Quick Freezing (IQF) is a method of freezing that involves rapidly freezing individual pieces of food, such as corn on the cob, to preserve their texture and flavor. This method is ideal for easy storage because it allows for the freezing of individual portions, making it convenient to thaw and use only what is needed. IQF also helps to prevent the formation of ice crystals, which can cause the corn to become mushy or develop off-flavors. By freezing the corn quickly, the water inside the cells is frozen in place, preserving the natural texture and flavor of the corn. Additionally, IQF makes it easy to store the frozen corn in airtight containers or freezer bags, keeping it fresh for several months. This method is also energy-efficient and cost-effective, as it eliminates the need for large quantities of ice or specialized freezing equipment. Overall, IQF is a reliable and efficient method for freezing corn on the cob in the husk, making it a great option for those looking to preserve their corn harvest for future use.
Standard Freezer Storage for Home Use
Standard freezer storage for home use is a common method for preserving corn on the cob in the husk. This method involves placing the corn in airtight containers or freezer bags, making sure to remove as much air as possible before sealing. The containers or bags are then stored in the freezer at 0°F (-18°C) or below. It's essential to label the containers or bags with the date and contents, so you can easily keep track of how long they've been stored. When stored properly, frozen corn on the cob in the husk can last for 8-12 months. It's also important to note that frozen corn is best consumed within 6-8 months for optimal flavor and texture. When you're ready to use the frozen corn, simply remove the desired amount from the freezer and thaw it in the refrigerator or at room temperature. You can also cook the frozen corn directly from the freezer, either by boiling, steaming, or grilling. Overall, standard freezer storage is a convenient and effective way to enjoy corn on the cob in the husk year-round.
Thawing and Cooking Frozen Corn on the Cob in the Husk
Here is the introduction paragraph: Thawing and cooking frozen corn on the cob in the husk can be a bit tricky, but with the right techniques, you can achieve delicious and tender results. There are several methods to thaw and cook frozen corn on the cob, including boiling and steaming, grilling and roasting, and using different thawing methods. In this article, we will explore the best ways to thaw and cook frozen corn on the cob in the husk, starting with the different thawing methods available. By understanding the various thawing methods, you can choose the best approach for your needs and move on to cooking your frozen corn on the cob to perfection. Here is the 200 words supporting paragraph: When it comes to thawing frozen corn on the cob, there are several methods to choose from, each with its own advantages and disadvantages. One of the most common methods is to thaw frozen corn on the cob in cold water. This method involves submerging the frozen corn in a large container of cold water, changing the water every 30 minutes to keep it cold. Another method is to thaw frozen corn on the cob in the refrigerator, which can take several hours or overnight. You can also thaw frozen corn on the cob in the microwave, but this method requires careful attention to avoid overheating the corn. Additionally, you can thaw frozen corn on the cob at room temperature, but this method is not recommended as it can lead to bacterial growth and foodborne illness. By understanding the different thawing methods, you can choose the best approach for your needs and ensure that your frozen corn on the cob is thawed safely and efficiently.
Thawing Methods for Frozen Corn on the Cob
When it comes to thawing frozen corn on the cob, there are several methods to choose from, each with its own advantages and disadvantages. The refrigerator thawing method is a safe and convenient option, allowing you to thaw frozen corn on the cob overnight in the refrigerator. Simply place the frozen corn in a covered container or plastic bag and let it thaw slowly in the refrigerator. This method is ideal for those who plan ahead and want to avoid any last-minute thawing hassles. On the other hand, cold water thawing is a faster method that involves submerging the frozen corn in cold water, changing the water every 30 minutes. This method is perfect for those who need to thaw frozen corn quickly, but it requires more attention and effort. Another option is to thaw frozen corn on the cob in the microwave, using the defrost setting. However, this method can be tricky, as it's easy to overheat or underheat the corn, leading to uneven thawing. It's essential to follow the microwave's defrosting instructions and check the corn frequently to avoid any mishaps. Lastly, some people prefer to thaw frozen corn on the cob by leaving it at room temperature, but this method is not recommended, as it can lead to bacterial growth and foodborne illness. Regardless of the thawing method chosen, it's crucial to cook the frozen corn on the cob immediately after thawing to ensure food safety and optimal flavor.
Boiling and Steaming Frozen Corn on the Cob
Boiling and steaming are two popular methods for cooking frozen corn on the cob. To boil frozen corn, fill a large pot with enough water to cover the corn, and bring it to a rolling boil. Carefully add the frozen corn to the pot, cover it with a lid, and cook for 5-7 minutes or until the corn is tender. To steam frozen corn, place it in a steamer basket over boiling water, cover the pot with a lid, and steam for 5-7 minutes or until the corn is tender. Both methods result in delicious and tender corn, but steaming helps retain more of the corn's natural nutrients and flavor. Regardless of the method, it's essential to check the corn for doneness by inserting a fork or knife into the kernels. If it slides in easily, the corn is cooked. If not, continue cooking in 1-minute increments until the corn is tender. After cooking, immediately submerge the corn in an ice bath to stop the cooking process and preserve the color and texture. This step is crucial to prevent overcooking and ensure the corn remains crunchy and flavorful. By following these simple steps, you can enjoy perfectly cooked frozen corn on the cob that's bursting with flavor and nutrients.
Grilling and Roasting Frozen Corn on the Cob
Grilling and roasting are two popular methods for cooking frozen corn on the cob, resulting in a deliciously caramelized and slightly charred exterior, while maintaining a tender interior. To grill frozen corn, preheat your grill to medium-high heat, then place the corn on the cob on the grates, turning every 2-3 minutes to achieve even cooking. You can also wrap the corn in foil with butter, seasonings, and herbs for added flavor. For roasting, preheat your oven to 400°F (200°C), place the frozen corn on a baking sheet lined with parchment paper, and roast for 15-20 minutes, turning occasionally, until lightly browned. Alternatively, you can toss the corn with olive oil, salt, and pepper, and spread it out in a single layer on the baking sheet for a crisper texture. Both grilling and roasting bring out the natural sweetness of the corn, making it a perfect side dish for summer barbecues, picnics, or family gatherings.