How To Do Hanging Indent Google Docs
 In today’s tech-savvy world, mastering tools like Google Docs is of paramount importance. If you're looking to improve your formatting skills, specifically in the realm of hanging indents, you've come to the right place. This comprehensive guide will provide you with an in-depth understanding of Google Docs and underscore the significance of a seemingly simple feature - the hanging indent. Our journey into the world of Google Docs will commence with a thorough understanding of its functionality and the critical role of the hanging indent in creating professional and polished documents. This will be followed by a step-by-step tutorial on generating an effective hanging indent, ensuring you grasp the process with ease. In our concluding section, we will address common problems encountered and mistakes often made while creating hanging indents and, more importantly, how to prevent them. Armed with this knowledge, your documents will stand out with a crisp, professional appearance. With this brief overview in mind, let's delve into the nitty-gritty of understanding Google Docs and the importance of the hanging indent.
Understanding Google Docs and the Importance of Hanging Indent
Google Docs, a modern tool for creating and managing documents, offers a plethora of features that have revolutionized the way we handle text. One such feature is the 'Hanging Indent,' which, despite its seeming simplicity, is a powerful tool for the presentation and organization of information. This article dives into the ins and outs of Google Docs, explores the concept of Hanging Indent, and further provides insight into its significance in formatting documents. First, we will understand the basics of Google Docs, a tool that has replaced traditional methods of document creation and management with its easy-to-use and share interface. Then we delve into the world of 'Hanging Indent,' formulating a comprehensive understanding of what it is and how it operates. The final stride in this journey of comprehension takes us through the importance of the Hanging Indent in formatting documents, revealing how this often overlooked feature can profoundly influence the readability and overall presentation of your work. By harnessing the capabilities of Google Docs and incorporating crucial formatting tools like the Hanging Indent, we can truly broaden our horizons in the realm of digital documentation. Let's first look at the basics of Google Docs.
The Basics of Google Docs
Google Docs, a product of Google's cloud-based productivity suite, is an innovative platform that allows for easy document creation, editing, sharing and storage. As an integral part of "Understanding Google Docs and the Importance of a Hanging Indent", it’s important to lay the foundation by understanding the basics of Google Docs. It's a tool renowned for its user-friendly interface and its formidable line-up of features designed to enhance productivity and collaboration among its users. Unlike traditional desktop-based word processors, Google Docs transcends the barriers of location-based work allowing for real-time updates that can be accessed from any device with an internet connection. This eliminates the need for saving documents on your hard drive, along with the accompanying stress of possibly losing them. With your documents securely saved in Google's servers, you gain the liberty to access, edit, and share your documents wherever you may be. The real charm of Google Docs, however, lies in its robust feature set. It offers everything from simple text formatting to sophisticated features like Voice Typing. One particularly significant feature is the 'Hanging Indent'. This formatting tool plays a pivotal role in the creation and organization of documents, especially long-form content. A Hanging Indent essentially indents every line of a paragraph except the first one, offering a visually unique text structure. Its primary use is in academic and bibliography writings to enhance readability, but it also conveys a sense of professionalism and structure across all content types. Exploring further, Google Docs also offers real-time collaboration; multiple users can work simultaneously on a document, making it a go-to tool for team-based projects. Changes are visible in real-time, preventing document version issues and facilitating seamless communication. It also records a history of changes made to the document, hence, any misunderstandings can be easily tracked and rectified. Understanding these essential features of Google Docs can significantly enhance your workflow. While this is just a brief glimpse into this versatile platform, it provides a solid foundation to further delve into more advanced features such as the Hanging Indent, and effectively utilize them for the creation of high-quality, professional and organized documents. The familiarity with Google Docs, along with its advanced options like Hanging Indents, can bolster your document-creation skills, and support you in delivering top-notch documents that meet professional standards.
What is Hanging Indent?
A hanging indent, a critical formatting tool available in Google Docs, is an essential aspect to understand when managing documents. A hanging indent arranges your text so that every line except the first is indented. In other words, it is the formatting style where all the lines of a paragraph or entry are indented, except for the first line which is left aligned. This creates a visually appealing layout, making your document legible and organized. The usage of a hanging indent isn't arbitrary. It plays a significant role in presenting citations and references sections for academic papers and works using styles such as APA, MLA and Chicago, which require a hanging indent for reference lists. This enables a reader to quickly locate the source from vast literature referenced, enhancing the readability and credibility of your scholarly article. In the business sphere, hanging indents are used in bibliographies, reference pages, and works cited pages for clear and structured presentation. Moreover, hanging indents can provide visual emphasis to an essential piece of information or separate a block of text from the rest. For instance, pull quotes in magazines and news articles often use this technique. It instantly draws the readers’ attention to the inset text. Learning how to use the hanging indent feature in Google Docs can significantly enhance your document structuring capabilities, reinforcing the importance of this powerful formatting tool in both academic and professional settings. In the context of digital storytelling, hanging indents can serve as a dynamic tool. They can be used to differentiate speech from description, or a flashback from the present story scene, giving unique depth to your narrative framework. Thus, mastering the hanging indent in Google Docs not only satisfies aesthetic and formatting requirements but can also become an instrumental component of effective storytelling and audience engagement.
Significance of Hanging Indent in Formatting Documents
The significance of the Hanging Indent feature in formatting documents cannot be overstated, particularly when it comes to the use of Google Docs. From the academic realm to the professional world, proper document formatting ensures readability and reflects attention to detail, which ultimately enhances the credibility and reception of the information provided. Hanging indents often exist behind the scenes, silently structuring bibliographies and reference lists, but its efficiency reaches far beyond that. The Hanging Indent feature in Google Docs significantly simplifies and streamlines the process. Not only does it save time by automatically aligning your text, but it also guarantees consistent formatting across your document. This uniformity aids navigation for readers, making it easier for them to process and understand the information. It's particularly useful when it comes to citing sources, where it becomes crucial to distinguish between multiple sources within a condensed space. Entering into an area lesser-known, a hanging indent can subtly improve the aesthetic of a document. It creates a visually neat and organized layout which can help to hold a reader's attention, an element particularly important in our digital age, where information is consumed rapidly, and first impressions are pivotal. Moreover, in the realm of SEO content, the use of hanging indents can assist in structuring content in a way that’s favored by search engine algorithms. Enhanced readability and clean formatting contribute silently to SEO ranking, as the algorithms match the readers’ preference for well-structured and easy-to-read content. Therefore, mastering the use of hanging indents, particularly in platforms like Google Docs, can serve as an under-the-radar boost to your SEO performance. In conclusion, the hanging indent, though seemingly insignificant, subtly shapes the fate of a document, playing a role in reader engagement, aesthetics, reader comprehension, and even SEO performance. Understanding and using the Hanging Indent feature within Google Docs doesn’t just reflect professionalism; it's a strategic move in the world of digital storytelling and content creation.
Steps to Create a Hanging Indent in Google Docs
Google Docs is an efficacious tool for drafting various documents, but sometimes you might find yourself unsure about functionalities like creating a hanging indent. This article will enthusiastically navigate you through the steps of creating a hanging indent in Google Docs through three informative and engaging methods. First, we will use the Ruler functionality for establishing a hanging indentation—this is a straightforward and visual process to create aesthetically-pleasing documents. Then, special attention will be given to the Format Menu Option, an underrated but highly practical feature of Google Docs. Finally, we will delve into the keyboard-centric technique, where using specific keyboard shortcuts can efficiently produce hanging indents. Each approach comes with its unique productivity and cosmetic advantages to ensure your document is high-quality and professional-looking. Let us start our journey to master Google Docs formatting by exploring how to use the Ruler for Hanging Indentation.
Using the Ruler for Hanging Indentation
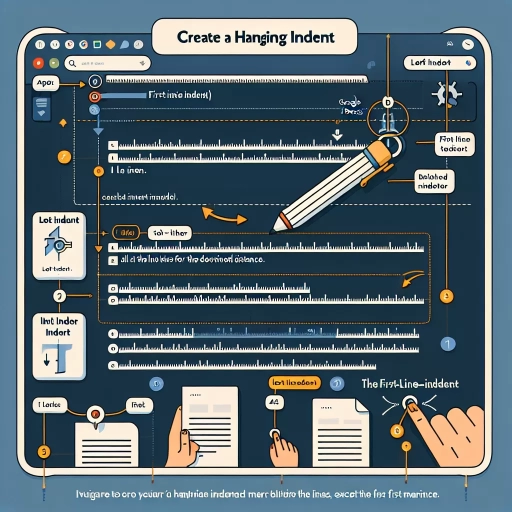
Perfecting the art of typesetting can exponentially improve the readability of your text, and one such technique often employed, especially in research papers or bibliographies, is the 'hanging indentation'. This is where the usage of a Ruler becomes significantly handy. Google Docs offers a simple and intuitive way to create a hanging indent by using the Ruler tool conveniently located at the top of the page. It measures the document’s margins and indents in inches, providing a visual framework for your formatting needs and it plays a pivotal role in setting up hanging indents. In a hanging indent format, the initial line of a paragraph begins at the margin while subsequent lines in the same paragraph are indented towards the right. The indent's width may commonly vary between half an inch to an inch or 1.27 to 2.54 cm depending upon the document layout preferences. The Ruler tool simplifies this seemingly daunting process. Initially, highlight the text you need to indent. This process of highlighting is crucial as the following actions will only apply to the highlighted text. Following that, on the ruler, drag the Left Indent (light blue marker) to the right by the amount you want your text to be indented. This action will move the First Line Indent marker (blue triangle) along with it. To create the hanging indent, drag the First Line Indent marker back to the left margin. You will see that only the first line of your selected text will move back, creating the desired hanging Indent. Familiarizing yourself with these ruler techniques will not only enhance your document formatting skills but also make your work more professional and visually appealing. As an added advantage, it aids readers in effortlessly navigating through your content. In essence, mastering the art of using the Ruler for Hanging Indentation is an invaluable skill in Google Docs. In the rapidly evolving digital space, knowing these small yet powerful tricks facilitate efficient and time-saving content creation.
Applying the Format Menu Option
Applying the Format Menu Option is an essential step in creating a hanging indent in Google Docs. Structured properly, this option enhances the overall aesthetic of your document, making it professionally presentable and easy to digest for your readers. Hanging indents, often used in bibliographies and reference lists, positions the first line of the paragraph flush against the left margin, while all other lines are indented to the right. To apply this appealing structure using the Format Menu Option, you start by opening your Google Docs document. Next, highlight the paragraph where you want the hanging indent. Navigate to the “Format” option on the main menu and select “Align and indent.” From the drop-down menu that appears, choose “Indentation options." In the indentation options, you'll locate the “Special indent” section – this is where the magic happens. Select “Hanging” and input the desired indentation length, commonly set at 0.5 inches. Click "Apply" to actualize your changes. When applied, this particular formatting results in an organized, visually pleasing output that perfectly suits academic and professional texts. Importantly, it provides consistency, allowing readers to easily locate and read cited sources or list entries. Thus, mastering the Format Menu Option for creating hanging indents can significantly elevate your use of Google Docs for academic, professional, or personal projects. Understanding the steps to apply the Format Menu Option is just one part of effectively using Google Docs. It equips users with the tools to not only make their documents more visually appealing but also to adhere to style guides and formatting prerequisites that are specific to certain types of documents. An effective use of the Format Menu Option embodies the thoughtful combination of function and form, making your document both engaging and easy to comprehend. Whether you're drafting a research paper, biblio-list, or simply writing a buddy-read novel, understanding how to best leverage this feature in Google Docs encourages a more refined and accessible writing style. Remember, just as search engine algorithms appreciate clear, well-structured content, so do your readers. And by applying these simple yet powerful steps in creating a hanging indent via the Format Menu Option in Google Docs, you're guaranteed a document that's not only pleasant to look at, but one that also resonates with and is easily navigable by your audience.
Creating a Hanging Indent with Keyboard Shortcuts
As you navigate through the entirety of the Google Docs interface, one particular feature that can greatly enhance your document's presentation and readability is the 'Hanging Indent'. This often-overlooked tool is an effective way to neatly arrange your bibliographical or citation lists, providing a more professional and polished vibe to your document. Creating a hanging indent with keyboard shortcuts enhances your ability to format swiftly, spurring productivity. To begin, select the text you want to apply the hanging indent to. On Windows, press Ctrl + Shift + M, or make use of the combo of Command + Shift + M if you're on a Mac. This shortcut directly initiates a hanging indent, allowing a consistent spacing for each line after the first in your selected paragraph. It's important to remember though, that keyboard shortcuts may vary based on the operating system you're using. What this does is, rather than indenting the first line, it pushes back all the other lines. A visual shift occurs where the first line stands flush with the left margin, but the subsequent lines are indented. Besides providing a visual guide to your readers, a hanging indent embraces an important aspect of digital storytelling - maintaining coherent design. It significantly improves the readability of your textual content and provides a structured appearance, helping reader's easier navigate through the details. Used effectively, the hanging indent tool creates a seamless association between your primary text and referenced information. Moreover, it quickens the referencing process, facilitating a more useful, informative, and engaging piece for your readers. In summary, mastering the keyboard shortcuts to create a hanging indent in Google Docs isn’t just about learning a new trick. It encapsulates efficiency, presentation, and storytelling, invaluable skills in the digitally dominated world of content creation, thus giving your work the added edge it deserves.
Common Issues and Mistakes When Creating a Hanging Indent
Creating a hanging indent may seem straightforward, but there are common issues and mistakes that can occur which may hinder your document's overall presentation. These mistakes can even lead to confusion amongst readers or lack of professional looking style, making it essential to avoid them. Broadly, these mistakes can be categorized into three classifications: Misplacement of Indent Marker, Incorrect Formatting for Different Document Styles, and Handling Multiple Paragraphs and Indents. Misplacement of the indent marker is a prevalent issue experienced by many. It results in non-uniformity across the document, thereby affecting its visual appeal. This fundamental alignment mistake, often overlooked, can make your document appear unorganized and unkempt. Correct placement of the indent marker is essential in maintaining consistency across your document. Let's delve deeper into this issue and discuss how it can be remedied.
Misplacement of Indent Marker
Misplacement of the indent marker is one of the most common issues users encounter when creating a hanging indent in Google Docs. The purpose of a hanging indent is to enhance readability by offsetting the start of the second and subsequent lines in a paragraph. However, the effectiveness of this formatting tool can be hindered if the indent marker is not correctly positioned. Misalignment can occur when the indent marker, also known as the slider on the horizontal ruler, is accidentally moved. It's crucial to differentiate between the two distinct parts of this tool: the upper triangle, which controls the first-line indent, and the lower one, accounting for the left indent of the overall text block. Misunderstanding or neglecting this vital difference can lead to misplaced indent markers, resulting in a less professional look and feel. Correct placement of the indent marker is determined by aligning it with the left margin for the first line of text, then dragging the lower triangle to the right, establishing a hanging indent. For instance, if aiming for a ½ inch hanging indent, the lower triangle should be dragged until it aligns with the ½ inch mark on the ruler. Incorrect marker placement can distort the structure of your text, leading to confusion for the reader. This is why mastering the use of the indent marker is essential for effective document design. In the arena of digital documentation, where aesthetics intertwines with the clarity of communication, it's important not to let such simple errors hinder your content. Remember, the key to resolving the misplacement of indent markers lies in understanding the different functionalities of the upper and lower triangles of the slider. Realize that the upper triangle controls the indentation of the first line, while the lower triangle decides the left indent of the remaining text. Once this is clear, you can maintain the elegance and precision of your textual layout, ensuring the smooth delivery of your content. Aim for perfection, even in the slightest details, because it is those seemingly negligible aspects like a well-placed indent that make your work stand out.
Incorrect Formatting for Different Document Styles
Formatting is an integral part of document creation and, when overlooked, can lead to unprofessional, inconsistent, and confusing presentations. Incorrect formatting is often a ubiquitous issue, particularly when attempting to match specific document styles, such as APA, MLA, or Chicago. Regardless of the content's quality, incorrect formatting can diminish the document's effectiveness and credibility. For instance, a common issue arises when creating a hanging indent -- a requirement in various citation styles. In Google Docs, the set-up and execution of a hanging indent seem straightforward; however, not following the guidelines to the letter can lead to repercussions varying from minor annoyances like a text looking out of place to significant consequences such as losing marks on a crucial academic paper. The wrong setup of a hanging indent might occur when the first line aligns with the subsequent lines, and the rest of the text does not shift to the right. Also, using the tab key to create space can also lead to inconsistent spaces between lines. The application of the indent to the entire document instead of the required paragraph can also lead to incorrect formatting. Another frequent mistake is the inaccurate application of styles for different document citations. Each style, such as APA, MLA, and Chicago, has specific guidelines for creating a hanging indent, including the number of spaces or tabs required and the placement of punctuation. Not adhering to these rules can potentially lead to the misrepresentation or misunderstanding of the cited information, causing a considerable dent in the document's integrity and disservice to the referenced authors. In conclusion, while Google Docs provides an easy way to create a hanging indent, users must be aware of common issues and mistakes that can undermine the impact of their documents. By being vigilant during the formatting process and having a clear understanding of different document styles and their requirements, users can enhance the readability, professionalism, and effectiveness of their document writing and presentations.
Handling Multiple Paragraphs and Indents
In dealing with multiple paragraphs and indents, it's critical to understand the inherent dynamics that dictate structuring and text placement. The flow of a piece is significantly influenced by appropriately constructed and managed paragraphs and indents—particularly hanging indents—where the first line breaks the margin boundary but the subsequent ones do not. Quality, clarity, and readability substantially depend on how well these components are arranged. Regrettably, many people face common issues and mistakes when creating hanging indents, especially when using tools such as Google Docs. Lack of familiarity with the formatting tools and guidelines and improper placement of the first line often result in a disjointed and unprofessional appearance. For instance, a common mistake involves applying a regular indentation instead of a hanging one. The distinction between the two is subtle but significant: a standard indent has only the first line indented, while in hanging indents, the converse applies. The first line is flush with the margin, and all subsequent lines within the paragraph are indented. Another typical issue is inconsistent indentation, which disrupts the uniformity of the text and confuses readers. Mistakenly, some might choose to manually space or tab the sentences of their paragraphs, but this can yield erratic results – a digital document does not recognize manual spaces and tabs as indents. Thus, one must use the platform’s built-in indentation tools to achieve consistency. When using Google Docs, for example, the ruler at the top of your document is a handy tool for creating and managing indents, including hanging indents. Yet, another common error is overlooking this tool and resorting to less efficient methods of paragraph spacing. The built-in tools guarantee adherence to the APA, MLA, or Chicago formatting requirements, depending on the one you choose to follow. In conclusion, understanding and properly implementing the multiple paragraphs and indents are key to generating high-quality, structured documents. Familiarizing oneself with platform-specific tools and guidelines can help avoid common errors and deliver a beautifully formatted text that captivates and enlightens readers.