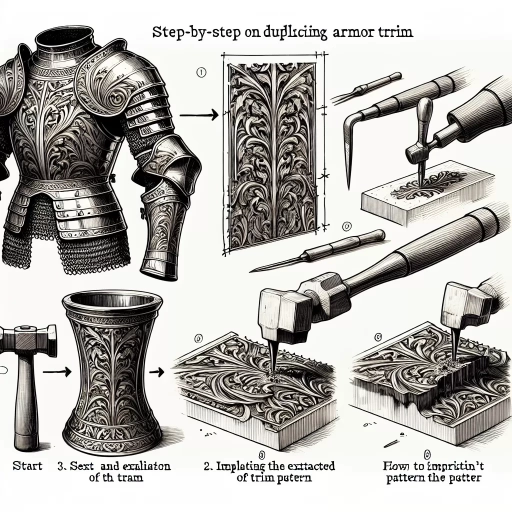
How To Duplicate Armor Trims
Armor trims are an essential part of vehicle customization, providing a sleek and personalized look to any car. However, for many car owners, obtaining the perfect armor trims can be a challenge, especially when it comes to finding the right materials and techniques. One solution to this problem is to duplicate armor trims, allowing car enthusiasts to create identical replicas of their favorite designs. To successfully duplicate armor trims, it's crucial to understand the basics of armor trims and their significance, as well as prepare the necessary materials and tools. In this article, we'll delve into the world of armor trims, exploring the key aspects of duplicating them. We'll start by examining the fundamentals of armor trims and their importance, then move on to preparing for the duplication process, and finally, provide a step-by-step guide on how to duplicate armor trims. By the end of this article, you'll have a comprehensive understanding of how to create identical armor trims, starting with understanding armor trims and their significance.
Understanding Armor Trims and Their Significance
When it comes to vehicle customization, one of the most overlooked yet crucial components is armor trims. These protective strips are designed to shield your vehicle's exterior from damage, but their significance extends far beyond mere protection. Armor trims come in a variety of types, each with its unique features and benefits. Understanding the different types of armor trims and their characteristics is essential for making informed decisions about your vehicle's customization. Moreover, armor trims play a vital role in enhancing the overall aesthetic appeal of your vehicle, making them a crucial aspect of the customization process. In this article, we will delve into the world of armor trims, exploring what they are and their purpose, the various types of armor trims and their unique features, and the importance of armor trims in vehicle customization. Let's start by understanding what armor trims are and their purpose.
What are Armor Trims and Their Purpose
Armor trims are decorative components that can be attached to armor pieces to enhance their appearance and provide additional protection. They serve multiple purposes, including aesthetic appeal, damage reduction, and identification of armor sets. In many games, armor trims are used to distinguish between different armor sets, making it easier for players to recognize and choose their desired armor. Moreover, armor trims can offer bonus stats, such as increased defense or resistance to certain elements, further enhancing the armor's overall effectiveness. By equipping armor trims, players can customize their armor to suit their playstyle and preferences, adding a layer of depth to the game's armor system. In some cases, armor trims may also be used to indicate a player's progression or achievements, serving as a visual representation of their accomplishments. Overall, armor trims play a significant role in enhancing the functionality and appearance of armor, making them a valuable component of any armor set.
Types of Armor Trims and Their Unique Features
Armor trims come in various types, each with its unique features and benefits. One of the most common types is the Standard Armor Trim, which provides a basic level of protection and is often used as a starting point for other trims. The Enhanced Armor Trim offers increased protection and durability, making it a popular choice for those who need extra security. The Reinforced Armor Trim is designed for heavy-duty use and features additional layers of protection, making it ideal for high-risk activities. The Lightweight Armor Trim is designed for speed and agility, providing protection without compromising mobility. The Custom Armor Trim allows users to personalize their armor to suit their specific needs and preferences. The Ballistic Armor Trim is designed to provide protection against ballistic threats, such as bullets and shrapnel. The Ceramic Armor Trim uses ceramic materials to provide lightweight and effective protection. The Composite Armor Trim combines different materials to create a strong and lightweight armor. The Smart Armor Trim features advanced technology, such as sensors and monitoring systems, to provide real-time feedback and enhance protection. The Exotic Armor Trim uses rare and advanced materials to provide unique and specialized protection. Each type of armor trim has its own unique features and benefits, and choosing the right one depends on the specific needs and requirements of the user.
Importance of Armor Trims in Vehicle Customization
The importance of armor trims in vehicle customization cannot be overstated. Armor trims serve as a protective barrier between the vehicle's body and the external environment, shielding it from damage caused by road debris, rocks, and other hazards. By installing armor trims, vehicle owners can significantly reduce the risk of scratches, dents, and other forms of damage that can compromise the vehicle's appearance and structural integrity. Moreover, armor trims can also help to prevent rust and corrosion by covering exposed metal edges and providing a layer of protection against the elements. In addition to their functional benefits, armor trims can also enhance the vehicle's aesthetic appeal by adding a rugged and aggressive look that is sure to turn heads. With a wide range of styles and designs available, vehicle owners can choose the perfect armor trims to match their vehicle's unique personality and style. Whether you're looking to protect your vehicle from the rigors of off-road driving or simply want to add a touch of rugged sophistication to your daily driver, armor trims are an essential component of any vehicle customization project. By investing in high-quality armor trims, vehicle owners can enjoy a safer, more durable, and more stylish driving experience that is sure to last for years to come.
Preparing for Armor Trim Duplication
Preparing for armor trim duplication requires careful planning and attention to detail to ensure a successful outcome. To achieve this, it is essential to gather the necessary tools and materials, choose the right armor trim design and pattern, and understand the duplication process and its challenges. By having the right tools and materials, individuals can ensure that they have everything needed to complete the duplication process efficiently. Choosing the right design and pattern is also crucial, as it can affect the overall appearance and functionality of the armor trim. Understanding the duplication process and its challenges can help individuals anticipate and overcome potential obstacles, ensuring a smooth and successful duplication process. With these key considerations in mind, the first step in preparing for armor trim duplication is to gather the necessary tools and materials.
Gathering Necessary Tools and Materials
When duplicating armor trims, it is essential to gather the necessary tools and materials to ensure a successful and efficient process. The required tools include a heat gun or a hair dryer, a pair of scissors or a craft knife, a cutting mat or other protective surface, a ruler or straightedge, a pencil or marker, and a sealant or adhesive. Additionally, you will need a reference image of the original armor trim, a template or pattern, and a suitable material for duplication, such as Worbla, Wonderflex, or foam. It is also recommended to have a well-ventilated workspace and a heat-resistant surface to prevent damage or injury. Having all the necessary tools and materials within reach will save time and reduce the risk of errors, allowing you to focus on creating an accurate and detailed duplicate of the armor trim.
Choosing the Right Armor Trim Design and Pattern
Choosing the right armor trim design and pattern is a crucial step in the duplication process. The design and pattern you choose will not only affect the aesthetic appeal of your armor but also its functionality and durability. When selecting a design, consider the type of armor you are duplicating, its intended use, and the materials you will be using. For example, a medieval-style armor trim design may not be suitable for a modern tactical armor. Similarly, a design that features intricate patterns may not be practical for an armor that will be subject to heavy use. It's also important to consider the skill level of the person duplicating the armor trim, as some designs may be more complex and require specialized skills. In terms of patterns, you can choose from a variety of options, including geometric, organic, or abstract designs. Geometric patterns, such as chevrons or diamonds, can add a touch of elegance to your armor, while organic patterns, such as leaves or flowers, can create a more natural look. Abstract patterns, such as swirling shapes or textures, can add a unique and dynamic element to your armor. Ultimately, the design and pattern you choose will depend on your personal preference and the specific requirements of your armor. By carefully considering these factors, you can create an armor trim that is both functional and visually appealing.
Understanding the Duplication Process and Its Challenges
The duplication process of armor trims involves creating an exact replica of the original trim, which can be a complex and challenging task. One of the primary challenges is ensuring that the duplicated trim is identical in terms of material, texture, and color. This requires a deep understanding of the original trim's composition, including the type of metal or plastic used, the finish, and any additional coatings or treatments. Moreover, the duplication process must also take into account the trim's shape, size, and curvature, as well as any intricate details or patterns. To overcome these challenges, armor trim duplicators use a range of techniques, including 3D scanning, computer-aided design (CAD), and computer numerical control (CNC) machining. These technologies enable the creation of highly accurate digital models and physical prototypes, which can be refined and perfected through an iterative process. However, even with the aid of advanced technology, the duplication process can still be time-consuming and labor-intensive, requiring a high degree of skill and attention to detail. Additionally, the duplicated trim must also meet the required standards for durability, strength, and resistance to environmental factors, which can add an extra layer of complexity to the process. Overall, understanding the duplication process and its challenges is crucial for preparing for armor trim duplication, as it allows individuals to anticipate and address potential issues, ensuring a successful outcome.
Step-by-Step Guide to Duplicating Armor Trims
Duplicating armor trims requires attention to detail, precision, and a step-by-step approach to achieve a high-quality finish. To successfully duplicate armor trims, one must first measure and cut the armor trim material with accuracy, taking into account the specific dimensions and curves of the original trim. This crucial step sets the foundation for the entire process. Next, applying adhesives and attaching the armor trim to the desired surface requires patience and skill to ensure a strong and lasting bond. Finally, adding the finishing touches and conducting quality control checks is essential to guarantee a flawless and professional-looking result. By following these steps, individuals can achieve a precise duplication of armor trims. To begin, let's start with the first step: measuring and cutting the armor trim material.
Measuring and Cutting the Armor Trim Material
Here is the paragraphy: Measuring and cutting the armor trim material is a crucial step in duplicating armor trims. To ensure accuracy, start by taking precise measurements of the original trim's length, width, and thickness. Use a caliper or a ruler to record these measurements, taking note of any curves or irregularities. Next, transfer these measurements to the armor trim material, using a pencil or marker to mark the cutting lines. When cutting the material, use a sharp utility knife or a power saw, depending on the material's thickness and your personal preference. Apply gentle to moderate pressure, depending on the material's density, to avoid damaging the surrounding area. For curved cuts, use a jigsaw or a coping saw to achieve smooth, precise curves. To minimize waste and ensure a snug fit, cut the material slightly oversized, then trim it down to the exact dimensions using a file or sandpaper. Finally, inspect the cut material for any imperfections or rough edges, and smooth them out using a deburring tool or sandpaper. By taking the time to accurately measure and cut the armor trim material, you'll be able to create a precise duplicate of the original trim, ensuring a seamless integration with the surrounding armor.
Applying Adhesives and Attaching the Armor Trim
Applying adhesives and attaching the armor trim is a crucial step in duplicating armor trims. To ensure a strong and durable bond, it is essential to choose the right adhesive for the job. There are several types of adhesives available, including epoxy, polyurethane, and acrylic, each with its own strengths and weaknesses. Epoxy adhesives are known for their high strength and resistance to heat and chemicals, making them an excellent choice for attaching armor trim to metal or plastic surfaces. Polyurethane adhesives, on the other hand, are more flexible and suitable for attaching trim to surfaces that are subject to vibration or movement. Acrylic adhesives are a good choice for attaching trim to surfaces that require a high level of flexibility and are resistant to UV light. Once the adhesive has been selected, it is essential to prepare the surface properly before applying it. This includes cleaning the surface to remove any dirt, oil, or other contaminants that may interfere with the adhesive. The surface should also be roughened to create a better bond between the adhesive and the surface. The adhesive should be applied to the back of the armor trim, following the manufacturer's instructions for application and drying times. The trim should then be carefully aligned with the surface and pressed firmly into place. It is essential to ensure that the trim is properly aligned and securely attached to prevent any movement or shifting over time. To add extra security to the attachment, mechanical fasteners such as screws or rivets can be used in conjunction with the adhesive. These fasteners should be spaced evenly apart to distribute the stress evenly and prevent any weak points in the attachment. By following these steps and choosing the right adhesive for the job, you can ensure a strong and durable bond between the armor trim and the surface, resulting in a professional-looking and long-lasting finish.
Finishing Touches and Quality Control
Finishing touches and quality control are crucial steps in duplicating armor trims. Once the trim has been fabricated, it's essential to inspect it for any imperfections or defects. Check for any scratches, dents, or misaligned parts, and make any necessary repairs. Next, apply a coat of primer and paint to match the original trim's color and finish. Allow the paint to dry completely before applying a clear coat to protect the finish and give it a glossy appearance. Finally, inspect the trim again for any imperfections and make any final adjustments before installing it on the vehicle. It's also important to test the trim's functionality, such as ensuring that any moving parts operate smoothly and that any electrical components are working properly. By paying attention to these finishing touches and quality control measures, you can ensure that your duplicated armor trim looks and functions like the original.