How To Take A Screenshot On Iphone 8
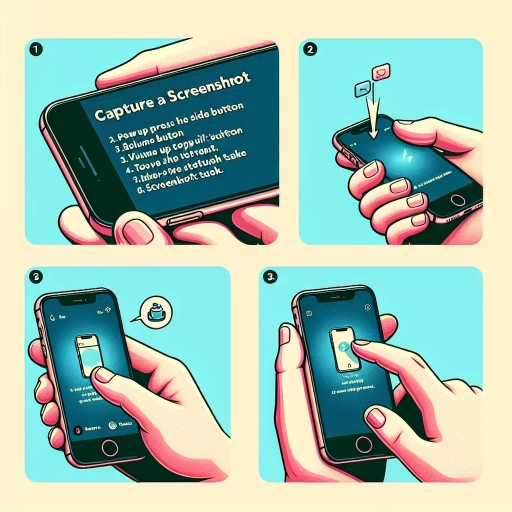
Taking a screenshot on an iPhone 8 is a simple yet powerful feature that allows you to capture and share moments from your screen. Whether you want to save a funny meme, document a problem, or share a great find, taking a screenshot is an essential skill to have. In this article, we will guide you through the process of taking a screenshot on your iPhone 8, from understanding the basics to editing and sharing your screenshot. First, we will cover the fundamentals of taking a screenshot on iPhone 8, including the necessary hardware and software requirements. Then, we will provide a step-by-step guide on how to take a screenshot on your iPhone 8, including the exact buttons to press and the timing. Finally, we will explore the various options for editing and sharing your screenshot, including cropping, annotating, and sending it to friends and family. To get started, let's begin with the basics of taking a screenshot on iPhone 8.
Understanding the Basics of Taking a Screenshot on iPhone 8
Taking a screenshot on an iPhone 8 is a straightforward process that can be mastered with a little practice. To get started, it's essential to understand the basics of screenshot functionality on your device. This involves locating the Sleep/Wake button and Home button, which are crucial for capturing screenshots. Additionally, it's vital to comprehend the screenshot functionality itself, including how to access and manage your screenshots. Once you've taken a screenshot, you'll also want to familiarize yourself with the Screenshots album, where all your captured images are stored. By understanding these fundamental concepts, you'll be well on your way to becoming a pro at taking screenshots on your iPhone 8. So, let's begin by locating the Sleep/Wake button and Home button, which are the first steps in capturing a screenshot.
Locating the Sleep/Wake Button and Home Button
The Sleep/Wake button and Home button are two essential components of the iPhone 8 that play a crucial role in taking a screenshot. To locate these buttons, start by holding your iPhone 8 in your hand with the screen facing you. The Sleep/Wake button is situated on the top right side of the device, while the Home button is positioned at the bottom center of the screen. The Sleep/Wake button is a small, oval-shaped button that is used to turn your iPhone on and off, as well as put it to sleep and wake it up. The Home button, on the other hand, is a circular button with a square icon in the center, which is used to return to the home screen, access the app switcher, and activate Siri. To take a screenshot, you will need to press and hold the Sleep/Wake button and the Home button simultaneously, so it's essential to familiarize yourself with their locations to ensure a smooth screenshot-taking experience.
Understanding the Screenshot Functionality
The screenshot functionality on iPhone 8 allows users to capture and save images of their screen, which can be useful for a variety of purposes, such as sharing information, saving memories, or troubleshooting issues. To take a screenshot, users simply need to press the Sleep/Wake button and the Home button simultaneously, which will capture the entire screen and save it to the Screenshots album in the Photos app. The screenshot will also be displayed as a thumbnail in the bottom-left corner of the screen, allowing users to edit or share it immediately. Additionally, users can also use the AssistiveTouch feature to take a screenshot, which can be enabled in the Settings app under General > Accessibility > AssistiveTouch. This feature allows users to take a screenshot by tapping on a virtual button, which can be useful for users who have difficulty pressing the physical buttons. Overall, the screenshot functionality on iPhone 8 is a convenient and easy-to-use feature that can be used in a variety of situations.
Familiarizing Yourself with the Screenshots Album
When you take a screenshot on your iPhone 8, it automatically gets saved to the Screenshots album in the Photos app. To familiarize yourself with this album, open the Photos app and tap on the "Albums" tab at the bottom. Scroll down to the "Media Types" section and select "Screenshots." This will take you to the Screenshots album, where you'll see all the screenshots you've taken on your iPhone 8. You can browse through the screenshots, share them, or delete them as needed. You can also use the "Edit" option to crop, rotate, or markup your screenshots. Additionally, you can use the "Share" option to send your screenshots to others via email, message, or social media. By familiarizing yourself with the Screenshots album, you can easily manage and organize your screenshots, making it easier to find and share the ones you need.
Step-by-Step Guide to Taking a Screenshot on iPhone 8
Taking a screenshot on an iPhone 8 is a straightforward process that can be completed in just a few steps. To capture a screenshot, you will need to simultaneously press the sleep/wake and home buttons, which will save the image to your camera roll. Once you've taken the screenshot, you can verify that it has been taken by checking for a flash on the screen and a camera shutter sound. After verifying, you can access and view the screenshot by going to your photos app, where it will be saved in the screenshots album. In this article, we will walk you through each of these steps in detail, starting with the first step: simultaneously pressing the sleep/wake and home buttons.
Simultaneously Pressing the Sleep/Wake and Home Buttons
To take a screenshot on an iPhone 8, simultaneously press the Sleep/Wake and Home buttons. This action captures the current screen and saves it to the Screenshots album in the Photos app. The Sleep/Wake button is located on the top right side of the iPhone, while the Home button is situated at the bottom center of the screen. Pressing both buttons at the same time will trigger a camera shutter sound and a flash, indicating that the screenshot has been taken. The screenshot will then be saved to the Screenshots album, where it can be viewed, edited, and shared. This method is a quick and easy way to capture and save a screenshot on an iPhone 8.
Verifying the Screenshot has been Taken
After taking a screenshot on your iPhone 8, it's essential to verify that the screenshot has been taken successfully. To do this, you can follow these simple steps. First, check your screen for a brief flash, which indicates that a screenshot has been captured. Next, look for a thumbnail of the screenshot in the bottom-left corner of your screen. This thumbnail will appear for a few seconds before disappearing. If you see the thumbnail, it means that the screenshot has been taken and saved to your Screenshots album in the Photos app. You can also check the Screenshots album to confirm that the screenshot has been saved. To do this, open the Photos app, tap on the Albums tab, and select the Screenshots album. If the screenshot is there, it means that it has been taken successfully. Additionally, you can also check the Notification Center to see if there's a notification that says "Screenshot saved to Screenshots album." If you see this notification, it's another confirmation that the screenshot has been taken. By following these steps, you can verify that the screenshot has been taken and saved to your iPhone 8.
Accessing and Viewing the Screenshot
To access and view your screenshot, navigate to the Photos app on your iPhone 8. The screenshot will be saved in the Screenshots album, which is automatically created when you take your first screenshot. To find the Screenshots album, open the Photos app and tap on the Albums tab at the bottom of the screen. Then, scroll down to the Media Types section and select Screenshots. This will display all the screenshots you've taken, including the most recent one. You can also use the Photos app's search function to find a specific screenshot by typing in keywords like "screenshot" or the date you took the screenshot. Additionally, you can view your screenshot in the Photos app's main feed, where it will be displayed along with your other photos and videos. From here, you can edit, share, or delete the screenshot as needed.
Editing and Sharing Your Screenshot on iPhone 8
Taking a screenshot on your iPhone 8 is just the first step in capturing and sharing a moment. Once you've taken a screenshot, you can edit it using the Markup tool, which allows you to add text, draw, and even crop your screenshot. After editing, you can share your screenshot with others via Messages, Email, or Social Media, making it easy to communicate and collaborate. Additionally, you can save and organize your screenshots in albums, keeping your Photos app tidy and making it easy to find specific screenshots later. In this article, we'll explore these features in more detail, starting with how to use the Markup tool to edit your screenshot.
Using the Markup Tool to Edit Your Screenshot
When you take a screenshot on your iPhone 8, you can use the Markup tool to edit it before sharing or saving it. To access the Markup tool, tap the thumbnail of the screenshot in the bottom-left corner of the screen. This will open the Markup editor, where you can use a variety of tools to annotate and edit your screenshot. You can use the pen tool to draw on the screenshot, the highlighter tool to highlight important text or areas, and the eraser tool to remove any unwanted marks. You can also add text to the screenshot using the text tool, and even add a signature or other images using the + icon. Additionally, you can crop the screenshot to focus on a specific area, and use the undo and redo buttons to experiment with different edits. Once you're happy with your edits, you can share the screenshot via email, message, or social media, or save it to your Photos app. The Markup tool is a powerful and intuitive way to edit and enhance your screenshots, and can be a big time-saver when you need to communicate complex information or provide feedback. By using the Markup tool, you can add context and clarity to your screenshots, making them more effective and engaging.
Sharing Your Screenshot via Messages, Email, or Social Media
After capturing a screenshot on your iPhone 8, you can easily share it with others via Messages, Email, or Social Media. To do this, tap the thumbnail of the screenshot in the bottom-left corner of the screen. This will open the Markup editor, where you can edit and annotate your screenshot before sharing it. If you don't want to edit your screenshot, you can skip this step and go straight to sharing. To share your screenshot, tap the "Share" icon, which looks like a box with an arrow coming out of it. This will open the Share menu, where you can choose how you want to share your screenshot. You can share it via Messages, Email, or social media platforms like Facebook, Twitter, or Instagram. Simply select the app you want to use, and your screenshot will be attached to a new message or post. You can also add a caption or message to your screenshot before sharing it. Additionally, you can also use the "Other Options" section to share your screenshot via other apps, such as Notes, Photos, or Files. Once you've selected how you want to share your screenshot, tap the "Share" button to send it to your chosen destination. Your screenshot will be shared instantly, and you can even see a preview of how it will look before it's sent. Sharing your screenshot is a great way to quickly communicate with others, whether it's to show them a funny meme, a screenshot of a conversation, or a photo of a product you're interested in. With the iPhone 8, sharing your screenshot is easier than ever, and you can do it all from the palm of your hand.
Saving and Organizing Your Screenshots in Albums
Taking a screenshot on your iPhone 8 is just the first step; organizing and saving them is equally important. With the numerous screenshots you take, it can be overwhelming to find a specific one when you need it. This is where creating albums comes in handy. To save and organize your screenshots in albums, start by opening the Photos app on your iPhone 8. Tap on the "Albums" tab at the bottom of the screen, then tap on the "+" icon in the top left corner to create a new album. Name your album, such as "Screenshots," and add a description if desired. Now, go to the "Media Types" tab and select "Screenshots" to view all your screenshots. Tap "Select" in the top right corner, then choose the screenshots you want to add to your new album. Tap "Add" to move them to the album. You can also add screenshots to an existing album by tapping "Add to Album" when viewing a screenshot. Additionally, you can use the "Smart Albums" feature, which automatically organizes your screenshots into albums based on the app or website you took the screenshot from. To access Smart Albums, go to the "Albums" tab, tap "See All," and then tap "Smart Albums." This feature is especially useful if you take a lot of screenshots from the same app or website. By organizing your screenshots into albums, you can easily find and access the ones you need, making it a more efficient and productive experience.