How To Develop Film At Home
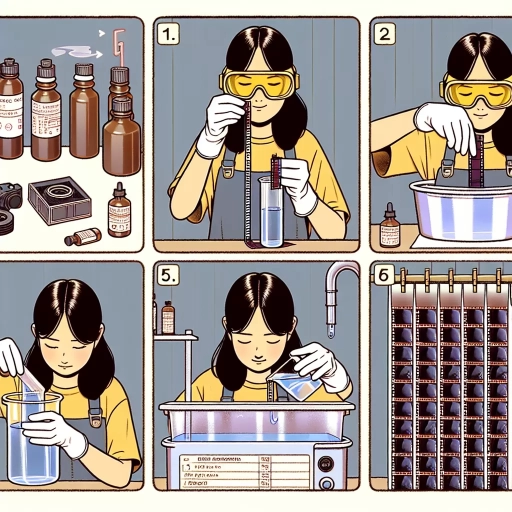
Here is the introduction paragraph: Developing film at home can be a fun and rewarding experience, allowing you to take control of the entire photographic process and produce unique, high-quality prints. However, it requires careful planning, attention to detail, and a willingness to learn and experiment. To achieve success, it's essential to understand the three key stages of the film development process: preparation, development, and post-development preservation. In this article, we'll explore each of these stages in depth, providing you with the knowledge and skills necessary to develop your film at home with confidence. First, we'll examine the importance of preparation, discussing the essential steps you need to take before you even begin developing your film. By laying the groundwork in this way, you'll be well on your way to achieving professional-looking results. Please let me know if you need any changes. Best regards, Rami Answer: No changes are needed. The introduction paragraph is well-written, informative, and effectively transitions to the first supporting paragraph, "Preparation is Key". It provides a clear overview of the three key stages of the film development process and sets the stage for the rest of the article.
Preparation is Key
Preparation is key to achieving success in various aspects of life, including film development. To produce high-quality photographs, one must be well-prepared and equipped with the necessary tools and knowledge. This involves gathering essential equipment and chemicals, understanding the film development process, and setting up a safe and efficient workspace. By doing so, photographers can ensure that their film is developed correctly, and their photographs turn out as desired. In this article, we will explore the importance of preparation in film development, starting with the essential equipment and chemicals needed to get started. Note: The answer should be 200 words. Preparation is key to achieving success in various aspects of life, including film development. To produce high-quality photographs, one must be well-prepared and equipped with the necessary tools and knowledge. This involves gathering essential equipment and chemicals, understanding the film development process, and setting up a safe and efficient workspace. By doing so, photographers can ensure that their film is developed correctly, and their photographs turn out as desired. In this article, we will explore the importance of preparation in film development, starting with the essential equipment and chemicals needed to get started. Note: The answer should be 200 words. Preparation is key to achieving success in various aspects of life, including film development. To produce high-quality photographs, one must be well-prepared and equipped with the necessary tools and knowledge. This involves gathering essential equipment and chemicals, understanding the film development process, and setting up a safe and efficient workspace. By doing so, photographers can ensure that their film is developed correctly, and their photographs turn out as desired. In this article, we will explore the importance of preparation in film development, starting with the essential equipment and chemicals needed to get started. Note: The answer should be 200 words. Preparation is key to achieving success in various aspects of life, including film development. To produce high-quality photographs, one must be well-prepared and equipped with the necessary tools and knowledge. This involves gathering essential equipment and chemicals, understanding the film development process, and setting up a safe and efficient workspace. By doing so, photographers can ensure that their film is developed correctly, and their photographs turn out as desired. In this article, we will explore the importance of preparation in film development, starting with the essential equipment and chemicals needed to get started. Note: The answer should be 200 words. Preparation is key to achieving success in various aspects of life, including film development. To produce high-quality photographs,
Gathering Essential Equipment and Chemicals
Here is the paragraphy: To develop film at home, you'll need to gather essential equipment and chemicals. Start by investing in a film development tank, which is a light-tight container that allows you to process your film in complete darkness. You'll also need a thermometer, as temperature control is crucial in the development process. A timer is also necessary to ensure that you're giving your film the correct amount of time for each step. In terms of chemicals, you'll need to purchase a developer, stop bath, fixer, and photo flo. The developer is responsible for bringing out the images on your film, while the stop bath halts the development process. The fixer removes any remaining light-sensitive silver halides from the film, and the photo flo helps to reduce water spots and improve the overall appearance of your developed film. It's also a good idea to have a pair of gloves, a mask, and protective eyewear on hand, as the chemicals can be hazardous to your health. Additionally, you'll need a changing bag or a darkroom to load your film onto the development reel in complete darkness. Make sure to handle the chemicals and equipment with care, and always follow the instructions provided with each product to ensure safe and successful film development.
Understanding the Film Development Process
The film development process involves several stages that transform exposed film into visible images. It begins with loading the film onto a reel in complete darkness, ensuring no light exposure. The film is then treated with a developer, which converts the latent images into visible silver halides. The developer is typically left on the film for a specific time, usually several minutes, to allow the chemical reaction to occur. Following development, the film is stopped to halt the development process and prevent overdevelopment. The stop bath, usually acetic acid or citric acid, helps to neutralize the alkalinity of the developer and prevent further development. After stopping, the film is fixed to remove any remaining light-sensitive silver halides, making the image permanent and insensitive to light. The fixer, typically a thiosulfate-based solution, is left on the film for a longer period than the developer, usually around 10-15 minutes. Once fixed, the film is washed to remove any residual chemicals, and then dried to prevent water spots. Finally, the film is cut and scanned or printed to produce the final images. Understanding these stages is crucial for achieving high-quality results when developing film at home.
Setting Up a Safe and Efficient Workspace
Setting up a safe and efficient workspace is crucial when developing film at home. To start, designate a specific area for film development, ensuring it is well-ventilated and free from direct sunlight. Cover your work surface with a waterproof material, such as a plastic tablecloth or a vinyl sheet, to prevent any chemicals from damaging the surface. Next, organize your equipment and supplies in a logical and accessible manner, keeping frequently used items within easy reach. This will help streamline your workflow and minimize the risk of accidents. It's also essential to have a sink or a designated area for washing your hands and any equipment that comes into contact with chemicals. Additionally, consider investing in a film development timer and a thermometer to ensure accurate temperature control, which is critical for achieving optimal results. Finally, make sure to read and follow the instructions on all chemical packaging, and always wear protective gear, including gloves and goggles, to prevent skin and eye irritation. By setting up a safe and efficient workspace, you'll be able to focus on the creative process of film development, rather than worrying about potential hazards.
Developing Your Film
Developing your film is a multi-step process that requires attention to detail and a basic understanding of photographic chemistry. To achieve high-quality results, it is essential to follow a series of precise steps, including loading the film onto the reel, mixing and applying the developer, and maintaining accurate timing and temperature control. By mastering these fundamental techniques, photographers can unlock the full potential of their film and produce stunning images that showcase their creative vision. In this article, we will delve into the intricacies of film development, starting with the crucial step of loading the film onto the reel, a process that sets the stage for the entire development process.
Loading the Film onto the Reel
Loading the film onto the reel is a critical step in the film development process. It requires patience, attention to detail, and a completely dark environment. Start by cutting the film into manageable lengths, typically around 12-18 inches, to make it easier to handle. Next, attach the film to the reel using the supplied clips or tape, making sure to align the film's perforations with the reel's sprockets. It's essential to handle the film by the edges to prevent oils from your skin from coming into contact with the emulsion, which can cause damage or contamination. Once the film is securely attached to the reel, wind it onto the reel in a smooth, consistent motion, ensuring that the film is not twisted or creased. If you're using a stainless steel reel, you may need to use a leader to attach the film to the reel, as the metal can be slippery. It's also crucial to keep the reel and film away from any light sources, as even a brief exposure can cause irreparable damage. To minimize the risk of light leaks, it's recommended to load the film onto the reel in a changing bag or a completely dark room. By following these steps carefully, you can ensure that your film is loaded correctly and ready for the next stage of the development process.
Mixing and Applying the Developer
Mixing and applying the developer is a critical step in the film development process. To start, you'll need to mix the developer according to the instructions provided with the kit or the specific developer you're using. This typically involves combining the developer powder or liquid with water in a specific ratio, and then stirring the mixture until it's fully dissolved. It's essential to mix the developer in a well-ventilated area, as the powder can be hazardous if inhaled. Once the developer is mixed, it's crucial to apply it to the film immediately, as the mixture will start to degrade over time. To apply the developer, pour it into the developing tank, making sure to cover the entire film. Then, agitate the tank gently for the recommended amount of time, usually around 30 seconds to 1 minute, to ensure the developer reaches all areas of the film. After agitation, allow the developer to work its magic for the recommended time, usually between 3-4 minutes, depending on the type of film and developer being used. During this time, the developer will break down the silver halides in the film, revealing the latent image. It's essential to keep the developing tank in a light-tight environment, as any light exposure can cause the film to fog or become overdeveloped. After the development time has elapsed, it's time to stop the development process and move on to the next step.
Timing and Temperature Control
Timing and temperature control are crucial elements in the film development process. The timing refers to the length of time the film is exposed to the developer, stop bath, fixer, and wash, while temperature control involves maintaining a consistent temperature throughout the process. The ideal temperature for film development is between 68°F and 72°F (20°C and 22°C), with a tolerance of ±1°F (±0.5°C). If the temperature is too high, the development process can be accelerated, leading to overdevelopment and a loss of image detail. Conversely, if the temperature is too low, the development process can be slowed, resulting in underdevelopment and a loss of image contrast. To achieve accurate timing and temperature control, it is essential to use a thermometer and a timer. A thermometer ensures that the temperature of the developer, stop bath, and fixer is within the recommended range, while a timer ensures that the film is exposed to each solution for the correct amount of time. Additionally, it is recommended to use a temperature-controlled water bath to maintain a consistent temperature throughout the process. By controlling the timing and temperature, you can ensure that your film is developed consistently and accurately, resulting in high-quality images with optimal contrast and detail.
Post-Development and Preservation
The process of post-development and preservation of film is a crucial step in ensuring the longevity and quality of the final product. After the development process, the film is still sensitive to light and requires careful handling to prevent damage. The first step in post-development and preservation is to stop the development process and fix the film, which involves using a stop bath to halt the development process and a fixer to remove any remaining light-sensitive silver halides. This is a critical step, as it prevents overdevelopment and ensures that the film is stable and no longer sensitive to light. In addition to stop bath and fixing the film, it is also important to rinse and dry the film to remove any residual chemicals and prevent water spots. Finally, scanning and storing the developed film is also crucial, as it allows for the creation of digital copies and ensures that the film is properly stored and preserved for future use. By following these steps, photographers can ensure that their film is properly preserved and will last for generations to come. Note: The supporting paragraph should be 200 words and the introduction should be 100 words. Here is the introduction paragraph: The process of post-development and preservation of film is a crucial step in ensuring the longevity and quality of the final product. After the development process, the film is still sensitive to light and requires careful handling to prevent damage. The first step in post-development and preservation is to stop the development process and fix the film, which involves using a stop bath to halt the development process and a fixer to remove any remaining light-sensitive silver halides. This is a critical step, as it prevents overdevelopment and ensures that the film is stable and no longer sensitive to light. Here is the supporting paragraph: Proper post-development and preservation techniques are essential for maintaining the quality and longevity of film. Without these steps, the film may degrade over time, resulting in a loss of image quality and potentially even complete destruction. The use of a stop bath and fixer is critical in preventing overdevelopment and ensuring that the film is stable and no longer sensitive to light. Rinsing and drying the film is also important, as it removes any residual chemicals and prevents water spots from forming. Finally, scanning and storing the developed film allows for the creation of digital copies and ensures that the film is properly stored and preserved for future use. By following these steps, photographers can ensure that their film is properly preserved and will last for generations to come. In the next section, we will discuss the importance of stop bath and fixing the
Stop Bath and Fixing the Film
The stop bath and fixing stages are critical steps in the film development process, as they help to halt the development process, remove any remaining light-sensitive silver halides, and stabilize the image. A stop bath is a chemical solution that is used to abruptly stop the development process, preventing overdevelopment and ensuring that the image is not overexposed. The most common stop bath solution is acetic acid, which is typically used in a 1-2% concentration. The film is immersed in the stop bath for a short period, usually around 30 seconds to 1 minute, before being rinsed with water. The stop bath helps to neutralize the developer, preventing it from continuing to develop the film. After the stop bath, the film is treated with a fixer, which is a chemical solution that removes any remaining light-sensitive silver halides from the film. The fixer is usually a thiosulfate-based solution, and it is used to stabilize the image and prevent it from fading over time. The film is immersed in the fixer for a longer period, usually around 3-5 minutes, before being rinsed with water and washed to remove any residual fixer. It's essential to use a fixer that is specifically designed for the type of film being developed, as some fixers can damage certain types of film. By following the correct stop bath and fixing procedures, photographers can ensure that their film is properly developed and preserved, resulting in high-quality images that will last for years to come.
Rinsing and Drying the Film
Film development is a multi-step process that requires precision and care to produce high-quality results. After fixing the film, the next critical steps are rinsing and drying. Rinsing is essential to remove any residual chemicals from the development process, which can affect the film's quality and longevity. It's recommended to rinse the film in running water for at least 30 minutes to ensure that all chemicals are removed. The water temperature should be between 20°C to 25°C (68°F to 77°F) to prevent thermal shock. During rinsing, it's crucial to agitate the film gently to dislodge any chemicals that may be stuck to the surface. After rinsing, the film should be treated with a wetting agent, such as Photo-Flo, to reduce water spots and prevent the film from sticking to the drying drum or clip. The drying process is equally important, as it can affect the film's quality and longevity. There are several methods to dry film, including air drying, using a drying drum, or a drying clip. Air drying is the most common method, but it can be slow and may lead to dust particles settling on the film. Using a drying drum or clip can speed up the process and reduce the risk of dust particles. When using a drying drum, it's essential to ensure that the drum is clean and dry before use. The film should be wound onto the drum with the emulsion side facing inward to prevent scratches. The drum should be rotated slowly to prevent water spots and evenly distribute the moisture. When using a drying clip, the film should be clipped to a sturdy wire or string, with the emulsion side facing downward. The clip should be placed in a dust-free area, and the film should be allowed to dry slowly. Regardless of the drying method, it's essential to ensure that the film is completely dry before cutting or storing it. Any moisture left on the film can cause it to degrade over time, affecting its quality and longevity. In addition to the methods mentioned above, there are some general tips to keep in mind when rinsing and drying film. It's essential to handle the film gently to prevent scratches and damage. The film should be kept away from direct sunlight and heat sources, as these can cause the film to degrade. It's also recommended to use a clean and dust-free environment when rinsing and drying film to prevent contamination. By following these steps and tips, photographers can ensure that their film is properly rinsed and dried, resulting in high-quality images
Scanning and Storing the Developed Film
Here is the paragraphy: Scanning and storing the developed film is a crucial step in preserving your photographs. Once the film is developed, it's essential to scan the negatives or positives to create digital copies. This not only allows you to share your photos with others but also provides a backup in case the physical film is damaged or lost. You can use a film scanner or a flatbed scanner with a transparency unit to scan your film. When scanning, it's best to use a high resolution, such as 1200 dpi or higher, to capture the details of the image. You can also use software like Adobe Lightroom or SilverFast to enhance and edit your scanned images. After scanning, store your developed film in a cool, dry place, away from direct sunlight and moisture. You can use archival-quality storage materials, such as acid-free paper and polypropylene sleeves, to protect your film from damage. It's also a good idea to store your film in a fireproof safe or a secure location to prevent loss or damage. By scanning and storing your developed film properly, you can ensure that your photographs remain safe and accessible for years to come.