How To Make Gif On Iphone
 In the era of digital communication, the popularity of GIFs has skyrocketed, becoming a fun and inventive way to express our thoughts and feelings. If you're an iPhone user, you might wonder, "How can I create my own?" Transforming static images or videos into interactive, dynamic GIFs on your iPhone may seem like an advanced technical feat, but you can easily accomplish it in just three steps. This article offers an easy, understandable guide to help you through each step of this process. We'll start with preparing your iPhone for GIF creation, ensure you understand the ins and outs of selecting and editing your GIF content, and finally guide you through creating and saving your own personalized GIFs. By the end of this read, you’ll have honed your skills on making unique and engaging GIFs right at the tips of your fingers. So, let's embark on this imaginative journey beginning with "Step 1: Preparing Your iPhone for GIF creation."
Step 1: Preparing Your iPhone for GIF Creation
The first step towards creating GIFs on your iPhone involves having your device fully prepared. Ensuring your device is running smoothly and is set up correctly will result in an optimal GIF creation experience. Firstly, running the most recent iOS version is essential. Updates often bring enhancements and new features that could possibly enhance your GIF creation abilities. Secondly, regularly checking your iPhone's storage space should not be overlooked. Running low on storage may hinder your GIF creating efforts - this suggests that clearing any unnecessary data could be worthwhile. Finally, it is important that you are well-versed with the Photos app as it contains several in-built tools for making GIFs. Furthermore, knowing how to effectively navigate through the app can save valuable time. With these preparatory steps in check, creating GIFs would be a breeze. Now, let's delve into why and how to ensure your iPhone is running the latest iOS version - the first critical aspect in preparing your iPhone for smooth GIF creation.
1.1 Ensure Your iPhone is Running the Latest iOS Version
To ensure the smooth creation and sharing of GIFs, it is crucial to make sure your iPhone is running on the latest iOS version. Regular updates to iOS often include new features, bug fixes, security enhancements, and improvements that make devices run more efficiently. Start by verifying the existing iOS version on your iPhone. Simply navigate to “Settings,” click on “General,” and then select “About.” The number next to “Version” represents the iOS version your iPhone is currently running. If the iOS version is not the latest, it's highly recommended you update it. To update your iOS, go back to “General” and choose “Software Update.” If there is a newer version available, download and install it. Ensure that your iPhone is connected to Wi-Fi when performing the update, especially if it requires a large amount of data. Also, don't forget to back up your iPhone before updating its iOS. Updates usually occur without issue, but in case something goes wrong, it's always wise to have all your data saved elsewhere. Moreover, having a current iOS ensures compatibility with the latest apps and features. In the case of creating GIFs, some methods, apps, or tools used might not work properly with old iOS versions. Some might not even be accessible or deliver a poor-quality GIF. Thus, having the latest iOS version aids in avoiding such issues and allows the user to create and modify GIFs without any obstacles. Indeed, ensuring your iPhone is running the latest iOS version is an essential step in preparing your iPhone for GIF creation. This not only helps in producing high-quality GIFs smoothly and efficiently but also secures your device and optimizes overall performance. It is a fundamental requirement in making the most out of your iPhone's capabilities, thereby enhancing your GIF making experience.
1.2 Check Your iPhone's Storage Space
Maintaining enough storage space on your iPhone is crucial for smooth operation, including the creation of GIFs. One may wonder, why is storage space important in making a GIF? When you make a GIF on your iPhone, the process requires temporary storage space before it finalizes the product. Therefore, not having enough storage can disrupt the process, resulting in errors or a sluggish manifestation. Ensuring that you have surplus storage before starting aids in a seamless GIF creation process, allowing for a higher quality outcome. To check your iPhone's storage space, go to the ‘Settings’ app. Once there, navigate through and select 'General,' then hit 'iPhone Storage.' This action will reveal a bar graph displaying your used and available storage along with a list of applications inhabiting your storage space. Checking this before starting your GIF creation process can save you from running into unexpected interruptions in the process. If you notice that your storage is almost fully occupied, consider moving your media files to iCloud, deleting unused apps, or offloading your photos and videos to optimize space. Furthermore, the iPhone Storage displays recommendations for optimizing storage space. For instance, it may suggest you review large attachments, remove old conversations, or enable auto delete for old messages, depending on your settings and usage patterns. These actions can be extremely beneficial before starting the GIF creation process. Consequently, checking your iPhone's storage and following measures to free up space promotes fluid functionality of all processes, including making a GIF. Remember, a successful GIF creation does not just start and end with knowing the process; it also includes the device's readiness to take on the task. Always consider checking your storage first; a well-prepared iPhone betters the experience in creating your personalized GIFs.
1.3 Familiarize Yourself with the Photos App
The Photos app is your primary tool when it comes to creating GIFs on your iPhone. Start by familiarizing yourself with its features and layout. Locate the app on your iPhone's home screen; its icon resembles a multi-colored flower. Open it and you'll see a plethora of pictures and videos you've taken or saved on your device. At the bottom, you'll find tabs labeled 'Photos', 'For You', 'Albums', and 'Search'. The 'Photos' tab displays all your photos and videos in chronological order, while 'For You' collects your Memories and Featured Photos. 'Albums' organizes your photos into several categories, and 'Search' allows you to find pictures based on location, date, or event. Another important feature to note is the editing tools available in the Photos app. When you choose a photo and tap 'Edit' in the top-right corner, you'll access options to apply filters, crop, adjust light and color, and more. In order to create captivating GIFs, understanding all these elements and how they work together is paramount. For instance, knowing how to utilize your 'Albums' tab would be helpful in locating the images and videos you intend on transforming into a GIF swiftly. The Photos app also functions hand in hand with other apps like Messages and Mail, making it easier to share your finished GIFs instantly. Therefore, dedicating a bit of time to learn the ins and outs of this application can truly launch your iPhone GIF creation abilities to new heights. Remember, practice makes perfect; so, the more you explore and experiment with the Photos app, the better you'll become at using it.
Step 2: Selecting and Editing Your GIF Content
In order to create a captivating GIF, it is essential to understand that the selection and editing of your contents are keys to the overall success of your creation. For an impressive product, you need to set a solid groundwork that entails three indispensable steps; choosing the right photos and videos, trimming and editing your selected content, and adding text or drawings to emphasize your message. Let us commence with the first paramount phase, picking the right photos and videos. This is where you engage your creativity and use outstanding images that will convey your idea in a significant and appealing way. Picture quality, relevance, and propriety should guide you in this process. Tailoring your selections to align with your intended result is essential here, and this leads us to the second crucial step - trimming and editing your chosen content, to ensure that every component seamlessly contributes to making your picture-perfect, attention-grabbing GIF.
2.1 Choose the Right Photos and Videos
The core of creating an engaging and influential GIF on your iPhone revolves around selecting the right photos and videos. Images are the heart and soul of your GIF, and the way they're perceived largely determines their effectiveness. Thus, deliberate selection of photos and videos is a crucial phase in the GIF-making process. When making this selection, consider the message you're trying to convey or the emotion you aim to evoke. The photos and videos should be visually appealing and relevant to your topic. In selecting the right content, certain criteria should be considered. First is composition; well-composed images tend to have a balance of elements that visually attract the viewer. Next, prioritize high-resolution images to maintain sharpness and clarity when transcoded into a GIF format. GIFs are known to compress image data leading to reduced quality. Hence, starting with a high quality image gives the reins of control to the creator. Furthermore, consider artwork or engagement. GIFs with a sense of motion or progression work well since part of the magic of GIFs lies in their inherent dynamism. As you select your photos or video snippets, ensure they contain enough action or variation to maintain the attention of your audience throughout the GIF sequence. Also, a GIF should not be excessively long; hence, try to choose a scene that can succinctly relay your intended message or impact. Consider color in your selection as well. Vibrant and contrasting colors can quickly captivate viewers and add appeal to your GIF. But remember, consistent use of color helps in creating a uniform and visually pleasing GIF. If the original photos or videos you’ve chosen don’t match your desired color scheme, editing tools on your iPhone would come handy to tweak them. Finally, remember that the chosen images or videos must work together to tell a story or deliver a punch line. They should complement each other and the transition from one to next should seem smooth and natural. This is your narrative arc; with careful choice and thoughtful arrangement, every GIF becomes a short, silent film to engage and delight your viewers. A well-crafted GIF can generate a range of emotions, humor and can be a powerful tool to illustrate complex ideas in a simplistic and engaging manner. With careful consideration and choice of the right photos and videos on your iPhone, the creation of an effective and captivating GIF is just a few taps away.
2.2 Trim and Edit Your Selected Content
Having selected your preferred content, the next step entails trimming and editing to create your ideal GIF. iPhone users have the advantage of using the iOS built-in tools or downloadable applications to execute this task. This step proves important as it isolates the parts you intend your GIF to communicate, thus eliminating unnecessary footage that will not contribute to your intended message or humor. A lengthy GIF could lose its appeal by becoming monotonous. Therefore, to retain the viewer's attention, aiming for a shorter and concise GIF ensures you create a direct, engaging, and interactive piece. The iOS Photos app comes with an editing tool that helps you cut out the sections you don't need in your video. To do this, open the video in your Photos app, tap 'Edit' and use the slider at the bottom of the screen to select the part you wish to keep for your GIF. A yellow frame indicates your selected part. Additionally, for a more intricate edit, applications like GIF Maker or GIPHY offer a wide array of features. Not only do they offer trimming options, but they also allow you to add captions, stickers, filters, or even merge multiple GIFs. They also provide the reverse video option and the ability to manage the speed of your GIF. It's worth noting that careful execution of this step ensures a clean, desirable, and high-quality output. Avoid any complex edits that could compromise the GIF's quality and steer clear from using too many embellishments that might distract the audience from the main content. In contrast, for those with advanced knowledge of editing, more elaborate applications like Adobe Photoshop permit the creation of professional-quality GIFs. Such applications provide numerous options to control the look and feel of your animation, including layering, coloring, and timing. They can be complex for first-time users but, once mastered, they offer unparalleled control over your GIF creation. Trimming and editing your content allow you to communicate effectively, befitting the famous adage that less is more. It guarantees your GIF remains amusing and captivating without exhausting your viewers. Therefore, take time with this step, use the right tools, and ensure you tailor your content, maintaining the fundamental aspects to create that eye-catching GIF.
2.3 Add Text and Drawings to Enhance Your GIF
With the help of various applications available on the App Store like GIPHY, GifLab, Gif Maker, etc., creating, adding text, and drawing on GIFs using iPhones have become incredibly easy. Step 2.3 adds another level of creativity to your GIF by enabling you to embellish your content with text and drawings, thus building on the foundational work achieved in Step 2: Selecting and Editing Your GIF Content. Once you have selected and edited your preferred content for your GIF, it's time to add a personal touch to your creation by embedding text or making drawings. To add text, simply select the "Text" option usually found at the bottom panel of these gif-making applications. You might be wondering why adding text could enhance your GIF? Text effectively provides a stronger context to your content. It effectively conveys or emphasises the message you want to send across via your GIF. There are a plethora of font styles, sizes and colours for you to choose from, allowing you flexibility in resonating your text with your GIF content. You can place the text anywhere on your GIF and adjust its size to suit your preference. It's worth noting that a short, clear, and witty text often works best for GIFs, considering the typically fast loop rate of GIF playback. On the other hand, the "Draw" tool, another fun way to customise your GIF, lets you add drawings or sketches over your content. It usually sits next to the text option in gif-creating apps. This tool can be an outlet for your creative juices - from drawing a hat on your dog's photo or sketching a birthday cake on your friend's picture to adding smiley faces or hearts. Drawing on your GIF allows you to give a fun and unique twist to your content. In essence, adding text and drawings gives you a wide range of options to play around with. It inevitably opens up new avenues to express your creativity and make your GIF more engaging and meaningful. Regardless of what edits or enhancements you decide to incorporate, always ensure that they compliment the primary content, in turn enhancing its overall impact and not overshadowing the actual GIF. Remember, the goal is to produce a cleverly curated, attention-grabbing, and unique GIF that is sure to bring about a smile or a chuckle when viewed.
Step 3: Creating and Saving Your GIF
In the thrilling third step of our guide, we will venture into the creative process of generating, tweaking and storing your extraordinary GIFs. We shall break down this process into three easy-to-follow parts in order to ensure that every reader can successfully maneuver the landscape of GIF creation. The first section, "Use the Photos App to Create a GIF", will initiate your journey into the creative world by teaching you how to transform conventional photos into lively, communicative GIFs through the Photos application. From there, we progress into the spirit of experimentation with our part two, 'Experiment with Different GIF Settings.' In this section, we open a Pandora's box of customization features and teach you how to manipulate these settings to personalize your GIFs. Lastly, we secure your masterpiece in 'Save and Share Your Finished GIF,' wherein we guide you through the process of saving your freshly minted GIF and sharing it with the online cosmos. Now that we have skimmed the surface of each section let us dive further into the first part, 'Use the Photos App to Create a GIF.'
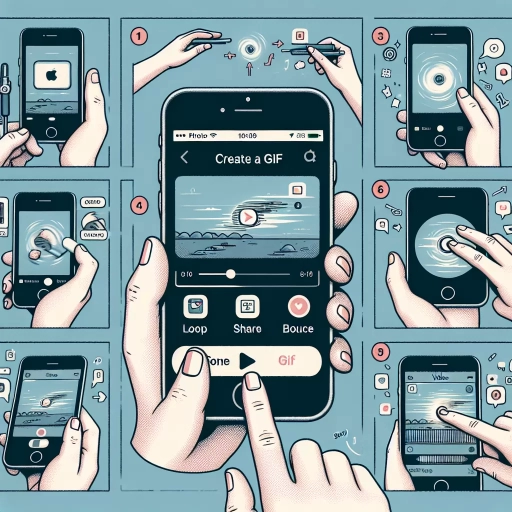
3.1 Use the Photos App to Create a GIF
The Photos app on your iPhone houses an ocean of exciting features and functionalities that can significantly enhance the quality of your photos. One such impressive feature is the ability to create a GIF. You might be wondering; what is a GIF? In short, a GIF (Graphics Interchange Format) is a type of digital file that is small and supports both animated and static images. If you want to captivate your audience or create engaging content for your social media followers, GIFs provide a good way of bringing your creative ideas to life. Now, if you want to create a GIF using the Photos app on your iPhone, follow these simple steps. To kick start the process, launch the Photos app from your iPhone's home screen. Proceed to select the Live Photo you want to turn into a GIF. Press 'edit' on the top right corner of your screen. A slider will appear at the bottom. A key icon will be visible on the slider - this represents the key frame of the image. Scroll through the slider and pause on the frame you want to use as the keyframe for your GIF. Adjust according to your preference by employing the Markup tool. To make your GIF engaging, consider adding relevant captions or doodles. Once satisfied with the animated effects and presentation design, go ahead and swipe upwards. You'll spot four effects: Live, Loop, Bounce, and Long Exposure. For fruitful GIF animation, choose either the 'Loop' or 'Bounce' effect. Remember, choosing 'Loop' will have your GIF play in a loop, acting like a boomerang bouncing back and forth. Save your GIF by simply tapping 'done.' Using iPhone Photos to create a GIF is as simple as that. It's a fun way of making your images come to life, adding extra flair to your visual content. As the current generation is creatively inclined, and social networking sites promote the use of GIF reactions and responses, mastering the art of creating GIFs can work in your favor. So, go ahead, experiment this feature, and indulge in creating amusing and engaging GIF animations. Not only does it add a creative touch to your visuals, but it also makes your posts more relatable and entertaining to your audience. The best part - you can make a GIF out of any photo in your gallery, ensuring non-stop entertainment. Take the artistic route today, tap onto the 'Photos' app of your iPhone, and kickstart your GIF creation journey!
3.2 Experiment with Different GIF Settings
In the process of creating and saving your GIF on your iPhone, one pivotal step that might leave you astounded with the results is the 3.2 experiment with different GIF settings. After the successful conversion of your video to GIF, the customization options you tackle are profoundly limitless. By experimenting with various GIF settings, you can remarkably alter the appearance and feel of your GIF to align with your expressed persona and convey the exact message you intended. Primarily, you can tweak the animation speed. This helps in creating the desired emphasis; a slower speed can intensify a dramatic moment, while a faster one accelerates the sequence to clinch humor or excitement. The control you have over speed customization ensures the GIF aligns perfectly with the desired tone. Secondly, you can experiment with different filters. This feature allows you to apply a wide array of effects, from vibrant color enhancements, sepia tones, to black and white color schemes according to your preference. Consequently, filters can change the tone, mood, and aesthetic of your GIF in a great way. Caption addition is another crucial setting you can play with. Quirky or explanatory phrases can be superimposed onto your GIF, offering an additional layer of communication. Font type, size, and color can also be adjusted to complement the vibe of your GIF. Moreover, experimenting with frames is another option. You can choose a specific frame as the cover of your GIF and also delete or add more frames to create a more engaging GIF. You can even add or remove loops that can make your GIF play continuously or for a certain number of times. Another dimension you might want to experiment with is the aspect ratio & cropping. Different platforms may necessitate different sizes and shapes, and the ability to crop your GIF to a suitable size without compromising the content is a handy feature. Play with the resolution and quality as well. Higher resolution leads to a more detailed and sharper image but with larger file size, while a lower resolution produces a less detailed and blurrier image but with a smaller file size. In conclusion, the possibility to customize and experiment with your GIF settings implies that you have a great deal of authority over the final product. Each alteration can create a substantial visual difference, hence it is fundamental to take some time and explore these options. By doing so, you can save and create your GIF that speaks your mind artistically and ingeniously. That’s the beauty of making GIFs on your iPhone; once the technicalities are out of the way, it’s all about letting your creativity and individuality shine.
3.3 Save and Share Your Finished GIF
The third step in creating a GIF on your iPhone is the ability to save and share your newly created, dynamic image. This 3.3 Save and Share Your Finished GIF section discusses the simplest and most effective ways to not only save your captivating animation, but also share with others, as a crucial part of Step 3: Creating and Saving Your GIF. Upon completion of your GIF, the next essential step is to save it on your device. Most GIF creator apps, such as Giphy, ImgPlay, GIF Toaster, enable the users to save the GIF directly to their camera roll or photo library. This is usually achieved by a single tap on the 'Save' option which generally could be found at the top-right or bottom-right of these applications' interface. Saved GIFs can be viewed at any time and do not necessarily require internet connection for access once downloaded. But creation and saving of GIFs are not meant to end in your gallery. They are designed as expressive digital tools to liven up your digital interaction. Therefore, sharing your art is an opportunity to showcase your creativity to the world. Various platforms support GIF sharing, including social media platforms like Facebook, Instagram and Twitter, messaging apps like iMessage, WhatsApp and more. The process to share is pretty straightforward. One needs to select the desired GIF from the camera roll, tap on the 'Share' or 'Send' button (often represented by an arrow or paper plane icon) and choose the preferred platform to share. But before you go GIF-sharing, it's vital to ensure that your recipient's device and chosen platform support GIF files. While most modern platforms have this functionality, there might be limitations on file size, dimensions or autoplay features depending on the specific app or device. Encapsulating stories, emotions, and information, GIFs have evolved as an incredible communication tool that blends the charm of images and the expressiveness of videos. Whether it's sending a hilarious reaction to a friend's text, making your emails more engaging, or making your social media posts more dynamic, understanding how to create, save and share GIFs on your iPhone expands your digital vocabulary and enables a more vibrant and interactive form of communication.