How To Tie Stretchy Bracelet String
Here is the introduction paragraph: Tying a stretchy bracelet string can seem intimidating, but with the right guidance, you can master this simple yet stylish accessory. To get started, it's essential to understand the basics of stretchy bracelet string, including the types of materials used and how they work. Once you have a grasp of the fundamentals, you can prepare to tie your stretchy bracelet string by gathering the necessary tools and materials. With your materials in hand, you can then move on to the fun part - tying the stretchy bracelet string. In this article, we'll break down each step of the process, starting with the basics of stretchy bracelet string.
Understanding the Basics of Stretchy Bracelet String
When it comes to creating unique and personalized jewelry, understanding the basics of stretchy bracelet string is essential. A good quality stretchy bracelet string can make all the difference in the overall look and feel of your finished piece. But what exactly is stretchy bracelet string made of, and how do you choose the right type for your project? In this article, we will delve into the world of stretchy bracelet string, exploring its composition, the different types available, and how to select the perfect one for your needs. From understanding the materials used to create stretchy bracelet string, to navigating the various types and their characteristics, we will cover it all. By the end of this article, you will be equipped with the knowledge to create beautiful and durable stretchy bracelets that will impress. So, let's start by taking a closer look at what stretchy bracelet string is made of.
What is Stretchy Bracelet String Made Of
Stretchy bracelet string, also known as elastic cord or stretch cord, is typically made from a type of synthetic rubber called polyurethane or polyisoprene. This material is known for its elasticity, flexibility, and durability, making it an ideal choice for creating stretchy jewelry. The polyurethane or polyisoprene is usually mixed with other materials, such as polyester or nylon, to enhance its strength and resistance to abrasion. The resulting string is then treated with a process called vulcanization, which cross-links the molecules to create a strong and flexible bond. This process allows the string to stretch and return to its original shape without losing its elasticity. Some stretchy bracelet strings may also be coated with a thin layer of wax or silicone to reduce friction and prevent tangling. Overall, the combination of polyurethane or polyisoprene with other materials and treatments makes stretchy bracelet string a reliable and long-lasting choice for jewelry makers.
Types of Stretchy Bracelet String
There are several types of stretchy bracelet string available in the market, each with its unique characteristics, advantages, and disadvantages. The most common types of stretchy bracelet string include elastic cord, beading cord, and stretchy cord. Elastic cord is a popular choice among jewelry makers due to its high elasticity, durability, and affordability. It is available in various thicknesses and colors, making it suitable for a wide range of designs. Beading cord, on the other hand, is a type of stretchy string specifically designed for beading projects. It is usually made of nylon or polyester and is known for its softness, flexibility, and resistance to tangling. Stretchy cord is a type of string that is made from a combination of elastic and non-elastic materials. It is known for its high stretchability and is often used for making chunky and statement pieces. Other types of stretchy bracelet string include waxed cord, leather cord, and suede cord, which are often used for making more rustic and bohemian-inspired designs. When choosing a type of stretchy bracelet string, it's essential to consider the design, material, and intended use of the bracelet to ensure the best results.
Choosing the Right Stretchy Bracelet String for Your Project
When it comes to choosing the right stretchy bracelet string for your project, there are several factors to consider. First, think about the type of beads or charms you'll be using. If you're working with small, delicate beads, you'll want a string that's thin and flexible to accommodate them. On the other hand, if you're using larger beads or heavier charms, you'll need a thicker, more durable string to support their weight. Next, consider the desired length of your bracelet. If you want a shorter, more delicate design, you'll want a shorter length of string. If you're going for a longer, more dramatic look, you'll need a longer length of string. You should also think about the color and texture of the string. If you're using brightly colored beads, you may want a clear or neutral-colored string to let them shine. If you're going for a more subtle look, you may want a string that matches the color of your beads. Finally, consider the material of the string. Some stretchy bracelet strings are made from elastic, while others are made from nylon or cotton. Elastic strings are great for projects that require a lot of stretch, while nylon or cotton strings are better suited for projects that need a bit more structure. By considering these factors, you can choose the right stretchy bracelet string for your project and create a beautiful, professional-looking piece of jewelry.
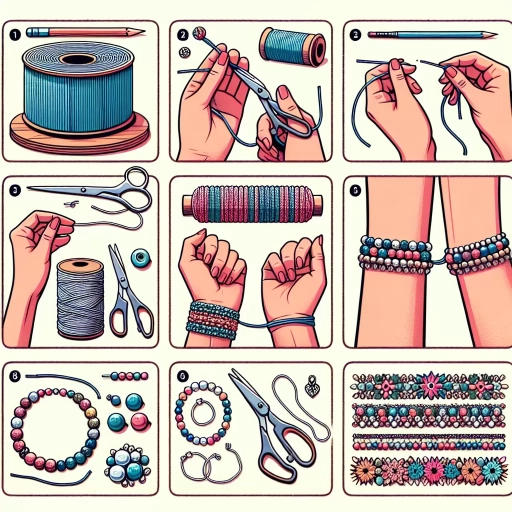
Preparing to Tie Your Stretchy Bracelet String
Preparing to tie your stretchy bracelet string is a crucial step in creating a beautiful and durable piece of jewelry. To ensure a successful outcome, it's essential to gather the necessary materials and tools, measure and cut the stretchy bracelet string accurately, and create a comfortable and organized workspace. By following these steps, you'll be able to tie your stretchy bracelet string with ease and confidence. In this article, we'll explore each of these steps in detail, starting with the first and most critical step: gathering materials and tools. With the right materials and tools at your disposal, you'll be well on your way to creating a stunning stretchy bracelet.
Gathering Materials and Tools
To prepare for tying your stretchy bracelet string, it's essential to gather the necessary materials and tools. You'll need a few simple items, including a stretchy cord or string, a pair of scissors, a lighter or a match, a ruler or a measuring tape, and a flat surface to work on. The stretchy cord or string can be made of various materials, such as elastic, nylon, or cotton, and comes in different colors, textures, and thicknesses. Choose a cord that suits your desired bracelet style and size. The scissors should be sharp and dedicated to cutting the stretchy material to avoid damaging the blades. A lighter or a match is necessary for melting the ends of the cord to prevent fraying. A ruler or a measuring tape will help you measure and cut the cord to the correct length. Finally, a flat surface, such as a table or a countertop, provides a stable area to work on, allowing you to focus on tying your bracelet string. Having all these materials and tools ready will ensure a smooth and successful bracelet-tying process.
Measuring and Cutting the Stretchy Bracelet String
When measuring and cutting the stretchy bracelet string, it's essential to get the length just right to ensure a comfortable and secure fit. To start, wrap the string around your wrist, overlapping the ends by about half an inch. This will give you a good idea of the length you need. Next, use a ruler or measuring tape to measure the length of the string, making sure to include the overlap. For a standard adult size, the length is usually around 7-8 inches. If you're making a bracelet for a child or a smaller wrist, you may need to adjust the length accordingly. Once you have your measurement, use scissors or a craft knife to cut the string to the desired length. It's better to err on the side of caution and cut a slightly longer length, as you can always trim it down later if needed. When cutting, make sure to cut cleanly and smoothly, as a rough cut can cause the string to fray or unravel. By taking the time to accurately measure and cut your stretchy bracelet string, you'll be able to create a comfortable and stylish accessory that fits perfectly.
Creating a Workspace for Tying the Bracelet
When creating a workspace for tying the bracelet, it's essential to choose a flat and stable surface that provides ample room to work on your project. A desk, table, or countertop is ideal, as it allows you to spread out your materials and tools without feeling cramped. Ensure the surface is clear of clutter and distractions, giving you a clean slate to focus on your craft. Good lighting is also crucial, as it will help you see the tiny threads and beads more clearly. Natural light is always the best option, but if you're working in a dimly lit area, consider using a desk lamp to illuminate your workspace. Additionally, having a comfortable and ergonomic seating arrangement will help you stay focused and avoid fatigue during the tying process. A chair with good back support and a footrest can make a big difference in your overall comfort level. To keep your materials organized, consider using a small tray or container to hold your beads, threads, and other supplies. This will prevent them from getting scattered or lost, and make it easier to access the items you need as you work on your bracelet. By setting up a well-organized and comfortable workspace, you'll be able to focus on the creative process of tying your stretchy bracelet string and achieve professional-looking results.
Tying the Stretchy Bracelet String
Tying the stretchy bracelet string can be a bit tricky, but with the right techniques, you can create a beautiful and secure piece of jewelry. To start, it's essential to learn the basic knots that will hold your bracelet together. Once you've mastered these knots, you can add beads or charms to give your bracelet a personalized touch. Finally, finishing the bracelet with a secure knot is crucial to prevent it from coming undone. In this article, we'll explore the basic knots for tying stretchy bracelet string, adding beads or charms, and finishing the bracelet with a secure knot. Let's begin with the foundation of a great stretchy bracelet: the basic knots.
Basic Knots for Tying Stretchy Bracelet String
Tying a stretchy bracelet string requires a good understanding of basic knots. The foundation of any knot is the "bunny ear" or "loop," which is created by folding the string in half and tucking the folded end under the main part of the string. From this foundation, you can create a variety of knots, including the "square knot" or "reef knot," which is a simple and effective knot for securing the string. To tie a square knot, start by creating a bunny ear, then wrap the string around the main part of the string and pass it through the loop. Pull the string tight to secure the knot. Another essential knot is the "bowline knot," which creates a secure loop at the end of the string. To tie a bowline knot, create a bunny ear, then pass the string through the loop and around the main part of the string. Bring the string back through the loop and pull it tight to secure the knot. These basic knots are the building blocks for more complex knots and are essential for tying a stretchy bracelet string. By mastering these knots, you can create a variety of stylish and secure bracelets.
Adding Beads or Charms to Your Stretchy Bracelet
Adding beads or charms to your stretchy bracelet can elevate its style and make it more personalized. To add beads or charms, start by threading the stretchy string through the hole of the bead or charm. If the bead or charm has a large hole, you can use a bead stopper or a small dot of clear nail polish to prevent it from sliding off. Once the bead or charm is in place, you can adjust its position by gently pulling on the string. You can add as many beads or charms as you like, spacing them out evenly or creating a pattern. When adding multiple beads or charms, it's a good idea to work from the center of the bracelet outwards, to ensure that they are evenly spaced. You can also experiment with different types of beads and charms, such as seed beads, gemstone beads, or metal charms, to create a unique and eye-catching design. By adding beads or charms to your stretchy bracelet, you can add texture, interest, and personality to your jewelry piece.
Finishing the Bracelet with a Secure Knot
Finishing the bracelet with a secure knot is a crucial step to ensure that your stretchy bracelet stays in place and doesn't come undone. To achieve this, you can use a few different knotting techniques. One popular method is the "bunny ear" knot, which involves folding the string into a loop and then wrapping the ends around the center to create a secure fastening. Another option is the "lark's head" knot, which involves folding the string into a loop and then passing the ends through the loop to create a knot. Regardless of the technique you choose, make sure to pull the knot tight to secure it in place. You can also add a dab of clear nail polish to the knot to help keep it from coming undone over time. By taking the time to finish your bracelet with a secure knot, you can enjoy wearing your stretchy bracelet with confidence, knowing that it will stay in place all day long.