How To Take A Screenshot On Iphone 15
Here is the introduction paragraph: Taking a screenshot on an iPhone 15 is a straightforward process that can be useful in various situations, such as capturing a memorable moment, saving information, or troubleshooting an issue. To get started, it's essential to understand the basics of taking a screenshot on your iPhone 15, including the different methods available and the features that come with it. In this article, we'll explore the various ways to take a screenshot on your iPhone 15, from the traditional method to more advanced techniques. We'll also cover how to edit and share your screenshots, making it easy to enhance and distribute them as needed. By the end of this article, you'll be equipped with the knowledge to take, edit, and share screenshots like a pro. So, let's begin by understanding the basics of taking a screenshot on iPhone 15.
Understanding the Basics of Taking a Screenshot on iPhone 15
Taking a screenshot on an iPhone 15 is a straightforward process that can be mastered with a little practice. To get started, it's essential to understand the basics of screenshotting on this device. This involves locating the Sleep/Wake button and Home button, understanding the role of the Volume Down button, and familiarizing yourself with the Screenshot Preview feature. By grasping these fundamental concepts, you'll be able to capture and share your iPhone 15 screen with ease. In this article, we'll delve into each of these topics, starting with the first step: locating the Sleep/Wake button and Home button.
Locating the Sleep/Wake Button and Home Button
To locate the Sleep/Wake button and Home button on your iPhone 15, start by looking at the top right side of your device, where you'll find the Sleep/Wake button. This button is used to turn your iPhone on and off, as well as put it to sleep and wake it up. It's a small, oval-shaped button that's easy to press. Next, look at the bottom center of your iPhone, where you'll find the Home button. The Home button is a circular button with a square icon in the center, and it's used to return to the home screen, access the app switcher, and activate Siri. On iPhone 15 models with Face ID, the Home button is not present, and the Sleep/Wake button is located on the top right side of the device. By familiarizing yourself with the location of these buttons, you'll be able to navigate your iPhone with ease and take screenshots quickly and efficiently.
Understanding the Role of the Volume Down Button
The Volume Down button plays a crucial role in taking a screenshot on an iPhone 15. Located on the left side of the device, this button is often overlooked, but it's essential to understand its function to capture screenshots successfully. When you press the Volume Down button simultaneously with the Side button, the iPhone 15 captures a screenshot of the current screen. This button combination is the standard method for taking screenshots on iPhone 15 devices. It's worth noting that the Volume Down button is also used for other functions, such as adjusting the volume during music playback or video watching. However, when used in conjunction with the Side button, its primary function is to facilitate screenshot capture. By understanding the role of the Volume Down button, you can take screenshots with ease and precision, allowing you to capture and share important information, funny moments, or memorable experiences with others.
Familiarizing Yourself with the Screenshot Preview
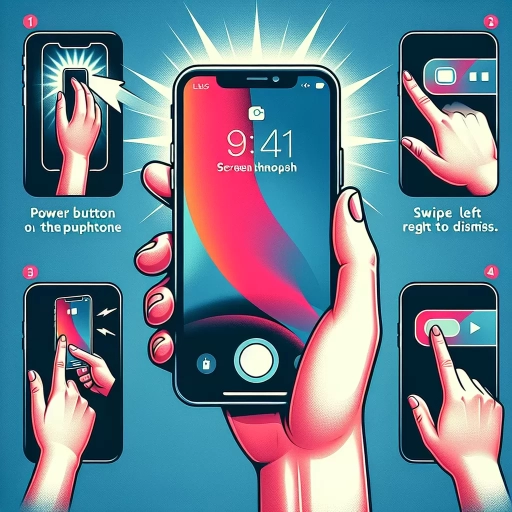
When you take a screenshot on your iPhone 15, a thumbnail of the screenshot will appear in the bottom-left corner of the screen. This is known as the Screenshot Preview. Familiarizing yourself with the Screenshot Preview is essential to understand the basics of taking a screenshot on your iPhone 15. The Screenshot Preview allows you to quickly view, edit, and share your screenshot without having to navigate to the Photos app. You can tap on the Screenshot Preview to open it in the Markup editor, where you can crop, annotate, and add text to your screenshot. You can also swipe left on the Screenshot Preview to dismiss it and save the screenshot to your Photos app. Additionally, you can tap the "Share" icon on the Screenshot Preview to share your screenshot via email, message, or social media. By understanding the Screenshot Preview, you can streamline your screenshot workflow and make the most out of this feature on your iPhone 15.
Methods for Taking a Screenshot on iPhone 15
Capturing a screenshot on an iPhone 15 is a straightforward process that can be accomplished in several ways. For users who prefer a more traditional approach, the combination of the Sleep/Wake and Home buttons can be employed. Alternatively, individuals who require more accessibility features can utilize the AssistiveTouch functionality to take a screenshot. Additionally, iPhone 15 users can also activate Siri to take a screenshot, providing a hands-free experience. In this article, we will explore these methods in more detail, starting with the most common technique: Using the Sleep/Wake and Home Buttons Combination.
Using the Sleep/Wake and Home Buttons Combination
To take a screenshot on your iPhone 15, you can use the Sleep/Wake and Home buttons combination. This method is simple and straightforward. First, make sure that the screen you want to capture is displayed on your iPhone. Then, locate the Sleep/Wake button, which is on the top right side of your iPhone, and the Home button, which is at the bottom of the screen. Press and hold the Sleep/Wake button and the Home button simultaneously for about one second. You will hear a camera shutter sound and see a flash on the screen, indicating that the screenshot has been taken. The screenshot will be saved to your Screenshots album in the Photos app, where you can view, edit, and share it as needed. This method is quick and easy, and it works well for capturing screenshots of your iPhone's screen.
Utilizing the AssistiveTouch Feature for Screenshot
Utilizing the AssistiveTouch feature is another method for taking a screenshot on your iPhone 15. This feature is particularly useful for individuals who have difficulty pressing the physical buttons or prefer a more accessible way of capturing their screen. To enable AssistiveTouch, go to Settings, then Accessibility, and select Touch. From there, toggle on AssistiveTouch, which will display a floating icon on your screen. Next, create a new gesture by tapping on "Customize Top Level Menu" and then the "+" icon. Select "Screenshot" from the list of available actions and tap "Done." With AssistiveTouch enabled, you can now take a screenshot by tapping the floating icon and then the screenshot action. This method provides an alternative way to capture your screen without relying on the physical buttons, making it a convenient option for those who need it.
Activating Siri to Take a Screenshot
Activating Siri to take a screenshot is a convenient method that allows you to capture your screen without having to physically press any buttons. To do this, make sure that Siri is enabled on your iPhone 15 by going to Settings > Siri & Search and toggling on "Listen for 'Hey Siri'" or "Press Side Button for Siri." Once Siri is activated, you can take a screenshot by saying "Hey Siri, take a screenshot." Siri will then capture your screen and save it to your Screenshots album in the Photos app. You can also ask Siri to "take a screenshot and share it" or "take a screenshot and edit it" to perform additional actions. This method is especially useful if you have difficulty pressing the physical buttons or if you want to take a screenshot hands-free. Additionally, you can also use Siri to take a screenshot of a specific part of the screen by saying "Hey Siri, take a screenshot of [specific area]." This feature is particularly helpful when you want to capture a specific section of the screen without having to crop the image later. Overall, activating Siri to take a screenshot is a quick and easy way to capture your screen, and it's a great alternative to the traditional button-pressing method.
Editing and Sharing Your Screenshots on iPhone 15
The iPhone 15 offers a seamless experience when it comes to editing and sharing screenshots. With its advanced features and intuitive interface, users can easily enhance and distribute their screenshots to various platforms. This article will explore three key aspects of editing and sharing screenshots on the iPhone 15: accessing the Markup tool for editing, sharing screenshots via messages, mail, and social media, and organizing screenshots in albums and folders. By mastering these features, users can unlock the full potential of their iPhone 15's screenshot capabilities. To get started, let's dive into the first step: accessing the Markup tool for editing screenshots, which provides a range of options for annotating and enhancing your images.
Accessing the Markup Tool for Editing Screenshots
To access the Markup tool for editing screenshots on your iPhone 15, start by taking a screenshot as you normally would by pressing the Sleep/Wake button and the Home button simultaneously. Once you've captured the screenshot, you'll see a thumbnail of it in the bottom-left corner of your screen. Tap on this thumbnail to open the screenshot in the Markup tool. Alternatively, you can also access the Markup tool by going to the Screenshots album in your Photos app, selecting the screenshot you want to edit, and then tapping the "Edit" button. From there, tap the "Markup" button, which looks like a pen tip, to enter the Markup tool. Within the Markup tool, you'll have access to a variety of editing options, including drawing tools, text tools, and a magnifier. You can use these tools to annotate your screenshot, highlight important information, and even add your signature. Once you've finished editing your screenshot, you can save it to your Photos app or share it with others via email, message, or social media.
Sharing Screenshots via Messages, Mail, and Social Media
When you've captured the perfect screenshot on your iPhone 15, you'll likely want to share it with others. Fortunately, Apple makes it easy to share your screenshots via Messages, Mail, and social media. To share a screenshot, simply tap the thumbnail that appears in the bottom-left corner of your screen after taking a screenshot. This will open the Markup editor, where you can edit and annotate your screenshot before sharing it. From here, you can tap the "Share" icon (represented by a box with an arrow coming out of it) to bring up the Share Sheet. The Share Sheet provides a variety of options for sharing your screenshot, including Messages, Mail, and social media platforms like Facebook, Twitter, and Instagram. You can also use the "More" option to access other sharing options, such as saving the screenshot to your Files app or printing it. If you want to share your screenshot quickly, you can also use the "Quick Actions" feature, which allows you to share your screenshot with a specific contact or group of contacts directly from the Markup editor. Overall, sharing screenshots on your iPhone 15 is a straightforward process that can be completed in just a few taps.
Organizing Screenshots in Albums and Folders
When it comes to organizing your screenshots on iPhone 15, there are several ways to keep them tidy and easily accessible. One effective method is to create albums and folders specifically designed for your screenshots. To do this, open the Photos app and tap on the "Albums" tab at the bottom. Then, tap the "+" icon in the top right corner to create a new album. Name your album something like "Screenshots" or "Captures" to make it easy to identify. You can also create subfolders within your album by tapping the "Edit" button and then the "+" icon again. This allows you to categorize your screenshots by date, topic, or any other criteria that makes sense to you. For example, you could create separate folders for work-related screenshots, personal screenshots, or screenshots from a specific project. By organizing your screenshots in this way, you'll be able to quickly find the one you need and avoid cluttering up your camera roll. Additionally, you can also use the "Media Types" feature in the Photos app to automatically sort your screenshots into a separate album, making it even easier to keep them organized. By taking a few minutes to set up your screenshot organization system, you'll save yourself time and frustration in the long run.