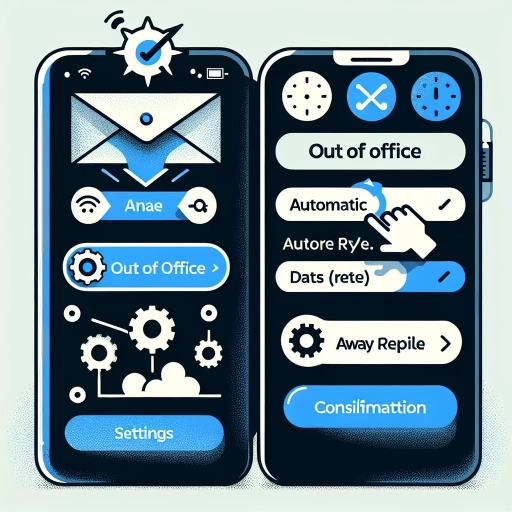
How To Turn On Out Of Office In Outlook App
Here is the introduction paragraph: When you're going out of the office for an extended period, it's essential to set up an auto-response to inform your colleagues, clients, and contacts about your unavailability. The Outlook app allows you to configure an out-of-office message, which can be activated and customized according to your needs. In this article, we'll guide you through the process of setting up and managing your out-of-office response in the Outlook app. We'll cover the steps to configure your out-of-office settings, activate the feature, and troubleshoot any issues that may arise. By the end of this article, you'll be able to effectively communicate your absence and minimize disruptions to your work. To get started, let's dive into the first step: configuring out of office in the Outlook app.
Configuring Out of Office in Outlook App
Configuring Out of Office in Outlook App is a straightforward process that can be completed in a few simple steps. To start, users need to access the Out of Office settings, which can be found in the File tab of the Outlook app. Once in the settings, users can set the specific dates and times when they want the Out of Office feature to be active, allowing them to customize the duration of their absence. Additionally, users can also customize the Out of Office message that will be sent to recipients, allowing them to provide more context and information about their absence. By following these steps, users can ensure that their Out of Office feature is set up correctly and effectively communicates their absence to others. To begin, let's take a closer look at accessing the Out of Office settings.
Accessing the Out of Office Settings
To access the Out of Office settings in the Outlook app, follow these steps. First, open the Outlook app on your device and navigate to the "Settings" or "Preferences" section, usually represented by a gear icon. On the settings page, scroll down to the "Mail" or "Email" section and look for the "Automatic Replies" or "Out of Office" option. Tap on this option to open the Out of Office settings page. Alternatively, you can also search for "Out of Office" in the search bar within the settings page to quickly locate the option. Once you're on the Out of Office settings page, you can configure the settings as desired, including setting the start and end dates, composing the auto-response message, and specifying the recipients who will receive the out-of-office reply. Make sure to save your changes before exiting the settings page to ensure that your Out of Office settings are applied correctly.
Setting the Out of Office Dates and Times
To set the out of office dates and times in Outlook, start by opening the Outlook app and navigating to the "File" tab. From there, click on "Automatic Replies" and then select "Send automatic replies." In the "Automatic Replies" window, check the box next to "Send automatic replies during this time period" and then set the start and end dates and times for your out of office period. You can choose to send automatic replies only during your working hours or at all times. Additionally, you can also set a specific time zone to ensure that your out of office replies are sent according to the correct time zone. Once you have set the dates and times, click "OK" to save your changes. It's also a good idea to test your out of office reply by sending an email to yourself to ensure that it is working correctly.
Customizing the Out of Office Message
When customizing the out of office message in Outlook, you have the flexibility to tailor the content to suit your specific needs. To start, click on the "File" tab in the Outlook app, then select "Automatic Replies" from the drop-down menu. In the "Automatic Replies" window, check the box next to "Send automatic replies" to enable the feature. You can then specify the start and end dates for when you want the out of office message to be sent. Next, compose your out of office message in the "Inside My Organization" and "Outside My Organization" tabs. You can include details such as your name, title, contact information, and a brief explanation of your absence. Additionally, you can add a link to a website or a document that provides more information about your work or organization. To make your message more engaging, you can use a conversational tone and include a personal touch. For example, you can mention a colleague who can be contacted in your absence or provide an alternative email address for urgent matters. Once you've crafted your message, click "OK" to save your changes. Your customized out of office message will now be sent to anyone who emails you during the specified period.
Activating Out of Office in Outlook App
When you're going out of the office for an extended period, it's essential to set up an auto-response to inform your contacts about your unavailability. The Outlook app allows you to activate the Out of Office feature, which automatically sends a response to incoming emails. To activate this feature, you'll need to enable it, specify the out of office status, and set the duration for which you'll be unavailable. Enabling the Out of Office feature is the first step in this process, and it's a straightforward task that can be completed in a few clicks. By enabling this feature, you'll be able to set up a custom message that will be sent to anyone who emails you while you're away. So, let's start by enabling the Out of Office feature in the Outlook app.
Enabling the Out of Office Feature
To enable the out of office feature in Outlook, start by opening the Outlook app on your device. Then, navigate to the "Settings" or "Preferences" section, depending on your device and Outlook version. Look for the "Automatic Replies" or "Out of Office" option and select it. You will then be prompted to toggle the switch to turn on the out of office feature. Once enabled, you can set the start and end dates for your out of office period, as well as compose a message that will be sent to anyone who emails you during this time. You can also choose to send automatic replies to only your contacts or to anyone who emails you. Additionally, you can set up a separate message for people outside of your organization. Make sure to save your changes to activate the out of office feature.
Specifying the Out of Office Status
When specifying the out of office status in Outlook, it's essential to provide clear and concise information to inform senders about your availability. To do this, start by clicking on the "File" tab in the Outlook app, then select "Automatic Replies" from the drop-down menu. In the "Automatic Replies" window, check the box next to "Send automatic replies." Next, specify the start and end dates for your out of office period, and then type in a message that will be sent to anyone who emails you during this time. You can also customize the message to include additional details, such as your return date, alternative contact information, or any other relevant information. Additionally, you can choose to send automatic replies only to people within your organization or to anyone who emails you, including those outside of your organization. By specifying the out of office status in Outlook, you can ensure that senders are informed about your availability and can plan accordingly.
Setting the Out of Office Duration
When setting the out of office duration, it's essential to consider the length of time you'll be away from the office and the frequency of your emails. You can set the duration to start immediately or schedule it to begin at a later time. The end date and time can also be set to automatically turn off the out of office feature. If you're going to be away for an extended period, you may want to consider setting the duration to recur daily or weekly to ensure that your auto-response is sent consistently. Additionally, you can also set the duration to be based on your work hours, so that the out of office feature is only active during your non-working hours. It's also important to note that you can set different durations for different email accounts, if you have multiple accounts set up in your Outlook app. By carefully setting the out of office duration, you can ensure that your auto-response is sent to the right people at the right time, and that you're not bombarded with emails when you return to the office.
Troubleshooting Out of Office in Outlook App
When using the Outlook app, the Out of Office feature is a convenient way to inform others of your unavailability. However, issues can arise, and troubleshooting is necessary to resolve them. If you're experiencing problems with the Out of Office feature, there are several steps you can take to resolve them. First, you may need to resolve Out of Office not working issues, which can be caused by a variety of factors, including incorrect settings or conflicts with other features. Additionally, you may need to fix Out of Office message not sending, which can be due to issues with your email account or server. Finally, you may need to disable the Out of Office feature altogether, which can be useful if you no longer need it or if it's causing problems. By following these steps, you can troubleshoot and resolve common issues with the Out of Office feature in Outlook. To start, let's take a closer look at resolving Out of Office not working issues.
Resolving Out of Office Not Working Issues
When the out of office feature in Outlook is not working as expected, there are several steps you can take to resolve the issue. First, ensure that the out of office feature is enabled and set up correctly. Check that the start and end dates are correctly set and that the message is properly formatted. If the issue persists, try restarting Outlook or checking for any software updates. Additionally, verify that the out of office feature is not being blocked by any company policies or IT restrictions. If none of these steps resolve the issue, try resetting the out of office feature to its default settings or seeking assistance from your IT department. It's also a good idea to check the Outlook app's settings and ensure that the out of office feature is enabled for the specific account you are using. By following these steps, you should be able to resolve any issues with the out of office feature in Outlook and ensure that your automatic replies are being sent correctly.
Fixing Out of Office Message Not Sending
When your out of office message is not sending in Outlook, it can be frustrating, especially if you're relying on it to inform colleagues and clients of your unavailability. To fix this issue, start by checking your internet connection and ensuring that your Outlook app is updated to the latest version. Next, verify that your out of office settings are correctly configured. Make sure that the "Send automatic replies" option is enabled and that the start and end dates are set correctly. Also, check that the message you've composed is not too long, as some email providers may block or truncate overly lengthy messages. If you're using a shared mailbox or have delegate access, ensure that you have the necessary permissions to send out of office messages. Additionally, check your Outlook rules to see if any are interfering with the automatic reply feature. If none of these troubleshooting steps resolve the issue, try restarting your Outlook app or contacting your IT department or email administrator for further assistance. By methodically checking these potential causes, you should be able to identify and fix the problem, ensuring that your out of office message is sent successfully.
Disabling Out of Office Feature
Disabling the Out of Office feature in Outlook is a straightforward process that can be completed in a few steps. To disable the feature, start by opening the Outlook app and navigating to the "File" tab. From there, click on "Automatic Replies" and then toggle the switch to the "Off" position. This will immediately stop the Out of Office message from being sent to recipients. Alternatively, you can also disable the feature by going to the "Settings" icon, selecting "View all Outlook settings," and then clicking on "Mail" and "Automatic replies." From there, toggle the switch to the "Off" position to disable the feature. It's also important to note that if you have set a specific end date for the Out of Office feature, it will automatically turn off on that date. However, if you need to disable it before the scheduled end date, you can do so by following the steps outlined above. Additionally, if you are using Outlook on a mobile device, you can disable the Out of Office feature by going to the "Settings" icon, selecting "Account settings," and then toggling the switch to the "Off" position. By disabling the Out of Office feature, you can ensure that you are not sending automatic replies to recipients and can respond to emails in a timely manner.