How Long For Jello To Set
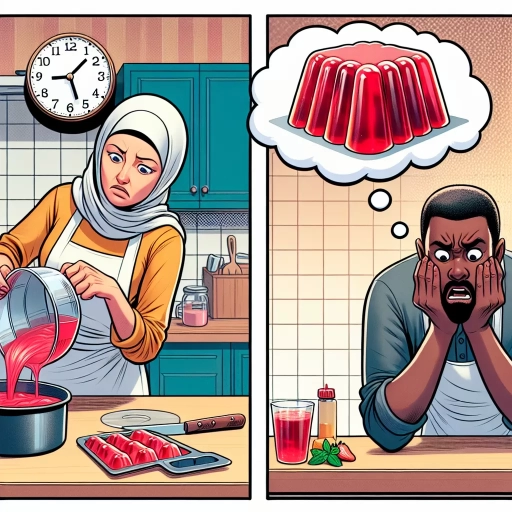 Whether you're hosting a party or serving up a nostalgic treat, mastering the art of perfect Jello preparation can turn an ordinary dessert into an extraordinary one. An essential part of this process involves understanding how long it takes for Jello to set. This procedure, often overlooked, has a significant impact on the final product's texture and taste. In this detailed, engaging, and informative article, we delve into the complex world of Jello setting. We'll start by exploring 'Understanding the Jello Setting Process,' to explain in-depth the science behind this common dessert's transformation from liquid to gelatinous form. Then, we'll provide invaluable 'Tips to Speed Up the Jello Setting Time,' ensuring your Jello is ready in a jiffy without sacrificing quality. Finally, we will address common 'Mistakes to Avoid in Jello Preparation' to arm you with the best practices for the foolproof Jello creation. Let's set the ball rolling by diving into the fascinating journey of how Jello finds its structural integrity.
Understanding the Jello Setting Process
Understanding how Jello sets often seems like magic to the untrained eye, while it is merely a fascinating interplay of science and culinary art. Jello, with its sweet taste and vibrant colors, hides an intricate process in its formation that revolves around science, factors that influence the setting time, and careful steps to achieve the perfect Jello. Firstly, the magical transformation from liquid to wobbly solid is all thanks to a scientific process we'll delve into, expanding on the role of gelatin, the superstar in Jello formation. Secondly, the setting time is not constant - it can change under the influence of various factors. We will expound on these influencers, shedding light on their roles in Jello's solidification journey. Finally, although seemingly straightforward, making perfect Jello is often easier said than done. We will guide you through this process that demands precision and patience. From now, let's demystify the magic and head straight into the science behind this delightful treat's formation.
The Science Behind Jello Formation
Jello, a beloved food item across generations, possesses an intriguing scientific aspect to its formation that might catch you by surprise. At the heart of Jello's unique consistency, is the process of protein denaturation and the subsequent polymerization of these denatured proteins. The primary component of Jello is 'gelatin', a protein derived primarily from bovine or porcine collagen. When the gelatin powder is mixed with hot water, the protein in gelatin denatures, meaning the structure of the protein is broken down. Interestingly, as the gelatinous mixture starts to cool down, the denatured proteins, which are now dispersed in the water, begin to rearrange themselves. Instead of returning to their original state, these protein strands undergo a process called 'polymerization'. They form a 3-dimensional matrix structure, similar to a disorganized and flexible net. This mesh-like assembly encapsulates and traps water molecules within it - giving us the wobbly, jelly-like structure we're familiar with. This metamorphosis is a subtle but undeniable example of nature's profound beauty carved through the science of protein transformation. A critical point to consider is that this transformation is not an instantaneous process, necessitating time to allow the molecules to gradually align and form the characteristic gel. The rate at which Jello sets mostly relies on the concentration of gelatin used and the temperature at which the mixture is kept. Generally, it can take anywhere from 2 to 4 hours for Jello to set properly, provided it's at room temperature. However, if you chose to quicken the process, you could refrigerate the mixture, which accelerates the polymerization process. The chillier environment speeds up the alignment of protein strands and consequently slashes the setting time in half. It's equally important to note that certain types of fruits such as pineapples, kiwi, or papaya can actually hinder the Jello formation due to certain enzymes they contain - an example of how nature is always poised with surprising checks and balances. In essence, the formation of Jello is not a simple matter but a scientific marvel that denotes the intricacy of the world at a molecular level. It's a living testament to the beauty of culinary science; a palatable lesson in protein transformation that brings joy and fascination to our tables. We can all appreciate the patience, careful crafting, and ultimately, the science that goes into producing a single serving of this captivating, jiggly delight.
Factors Influencing the Jello Setting Time
If you've ever enjoyed the colorful, wiggly delight that is Jello, you've probably wondered about the science behind its transformation from liquid to solid. The setting process of Jello, or gelatin desserts, is a fascinating mix of chemistry and cooking, significantly influenced by various factors. The setting time of Jello primarily depends on the elements it interacts with during its preparation. Temperature plays a crucial role in this process. Higher temperatures expedite the dissolution of the gelatin powder, but once mixed, a decrease in temperature is vital for the Jello to set. The ideal setting temperature is around 4 degrees Celsius or 35-40 degrees Fahrenheit. However, the time it takes for the Jello to set can differ, ranging anywhere from 2 to 4 hours, depending on the surrounding temperature. Leaving it overnight in the refrigerator can ensure a well-set Jello dessert. Also key to the setting process are the proportions of the ingredients used. Too much water can lead to a less firm Jello, while using less water than recommended could result in an overly stiff product. The concentration of the gelatin powder also significantly influences the setting time - a higher concentration results in a quicker setting time, while a lower concentration necessitates a longer setting period. It's worth noting that the addition of certain fruits to the mix, like pineapple, kiwi, and papaya, may hamper the setting process. These fruits contain enzymes known as proteases that break down the gelatin's protein structure, preventing it from solidifying properly. Using canned or cooked variations of these fruits, however, can negate this effect since the heating process deactivates the enzymes. In conclusion, making Jello is more than just mixing powder with water. It's a delicate balancing act involving temperature control, precise measurement, and wise ingredient choices. So next time you prepare this tasty treat, keep these factors in mind to ensure a well-set, deliciously wobbly Jello.
Steps in Making Perfect Jello
In the delightful world of desserts, making perfect Jello is an underrated skill. The process may seem straightforward, but as with all cooking, understanding the science behind it can lead to elevated outcomes. Jello, loved for its colorful allure and intriguing texture, is ultimately a product of chemistry. The key component, gelatin, is a protein derived from collagen, which provides Jello its characteristic jelly-like consistency. Initiating the Jello-making process starts with boiling water, typically one cup. The heat is necessary to break down the proteins in the gelatin, allowing them to recombine in a structure that will give your Jello its distinctive shape. It's essential to stir in the Jello powder until it is fully dissolved, which ensures a smooth, lump-free texture and clear aesthetic appeal. At this point, adding additional items like fruits or cream is optional and purely left to the cook's preference and creativity. Adding cold water afterwards speeds the cooling and setting process while maintaining the intended consistency of your finished Jello dessert. The next crucial step is refrigeration: this is where the magic happens. The dissolved gelatin mixture needs to cool down, which prompts the proteins to slowly begin reconnecting. They’ll form a mesh-like network that traps the water molecules, creating the unique wobble of set Jello. It's vital to allow enough time for the mixture to set adequately - typically around 2 to 4 hours, but overnight refrigeration is recommended to assure a delectable, firm consistency. However, as with any culinary endeavor, patience is critical. Attempting to unmold or serve the Jello too soon can lead to a final product that’s less than perfect. By fully understanding and abiding by the recommended chilling period, you can ensure a flawless, evenly set Jello that holds its shape while maintaining its charmingly soft texture and intense flavor. But remember, a beautifully set Jello is just the first step. How you serve this versatile dessert can transform it from a simple treat into a piece of art. Whether you choose to layer different flavors, embed fruits, or enhance it with whipped cream or a drizzle of sauce, there's no limit to the creative ways you can elevate a humble Jello to an exquisite dessert that delights the palate. While making the perfect Jello necessitates precision and patience, by truly contemplating the individual steps, you can gain an appreciation for the culinary science behind its creation. The entire process, from a single collagen strand to a visually appealing dessert, is nothing short of miraculous. Hence, understanding the process is not only critical for your culinary skills, but it's also a testament to the wonders of food, science, and their fascinating interplay.
Tips to Speed Up the Jello Setting Time
Jello is a timeless dessert that is loved by people of all ages for its wiggly texture and fruity taste. It's not uncommon that there are times when you can't cater to its typical setting time due to last-minute gatherings or impatient little ones. We are here to help you with that! You can speed up the Jello setting by implementing a few diligent tactics such as waiting uselessly. Three highly effective methods have been identified to quicken the setting time. Utilizing the Chill Factor involves applying cold temperatures input to solidify the Jello faster. Reducing the Liquid Components minimizes the fluid content in the mixture, which in turn quickens the solidification process. And finally, Implementing the 'Whip it Up' Method involves beating air into the Jello to hasten the setting process. Today, we'll first delve into the core details of Utilizing the Chill Factor, making use of the science behind temperatures to guide us in achieving that quick set Jello we all love.
Utilizing the Chill Factor
Utilizing the Chill Factor The Chilling Factor plays an instrumental role in expediting the setting time of jello, making it an indispensable tip to understand and incorporate. This factor involves using calculated measures to enhance the efficacy of the chilling process in your favor. Traditionally, jello might need to sit in the fridge for hours, sometimes even overnight, to achieve the perfect consistency. However, it’s not always that one has the luxury of time. This is where the chilling factor comes into play, promising to reduce the conventional setting time significantly. To kick-start the magic of the chilling factor, begin by reducing the amount of water that the recipe demands. For instance, if a pack instructs the use of two cups of water, use only one and a half. Complement this measure with an incremental dosage of cold water and ice into the mixture. This drives down the overall temperature, initiating an accelerated setting process. The cold temperature triggers the gelatin molecules to bond quicker, and as a result, they begin to form a semi-solid structure in a shorter span of time. However, one crucial thing to take into account is to dissolve the gelatin completely in hot water before introducing cold water. This ensures a smooth texture without any lumps. Another way to capitalize on the chill efficiency is by using a shallow dish to set the jello. By spreading the jello thin across a larger surface area, you encourage quicker cooling and faster setting. Metal containers can also be your secret weapon as they conduct cold temperatures better than plastic or glass containers. It's also advisable to pre-chill these dishes before adding the jello to expedite the cooling process further. The application of the chilling factor does not end here; there's yet another secret tip – the use of a freezer. While traditionally, the refrigerator is the chosen spot for jello to set, the freezer can prove to be your speed-saving ally. However, caution is advised as leaving it too long can cause it to freeze, losing the classic jello texture. In conclusion, harnessing the chilling factor intelligently can accelerate the jello setting time, without compromising the texture or flavor. It's about using proven scientific principles and a little creativity to enjoy your jello sooner than later.
Reducing the Liquid Components
Jello is a scrumptious timeless treat that has been around for decades. However, the time it requires to set and firm up can often be a hindrance for those after a quick dessert solution. A crucial knack to mitigate this prolonged waiting time lies in reducing liquid components. Liquid reduction in jello preparation is all about balance. Too much liquid leaves you with a soupy mess, while too little can result in a overly firm outcome, dwarfing the delightful jiggling sensation it’s known for. The fundamental rule of thumb suggests one cup of boiling water for every package of jello powder, typically followed by another cup of cold water. However, in the quest to expedite the setting process, reducing the amount of cold water by a quarter to a half can prove instrumental. It’s important to remember the composition of jello, being largely a product of gelatin - a substance that gels in cool temperatures. Hence reducing cold water implies less substance to gel, effectively shortening the setting duration. Moreover, altering the nature or the temperature of the liquid used can significantly impact the setting speed of jello. For instance, replacing a portion of cold water with ice cubes offers an instantly colder mixture, propelling the jello towards its set state much faster. Alternatively, using less sugary or less acidic liquids also can expedite the setting process. Sugar and acid tend to interfere with the gelling process, thus swapping fruit juices with water or cutting down on added sugars can make a noticeable difference. Nevertheless, caution is necessary to ensure the taste and texture of the final product don't suffer. An optimal balance between quick setting time and maintaining the desirable jello characteristics is what makes this dessert delightful and impeccable. Therefore, minimizing the liquid components in your jello mix may seem like a small alteration, but with the right quantity and careful adjustment, you might just find your jello setting much quicker than ever before without compromising on its enticing allure. Always remember that the ultimate goal is to create a dessert that is as enjoyable to eat as it is quick to prepare.
Implementing the "Whip it Up" Method
Implementing the "Whip it Up" Method The "Whip it Up" method is a game-changer when it comes to accelerating the jello setting process. With this technique, you no longer need to wait an agonizing span of time to enjoy your favorite wobbly delight. The "Whip it Up" method begins by dissolving your jello mix in boiling water as per usual instructions. However, instead of adding the usual amount of cold water next, you half the quantity and replace the rest with ice. Stir the mix until the ice completely dissolves. Be aware that applying this method may result in your jello having a slightly different texture, it becomes somewhat fluffy due to the incorporation of air during the whipping process. Once you have dissolved the ice into the mix, place it into the refrigerator for it to chill and begin setting. Here's the clever part - after about 30 minutes, take out the bowl and begin whipping your partially-set jello using a whisk or an electric mixer. This helps to aerate the mix, increasing its volume, and disrupting the gelling process, which ultimately speeds up the setting time. Safety is paramount, especially with electric mixing equipment. Make sure to use the lowest setting to avoid jello splatter, and gradually increase speed only as needed. The method may take a few tries to master as the timing and rigor of the whipping can determine the final texture of your jello. But once you've perfected the process, you'll be able to whip up batches in record time. Whether you're running late for a potluck, or you have unexpected guests, the "Whip it Up" method is your swift solution to rapid jello preparation. The versatility of jello makes it a fitting quick-fix for almost any occasion - kids' parties, family gatherings, weekend potlucks or simply to fulfill a late-night craving. With the "Whip it Up" method, you can lessen your preparation time without compromising the quality and taste of your dessert. At the end of it all, the sooner you have that bowl of jello ready, the quicker you're transporting yourself to a world of wobbly, gelatinous joy. Remember, this does not alter any standard safety measures when preparing food. Always ensure cleanliness in your culinary space and proper storage of food to guarantee its quality and safety for consumption. Now, happy quick jello-making with the "Whip it Up" method!
Mistakes to Avoid in Jello Preparation
In the culinary world, perfection is often sought and seldom achieved. This especially rings true in the preparation of a seemingly simple dessert: Jello. Despite its reputation for simplicity, there are several key mistakes that can turn this dessert dream into a kitchen nightmare. Understanding these pitfalls can help you avoid them and perfect your Jello-making skills. This article carefully breaks down the three notorious mistakes to avoid in Jello preparation: premature unmolding, falling into the overheating and overcooling trap, and not preempting the fruit acid setback. By paying heed to these potentially disastrous faults, you can transform your Jello from a wobbling disaster to a picture-perfect plate of delight. Let's kick things off by talking about our first potential misstep: the peril of premature unmolding. With a little patience and precision, you can dodge this common error that has thwarted many amateur cooks.
Avoidance of Early Unmolding
When preparing Jello, a common mistake made by many is the avoidance of early unmolding, which can significantly impact the final product's appearance and texture. Search engine optimized content on this topic would delve into the importance of letting the jello set completely, outlining the mistakes that can arise from premature unmolding. The magic in a perfectly set Jello is its cohesiveness, elasticity, and almost whimsical jiggle. All of these qualities are a result of meticulous preparation disregarded by many due to an eagerness to revel in the dessert's delicious charm. When you rush to unmold your Jello, you're likely to end up with a sloppy mess far from the aesthetically pleasing, firm consistency desired. Firstly, premature unmolding can lead to a Jello that, rather than retaining its molded shape, spreads out into an incohesive heap. Timing is critical, and removing the Jello before it has fully firmed can tarnish the effort you put into acquiring the perfect form. Patience is paramount in any culinary measure, and in the case of Jello making, it’s your secret weapon for an impressive result. Secondly, in aesthetics, a Jello that has not fully set and is removed early from its mold will lack the lustrous gloss that a fully-set Jello boasts. The beauty of Jello is not only in its taste but also its visual appeal. An intriguing part of its charm lies in its slightly translucent, colorful sheen that, unfortunately, is forfeited when removed prematurely from the mold. Lastly, the texture of a prematurely unmolded Jello will bear the impact. Instead of the delightful springiness that marks a well-made Jello, the texture turns out to be inconsistent, soft, and rather unappetizing. Therefore, a crucial aspect of Jello preparation lies in the avoidance of early unmolding. Patience is rewarded with a dessert that strikes the perfect balance between taste, texture, and visual allure. Through understanding and avoiding such common errors, you are better equipped to create the perfect Jello dessert, a visual and tasty treat that speaks of your culinary prowess. These insights give power to a more effective search engine optimization strategy, allowing you to meet your audience's needs and rise to the top of search engine results, thus maximizing engagement with your digital content.
Bypassing the Overheating and Overcooling Trap
When making jello, understanding the science behind the process is crucial for avoiding the overheating and overcooling trap. Firstly, overheating is a common mistake that beginners often make. Undue heat can damage the very structure of gelatin, rendering it unable to set properly. Jello involves a delicate balance of hydrating the gelatin granules, which expands in water, and then heating the solution adequately so that they dissolve. But, if the gelatin mixture is overboiled or overheated, it could lose its ability to thicken and coagulate, leading to a runny dessert that fails to hold shape. Contrarily, overcooling or premature cooling can also cause the jello to separate, leaving you with grainy or lumpy jello. It occurs when the gelatin mixture is cooled too rapidly, not allowing the gelatin granules to dissolve fully. This can result in a jello with an uneven texture that isn't particularly pleasing. To bypass this overheating and overcooling trap, control is key. Maintain a steady, gentle heat when preparing your gelatin mixture — boiling is not necessary and can cause damage to the gelatin. Stirring periodically will ensure the heat is being distributed evenly and the gelatin is fully dissolving. Once the gelatin is fully dissolved, let the mixture cool at room temperature. Avoid placing the heated mixture directly into the refrigerator as the drastic temperature change can cause lumping or separation. Understanding these heating and cooling mistakes is more than just knowing 'how long for jello to set'. It's about understanding the science behind it to make the perfect, wobbling dessert. Perfect preparation takes into account the right heating and cooling techniques to avoid common mishaps. Thus, being aware of the overheating and overcooling trap and knowing how to bypass it will ensure flawless jello preparation. Also, mastering these methods will surely help you in impressing your audience, whether it's a big party or a simple family dinner.
Preventing the Fruit Acid Setback
Preventing the Fruit Acid Setback is an essential step while making your perfect jello dessert, a critical element to understanding and avoiding common Mistakes in Jello Preparation. While choosing your favorite fruits might seem like a natural process, some fruits can inadvertently create a setback, causing your jello to remain liquid rather than setting into its characteristic jiggly form. This happens due to the presence of certain acids and enzymes in some fruits that hinder the setting process of jello. Fruits known for their high acid and enzyme content, such as pineapple, kiwi, papaya, mango, and guava, among others, can interfere with the gelatin content in jello. This performance-deteriorating effect occurs because the protease enzymes present in these fruits break down the collagen in gelatin, preventing it from setting properly. So, unknowingly incorporating these fruits can make your jello runny and adversely affect your dessert preparation experience. However, don't shelve your tropical fruit fantasies just yet. You can still use these fruits in your jello, but it requires some extra steps. Cooking or grilling these fruits before adding them to your jello mixture can deactivate the enzymes causing the issue. The heat disables the proteases, so they stop affecting the gelatin and allow your jello to set. Using canned or pre-cooked versions of these fruits is a quicker solution. An alternate technique to minimize the fruit acid setback is balancing the acidity levels with an additional gelatin packet or using low-acid fruits like apples, oranges, and strawberries, which blend beautifully into your jello without disrupting the solidifying process. This approach of preventing the fruit acid setback can deliver a beautiful, delicious, and firm jello dessert, the outcome of your culinary efforts. In conclusion, navigating the 'Fruit Acid Setback' barrier can enhance your jello preparation skills. Armed with this knowledge, take the confidence and flair to incorporate your favorite fruits into the jello, ensuring a delectable dessert that holds its form, appearance, and taste. Remember, making jello is both a science and an art. The knowledge of enzymes, gelatin, fruits, and the subsequent effect on the setting process are the scientific aspects. Simultaneously, regarding the choice of fruits, their presentation, and the creative element in jello-making is undoubtedly an art. Mastering jello preparation involves perfecting the balance between both.