How To Change Monitor 1 And 2
Here is the introduction paragraph: Are you tired of dealing with a cluttered desktop and struggling to manage multiple monitors? Changing the primary and secondary monitor settings can greatly improve your productivity and overall computing experience. In this article, we will guide you through the process of changing monitor 1 and 2, starting with the basics of monitor configuration. We will cover the essential steps to change the primary and secondary monitor settings on Windows, as well as provide troubleshooting tips to resolve common issues that may arise. By understanding the fundamentals of monitor configuration, you will be able to optimize your multi-monitor setup and enhance your computing experience. Let's begin by understanding the basics of monitor configuration.
Understanding the Basics of Monitor Configuration
When it comes to setting up a computer system, one of the most crucial aspects to consider is the monitor configuration. A well-configured monitor can significantly enhance the overall user experience, while a poorly configured one can lead to eye strain, decreased productivity, and even damage to the hardware. In this article, we will delve into the basics of monitor configuration, exploring what it entails, the differences between various monitor settings, and common scenarios that require specific configurations. We will start by examining what a monitor configuration is and why it is essential for optimal performance. By understanding the fundamentals of monitor configuration, users can make informed decisions about their display settings and ensure a seamless computing experience. So, let's begin by exploring what a monitor configuration is and why it is important.
What is a Monitor Configuration and Why is it Important
A monitor configuration refers to the arrangement and settings of multiple monitors connected to a single computer system. It is a crucial aspect of computing, especially for individuals who require multiple screens to enhance their productivity, multitasking capabilities, and overall user experience. A well-configured monitor setup allows users to efficiently manage their workspace, reduce clutter, and increase their screen real estate. This, in turn, enables them to work on multiple tasks simultaneously, compare data, and make informed decisions quickly. Moreover, a properly configured monitor setup can also improve ergonomics, reduce eye strain, and promote a comfortable working environment. In today's fast-paced digital landscape, having a well-optimized monitor configuration is essential for professionals, gamers, and anyone who relies heavily on their computer system to get work done efficiently. By understanding the basics of monitor configuration, users can unlock the full potential of their multi-monitor setup and take their productivity to the next level.
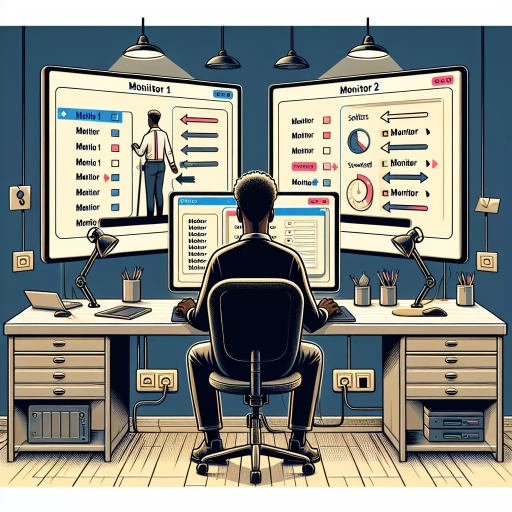
The Difference Between Monitor 1 and Monitor 2
When it comes to monitor configuration, one of the most common questions is what's the difference between Monitor 1 and Monitor 2. In essence, Monitor 1 and Monitor 2 refer to the primary and secondary display settings on a computer. Monitor 1 is typically the primary display, which is usually the built-in laptop screen or the main desktop monitor. This is the display that the computer defaults to when it boots up, and it's usually where the taskbar, start menu, and other essential system elements are located. On the other hand, Monitor 2 is the secondary display, which can be an external monitor connected to the computer via a video cable. This display can be used to extend the desktop, mirror the primary display, or show a separate desktop. The key difference between the two is that Monitor 1 is the primary display that the computer relies on, while Monitor 2 is an auxiliary display that can be used to enhance productivity or provide additional screen real estate. Understanding the difference between Monitor 1 and Monitor 2 is crucial when it comes to configuring multiple monitors, as it allows users to set up their displays in a way that suits their needs and workflow.
Common Monitor Configuration Scenarios
When it comes to setting up multiple monitors, there are several common configuration scenarios that users often encounter. One of the most popular scenarios is the "Extended Desktop" setup, where two or more monitors are connected to a single computer, and the desktop is extended across all screens. This setup is ideal for multitasking, as users can have multiple applications open on different screens, increasing productivity and efficiency. Another common scenario is the "Mirror" setup, where the same image is displayed on multiple monitors. This setup is often used in presentations, where the same content needs to be displayed on multiple screens. The "Clone" setup is similar to the mirror setup, but it allows for more flexibility, as users can clone a single monitor to multiple screens, while still being able to use the other screens independently. The "Span" setup is another common scenario, where a single image is spanned across multiple monitors, creating a single, large desktop. This setup is ideal for gaming and video editing, as it provides a wider field of view and a more immersive experience. Finally, the "Independent" setup allows each monitor to display a separate image, giving users the flexibility to use each screen independently. This setup is ideal for users who need to work on multiple projects simultaneously, or for those who want to use multiple monitors for different tasks, such as browsing the web on one screen and working on a document on another. By understanding these common monitor configuration scenarios, users can choose the setup that best suits their needs and work style, and take full advantage of the benefits of using multiple monitors.
Changing Monitor 1 and 2 on Windows
Changing the monitor settings on a Windows computer can be a straightforward process, but it can also be confusing, especially for those who are new to using multiple monitors. Fortunately, there are several ways to change the monitor settings, including using the Display Settings, the NVIDIA Control Panel, and disabling and re-enabling the monitors. In this article, we will explore these methods in more detail, starting with the simplest and most commonly used method: using the Display Settings to swap monitors. By following these steps, you can easily change the monitor settings to suit your needs, whether you're working on a project that requires multiple screens or simply want to switch the primary monitor. With these methods, you can take control of your monitor settings and improve your overall computing experience. Using the Display Settings to swap monitors is a great place to start, and we will dive into the specifics of this method next.
Using the Display Settings to Swap Monitors
Using the Display Settings to Swap Monitors is a straightforward process that can be completed in a few simple steps. To begin, click on the Start button and select the Settings icon, which looks like a small gear. From there, click on the System option, followed by the Display option on the left-hand side of the screen. This will open up the Display Settings window, where you can see a visual representation of your monitors, labeled as 1 and 2. To swap the monitors, simply click on the monitor that is currently labeled as 1 and drag it to the position of the monitor that is currently labeled as 2. You will see the labels swap, indicating that the monitors have been successfully swapped. Alternatively, you can also use the Identify button to identify which monitor is which, and then use the dropdown menu to select the monitor you want to use as the primary monitor. Once you have made the changes, click on the Apply button to save the new settings. Your monitors should now be swapped, and you can use them as desired.
Utilizing the NVIDIA Control Panel for Advanced Settings
The NVIDIA Control Panel is a powerful tool that allows users to customize and optimize their graphics settings for an enhanced gaming and computing experience. To access the NVIDIA Control Panel, right-click on an empty area of the desktop and select "NVIDIA Control Panel" from the context menu. Once open, users can navigate to the "Display" section, where they can adjust settings such as resolution, refresh rate, and display orientation. For users looking to change the primary and secondary monitor settings, the "Set up multiple displays" option is available, allowing users to configure the display settings for each monitor, including the ability to set a monitor as the primary display. Additionally, the NVIDIA Control Panel offers advanced settings such as NVIDIA Surround, which enables users to span a single image across multiple monitors, and NVIDIA Mosaic, which allows users to combine multiple monitors into a single, large desktop. By utilizing the NVIDIA Control Panel, users can unlock the full potential of their graphics card and take their computing experience to the next level.
Disabling and Re-enabling Monitors to Reset Settings
Disabling and re-enabling monitors is a simple yet effective way to reset monitor settings to their default values. This method can be particularly useful when you're experiencing issues with your monitor's display, such as incorrect resolution, refresh rate, or orientation. To disable a monitor, go to the Display settings in your Windows operating system, click on the monitor you want to disable, and select the "Disconnect this display" option. Alternatively, you can also press the Windows key + P and select the "PC screen only" option to disable the second monitor. Once you've disabled the monitor, wait for a few seconds and then re-enable it by selecting the "Extend" or "Duplicate" option. This will reset the monitor's settings to their default values, which can often resolve display issues. Additionally, disabling and re-enabling monitors can also help to reset the monitor's calibration, which can improve the overall display quality. It's worth noting that this method will not affect any other display settings, such as the desktop background or icon arrangement, so you don't have to worry about losing any of your customizations. By disabling and re-enabling your monitors, you can quickly and easily reset their settings and get your display back to normal.
Troubleshooting Common Issues with Monitor Configuration
When it comes to troubleshooting common issues with monitor configuration, there are several key areas to focus on to ensure optimal performance and display quality. One of the primary concerns is resolving display driver issues and conflicts, which can cause a range of problems from distorted images to complete system crashes. Additionally, adjusting monitor settings is crucial for achieving the best possible display quality, and identifying and fixing hardware-related problems can help prevent more serious issues from arising. By addressing these key areas, users can quickly and effectively troubleshoot common monitor configuration issues and get back to work or play with minimal disruption. In this article, we will explore these topics in more detail, starting with the critical task of resolving display driver issues and conflicts.
Resolving Display Driver Issues and Conflicts
When dealing with display driver issues and conflicts, it's essential to identify the root cause of the problem to resolve it effectively. Start by checking for any loose connections between the monitor and the computer, as a simple reconnection can often resolve the issue. Next, ensure that the display drivers are up-to-date by checking the manufacturer's website for any updates. If the drivers are outdated, download and install the latest version. If the issue persists, try rolling back the drivers to a previous version or uninstalling and reinstalling them. Additionally, check for any conflicts with other hardware or software by disabling any recently installed devices or programs and see if the issue resolves. If none of these steps resolve the issue, it may be necessary to perform a system restore or seek further assistance from the manufacturer's support team. Regularly updating display drivers and monitoring system performance can help prevent display driver issues and conflicts from arising in the future. By following these steps, you can quickly and effectively resolve display driver issues and conflicts, ensuring a smooth and uninterrupted computing experience.
Adjusting Monitor Settings for Optimal Performance
Adjusting monitor settings is crucial for optimal performance. To start, ensure the monitor is set to its native resolution, which can be found in the monitor's manual or online documentation. Next, adjust the brightness and contrast settings to a comfortable level for your eyes. If the image appears too bright or washed out, reduce the brightness. If the image appears too dark, increase the contrast. Additionally, adjust the color temperature to a setting that is easy on the eyes, such as the "warm" or "reading" mode. This can help reduce eye strain and improve overall viewing experience. Furthermore, consider adjusting the monitor's refresh rate, which can help reduce screen tearing and improve motion clarity. A higher refresh rate, such as 144Hz or 240Hz, can provide a smoother and more responsive experience, especially for gaming and video editing. Finally, ensure the monitor is properly calibrated, which can be done using built-in calibration tools or third-party software. Proper calibration can help ensure accurate color representation and improve overall image quality. By adjusting these settings, you can optimize your monitor's performance and enjoy a better viewing experience.
Identifying and Fixing Hardware-Related Problems
When it comes to troubleshooting common issues with monitor configuration, identifying and fixing hardware-related problems is a crucial step. To start, it's essential to understand the different components involved in the monitor setup, including the monitor itself, the graphics card, and the cables connecting them. If the monitor is not turning on, check the power cord and ensure it's properly plugged into both the monitor and the power outlet. Next, verify that the graphics card is properly seated in the computer and that the cables are securely connected to the correct ports. If the issue persists, try swapping the cables or using a different graphics card to isolate the problem. Additionally, check the monitor's settings to ensure that the correct input is selected and that the display is set to the correct resolution. If the issue is related to a distorted or fuzzy image, check the cable connections and ensure that they are not loose or damaged. You can also try adjusting the monitor's settings to optimize the image quality. In some cases, hardware-related problems may require more advanced troubleshooting, such as running a diagnostic test on the graphics card or updating the monitor's firmware. By methodically identifying and fixing hardware-related problems, you can resolve common issues with monitor configuration and ensure a clear and stable display.