How To Create Macros In Excel
Here is the introduction paragraph: Macros in Excel are a powerful tool that can automate repetitive tasks, streamline workflows, and increase productivity. By creating and using macros, users can save time and effort, and focus on more complex and creative tasks. But, how do you get started with creating macros in Excel? In this article, we will explore the basics of macros in Excel, including how to record and create them, and how to edit and manage them. We will start by understanding the basics of macros in Excel, including what they are, how they work, and the benefits of using them. By the end of this article, you will have a solid foundation in creating and using macros in Excel, and be able to take your skills to the next level. Let's start by understanding the basics of macros in Excel.
Understanding the Basics of Macros in Excel
Macros in Excel are a powerful tool that can automate repetitive tasks, increase productivity, and enhance the overall user experience. Understanding the basics of macros is essential for anyone looking to take their Excel skills to the next level. In this article, we will explore the fundamentals of macros in Excel, including what they are and how they work, the benefits of using them, and the basic requirements for creating them. By the end of this article, you will have a solid understanding of macros and be able to start creating your own. So, let's start by answering the question, what are macros and how do they work in Excel?
What are Macros and How Do They Work in Excel?
Macros are a series of automated commands that can be recorded or written in Visual Basic for Applications (VBA) to perform repetitive tasks in Excel. They work by recording or writing a set of instructions that can be executed with a single command, allowing users to automate tasks such as data entry, formatting, and calculations. When a macro is created, Excel records the user's actions and translates them into VBA code, which can then be edited and customized to perform more complex tasks. Macros can be triggered by a variety of methods, including keyboard shortcuts, buttons, and menu items, making it easy to integrate them into your workflow. By using macros, users can save time, increase productivity, and reduce errors by automating repetitive tasks and streamlining their workflow.
Benefits of Using Macros in Excel
Using macros in Excel can greatly enhance your productivity and efficiency when working with spreadsheets. One of the primary benefits of using macros is that they allow you to automate repetitive tasks, freeing up time for more complex and creative work. By recording a series of actions and saving them as a macro, you can easily repeat those actions with the click of a button, saving you hours of manual labor. Additionally, macros can be used to perform complex calculations and data analysis, making it easier to extract insights and make informed decisions. Macros can also be used to create custom tools and interfaces, allowing you to tailor your Excel experience to your specific needs. Furthermore, macros can be shared with others, making it easy to collaborate and standardize processes across teams and organizations. Overall, using macros in Excel can help you work smarter, not harder, and achieve more in less time.
Basic Requirements for Creating Macros in Excel
To create macros in Excel, you'll need to meet some basic requirements. First, ensure that your Excel version supports macros. Most versions of Excel, including Excel 2010 and later, support macros, but some versions, like Excel 2007, may have limitations. Next, check that your macro settings are enabled. Go to the "Developer" tab in the ribbon, click on "Macro Security," and select "Enable all macros" or "Disable all macros except digitally signed macros." If you don't see the "Developer" tab, go to "File" > "Options" > "Customize Ribbon" and check the box next to "Developer." Additionally, make sure that your workbook is not in "Protected View" or "Trusted Locations" as macros won't run in these modes. You'll also need to save your workbook in a macro-enabled file format, such as ".xlsm" or ".xltm." Finally, be aware that macros can pose a security risk, so only enable macros from trusted sources and be cautious when running macros from unknown sources.
Recording and Creating Macros in Excel
Macros in Excel are a powerful tool that can automate repetitive tasks, saving you time and increasing productivity. By recording and creating macros, you can streamline your workflow and focus on more complex tasks. In this article, we will explore the world of macros in Excel, starting with the basics of recording a macro. We will also delve into the Visual Basic Editor, where you can edit and customize your macros. Additionally, we will cover the process of creating a macro from scratch using VBA code. By the end of this article, you will have a solid understanding of how to record, edit, and create macros in Excel. So, let's get started with the first step: How to Record a Macro in Excel.
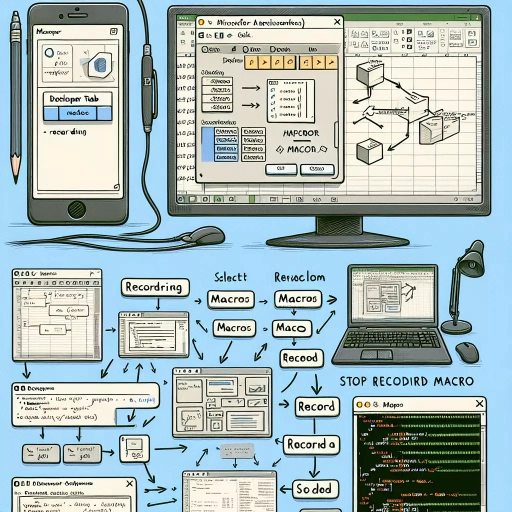
How to Record a Macro in Excel
To record a macro in Excel, start by opening your workbook and navigating to the Developer tab. If you don't see the Developer tab, you can add it by going to File > Options > Customize Ribbon and checking the box next to Developer. Once you're in the Developer tab, click on the Record Macro button in the Code group. This will open the Record Macro dialog box, where you can enter a name for your macro, choose a shortcut key, and select where you want to store the macro. Choose a location, such as This Workbook or New Workbook, and click OK. Excel will then start recording your actions, so be careful what you do next. Perform the actions you want to automate, such as formatting cells, inserting formulas, or creating charts. As you work, Excel will record each step and translate it into VBA code. When you're finished, click the Stop Recording button in the Developer tab or press the shortcut key you assigned. Your macro is now recorded and ready to use. You can run it by clicking the Macros button in the Developer tab, selecting your macro, and clicking Run. You can also edit your macro by clicking the Edit button, which will open the Visual Basic Editor where you can modify the code.
Understanding the Visual Basic Editor in Excel
The Visual Basic Editor (VBE) is a powerful tool in Excel that allows users to create, edit, and manage macros. To access the VBE, press Alt + F11 or navigate to Developer > Visual Basic in the ribbon. The VBE is divided into several sections, including the Project Explorer, Properties window, and Code window. The Project Explorer displays a tree-like structure of all open workbooks and their respective modules, while the Properties window shows the properties of the selected object. The Code window is where users can write and edit VBA code. The VBE also includes a toolbar with various buttons for tasks such as running code, debugging, and inserting controls. Understanding the VBE is essential for creating and managing macros in Excel, as it provides a platform for writing and editing VBA code. By familiarizing yourself with the VBE, you can unlock the full potential of macros in Excel and automate complex tasks with ease.
Creating a Macro from Scratch Using VBA Code
Creating a macro from scratch using VBA code allows you to automate complex tasks in Excel with precision and flexibility. To start, open the Visual Basic Editor by pressing Alt + F11 or navigating to Developer > Visual Basic in the ribbon. In the Editor, click Insert > Module to create a new module, which will hold your macro code. Next, declare the macro by typing "Sub" followed by the name of your macro, such as "MyMacro." Then, define the actions you want the macro to perform by writing VBA code, using Excel's object model to interact with worksheets, ranges, and other elements. For example, you can use the "Range" object to select a specific cell or range, or the "Worksheet" object to activate a specific sheet. As you write your code, use the Editor's built-in tools, such as IntelliSense and debugging features, to help you identify and fix errors. Once you've written your code, click Run > Run Sub/UserForm to test your macro, or press F5 to run it from the Editor. If your macro works as expected, you can save it by clicking File > Save, and then use it in your Excel workbook by clicking Developer > Macros and selecting your macro from the list. By creating a macro from scratch using VBA code, you can automate complex tasks, streamline your workflow, and increase productivity in Excel.
Editing and Managing Macros in Excel
Macros in Excel are a powerful tool that can automate repetitive tasks, streamline workflows, and increase productivity. However, once created, macros often require editing and management to ensure they continue to function as intended. In this article, we will explore the essential skills for editing and managing macros in Excel, including how to edit an existing macro, manage macro security, and share and distribute macros with others. By mastering these skills, users can unlock the full potential of macros and take their Excel skills to the next level. To get started, let's dive into the first step: editing an existing macro in Excel.
How to Edit an Existing Macro in Excel
To edit an existing macro in Excel, start by opening the Visual Basic Editor. You can do this by pressing "Alt + F11" or by navigating to the "Developer" tab in the ribbon and clicking on the "Visual Basic" button. Once the Visual Basic Editor is open, you will see a list of all the macros that are currently stored in your workbook. To edit a macro, simply click on the macro you want to edit in the "Project" window, and then click on the "Edit" button or press "F7". This will open the macro in the code editor, where you can make changes to the code. You can also use the "Find" and "Replace" functions to quickly locate and modify specific parts of the code. When you are finished making changes, click "File" and then "Save" to save the updated macro. Alternatively, you can also use the "Run" button or press "F5" to test the macro and see how it works with the changes you made. If you want to make changes to the macro's properties, such as its name or description, you can do so by clicking on the "Properties" window in the "Project" window. By following these steps, you can easily edit an existing macro in Excel and make changes to its code and properties.
Managing Macro Security in Excel
Managing macro security in Excel is crucial to prevent malicious code from running on your computer. To manage macro security, go to the "Developer" tab in the ribbon, click on "Macro Security" in the "Code" group, and select "Macro Settings" from the drop-down menu. In the "Trust Center" window, you can set the macro security level to "Disable all macros without notification," "Disable all macros with notification," "Disable all macros except digitally signed macros," or "Enable all macros." The recommended setting is "Disable all macros except digitally signed macros," which allows macros from trusted sources to run while blocking unsigned macros. You can also add trusted locations, such as a network folder or a specific workbook, to the "Trusted Locations" list, which allows macros from those locations to run without prompting. Additionally, you can set up a "Trusted Publishers" list, which allows macros from specific publishers to run without prompting. It's also important to digitally sign your macros to ensure they are trusted and can run without issues. To do this, you need to obtain a digital certificate from a trusted certificate authority and then use the "SelfCert" tool to sign your macros. By managing macro security effectively, you can protect your computer from malicious code and ensure that your macros run smoothly and securely.
Sharing and Distributing Macros with Others
Sharing and distributing macros with others can be a convenient way to streamline workflows and increase productivity across teams and organizations. To share a macro, you can either send the entire workbook containing the macro or export the macro as a separate file. When sending the workbook, make sure to save it as a macro-enabled file (.xlsm) to preserve the macro code. Alternatively, you can export the macro as a .bas file, which can be imported into another workbook. To do this, go to the Visual Basic Editor, click "File" > "Export File," and choose a location to save the file. When sharing macros, it's essential to consider security and compatibility issues. Macros can potentially contain malicious code, so it's crucial to only share macros from trusted sources. Additionally, macros may not be compatible with different versions of Excel or operating systems, so it's recommended to test the macro on different environments before sharing. To distribute macros to a wider audience, you can also create an add-in, which is a file that contains a collection of macros and can be easily installed and uninstalled. To create an add-in, go to the Visual Basic Editor, click "File" > "Save As," and choose "Excel Add-in" as the file type. Once created, the add-in can be shared with others, who can install it by going to the "Developer" tab > "Add-ins" > "Manage Add-ins" and browsing to the location of the add-in file. By sharing and distributing macros effectively, you can leverage the power of automation to improve workflows and increase productivity across your organization.