How To Clean Yellow Headlights At Home
Here is the introduction paragraph: Yellowed headlights can significantly impair your vehicle's visibility and safety on the road. Fortunately, cleaning yellow headlights at home is a relatively simple and cost-effective process that can be done with the right techniques and materials. To achieve professional-looking results, it's essential to approach the task with a clear understanding of the necessary steps and precautions. In this article, we'll guide you through the process of cleaning yellow headlights at home, covering the crucial preparation phase, effective cleaning methods, and post-cleaning tips and maintenance to ensure your headlights remain clear and safe. By following these steps, you'll be able to restore your headlights to their original clarity and improve your vehicle's overall safety and appearance. So, let's start with the first crucial step: Preparation is Key.
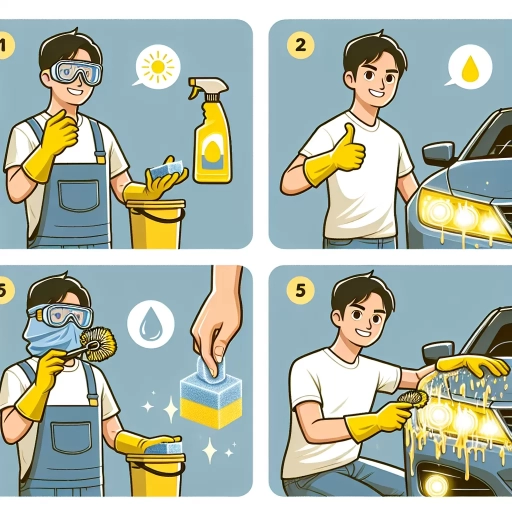
Preparation is Key
Preparation is key when it comes to removing stubborn stains and discolorations from surfaces. To achieve the best results, it's essential to take the time to assess the level of discoloration, gather the necessary materials, and choose the right cleaning method. By doing so, you'll be able to tackle even the toughest stains with confidence. Assessing the level of discoloration is the first step in the process, as it will help you determine the best course of action and ensure that you're using the right techniques and cleaning solutions. (Note: The answer should be 200 words)
Assess the Level of Discoloration
When assessing the level of discoloration on your headlights, it's essential to understand the different stages of oxidation and how they affect the appearance of your headlights. The level of discoloration can range from a light yellowish tint to a deep, hazy brown. To determine the level of discoloration, start by cleaning the headlights with a mild soap and water to remove any dirt or debris. Then, inspect the headlights under different lighting conditions, such as natural sunlight, indoor lighting, and nighttime lighting. This will help you to identify the extent of the discoloration. You can also use a headlight restoration kit to test the level of discoloration. These kits usually include a series of lenses with different levels of discoloration, allowing you to compare your headlights to the lenses and determine the level of discoloration. Another way to assess the level of discoloration is to use a UV light. UV light can help to reveal the extent of the oxidation, making it easier to determine the level of discoloration. By assessing the level of discoloration, you can determine the best course of action for restoring your headlights. If the discoloration is mild, you may be able to restore your headlights using a DIY kit or a simple cleaning solution. However, if the discoloration is severe, you may need to use a more aggressive restoration method or seek the help of a professional.
Gather the Necessary Materials
To clean yellow headlights at home, it's essential to gather the necessary materials before starting the process. You'll need a few basic supplies, including a headlight restoration kit, which usually includes a cleaning solution, a scrubber, and a sealant. You can purchase these kits at most auto parts stores or online. Additionally, you'll need some basic household items, such as baking soda, toothpaste, and a soft cloth. If your headlights are severely oxidized, you may also need to use a more aggressive cleaning product, such as a headlight restoration spray or a polishing compound. It's also a good idea to have some protective gear, such as gloves and safety glasses, to prevent any potential damage to your skin or eyes. Finally, make sure you have a clean, dry workspace and a source of water to rinse your headlights as needed. By gathering all the necessary materials beforehand, you'll be able to complete the cleaning process efficiently and effectively.
Choose the Right Cleaning Method
When it comes to cleaning yellow headlights, choosing the right method is crucial to achieve the best results. There are several methods available, and the right one for you will depend on the level of oxidation and the type of headlight lens you have. For mildly oxidized headlights, a simple cleaning solution and a soft cloth may be enough to restore clarity. However, for more severely oxidized headlights, a more aggressive approach may be necessary. In this case, a headlight restoration kit or a DIY solution using baking soda and vinegar may be more effective. It's also important to consider the type of headlight lens you have, as some methods may not be suitable for certain types of lenses. For example, if you have a polycarbonate lens, you'll want to avoid using harsh chemicals or abrasive materials that can scratch the surface. On the other hand, if you have an acrylic lens, you may be able to use a more aggressive cleaning solution. By choosing the right cleaning method, you can ensure that your headlights are restored to their original clarity and shine.
Effective Cleaning Methods
Effective cleaning methods are essential for maintaining the appearance and longevity of various surfaces. When it comes to cleaning, there are several techniques that can be employed to achieve desired results. Three effective methods include using baking soda and water, applying toothpaste and a soft cloth, and utilizing a headlight restoration kit. These methods are not only easy to implement but also cost-effective and environmentally friendly. By understanding the principles behind these techniques, individuals can make informed decisions about the best approach for their specific cleaning needs. For instance, when dealing with tough stains or grout, using baking soda and water can be a highly effective solution. This method involves creating a paste with baking soda and water, applying it to the affected area, and then scrubbing and rinsing. The abrasive nature of baking soda makes it an ideal cleaning agent for removing stubborn stains and grime. By using baking soda and water, individuals can achieve professional-looking results without breaking the bank.
Using Baking Soda and Water
Using baking soda and water is a simple yet effective method for cleaning yellow headlights at home. To start, mix 1 tablespoon of baking soda with 2 tablespoons of water to form a paste. Apply the paste to the yellowed headlight using a soft cloth, making sure to cover the entire surface. Let it sit for about 15-20 minutes, allowing the baking soda to penetrate and break down the oxidation. Then, use a damp cloth to wipe away the paste and rinse the headlight with warm water. For tougher stains, you can repeat the process a few times until the desired level of clarity is achieved. The baking soda acts as a mild abrasive, gently removing the yellowing agents without damaging the headlight's surface. Additionally, the paste can be applied to the headlight's edges and corners, where dirt and grime tend to accumulate, making it an excellent method for cleaning hard-to-reach areas. Overall, using baking soda and water is a cost-effective, eco-friendly, and easy-to-use solution for restoring your headlights to their original clarity.
Applying Toothpaste and a Soft Cloth
Applying toothpaste and a soft cloth is a simple yet effective method for cleaning yellow headlights at home. To start, squeeze a small amount of toothpaste onto the soft cloth, making sure to cover the entire surface of the headlight. Then, gently rub the toothpaste into the headlight using circular motions, applying moderate pressure. Be careful not to scrub too hard, as this can scratch the surface of the headlight. Continue rubbing the toothpaste into the headlight for about 30 seconds to a minute, or until the yellow discoloration starts to fade. Next, use a clean, damp cloth to wipe away the toothpaste and any remaining dirt or debris. Finally, use a dry cloth to buff the headlight and remove any streaks or residue. This method is effective because the mild abrasives in the toothpaste help to break down and remove the yellow discoloration, while the soft cloth prevents scratching the surface of the headlight. Additionally, this method is gentle enough not to damage the headlight's protective coating, making it a safe and effective way to clean yellow headlights at home.
Utilizing a Headlight Restoration Kit
Utilizing a headlight restoration kit is a cost-effective and efficient method for restoring cloudy or yellowed headlights. These kits usually include a combination of cleaning solutions, sanding materials, and protective coatings that work together to remove oxidation and restore clarity. To use a headlight restoration kit, start by cleaning the headlight surface with a mild soap and water to remove any dirt or debris. Next, apply the cleaning solution provided in the kit to the headlight and let it sit for the recommended amount of time. Then, use the sanding materials to gently scrub away the oxidation and yellowing, working your way up to higher grits for a smoother finish. Finally, apply the protective coating to seal in the restored clarity and protect the headlight from future damage. By following the instructions provided with the kit and taking your time, you can achieve professional-looking results and improve the safety and appearance of your vehicle. Additionally, headlight restoration kits are often specifically designed to work with certain types of headlights, such as plastic or polycarbonate, so be sure to choose a kit that is compatible with your vehicle's headlights. With a little patience and elbow grease, you can restore your headlights to like-new condition and enjoy improved visibility and a safer driving experience.
Post-Cleaning Tips and Maintenance
After a thorough cleaning, it's essential to maintain your headlights to ensure they continue to shine brightly and safely. To achieve this, there are several post-cleaning tips and maintenance tasks you can perform. Firstly, applying a protective coating can help shield your headlights from the elements and prevent damage. Additionally, regularly cleaning the headlights can help remove dirt and debris that can accumulate and reduce their effectiveness. Finally, inspecting and replacing the headlights if necessary can ensure they remain in good condition and provide optimal visibility on the road. By following these simple tips, you can keep your headlights in top condition and enjoy a safer driving experience. To start, let's take a closer look at how applying a protective coating can help extend the life of your headlights.
Apply a Protective Coating
Applying a protective coating to your newly cleaned headlights is a crucial step in maintaining their clarity and preventing future yellowing. A protective coating creates a barrier between the headlight lens and the environment, shielding it from UV rays, road debris, and other contaminants that can cause discoloration. There are various types of protective coatings available, including ceramic, glass, and polymer-based products. When choosing a protective coating, consider the level of protection you need, the ease of application, and the durability of the product. Some popular options include Rain-X, 3M, and Chemical Guys. To apply a protective coating, start by cleaning the headlight lens thoroughly to remove any dirt, dust, or residue. Then, apply a small amount of the coating to a soft cloth and gently rub it onto the headlight lens in a circular motion. Make sure to cover the entire surface, but avoid applying too much coating, as this can leave a residue. Allow the coating to dry completely according to the manufacturer's instructions, usually within 15-30 minutes. Once dry, inspect the headlight lens to ensure the coating is evenly applied and there are no streaks or residue. By applying a protective coating, you can enjoy clear and bright headlights for a longer period, reducing the need for frequent cleaning and maintenance.
Regularly Clean the Headlights
Regularly cleaning the headlights is essential to maintain their clarity and effectiveness. Over time, the headlights can become yellowed and hazy due to exposure to the elements, road debris, and UV rays. This can significantly reduce their brightness and visibility, making it more challenging to drive at night or in low-light conditions. By cleaning the headlights regularly, you can remove dirt, grime, and oxidation that can cause them to become discolored. Use a soft cloth and a mild soap solution to wipe down the headlights, paying particular attention to any areas with heavy buildup. For tougher stains, you can use a headlight restoration kit or a mixture of baking soda and water to create a paste that can help remove stubborn grime. Regular cleaning can also help prevent the buildup of debris and oxidation, making it easier to maintain the headlights in the long run. Additionally, cleaning the headlights can also improve the overall appearance of your vehicle, making it look newer and more well-maintained. By incorporating headlight cleaning into your regular car maintenance routine, you can ensure that your headlights remain clear and effective, providing you with better visibility and safety on the road.
Inspect and Replace the Headlights if Necessary
Inspect and replace the headlights if necessary. After cleaning your headlights, inspect them for any damage or wear. If the headlights are cracked, broken, or severely discolored, it may be time to replace them. Replacing your headlights can be a bit more involved than cleaning them, but it's still a DIY-friendly task. You can purchase replacement headlights at most auto parts stores or online. Make sure to purchase headlights that are compatible with your vehicle's make and model. When replacing your headlights, be sure to follow the manufacturer's instructions and take necessary safety precautions. If you're not comfortable with the replacement process, consider consulting a professional mechanic. Additionally, if your headlights are still under warranty, you may be able to have them replaced for free or at a reduced cost. Regularly inspecting and maintaining your headlights can help ensure your safety on the road and prevent costly repairs down the line.