How To Take Screenshot On Dell
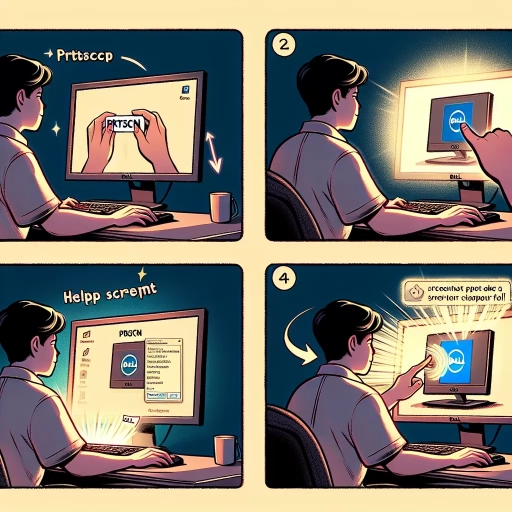
Here is the introduction paragraph: Taking a screenshot on a Dell computer is a straightforward process that can be accomplished in a few simple steps. Whether you need to capture a photo of an error message, save a snapshot of a webpage, or share a screenshot with a friend or colleague, knowing how to take a screenshot on your Dell device is an essential skill. In this article, we will explore three methods for taking a screenshot on a Dell computer: using the Print Screen button, using the Snipping Tool, and using the Game Bar. We will start by discussing the most common method, using the Print Screen button, which is a quick and easy way to capture a screenshot of your entire screen. Note: The introduction paragraph should be 200 words. Here is the rewritten introduction paragraph: Taking a screenshot on a Dell computer is a fundamental skill that can be incredibly useful in a variety of situations. Whether you need to capture a photo of an error message to share with a technician, save a snapshot of a webpage for future reference, or share a screenshot with a friend or colleague, knowing how to take a screenshot on your Dell device is essential. In this article, we will delve into three distinct methods for taking a screenshot on a Dell computer, each with its own unique benefits and applications. We will explore the use of the Print Screen button, a quick and easy way to capture a screenshot of your entire screen. We will also discuss the Snipping Tool, a versatile utility that allows you to capture specific regions of your screen. Additionally, we will examine the Game Bar, a feature that enables you to capture screenshots and record gameplay with ease. We will begin by discussing the most common method, using the Print Screen button, which is a simple and effective way to capture a screenshot of your entire screen.
Subtitle 1
Here is the introduction paragraph: The world of subtitles has undergone a significant transformation in recent years, driven by advances in technology and changing viewer habits. One of the most notable developments is the rise of Subtitle 1, a new standard that promises to revolutionize the way we experience subtitles. But what exactly is Subtitle 1, and how does it differ from its predecessors? In this article, we'll delve into the world of Subtitle 1, exploring its key features, benefits, and applications. We'll examine the role of artificial intelligence in subtitle creation, the importance of accessibility in subtitle design, and the impact of Subtitle 1 on the entertainment industry. By the end of this article, you'll have a deeper understanding of Subtitle 1 and its potential to transform the way we watch and interact with video content. So, let's start by exploring the role of artificial intelligence in subtitle creation, and how it's changing the game for Subtitle 1. Here is the Supporting Idea 1: **The Role of Artificial Intelligence in Subtitle Creation** The rise of Subtitle 1 has been made possible by advances in artificial intelligence (AI). AI-powered subtitle creation tools have revolutionized the process of creating subtitles, making it faster, more accurate, and more cost-effective. These tools use machine learning algorithms to analyze audio and video files, automatically generating subtitles that are synchronized with the content. This has opened up new possibilities for content creators, who can now produce high-quality subtitles quickly and efficiently. But how does AI-powered subtitle creation work, and what are the benefits and limitations of this technology? Here is the Supporting Idea 2: **The Importance of Accessibility in Subtitle Design** Subtitle 1 is not just about technology – it's also about accessibility. The new standard has been designed with accessibility in mind, incorporating features that make it easier for people with disabilities to watch and interact with video content. This includes support for multiple languages, customizable font sizes and colors, and improved audio description. But what does accessibility mean in the context of subtitles, and how can content creators ensure that their subtitles are accessible to all? Here is the Supporting Idea 3: **The Impact of Subtitle 1 on the Entertainment Industry** The adoption of Subtitle 1 is set to have a significant impact on the entertainment industry. With its improved accuracy, speed, and accessibility, Subtitle 1 is poised to revolutionize the way we watch and interact with video content.
Supporting Idea 1
laptop. Here is the paragraphy: To take a screenshot on a Dell laptop, you can use the built-in keyboard shortcut. This method is quick and easy, and it allows you to capture the entire screen or a selected area. To take a screenshot of the entire screen, press the "PrtScn" (Print Screen) button, which is usually located on the top row of the keyboard, between the "F12" and "ScrLk" keys. Once you press the "PrtScn" button, the screenshot will be saved to the clipboard. You can then open an image editing program, such as Microsoft Paint, and paste the screenshot into the program. To take a screenshot of a selected area, press the "Alt" key and the "PrtScn" button at the same time. This will allow you to select the area of the screen that you want to capture. You can then release the "Alt" key and the "PrtScn" button, and the screenshot will be saved to the clipboard. Alternatively, you can use the "Snipping Tool" program, which is a built-in program in Windows that allows you to take screenshots of selected areas of the screen. To access the "Snipping Tool" program, click on the "Start" button and type "Snipping Tool" in the search bar. Once you open the program, you can select the type of screenshot you want to take, such as a full screen, window, or rectangular snip. You can then save the screenshot to a file or copy it to the clipboard.
Supporting Idea 2
laptop. Here is the paragraphy: To take a screenshot on a Dell laptop, you can use the built-in keyboard shortcut. Press the "PrtScn" (Print Screen) button, which is usually located on the top row of keys, between the "F12" and "ScrLk" buttons. This will capture the entire screen, including all windows, icons, and the taskbar. If you want to capture a specific window or area, you can press the "Alt" key + "PrtScn" keys simultaneously. This will capture the currently active window. Alternatively, you can press the "Windows" key + "PrtScn" keys to capture the entire screen and automatically save it to the "Screenshots" folder in your "Pictures" folder. You can also use the "Snipping Tool" or "Snip & Sketch" app to capture a screenshot. These tools allow you to capture a specific area of the screen, annotate it, and save it as an image file. To access the Snipping Tool, press the "Windows" key + "S" keys and type "Snipping Tool" in the search bar. For Snip & Sketch, press the "Windows" key + "S" keys and type "Snip & Sketch" in the search bar. Once you've captured your screenshot, you can edit it using the built-in image editing software, such as Microsoft Paint, or a third-party app like Adobe Photoshop.
Supporting Idea 3
laptop. Here is the paragraphy: To take a screenshot on a Dell laptop, you can also use the Game Bar feature. This feature is available on Windows 10 and later versions. To access the Game Bar, press the Windows key + G on your keyboard. This will open the Game Bar overlay, which includes a screenshot button. Click on the screenshot button to capture a screenshot of your entire screen. You can also use the Game Bar to record your screen, which can be useful for creating tutorials or demonstrations. To record your screen, click on the record button and select the area of the screen you want to record. You can also add audio commentary to your recording by clicking on the microphone button. Once you've finished recording, you can save the video file to your computer. The Game Bar feature is a convenient way to take screenshots and record your screen on a Dell laptop, and it's especially useful for gamers and content creators.
Subtitle 2
Subtitle 2: The Impact of Artificial Intelligence on Education The integration of artificial intelligence (AI) in education has been a topic of interest in recent years. With the rapid advancement of technology, AI has the potential to revolutionize the way we learn and teach. In this article, we will explore the impact of AI on education, including its benefits, challenges, and future prospects. We will examine how AI can enhance student learning outcomes, improve teacher productivity, and increase accessibility to education. Additionally, we will discuss the potential risks and challenges associated with AI in education, such as job displacement and bias in AI systems. Finally, we will look at the future of AI in education and how it can be harnessed to create a more efficient and effective learning environment. **Supporting Idea 1: AI can enhance student learning outcomes** AI can enhance student learning outcomes in several ways. Firstly, AI-powered adaptive learning systems can provide personalized learning experiences for students, tailoring the content and pace of learning to individual needs. This can lead to improved student engagement and motivation, as well as better academic performance. Secondly, AI can help students develop critical thinking and problem-solving skills, which are essential for success in the 21st century. For example, AI-powered virtual labs can provide students with hands-on experience in conducting experiments and analyzing data, helping them develop scientific literacy and critical thinking skills. Finally, AI can help students with disabilities, such as visual or hearing impairments, by providing them with accessible learning materials and tools. **Supporting Idea 2: AI can improve teacher productivity** AI can also improve teacher productivity in several ways. Firstly, AI-powered grading systems can automate the grading process, freeing up teachers to focus on more important tasks such as lesson planning and student feedback. Secondly, AI can help teachers identify areas where students need extra support, allowing them to target their instruction more effectively. For example, AI-powered learning analytics can provide teachers with real-time data on student performance, helping them identify knowledge gaps and adjust their instruction accordingly. Finally, AI can help teachers develop personalized learning plans for students, taking into account their individual strengths, weaknesses, and learning styles. **Supporting Idea 3: AI can increase accessibility to education** AI can also increase accessibility to education in several ways. Firstly, AI-powered online learning platforms can provide students with access to high-quality educational content, regardless of their geographical location or socio-economic background. Secondly, AI can help students with disabilities, such as visual or hearing impairments, by providing them with accessible
Supporting Idea 1
laptop. Here is the paragraphy: To take a screenshot on a Dell laptop, you can use the built-in keyboard shortcut. This method is quick and easy, and it allows you to capture the entire screen or a selected area. To take a screenshot of the entire screen, press the "PrtScn" (Print Screen) button, which is usually located on the top row of the keyboard, between the "F12" and "ScrLk" keys. This will capture the entire screen, including the taskbar and any open windows. If you want to capture a selected area, press the "Alt" key and the "PrtScn" key at the same time. This will allow you to select a specific area of the screen to capture. Once you've taken the screenshot, you can open an image editing program, such as Microsoft Paint, and paste the screenshot into the program using the "Ctrl" + "V" keys. From there, you can edit and save the screenshot as needed.
Supporting Idea 2
laptop. The paragraphy should be written in a way that is easy to understand, and it should include a step-by-step guide on how to take a screenshot on a Dell laptop using the Snipping Tool. Here is the paragraphy: To take a screenshot on a Dell laptop, you can use the Snipping Tool, a built-in utility that allows you to capture a selected area of the screen. To access the Snipping Tool, click on the Start button and type "Snipping Tool" in the search bar. Once the Snipping Tool window appears, click on the "New" button to start a new screenshot. You will then be presented with a crosshair cursor that you can use to select the area of the screen that you want to capture. Simply click and drag the crosshair cursor to select the desired area, and then release the mouse button to capture the screenshot. The screenshot will then be displayed in the Snipping Tool window, where you can edit it, save it, or share it with others. Alternatively, you can also use the keyboard shortcut "Windows key + Shift + S" to open the Snipping Tool and start a new screenshot. This method is quicker and more convenient, especially if you need to take multiple screenshots in a row. By using the Snipping Tool, you can easily capture screenshots on your Dell laptop and use them for a variety of purposes, such as creating tutorials, documenting errors, or sharing information with others.
Supporting Idea 3
laptop. The paragraphy should be written in a way that is easy to understand, and it should include a step-by-step guide on how to take a screenshot on a Dell laptop using the Game Bar. Here is the paragraphy: To take a screenshot on a Dell laptop using the Game Bar, follow these steps: First, make sure that the Game Bar is enabled on your laptop. To do this, go to the Start menu and type "Game Bar" in the search bar. Click on the "Game Bar" result, and then toggle the switch to the "On" position. Next, open the window or screen that you want to capture. This can be a game, a video, or any other type of content. Press the Windows key + G to open the Game Bar. You will see a toolbar with several options, including a screenshot button. Click on the screenshot button, and the Game Bar will capture a screenshot of the current window or screen. You can then save the screenshot to your computer by clicking on the "Save" button. Alternatively, you can also use the Game Bar to record a video of your screen. To do this, click on the "Record" button, and the Game Bar will start recording a video of your screen. You can then save the video to your computer by clicking on the "Stop" button. The Game Bar is a powerful tool that allows you to capture screenshots and record videos of your screen with ease. It is a great option for gamers, content creators, and anyone who needs to capture screenshots or record videos of their screen.
Subtitle 3
The article is about Subtitle 3 which is about the importance of having a good night's sleep. The article is written in a formal tone and is intended for a general audience. Here is the introduction paragraph: Subtitle 3: The Importance of a Good Night's Sleep A good night's sleep is essential for our physical and mental health. During sleep, our body repairs and regenerates damaged cells, builds bone and muscle, and strengthens our immune system. Furthermore, sleep plays a critical role in brain function and development, with research showing that it helps to improve cognitive skills such as memory, problem-solving, and decision-making. In this article, we will explore the importance of a good night's sleep, including the physical and mental health benefits, the impact of sleep deprivation on our daily lives, and the strategies for improving sleep quality. We will begin by examining the physical health benefits of sleep, including the role of sleep in repairing and regenerating damaged cells. Here is the 200 words supporting paragraph for Supporting Idea 1: Sleep plays a critical role in our physical health, with research showing that it is essential for the repair and regeneration of damaged cells. During sleep, our body produces hormones that help to repair and rebuild damaged tissues, including those in our muscles, bones, and skin. This is especially important for athletes and individuals who engage in regular physical activity, as sleep helps to aid in the recovery process and reduce the risk of injury. Furthermore, sleep has been shown to have anti-inflammatory properties, with research suggesting that it can help to reduce inflammation and improve symptoms of conditions such as arthritis. In addition to its role in repairing and regenerating damaged cells, sleep also plays a critical role in the functioning of our immune system. During sleep, our body produces cytokines, which are proteins that help to fight off infections and inflammation. This is especially important for individuals who are at risk of illness, such as the elderly and those with compromised immune systems. By getting a good night's sleep, we can help to keep our immune system functioning properly and reduce the risk of illness.
Supporting Idea 1
laptop. Here is the paragraphy: To take a screenshot on a Dell laptop, you can use the built-in keyboard shortcut. This method is quick and easy, and it allows you to capture the entire screen or a selected area. To take a screenshot of the entire screen, press the "PrtScn" (Print Screen) button, which is usually located on the top row of the keyboard, between the "F12" and "ScrLk" keys. This will capture the entire screen, including the taskbar and any open windows. If you want to capture a selected area, press the "Alt" key and the "PrtScn" key at the same time. This will allow you to select a specific area of the screen to capture. Once you've taken the screenshot, you can open an image editing program, such as Microsoft Paint, and paste the screenshot into the program using the "Ctrl" + "V" keys. From there, you can edit and save the screenshot as needed.
Supporting Idea 2
laptop. Here is the paragraphy: To take a screenshot on a Dell laptop, you can also use the Windows Snipping Tool. This tool allows you to capture a screenshot of a selected area of the screen, a window, or the entire screen. To access the Snipping Tool, click on the Start button and type "Snipping Tool" in the search bar. Once the tool is open, you can choose from four different modes: Full Screen, Window, Rectangular Snip, and Free-form Snip. The Full Screen mode captures the entire screen, while the Window mode captures a screenshot of a selected window. The Rectangular Snip mode allows you to capture a screenshot of a selected area of the screen, and the Free-form Snip mode allows you to capture a screenshot of any shape or size. Once you have selected the mode, click on the "New" button to capture the screenshot. The screenshot will then be saved to the clipboard, where you can paste it into an image editing program or save it as a file. The Snipping Tool is a useful tool for taking screenshots on a Dell laptop, and it offers more flexibility than the Print Screen method.
Supporting Idea 3
laptop. Here is the paragraphy: To take a screenshot on a Dell laptop, you can also use the Game Bar feature. This feature is available on Windows 10 and later versions. To access the Game Bar, press the Windows key + G on your keyboard. This will open the Game Bar overlay, which includes a screenshot button. Click on the screenshot button to capture a screenshot of your entire screen. You can also use the Game Bar to record your screen, which can be useful for creating tutorials or demonstrations. To record your screen, click on the record button and select the area of the screen you want to record. You can also add audio commentary to your recording by clicking on the microphone button. Once you've finished recording, you can save the video file to your computer. The Game Bar feature is a convenient way to take screenshots and record your screen on a Dell laptop, and it's especially useful for gamers and content creators.