How To Make Condensed Milk At Home
Condensed milk is a staple ingredient in many cuisines, particularly in desserts and sweet treats. However, store-bought condensed milk can be expensive and may contain additives that some people prefer to avoid. Making condensed milk at home is a simple and cost-effective solution that allows you to control the ingredients and quality of the final product. To get started, it's essential to understand what condensed milk is and its various uses in cooking and baking. Additionally, you'll need to gather the basic ingredients and equipment required for the process. Once you have a grasp of these fundamentals, you can follow a step-by-step guide to make condensed milk at home. In this article, we'll explore the world of condensed milk, starting with its definition and uses, to help you appreciate the versatility of this ingredient and inspire you to create your own homemade version.
Understanding Condensed Milk and Its Uses
Condensed milk is a popular ingredient in many recipes, but its uses and benefits extend far beyond the kitchen. For those who are new to cooking and baking, understanding what condensed milk is and how it's used can be a game-changer. In this article, we'll delve into the world of condensed milk, exploring its common uses in cooking and baking, the benefits of making it at home, and what exactly it is. From sweet treats like cheesecakes and flans to savory dishes like soups and sauces, condensed milk is a versatile ingredient that can elevate any recipe. By the end of this article, you'll be equipped with the knowledge to incorporate condensed milk into your cooking and baking repertoire. So, let's start with the basics: what is condensed milk?
What is Condensed Milk?
Condensed milk is a type of sweetened milk that has been condensed to remove excess water, resulting in a thick, creamy liquid with a rich, sweet flavor. It is made by heating milk to a high temperature, usually around 145°F (63°C), and then evaporating the water content through a process of vacuum distillation or open boiling. This process concentrates the milk's natural sugars, proteins, and fats, creating a smooth, velvety texture and a deep, caramel-like flavor. Condensed milk is often used in baking, cooking, and as a topping for desserts, and it is a key ingredient in many traditional recipes, such as key lime pie, cheesecake, and flan. It is also a popular ingredient in many international cuisines, including Latin American, Asian, and European desserts. There are different types of condensed milk, including sweetened condensed milk, evaporated milk, and unsweetened condensed milk, each with its own unique characteristics and uses. Overall, condensed milk is a versatile and delicious ingredient that can add richness, creaminess, and sweetness to a wide range of desserts and dishes.
Common Uses of Condensed Milk in Cooking and Baking
Condensed milk is a versatile ingredient that has been a staple in many cuisines, particularly in baking and cooking. Its rich, creamy texture and sweet flavor make it an ideal addition to a variety of desserts, beverages, and even savory dishes. One of the most common uses of condensed milk is in desserts such as cheesecakes, flans, and creme brûlées, where it adds a smooth and creamy texture. It is also a key ingredient in traditional desserts like key lime pie, tres leches cake, and Vietnamese coffee. In addition to its use in desserts, condensed milk is also used in beverages like coffee, tea, and hot chocolate, where it adds a rich and creamy texture. It is also used as a topping for pancakes, waffles, and French toast, adding a sweet and indulgent touch. Furthermore, condensed milk is used in savory dishes like curries and sauces, where it adds a creamy and rich texture. It is also used as a substitute for heavy cream or half-and-half in recipes, making it a popular choice for those looking for a dairy-free or low-fat alternative. In some cuisines, condensed milk is also used as a marinade for meats, adding a sweet and sticky glaze. Overall, condensed milk is a versatile ingredient that can be used in a variety of sweet and savory dishes, making it a staple in many kitchens around the world.
Benefits of Making Condensed Milk at Home
Making condensed milk at home offers numerous benefits that make it a worthwhile endeavor. Firstly, homemade condensed milk allows for control over the ingredients, enabling individuals to choose the type and quality of milk used, as well as the amount of sugar added. This is particularly beneficial for those with dietary restrictions or preferences, such as lactose intolerance or a desire to reduce sugar intake. Additionally, homemade condensed milk is free from additives and preservatives commonly found in store-bought versions, making it a healthier alternative. Furthermore, making condensed milk at home is cost-effective, as it eliminates the need to purchase expensive store-bought condensed milk. The process of making condensed milk at home also allows for customization, enabling individuals to experiment with different flavorings, such as vanilla or cinnamon, to create unique and delicious variations. Moreover, homemade condensed milk can be made in small batches, reducing food waste and allowing for a fresher product. Overall, making condensed milk at home offers a range of benefits that cater to various needs and preferences, making it a convenient and rewarding process.
Basic Ingredients and Equipment Needed
To make a delicious and creamy dessert, you need to start with the right ingredients and equipment. The basic ingredients and equipment needed for making desserts are crucial in determining the final taste, texture, and appearance of the dessert. In this article, we will discuss the core ingredients, optional ingredients, and equipment required for making desserts. We will start by looking at the core ingredients, milk and sugar, which are the foundation of most desserts. We will then explore optional ingredients that can be added to enhance flavor and preservation. Finally, we will discuss the equipment needed for heating and reducing milk, which is a critical step in making many desserts. By understanding the basic ingredients and equipment needed, you can create a wide range of delicious desserts. Let's start by looking at the core ingredients, milk and sugar, which are the building blocks of most desserts.
Milk and Sugar: The Core Ingredients
Milk and sugar are the core ingredients in making condensed milk at home. Milk provides the base for the condensed milk, offering a rich source of protein, calcium, and other essential nutrients. Whole milk is preferred for its creamy texture and flavor, although low-fat or nonfat milk can be used as a substitute for a lighter version. Sugar, on the other hand, serves as a sweetener and a preservative, helping to extend the shelf life of the condensed milk. Granulated sugar is the most commonly used type, but other sweeteners like brown sugar or honey can be used to create different flavor profiles. The ratio of milk to sugar is crucial, with a general rule of thumb being 1 cup of sugar for every 2 cups of milk. This ratio can be adjusted to suit personal taste preferences, but it's essential to maintain a balance between the two ingredients to achieve the desired consistency and flavor. By combining milk and sugar in the right proportions, you can create a delicious and creamy condensed milk that's perfect for baking, cooking, or enjoying on its own.
Optional Ingredients for Flavor and Preservation
When it comes to adding flavor and preservation to your homemade condensed milk, there are several optional ingredients you can consider. Vanilla extract is a popular choice, as it adds a subtle, sweet flavor that complements the richness of the milk. You can add a few drops of vanilla extract to the milk during the cooking process or stir it in after the milk has cooled. Another option is to add a pinch of salt, which can help to balance out the sweetness of the milk and enhance its flavor. If you're looking for a more unique flavor, you could try adding a teaspoon of cinnamon, nutmeg, or cardamom to the milk. These spices can add a warm, aromatic flavor that's perfect for using in desserts or drinks. In terms of preservation, you can add a small amount of potassium sorbate or sodium benzoate to the milk to help extend its shelf life. These preservatives can help to prevent the growth of bacteria and mold, allowing you to store your homemade condensed milk in the fridge for several weeks. However, it's worth noting that these preservatives can affect the flavor and texture of the milk, so use them sparingly. Finally, if you're looking for a non-dairy version of condensed milk, you can try using a non-dairy milk such as almond, soy, or coconut milk as a substitute. These milks can be used in place of regular milk to create a dairy-free condensed milk that's perfect for those with dietary restrictions.
Equipment for Heating and Reducing Milk
To heat and reduce milk, you'll need a few essential pieces of equipment. A medium-sized saucepan made of stainless steel or enameled cast iron is ideal, as it allows for even heat distribution and can withstand high temperatures. A heavy-bottomed saucepan is also recommended, as it will help to prevent scorching and promote smooth reduction. A silicone spatula or wooden spoon is necessary for frequent stirring, which is crucial to prevent the milk from sticking to the bottom of the pan and developing a burnt flavor. A candy thermometer is also highly recommended, as it will help you to monitor the temperature of the milk and ensure that it reaches the optimal temperature for reduction. Additionally, a glass measuring cup or a heat-resistant glass bowl is necessary for cooling the reduced milk, as it will help to stop the cooking process and prevent further reduction. Finally, a fine-mesh strainer or cheesecloth can be used to strain the reduced milk and remove any impurities or sediment that may have formed during the heating process. By using these pieces of equipment, you'll be able to heat and reduce the milk safely and effectively, resulting in a smooth and creamy condensed milk.
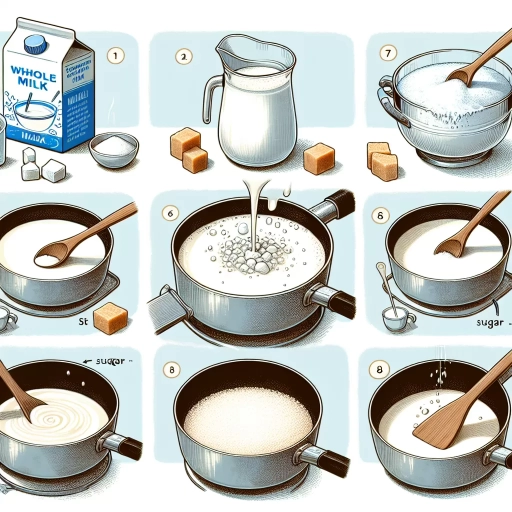
Step-by-Step Process to Make Condensed Milk at Home
Making condensed milk at home is a simple process that requires just a few ingredients and some basic kitchen equipment. To start, you'll need to heat the milk to the right temperature, which is crucial in creating the perfect consistency and flavor. This involves heating the milk to a specific temperature, usually around 170°F to 180°F, to create a rich and creamy texture. Once the milk has reached the desired temperature, you can then add sugar and reduce the mixture to create a thick and syrupy consistency. As you continue to heat and stir the mixture, it's essential to monitor its consistency closely, as it can quickly go from perfect to too thick. By following these steps, you can create delicious homemade condensed milk that's perfect for baking, cooking, or as a topping for your favorite desserts. First, let's start with the first step: heating the milk to the right temperature.
Heating the Milk to the Right Temperature
Heating the milk to the right temperature is a crucial step in making condensed milk at home. The ideal temperature for heating milk is between 145°F and 155°F (63°C to 68°C). Heating the milk to this temperature range helps to kill off any bacteria that may be present, while also denaturing the proteins and creating a smooth, creamy texture. If the milk is heated too high, it can scald and develop an unpleasant flavor, while heating it too low may not effectively kill off bacteria. To heat the milk to the right temperature, it's best to use a medium heat and stir constantly to prevent scorching. A candy thermometer can be used to monitor the temperature and ensure that it reaches the desired range. Once the milk has reached the correct temperature, it's ready to be mixed with sugar and continue the process of making condensed milk.
Adding Sugar and Reducing the Mixture
To add sugar and reduce the mixture, start by combining the milk and sugar in a medium saucepan. Heat the mixture over medium heat, stirring occasionally, until the sugar has dissolved. Bring the mixture to a simmer and cook for about 10-15 minutes, or until it has reduced by half and thickened slightly. You can help the process by occasionally tilting the saucepan to check the consistency of the mixture. As the mixture reduces, you'll notice it start to thicken and turn a light golden color. Be careful not to let it boil or scorch, as this can affect the flavor and texture of the condensed milk. Once the mixture has reached the desired consistency, remove it from the heat and let it cool slightly. This step is crucial in creating a smooth and creamy condensed milk. By reducing the mixture, you're concentrating the flavors and thickening the texture, which will give your homemade condensed milk a rich and velvety consistency.
Monitoring and Achieving the Desired Consistency
Monitoring and achieving the desired consistency is a crucial step in making condensed milk at home. To ensure the perfect consistency, it's essential to monitor the mixture's temperature and thickness regularly. As the mixture thickens, it will start to coat the back of a spoon and form a ribbon-like texture when lifted. This is a good indication that the condensed milk is almost ready. However, if you prefer a thicker consistency, you can continue to simmer the mixture for a few more minutes, stirring constantly to prevent scorching. It's also important to note that the consistency of condensed milk can vary depending on the desired use, such as in recipes or as a topping. For example, if you're using the condensed milk in a recipe, you may want a thicker consistency, while a thinner consistency may be preferred for topping desserts. By monitoring the temperature and thickness of the mixture, you can achieve the perfect consistency for your desired use. Additionally, it's a good idea to test the consistency by drizzling a small amount of the mixture onto a chilled plate. If it holds its shape and doesn't run, it's ready. If not, continue to simmer and test again until the desired consistency is achieved. By following these tips, you can ensure that your homemade condensed milk has the perfect consistency for your needs.