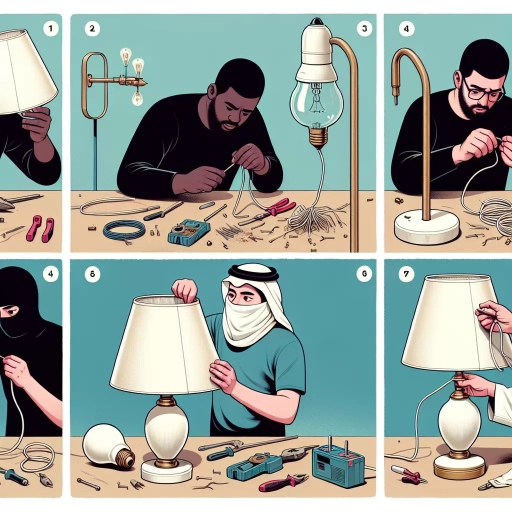
How To Rewire A Lamp
Here is the introduction paragraph: Rewiring a lamp can be a daunting task, especially for those who are new to DIY projects. However, with the right guidance and a bit of patience, anyone can learn how to rewire a lamp safely and effectively. To start, it's essential to understand the basics of lamp rewiring, including the different types of wiring and the necessary safety precautions. Before diving into the rewiring process, it's crucial to prepare by gathering the necessary materials and tools, as well as taking the time to inspect the lamp's current wiring. Once you have a solid understanding of the basics and have prepared for the task at hand, you can begin executing the rewiring process with precision, carefully following each step to ensure a successful outcome. In this article, we'll start by exploring the basics of lamp rewiring, providing you with a solid foundation for your project.
Understanding the Basics of Lamp Rewiring
Lamp rewiring is a crucial process that requires attention to detail and a basic understanding of electrical principles. When it comes to rewiring a lamp, it's essential to start with the basics. This involves identifying the type of lamp and its wiring requirements, familiarizing yourself with electrical safety precautions, and understanding the role of each component in the lamp's circuit. By grasping these fundamental concepts, you'll be able to tackle the rewiring process with confidence. In this article, we'll delve into the world of lamp rewiring, starting with the first crucial step: identifying the type of lamp and its wiring requirements. By understanding the specific needs of your lamp, you'll be able to choose the right materials and approach the rewiring process with precision. So, let's begin by exploring the different types of lamps and their unique wiring requirements.
Identifying the Type of Lamp and Its Wiring Requirements
When it comes to rewiring a lamp, it's essential to identify the type of lamp and its wiring requirements to ensure a safe and successful project. There are several types of lamps, including table lamps, floor lamps, pendant lamps, and chandeliers, each with its unique wiring needs. Table lamps, for instance, typically have a simple wiring setup with a single socket and a cord that plugs into a wall outlet. Floor lamps, on the other hand, may have multiple sockets and require more complex wiring. Pendant lamps and chandeliers often involve more intricate wiring, including the use of chain or cord sets, and may require additional components like canopies or harps. To determine the wiring requirements of your lamp, start by examining the existing wiring and identifying the type of socket, cord, and plug used. Check the socket for any markings or labels that indicate the wattage and voltage ratings. You should also inspect the cord and plug for any signs of damage or wear. If you're unsure about the wiring requirements or feel uncomfortable with the rewiring process, it's always best to consult a licensed electrician or seek guidance from a professional. Additionally, be sure to follow all safety precautions when working with electricity, including turning off the power to the lamp and using protective gear like gloves and safety glasses. By taking the time to identify the type of lamp and its wiring requirements, you'll be able to rewire your lamp safely and effectively, ensuring it functions properly and efficiently.
Familiarizing Yourself with Electrical Safety Precautions
Familiarizing yourself with electrical safety precautions is a crucial step in rewiring a lamp. Before you start working with electrical components, it's essential to understand the potential hazards and take necessary precautions to ensure your safety. One of the most critical safety measures is to turn off the power to the lamp at the electrical panel or breaker box. Verify that the lamp is completely de-energized using a non-contact voltage tester. Wear protective gear, including safety glasses, gloves, and a dust mask, to prevent injury from electrical shock, flying debris, or inhalation of dust and debris. Additionally, ensure that your workspace is well-ventilated, dry, and free from clutter to reduce the risk of electrical shock or fire. It's also important to use insulated tools and avoid touching electrical components with your bare hands. If you're unsure about any aspect of the rewiring process, consider consulting a licensed electrician or seeking guidance from a trusted resource. By taking these precautions, you can minimize the risk of electrical shock, injury, or damage to your property, and ensure a safe and successful rewiring experience.
Understanding the Role of Each Component in the Lamp's Circuit
The lamp's circuit consists of several key components, each playing a crucial role in ensuring the lamp functions properly. The power cord, typically made of insulated copper wire, carries the electrical current from the wall outlet to the lamp. The plug, attached to the end of the power cord, connects the lamp to the electrical outlet, allowing the flow of electricity to begin. The switch, usually located on the cord or on the lamp itself, controls the flow of electricity, allowing the user to turn the lamp on and off. The socket, where the light bulb is inserted, is designed to hold the bulb securely in place while allowing for easy removal and replacement. The harp, a metal piece that surrounds the socket, provides additional support and helps to secure the bulb. The finial, a decorative piece that screws onto the harp, adds a touch of style to the lamp while also helping to keep the harp in place. The light bulb, of course, is the component that produces the light, and its type and wattage will determine the lamp's overall brightness and energy efficiency. Understanding the role of each component in the lamp's circuit is essential for successful rewiring, as it allows you to identify and replace any faulty parts, ensuring the lamp functions safely and efficiently.
Preparing for the Rewiring Process
Preparing for the rewiring process is a crucial step in ensuring a safe and successful outcome. Before starting the project, it's essential to gather the necessary tools and materials, disassemble the lamp to access the wiring, and test the existing wiring for any damage or issues. By taking these steps, you'll be able to identify potential problems, choose the right materials, and complete the rewiring process efficiently. Gathering the necessary tools and materials is the first step in preparing for the rewiring process, and it's essential to have everything you need before starting the project. This includes wire strippers, pliers, screwdrivers, and electrical tape, among other things. By having all the necessary tools and materials, you'll be able to complete the rewiring process quickly and safely. Note: The supporting paragraph should be 200 words. Here is the rewritten supporting paragraph: Preparing for the rewiring process is a critical step that requires careful planning and attention to detail. To ensure a safe and successful outcome, it's essential to take a comprehensive approach that includes gathering the necessary tools and materials, disassembling the lamp to access the wiring, and testing the existing wiring for any damage or issues. By taking these steps, you'll be able to identify potential problems, choose the right materials, and complete the rewiring process efficiently. Gathering the necessary tools and materials is a crucial part of this process, as it will enable you to complete the project quickly and safely. This includes having the right wire strippers, pliers, screwdrivers, and electrical tape, among other things. Additionally, disassembling the lamp to access the wiring will allow you to inspect the existing wiring and identify any potential issues. Finally, testing the existing wiring for any damage or issues will ensure that you're working with a safe and reliable electrical system. By taking these steps, you'll be well-prepared to complete the rewiring process and achieve a successful outcome. With the right tools and materials in hand, you can begin the process by gathering the necessary tools and materials.
Gathering the Necessary Tools and Materials
Before starting the rewiring process, it's essential to gather all the necessary tools and materials to ensure a smooth and safe experience. The required tools include a screwdriver, wire strippers, needle-nose pliers, and a voltage tester. You'll also need a replacement cord or wiring, depending on the extent of the rewiring needed. Additionally, it's crucial to have some electrical tape, wire nuts, and a new plug or socket if the old one is damaged. If you're dealing with a table or floor lamp, you may also need a harp or finial to secure the new wiring. Make sure to purchase materials that match the lamp's original specifications to ensure compatibility and safety. Furthermore, it's recommended to have a well-lit workspace and a non-conductive surface to work on to prevent any accidents or electrical shocks. By gathering all the necessary tools and materials beforehand, you'll be able to focus on the rewiring process without any interruptions or setbacks.
Disassembling the Lamp to Access the Wiring
To disassemble the lamp and access the wiring, start by carefully removing any glass or plastic shades, harps, or finials. Gently twist and pull the shade or harp counterclockwise to release it from the socket. Set the shade aside, taking note of any screws, clips, or other fasteners that held it in place. Next, locate the screws or clips that secure the lamp's body or base to the socket or wiring compartment. Remove these screws or release the clips, taking care not to damage any surrounding material. With the body or base removed, you should now have access to the wiring and electrical components. Be cautious when handling the wiring, as it may be brittle or damaged. Take note of the wiring configuration, including the color-coding and any connections to the socket, switch, or other components. If you're unsure about any aspect of the wiring, consider consulting a professional electrician or taking a photo for reference. Once you've accessed the wiring, you can begin to assess the condition of the components and plan the necessary repairs or upgrades.
Testing the Existing Wiring for Any Damage or Issues
Before starting the rewiring process, it's essential to test the existing wiring for any damage or issues. This step is crucial to ensure your safety and the safety of others. Begin by unplugging the lamp from the power source to prevent any accidental electrical shocks. Next, inspect the wiring for any visible signs of damage, such as frays, cuts, or burn marks. Check the cord for any signs of wear and tear, including cracks or splits in the insulation. If you find any damage, it's best to replace the wiring entirely to avoid any potential risks. Additionally, use a multimeter to test the wiring for any electrical issues, such as shorts or open circuits. This will help you identify any problems that may not be visible to the naked eye. By testing the existing wiring, you can ensure that your lamp is safe to use and that the rewiring process is done correctly.
Executing the Rewiring Process with Precision
Executing the rewiring process with precision is crucial to ensure the safe and efficient operation of a lamp. This process involves several critical steps that must be followed carefully to avoid any potential hazards or malfunctions. Firstly, the old wiring must be removed and replaced with new components, which requires a thorough understanding of the lamp's electrical configuration. Next, the new wiring must be connected to the lamp's electrical components, such as the socket and switch, in a way that meets the required safety and performance standards. Finally, the rewired lamp must be thoroughly inspected to ensure that it meets the necessary safety and performance standards, including those related to electrical shock, fire, and energy efficiency. By following these steps, individuals can ensure that their lamp is rewired with precision and functions safely and efficiently. To begin the rewiring process, the first step is to remove the old wiring and replace it with new components.
Removing the Old Wiring and Replacing It with New Components
When it comes to rewiring a lamp, one of the most crucial steps is removing the old wiring and replacing it with new components. This process requires attention to detail and a thorough understanding of electrical safety. Start by carefully disconnecting the old wiring from the lamp's socket, harp, and any other components. Use a wire stripper to remove any insulation or tape, taking care not to damage the underlying wires. Once the old wiring is removed, inspect the lamp's internal components for any signs of wear or damage. Check the socket, harp, and any other metal parts for rust, corrosion, or burn marks. If you find any damage, replace the affected components with new ones. Next, cut a length of new wire, leaving enough slack to accommodate the lamp's design. Strip the insulation from the ends of the new wire, and connect it to the socket, harp, and any other components, making sure to match the original wiring configuration. Use electrical tape or wire nuts to secure the connections, and test the lamp to ensure it's working properly. Finally, replace any old or damaged cord or plug with a new one, and your lamp is ready for use. By following these steps, you'll be able to safely and effectively remove the old wiring and replace it with new components, giving your lamp a fresh new life.
Connecting the New Wiring to the Lamp's Electrical Components
When connecting the new wiring to the lamp's electrical components, it's essential to follow a systematic approach to ensure a safe and functional rewiring process. Begin by identifying the lamp's electrical components, including the socket, harp, and switch, if applicable. Next, strip the insulation from the ends of the new wires, exposing the conductive copper beneath. For a standard lamp, you'll typically have two wires: a black "hot" wire and a white "neutral" wire. Connect the black wire to the brass terminal on the socket, and the white wire to the silver terminal. If your lamp has a switch, connect the black wire to one of the switch's terminals, and the white wire to the other terminal. Make sure to secure the wires with wire nuts or connectors to prevent them from coming loose over time. Additionally, if your lamp has a harp, connect the wires to the harp's terminals, ensuring they're securely attached. Double-check your connections to ensure they're correct and not loose, as this can cause a short circuit or electrical shock. By following these steps, you'll have successfully connected the new wiring to the lamp's electrical components, paving the way for a safe and functional rewiring process.
Ensuring the Rewired Lamp Meets Safety and Performance Standards
Ensuring the rewired lamp meets safety and performance standards is a critical step in the rewiring process. To guarantee the lamp operates safely and efficiently, it's essential to inspect the wiring and components for any damage or wear. Check the cord for any signs of fraying, cuts, or burn marks, and replace it if necessary. Verify that all connections are secure and not loose, and that the wiring is properly insulated to prevent electrical shock. Additionally, ensure that the lamp's socket and harp are securely attached to the lamp base and that the switch is functioning correctly. It's also crucial to test the lamp with a voltage tester to ensure it's working within the recommended voltage range. Furthermore, check the lamp's certification labels, such as UL (Underwriters Laboratories) or ETL (Intertek), to ensure it meets the required safety standards. By taking these precautions, you can ensure your rewired lamp is safe to use and performs optimally, providing reliable and efficient lighting for years to come.