How To Protect Cells In Excel Without Protecting Sheet
Here is the introduction paragraph: Protecting cells in Excel is a crucial step in maintaining data integrity and preventing unauthorized changes. While protecting an entire sheet can be an effective way to safeguard data, there are situations where you may want to protect specific cells or ranges without locking down the entire sheet. In this article, we will explore the methods to protect cells in Excel without protecting the sheet, and provide best practices for implementing cell protection effectively. To understand how to protect cells in Excel, it's essential to first grasp the concept of cell protection and how it differs from sheet protection. We will delve into the world of cell protection, discussing the methods to protect cells, and the best practices to keep in mind. By the end of this article, you will be equipped with the knowledge to protect your cells with confidence. Let's start by understanding cell protection in Excel.
Understanding Cell Protection in Excel
In today's fast-paced digital world, data security and integrity are of utmost importance, especially when it comes to sensitive information stored in spreadsheets. Microsoft Excel, being one of the most widely used spreadsheet software, offers a robust feature to safeguard data - cell protection. Understanding cell protection in Excel is crucial for users to ensure that their data remains secure and tamper-proof. But what exactly is cell protection, and why is it important? Moreover, how does it differ from sheet protection, and in what scenarios is it absolutely necessary? In this article, we will delve into the world of cell protection, exploring its definition and significance, its differences with sheet protection, and common scenarios where it is indispensable. By the end of this article, you will have a comprehensive understanding of cell protection and how to effectively utilize it to protect your data. So, let's start by understanding what cell protection is and why it is important.
What is Cell Protection and Why is it Important
Cell protection is a security feature in Microsoft Excel that allows users to restrict access to specific cells or ranges of cells in a worksheet. This feature is important because it helps prevent unauthorized changes, deletions, or formatting of sensitive data. By protecting cells, users can ensure that their data remains accurate, consistent, and secure. Cell protection is particularly useful in collaborative work environments where multiple users may have access to the same worksheet. It also helps to prevent accidental changes or deletions, which can be time-consuming and costly to rectify. Furthermore, cell protection can be used to hide formulas and prevent users from viewing or modifying them, which is essential for protecting intellectual property and trade secrets. Overall, cell protection is a crucial feature in Excel that helps maintain data integrity, security, and confidentiality.
Differences Between Cell Protection and Sheet Protection
When it comes to protecting data in Excel, two common methods are cell protection and sheet protection. While both methods aim to restrict user access and prevent unauthorized changes, there are significant differences between them. Cell protection allows you to lock specific cells or ranges of cells, making them read-only or hidden, while still allowing users to edit other cells in the worksheet. This is particularly useful when you want to protect sensitive data, such as formulas or confidential information, while still enabling users to input data into other cells. On the other hand, sheet protection locks the entire worksheet, preventing users from making any changes, including formatting, inserting, or deleting cells, rows, or columns. Sheet protection is ideal when you want to prevent users from modifying the structure or layout of the worksheet, such as in a template or a dashboard. Another key difference is that cell protection can be applied to specific cells or ranges, whereas sheet protection applies to the entire worksheet. Additionally, cell protection can be used in conjunction with sheet protection, allowing you to lock specific cells within a protected sheet. Overall, understanding the differences between cell protection and sheet protection is crucial in determining the best approach to protect your data in Excel.
Common Scenarios Where Cell Protection is Necessary
When working with Excel, there are several common scenarios where cell protection is necessary to prevent unauthorized changes, maintain data integrity, and ensure the accuracy of calculations. One such scenario is when sharing workbooks with colleagues or clients, where sensitive information or formulas need to be protected from accidental or intentional modifications. Another scenario is when creating templates or worksheets that require users to input data in specific cells, while preventing them from altering formulas or formatting. Additionally, cell protection is crucial when working with financial models or budgets, where a single incorrect entry can have significant consequences. Furthermore, in educational settings, teachers may want to protect certain cells in worksheets to prevent students from altering answers or formulas, while still allowing them to input their own data. In all these scenarios, cell protection in Excel provides a secure and reliable way to safeguard sensitive information and maintain the integrity of worksheets.
Methods to Protect Cells in Excel
When working with Excel, protecting cells is crucial to prevent unauthorized changes, maintain data integrity, and ensure the accuracy of calculations. There are several methods to protect cells in Excel, each with its unique benefits and applications. One approach is to use the "Protect Sheet" feature, which allows you to set specific permissions for certain cells or ranges. Another method is to apply conditional formatting to restrict cell editing, making it more difficult for users to modify certain cells. Additionally, utilizing VBA macros can provide a more advanced level of protection by locking specific cells or ranges. By understanding these methods, users can effectively safeguard their Excel worksheets and prevent unwanted changes. In this article, we will explore these methods in more detail, starting with the "Protect Sheet" feature, which provides a straightforward way to set specific permissions for certain cells or ranges.
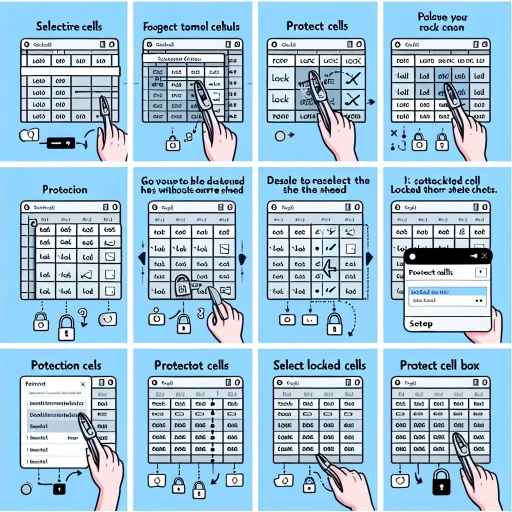
Using the "Protect Sheet" Feature with Specific Cell Permissions
When working with sensitive data in Excel, it's essential to control who can edit specific cells while still allowing others to view or interact with the rest of the sheet. The "Protect Sheet" feature with specific cell permissions is a powerful tool that enables you to achieve this level of control. To use this feature, start by selecting the cells you want to protect, then go to the "Review" tab and click on "Protect Sheet." In the "Protect Sheet" dialog box, select the "Allow users to edit ranges" option and click on "New." This will open the "New Range" dialog box, where you can specify the cells you want to protect and set permissions for specific users or groups. You can choose to allow users to edit, format, or delete cells, or restrict their access entirely. Once you've set the permissions, click "OK" to apply the protection. The protected cells will be locked, and users will only be able to interact with them according to the permissions you've set. This feature is particularly useful when working with collaborative spreadsheets, as it allows you to control who can make changes to sensitive data while still enabling others to contribute to the sheet. By using the "Protect Sheet" feature with specific cell permissions, you can ensure that your data is secure and that only authorized users can make changes to it.
Applying Conditional Formatting to Restrict Cell Editing
Applying Conditional Formatting to Restrict Cell Editing is a clever technique to control user input in specific cells without fully protecting the worksheet. This method allows you to restrict editing in certain cells based on specific conditions, such as the value in another cell or the format of the cell itself. To apply Conditional Formatting, select the cells you want to restrict, go to the Home tab, and click on Conditional Formatting. Choose "New Rule" and select "Use a formula to determine which cells to format." Enter a formula that defines the condition under which the cell should be restricted, such as `=A1="Locked"` if you want to lock the cell based on the value in cell A1. Then, select a format that will indicate to the user that the cell is restricted, such as a gray fill or a bold border. When the condition is met, the cell will be formatted accordingly, and users will be less likely to edit it. You can also use this method to restrict editing based on the user's role or permissions, by using formulas that check the user's name or group membership. By applying Conditional Formatting to restrict cell editing, you can add an extra layer of protection to your worksheet without fully protecting it, allowing users to still edit other cells while maintaining control over sensitive data.
Utilizing VBA Macros to Lock Specific Cells or Ranges
Utilizing VBA Macros to Lock Specific Cells or Ranges is a powerful method to protect cells in Excel. This approach allows you to lock specific cells or ranges while keeping the rest of the worksheet editable. To implement this method, you need to create a VBA macro that will lock the desired cells or ranges. To start, open the Visual Basic Editor by pressing Alt + F11 or navigating to Developer > Visual Basic. In the Editor, insert a new module by clicking Insert > Module. Then, paste the following code: `Sub LockCells() Dim ws As Worksheet Set ws = ThisWorkbook.Sheets("YourSheetName") ws.Range("YourRange").Locked = True ws.Protect "YourPassword" End Sub`. Replace "YourSheetName" with the name of your worksheet, "YourRange" with the range you want to lock, and "YourPassword" with a password of your choice. This macro will lock the specified range and protect the worksheet with a password. To run the macro, click Developer > Macros, select the "LockCells" macro, and click Run. You can also assign the macro to a button or shortcut for easier access. By utilizing VBA macros, you can lock specific cells or ranges while keeping the rest of the worksheet editable, providing a flexible and secure way to protect your data.
Best Practices for Cell Protection in Excel
When working with sensitive data in Excel, protecting cells is crucial to prevent unauthorized access or accidental changes. However, simply locking cells is not enough; it's essential to follow best practices for cell protection to ensure the integrity and security of your data. One key aspect of effective cell protection is documenting protected cells and ranges for future reference, allowing you to easily track and manage access permissions. Additionally, testing protected cells is vital to ensure they function as intended, preventing potential errors or security breaches. Furthermore, maintaining flexibility for future edits and updates is also crucial, as it enables you to adapt to changing requirements without compromising data security. By implementing these strategies, you can ensure that your Excel data is both secure and accessible. To start, it's essential to document protected cells and ranges for future reference, which will be discussed in the next section.
Documenting Protected Cells and Ranges for Future Reference
When working with protected cells and ranges in Excel, it's essential to document them for future reference. This documentation serves as a record of the protected areas, helping you or others understand the purpose and scope of the protection. To document protected cells and ranges, start by creating a separate worksheet or section within your workbook dedicated to tracking protected areas. In this documentation sheet, include columns for the range or cell reference, the type of protection applied (e.g., locked, hidden, or both), and a brief description of the reason for protection. You can also add additional columns to track the date the protection was applied, the user who applied it, or any other relevant information. By maintaining this documentation, you can easily identify protected areas, understand the reasoning behind the protection, and make informed decisions when updating or removing protection. This documentation also helps when collaborating with others or when revisiting a workbook after a period of time, ensuring that you can quickly understand the protection scheme in place. Furthermore, documenting protected cells and ranges can aid in troubleshooting issues related to protection, such as identifying conflicts between protected areas or resolving errors caused by incorrect protection settings. By taking the time to document protected cells and ranges, you can ensure that your workbook remains organized, secure, and easy to maintain.
Testing Protected Cells to Ensure Desired Functionality
When testing protected cells, it's essential to ensure that the desired functionality is achieved. This involves verifying that the protected cells behave as expected, and that users can interact with the worksheet in the intended way. To test protected cells, start by attempting to edit or modify the protected cells directly. Try typing in a protected cell, or copying and pasting data into it. If the protection is working correctly, you should receive an error message or be prevented from making changes. Next, test any formulas or functions that rely on the protected cells. Ensure that they update correctly and return the expected results. Additionally, test any conditional formatting or data validation rules that are applied to the protected cells. Verify that they are triggered correctly and display the expected behavior. It's also important to test the protected cells in conjunction with other worksheet features, such as charts, pivot tables, and filters. Ensure that the protected cells do not interfere with the functionality of these features, and that they update correctly when changes are made to the worksheet. By thoroughly testing protected cells, you can ensure that they provide the desired level of security and functionality, and that your worksheet behaves as intended.
Maintaining Flexibility for Future Edits and Updates
Maintaining flexibility for future edits and updates is crucial when protecting cells in Excel. To achieve this, it's essential to strike a balance between security and accessibility. One approach is to use a combination of protection methods, such as locking cells and using permissions, to control who can edit specific ranges or worksheets. This way, you can ensure that sensitive data is protected while still allowing authorized users to make changes as needed. Another strategy is to use Excel's built-in features, like data validation and conditional formatting, to enforce data integrity and consistency without restricting user input. By implementing these measures, you can maintain flexibility for future edits and updates while safeguarding your data. Additionally, consider using Excel's "Allow Users to Edit Ranges" feature, which enables you to specify specific ranges that can be edited by designated users, even if the worksheet is protected. This feature allows for a high degree of customization and control, making it easier to adapt to changing requirements and updates. By taking a flexible and adaptable approach to cell protection, you can ensure that your Excel worksheets remain secure, yet responsive to evolving needs.