How To Turn Off Live Photos
Here is the introduction paragraph: Live Photos, a feature introduced by Apple in 2015, has been a staple on iPhones ever since. While it allows users to capture a brief moment in time, some may find it unnecessary or even annoying. If you're one of those who want to turn off Live Photos, you're in the right place. In this article, we'll explore how to disable this feature on your iPhone, as well as manage it on other devices. But before we dive into the nitty-gritty, let's first understand what Live Photos are and how they work. By grasping the concept of Live Photos, you'll be better equipped to make the most of this feature, or disable it altogether. So, let's start by Understanding Live Photos.
Understanding Live Photos
Live Photos are a unique feature that allows users to capture and relive special moments in a more engaging way. But what exactly are Live Photos, and how do they work? In this article, we will delve into the world of Live Photos, exploring their benefits, and when to use them. We will start by explaining what Live Photos are and how they work, then move on to discuss the benefits of using them, and finally, provide guidance on when to use them to capture the perfect moment. By the end of this article, you will have a deeper understanding of Live Photos and how to use them to enhance your photography experience. So, let's start by understanding the basics of Live Photos and how they work.
What are Live Photos and how do they work?
Live Photos are a unique feature introduced by Apple in 2015, allowing users to capture a 3-second video clip along with a still image. When you take a Live Photo, your iPhone or iPad records 1.5 seconds of video before and after the moment you press the shutter button, creating a 3-second video clip. This clip is then paired with the still image, creating a Live Photo. The Live Photo is saved as a single file, which can be shared and viewed on compatible devices. When you view a Live Photo, you can press and hold on the image to play the 3-second video clip, bringing the moment to life. Live Photos work by using the iPhone's camera and image signal processor to capture the video and still image simultaneously. The camera records the video at a lower frame rate than a traditional video, which helps to reduce the file size and make it easier to share. The image signal processor then combines the video and still image into a single file, which is saved to your device. Overall, Live Photos provide a unique way to capture and share moments, adding an extra layer of depth and emotion to your photos.
Benefits of using Live Photos
The benefits of using Live Photos are numerous, making them a valuable feature for iPhone users. One of the primary advantages is that they allow users to capture more than just a single moment in time. By recording 1.5 seconds of video before and after the photo is taken, Live Photos provide a more dynamic and immersive experience. This feature is particularly useful for capturing special moments, such as a child's first steps or a wedding proposal, as it allows users to relive the moment in a more engaging way. Additionally, Live Photos can be used to add context to a photo, such as showing the surroundings or the emotions of the people in the photo. They can also be used to create a sense of movement and energy, making them ideal for capturing action shots or sports events. Furthermore, Live Photos can be edited and shared just like regular photos, making them a versatile and convenient feature. Overall, the benefits of using Live Photos make them a valuable addition to the iPhone camera, allowing users to capture and share more engaging and dynamic photos.
When to use Live Photos
When to use Live Photos. Live Photos are a great way to capture special moments, but they're not always necessary. Here are some scenarios where using Live Photos makes sense: When you want to relive a memory: Live Photos can help you relive a memory by capturing a few seconds of video before and after the photo is taken. This can be especially useful for capturing special moments like birthdays, weddings, or graduations. When you want to add context: Live Photos can provide context to a photo by showing what was happening before and after the photo was taken. For example, if you're taking a photo of a beautiful sunset, the Live Photo can show the sun moving across the sky. When you want to capture a moment in motion: Live Photos are great for capturing moments in motion, like a child's first steps or a pet's antics. The short video clip can help convey the action and emotion of the moment. When you want to create a sense of place: Live Photos can help create a sense of place by capturing the sounds and movements of a location. For example, if you're taking a photo of a bustling city street, the Live Photo can capture the sounds of traffic and pedestrians. When you want to tell a story: Live Photos can be used to tell a story by capturing a series of moments in time. For example, you could take a series of Live Photos to show a child growing up, or to document a trip. In general, Live Photos are a great way to add depth and context to your photos, and can be especially useful for capturing special moments or telling a story.
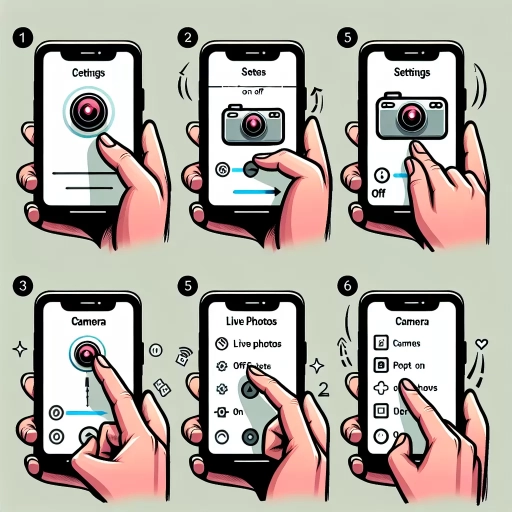
Disabling Live Photos on iPhone
If you're an iPhone user, you're probably familiar with Live Photos, a feature that captures a few seconds of video before and after you take a photo. While Live Photos can be a fun and creative way to capture memories, they can also take up a lot of storage space on your device. If you're looking to free up some space or simply prefer traditional still photos, disabling Live Photos is a great option. In this article, we'll explore three ways to disable Live Photos on your iPhone: turning off Live Photos in the Camera app, disabling Live Photos for specific photos, and using the Photos app to turn off Live Photos. By the end of this article, you'll know how to take control of your camera settings and start taking traditional photos again. To get started, let's take a look at how to turn off Live Photos in the Camera app.
Turning off Live Photos in the Camera app
When you want to capture a moment without the extra motion, you can easily turn off Live Photos in the Camera app. To do this, locate the Live Photos icon, which resembles a series of concentric circles, at the top right corner of the screen. Tap on this icon to toggle Live Photos off. You'll know it's off when the icon is highlighted in yellow. With Live Photos disabled, your iPhone will capture a standard still photo instead of a 3-second video clip. This is particularly useful when you want to take a photo in a situation where you don't want any extra motion or when you're trying to capture a precise moment. Additionally, turning off Live Photos can also help reduce the file size of your photos, making them easier to share and store. By turning off Live Photos in the Camera app, you have more control over the type of photos you take and can choose the best option for your needs.
Disabling Live Photos for specific photos
Disabling Live Photos for specific photos is a great way to have more control over your iPhone's camera features. To do this, open the Photos app and select the Live Photo you want to disable. Tap the "Edit" button in the top right corner, then tap the "Live" button in the bottom left corner. This will toggle off the Live Photo feature for that specific image. Alternatively, you can also disable Live Photos for specific photos by using the "Share" feature. When you share a Live Photo, you can choose to share it as a still image, which will disable the Live Photo feature. To do this, open the Photos app, select the Live Photo you want to share, and tap the "Share" button. Then, tap "Share as Still Photo" to disable the Live Photo feature. Disabling Live Photos for specific photos can be useful if you want to share a photo on social media or via email, but don't want the Live Photo feature to be enabled. It's also a good way to save storage space on your iPhone, as Live Photos take up more space than regular photos. By disabling Live Photos for specific photos, you can have more control over your iPhone's camera features and make the most of your device's storage space.
Using the Photos app to turn off Live Photos
To turn off Live Photos using the Photos app, navigate to the Albums tab and select the "Media Types" album. From there, choose "Live Photos" to view all your Live Photos in one place. Tap on the "Select" option in the top right corner, then choose the Live Photos you want to turn off. Once you've selected the desired photos, tap the "Share" icon and choose "Turn Off Live Photos" from the menu. This will convert the selected Live Photos into standard still images, removing the live aspect. Alternatively, you can also turn off Live Photos for individual photos by opening the photo, tapping the "Edit" button, and then tapping the "Live" button to toggle it off. This method allows you to turn off Live Photos for specific photos without affecting the rest of your Live Photos collection. By using the Photos app to turn off Live Photos, you can easily manage and convert your Live Photos to standard still images, giving you more control over your photo library.
Managing Live Photos on Other Devices
Here is the introduction paragraph: Managing Live Photos on other devices can be a bit tricky, but with the right steps, you can easily control and share your Live Photos across different platforms. Whether you want to turn off Live Photos on your iPad or iPod touch, disable them on your Mac or PC, or transfer them to non-Apple devices, this article will guide you through the process. In this article, we will explore how to manage Live Photos on other devices, starting with turning off Live Photos on iPad and iPod touch. Here is the supporting paragraph: When it comes to managing Live Photos on other devices, it's essential to understand the different options available. For instance, if you want to share your Live Photos with friends who use non-Apple devices, you'll need to transfer them in a compatible format. On the other hand, if you want to disable Live Photos on your Mac or PC, you'll need to use a different approach. By understanding the various options and steps involved, you can easily manage your Live Photos and share them with others, regardless of the device they use. This flexibility is particularly useful when you want to share your favorite memories with friends and family who may not use Apple devices. By turning off Live Photos on your iPad or iPod touch, you can ensure that your photos are displayed in the format you prefer, and we'll explore how to do this in the next section.
Turning off Live Photos on iPad and iPod touch
When you want to turn off Live Photos on your iPad or iPod touch, the process is straightforward. To start, open the "Settings" app on your device. Then, scroll down and tap on "Camera." In the Camera settings, you'll see the option for "Live Photos" at the top. Tap on the toggle switch next to "Live Photos" to turn it off. This will disable Live Photos for all future photos you take with your iPad or iPod touch. If you want to turn off Live Photos for a specific photo, you can do so in the "Photos" app. Open the photo you want to edit, tap the "Edit" button, and then tap the "Live" button at the top of the screen. This will turn off Live Photos for that specific photo. Additionally, you can also turn off Live Photos when sharing a photo. When you go to share a photo, you'll see the option to turn off Live Photos in the share menu. This way, you can choose to share a still photo instead of a Live Photo. By turning off Live Photos on your iPad or iPod touch, you can save storage space and also have more control over how your photos are shared.
Disabling Live Photos on Mac and PC
When it comes to managing Live Photos on other devices, disabling them on Mac and PC is a straightforward process. On a Mac, you can disable Live Photos by opening the Photos app, selecting the Live Photo you want to disable, and clicking on the "Edit" button. From there, click on the "Live" button in the top-right corner of the screen, and then select "Turn Off Live Photo" from the dropdown menu. Alternatively, you can also right-click on the Live Photo and select "Turn Off Live Photo" from the context menu. On a PC, the process is similar. Open the Photos app, select the Live Photo you want to disable, and click on the three dots in the top-right corner of the screen. From there, select "Edit & Create" and then click on the "Live" button. Finally, toggle the switch next to "Live Photo" to the "Off" position. By disabling Live Photos on your Mac and PC, you can prevent them from playing automatically and save storage space on your devices. Additionally, disabling Live Photos can also help to improve the performance of your devices, especially if you have a large collection of Live Photos. Overall, disabling Live Photos on Mac and PC is a simple process that can help you to better manage your photos and improve the performance of your devices.
Transferring Live Photos to non-Apple devices
Transferring Live Photos to non-Apple devices can be a bit tricky, but there are a few methods to make it possible. One way is to use the "Share" feature on your iPhone or iPad to send the Live Photo to a non-Apple device via email or messaging apps. However, this method will convert the Live Photo into a still image, losing its dynamic feature. To transfer Live Photos with their original functionality, you can use a third-party app like Google Photos or Microsoft Photos, which support Live Photos and allow you to share them with non-Apple devices. Another method is to use a cloud storage service like Google Drive or Dropbox, which can store and share Live Photos in their original format. Additionally, some social media platforms like Facebook and Instagram also support Live Photos, allowing you to share them with non-Apple users. It's worth noting that the recipient's device must also support Live Photos or have an app that can play them, otherwise, they will only see a still image. By using one of these methods, you can successfully transfer your Live Photos to non-Apple devices and share them with friends and family who don't use Apple products.