How To Create A Group Chat On Messenger
Here is the introduction paragraph: In today's digital age, staying connected with friends, family, and colleagues has never been easier, thanks to the power of social media and messaging apps. One of the most popular messaging apps, Facebook Messenger, offers a convenient way to communicate with multiple people at once through group chats. Whether you want to plan a night out with friends, discuss a project with team members, or simply stay in touch with loved ones, creating a group chat on Messenger is a great way to do so. In this article, we'll take you through the process of creating a group chat on Messenger, from getting started with the basics to managing and engaging with your group chat. We'll begin by getting started with Messenger group chats, exploring the benefits and features of this powerful tool. Let me know if you need any changes.
Getting Started with Messenger Group Chats
Getting started with Messenger group chats is an exciting way to connect with friends, family, and colleagues in a more interactive and engaging way. To begin, it's essential to understand the benefits of group chats, which we'll explore in the next section. Before diving into the benefits, you'll need to have Messenger downloaded and installed on your device, which is a straightforward process that we'll guide you through. Additionally, if you're new to Messenger, you'll need to create an account, which is a simple and quick process. By following these steps, you'll be well on your way to enjoying the many advantages of group chats. Understanding the benefits of group chats is a crucial first step, so let's dive in and explore what makes them so useful.
Understanding the Benefits of Group Chats
Group chats on Messenger offer numerous benefits that make them an essential tool for communication and collaboration. One of the primary advantages of group chats is that they enable users to connect with multiple people at once, making it easier to share information, discuss topics, and make decisions. This is particularly useful for groups of friends, family members, or colleagues who need to stay in touch and coordinate activities. Group chats also allow users to share files, photos, and videos, making it easy to collaborate on projects or share memories with others. Additionally, group chats provide a sense of community and belonging, which can be especially important for people who are part of online communities or social groups. Furthermore, group chats can be customized with nicknames, emojis, and colors, making them a fun and personalized way to communicate with others. Overall, group chats on Messenger offer a convenient, flexible, and engaging way to connect with others, making them an essential tool for anyone looking to stay in touch with friends, family, or colleagues.
Downloading and Installing Messenger
To get started with Messenger group chats, you'll first need to download and install the Messenger app on your device. If you already have the Facebook app installed, you can easily access Messenger by tapping the three horizontal lines on the top right corner of the screen and selecting "Messenger" from the dropdown menu. Alternatively, you can download the Messenger app from the App Store (for iOS devices) or Google Play Store (for Android devices). Once you've downloaded the app, follow the prompts to install it on your device. After installation, open the app and log in with your Facebook credentials. If you don't have a Facebook account, you can create one directly from the Messenger app. Once you're logged in, you'll be taken to the Messenger home screen, where you can start creating a new group chat by tapping the "Create New Group" button.
Creating a Messenger Account
To create a Messenger account, start by downloading the Messenger app from the App Store or Google Play Store, depending on your device. Once installed, open the app and tap "Create New Account" if you don't already have a Facebook account. Enter your name, email address, and password, and then tap "Sign Up." If you already have a Facebook account, you can log in with your existing credentials. After signing up or logging in, you'll be asked to add a profile picture and cover photo, which will help others recognize you in the app. You'll also be prompted to add friends, which you can do by searching for their names or syncing your phone's contact list. Once you've set up your account, you can start using Messenger to send messages, make voice and video calls, and even send money to friends. As you get started with Messenger, you'll also want to explore the app's various features, such as the ability to create group chats, which allows you to communicate with multiple people at once. This feature is especially useful for coordinating events, discussing projects, or simply staying in touch with friends and family. By following these steps, you'll be well on your way to creating a Messenger account and getting started with group chats.
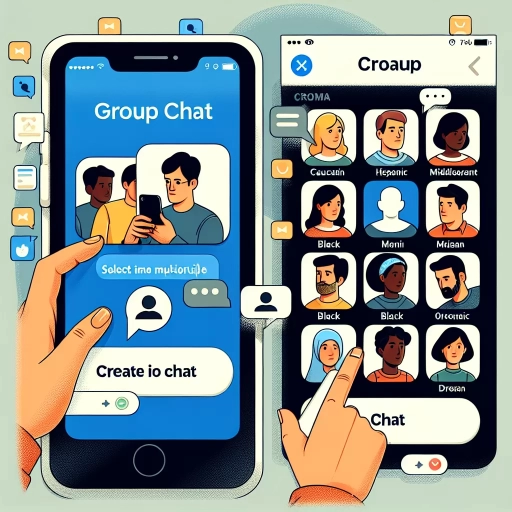
Creating a Group Chat on Messenger
Creating a group chat on Messenger is a convenient way to stay connected with friends, family, or colleagues. With the ability to add multiple participants, share files, and make voice or video calls, group chats have become an essential feature in modern communication. To create a group chat on Messenger, you'll need to access the new group chat feature, which allows you to start a conversation with multiple people at once. Once you've accessed the feature, you can add participants to the group chat, either by selecting them from your contact list or by sending them an invitation link. Additionally, you can customize group chat settings to suit your needs, such as setting a group name, adding a profile picture, or enabling notifications. By following these steps, you can create a group chat on Messenger that meets your communication needs. To get started, let's first explore how to access the new group chat feature.
Accessing the New Group Chat Feature
To access the new group chat feature on Messenger, start by opening the app and navigating to the "Chats" tab. From there, tap the "Compose" button, usually represented by a pencil icon, to begin creating a new conversation. Next, select the contacts you wish to add to the group chat by tapping on their names or profiles. You can add up to 250 people to a single group chat, making it an ideal feature for large groups or communities. Once you've selected all the desired participants, tap the "Create Group" button to establish the new group chat. You'll then be prompted to give your group a name, which will help you and other members easily identify the conversation. After naming your group, you can customize the chat by adding a photo or changing the chat color to give it a personalized touch. With the new group chat feature, you can also control who can join the conversation and manage the group's settings to ensure a smooth and enjoyable experience for all members.
Adding Participants to the Group Chat
To add participants to a group chat on Messenger, start by opening the chat and tapping the group name at the top. Then, select "Add People" from the menu. You can add people from your Facebook friends list or enter the name of the person you want to add. You can also add people by sharing a link to the group chat. To do this, tap the "Share Link" option and choose how you want to share the link, such as via email or text message. Once you've added new participants, they'll receive a notification and can join the group chat. You can also set the group chat to allow anyone with the link to join, or require admin approval for new members. Additionally, you can add participants to a group chat by scanning a QR code or using a group chat link. To do this, go to the group chat and tap the "Add People" option, then select "Scan Code" or "Join with Link." This will allow you to quickly and easily add new participants to the group chat.
Customizing Group Chat Settings
When creating a group chat on Messenger, customizing the group chat settings can enhance the overall experience for all members. To access the group chat settings, tap on the group name at the top of the chat window, then select "Group Settings" from the dropdown menu. From here, you can customize various settings, such as changing the group name, adding or removing members, and setting a group photo. You can also enable or disable features like notifications, chat themes, and polls. Additionally, you can designate specific members as administrators, giving them the ability to manage the group and make changes to the settings. Furthermore, you can also set a custom notification sound for the group, allowing you to quickly identify when someone has sent a message. By customizing the group chat settings, you can tailor the experience to fit the needs and preferences of the group, making it easier to communicate and collaborate with each other.
Managing and Engaging with Your Group Chat
Effective group chat management is crucial for maintaining productivity, fostering collaboration, and ensuring seamless communication among team members. To achieve this, it's essential to understand the various aspects of managing and engaging with your group chat. This includes sending messages and sharing content, using group chat features and tools, and managing group chat members and settings. By mastering these skills, you can create a positive and efficient group chat experience that promotes teamwork and drives results. In this article, we'll delve into the world of group chat management, starting with the basics of sending messages and sharing content, which is the foundation of any successful group chat. By understanding how to effectively communicate and share information, you'll be well on your way to creating a thriving group chat environment.
Sending Messages and Sharing Content
When it comes to sending messages and sharing content in a group chat on Messenger, the possibilities are endless. You can send text messages, photos, videos, audio files, and even make voice or video calls to the entire group or individual members. To send a message, simply type in the chat box and press the send button. You can also add emojis, stickers, and GIFs to make your messages more engaging and fun. If you want to share content, you can upload files from your device or share links from the web. Messenger also allows you to share your location, which can be useful for coordinating meetups or events. Additionally, you can use the "Poll" feature to create a poll and gather opinions from the group members. This feature is particularly useful for making group decisions or planning events. Furthermore, Messenger also allows you to share content from other apps, such as Instagram and Facebook, making it easy to share your favorite posts and stories with the group. Overall, sending messages and sharing content in a group chat on Messenger is easy, convenient, and fun, making it a great way to stay connected with friends, family, or colleagues.
Using Group Chat Features and Tools
Using group chat features and tools can significantly enhance the overall experience of managing and engaging with your group chat on Messenger. One of the most useful features is the ability to create custom nicknames for each member, making it easier to identify who's who in the conversation. Additionally, you can use the "Poll" feature to gather opinions or make decisions within the group, which can be especially helpful for planning events or making collective decisions. Another useful tool is the "File Sharing" feature, which allows you to share files of up to 100MB with the group, making it easy to share documents, images, or videos. You can also use the "GIF" feature to add some humor and personality to the conversation. Furthermore, the "Reactions" feature allows you to quickly respond to messages with a range of emotions, from likes to loves to laughs. By utilizing these features and tools, you can create a more engaging, interactive, and productive group chat experience that fosters collaboration and connection among members.
Managing Group Chat Members and Settings
Managing group chat members and settings is crucial to ensure a productive and enjoyable conversation. To manage members, go to the group chat and tap on the group name or photo, then select "Members" or "People" to view the list of participants. From here, you can add or remove members, and even assign admin roles to trusted individuals. Admins can manage the group's settings, such as changing the group name, photo, or description, and even deleting the group. To access settings, tap on the group name or photo, then select "Settings" or "Group Settings." Here, you can customize notification preferences, such as muting notifications or setting a custom notification sound. You can also control who can join the group, either by allowing anyone to join or requiring admin approval. Additionally, you can set a group type, such as a social or work group, to help members understand the group's purpose. By managing group chat members and settings, you can create a tailored experience that meets the needs of your group and fosters meaningful conversations.