How To Connect Apple Pencil
 When Steve Jobs famously said, 'Who wants a stylus?' he probably didn't foresee the success of Apple Pencil, a design marvel that has enthralled professionals and creatives alike. Today, we demystify the elegance of the Apple Pencil and bring you an exciting journey steeped in technology, ease, and creativity. In this comprehensive article, we first dive into 'Understanding Your Apple Pencil: An Introduction', shedding light on your pencil's sophisticated features and its fascinating story. Once familiar with your device, you'd want to put it to good use. This is where 'The Step-by-step Guide on Connecting Your Apple Pencil' comes into play, ensuring you initiate your artistic venture smoothly. But don't stop just yet! Mastery beckons as you navigate our 'Maximising Your Drawing Experience: Advanced Tips for Apple Pencil Users'. By the end of this enriching exploration, you will not just connect your Apple Pencil but seamlessly blend technology with human creativity. So, ready to understand your Apple Pencil better? Wield your Pencil and let the magic unravel.
Understanding Your Apple Pencil: An Introduction
Understanding the dynamics of your Apple Pencil can transform your user experience rapidly from basic to extraordinary. This powerful tool, while sleek and stylish, is more than just an adornment for your Apple devices; it's a game-changer. This article explores the many dimensions of the Apple Pencil, including its standout features, the difference between the two models - Apple Pencil 1 and 2, and its compatibility with various Apple devices. Delve into the essential features of the Apple Pencil to better grasp how this high-tech stylus enhances your productivity and creativity, whether you're note-taking, drawing, designing, or editing. Uncover the distinctive characteristics of both models to understand their uniqueness and decide which one suits your needs the best. Furthermore, we dissect the compatibility aspects, guiding you on the different Apple devices that synchronize seamlessly with the Pencil. As we embark on this enlightening journey, our first pit stop will be pinpointing the quintessential features adorning the Apple Pencil, uniquely designed to enrich your digital interactions and amplify your Apple device usage.
The Essential Features of the Apple Pencil
The Apple Pencil, with its myriad of impressive features, is a tool that has revolutionized stylus technology and transformed the way users interact with their iPad. The first thing to understand about the Apple Pencil is its extreme precision. It does more than just track your touch - it captures the nuances of your movement, pressure and tilt to create a truly realistic and natural writing or drawing experience. The Apple Pencil is even capable of distinguishing whether you're drawing with its tip or tilting it to shade, much like a conventional pencil. The second essential feature lies in its handy seamless pairing and charging. It's configured to connect to your iPad without any hitch through Bluetooth, minimizing friction between user and technology and thereby amplifying user experience. Charging is equally effortless; just attach your Apple Pencil magnetically to the side of your iPad and it begins to charge wirelessly. This essentially means you can simultaneously charge your Apple Pencil and iPad, without any need for cables or adapters. Lastly, understanding your Apple Pencil isn't complete without appreciating its integration with multiple apps. Whether you want to take notes in a meeting, paint a watercolor or sign a lease, with Apple Pencil, it's all possible. It amplifies the remarkable pro-level precision of iPad Pro, making it even more versatile and productive. It works with apps like Notability, Procreate, Adobe Illustrator, and more, giving you an edge to do eye-catching sketches, illustrate fantastic artworks or even jot down notes in your handwriting. In summary, the Apple Pencil is beyond just a stylus. It becomes an extension of you, translating your movements and thoughts onto the iPad effortlessly and with precision. Its essential features not only improve productivity but also contribute to immersive digital storytelling and artistry, lending it an almost magical feel. Incorporating these powerful features, your understanding of the Apple Pencil will deepen and your proficiency in using it will certainly soar.
The Different Models of Apple Pencil: Apple Pencil 1 vs Apple Pencil 2
For users who just started exploring the world of Apple Pencil, you might not realize that there are actually two different Apple Pencil models available. This spectrum of stylus from Apple – the Apple Pencil 1 and Apple Pencil 2 – both offer a range of unique features and discreet sophistication. Introduced in November 2015, the first-generation Apple Pencil, simply denoted as 'Apple Pencil', revolutionized digital creativity in the form of a stylus. It is characterized by its sleek, cylindrical design and matte white finish. One notable feature of the Apple Pencil 1 is its lightning-connector charger nestled under a magnetic cap at the end of the pencil. This model's compatibility extends to an array of iPads including the 6th, 7th, and 8th generation iPad, 5th and 6th generation iPad Mini, 3rd generation iPad Air, and all iPad Pro models up until 2017. On the other hand, Apple advanced its original concept in October 2018 with the Apple Pencil 2. Sharing the same minimalist look, this version marks notable design and feature improvements. Unlike its predecessor, it boasts a seamless design, removing the need for a removable cap and the lightning-connector as it charges wirelessly when magnetically attached to the side of the iPad Pro. Precisely designed to be ergonomic, the Apple Pencil 2 is flat-sided providing a comfortable, natural feel while in use. This updated model is exclusively compatible with the new 3rd, 4th, and 5th Generation iPad Pro, and the 4th Generation iPad Air, thus limiting its compatibility compared to the first model but improving its performance and user convenience. Though both models promise impressive precision, low latency, and pressure sensitivity, it's the strategic combination of the advanced tech features and the individual's specific digital needs that should guide the decision when choosing between the Apple Pencil models. The next section, 'Connecting Your Apple Pencil', will guide you through the precise steps to integrate your choice of Apple Pencil with your iPad seamlessly, ensuring a smooth start to your digital artistic journey.
The Compatibility of Apple Pencil With Various Devices
As part of broadening your understanding of the dynamic Apple Pencil, it's crucial to delve into its compatibility with various devices. The pioneering creation of Apple does not just breed ingenuity but establishes a seamless connection with its own line of products. Apple Pencil performances are not just confined to one gadget; it expands its usability across an array of Apple devices and versions. Foremost, the first-generation Apple Pencil lays ground for extensive compatibility. Its synergy extends to devices including the iPad Pro 12.9-inch (1st and 2nd generation), iPad Pro 10.5-inch, iPad Pro 9.7-inch, and even the sixth, seventh, and eighth-generation of iPad. Then there's the iPad Air (3rd generation) and the iPad mini (5th generation) that are also worthy of mention. This diversity in the application underscores the flexibility of this stylish stylus. On the other hand, the second-generation Apple Pencil scales up the compatibility quotient. Beyond the traditional line-up, it also supports iPad Pro 11-inch (1st, 2nd, and 3rd generation), iPad Pro 12.9-inch (3rd, 4th, and 5th generation), and the latest iPad Air (4th generation). This compatibility mapping ensures anyone with these devices can employ the elite functions of the Apple Pencil – be it writing, drawing, or designing. However, despite its impressive range, it's critical to remember that Apple Pencil does not currently connect with any iPhone model - a limitation in the grand scope of Apple's device ecosystem. Despite these integration confines, the adaptable performance of the Apple Pencil makes it a choice accessory for most iPad users. By being compatible with an extensive list of devices, Apple Pencil proves it isn't just an ordinary stylus pen. It is a tool that enhances the digital interaction experience, breaking new grounds of innovation and convenience. This way, Apple Pencil sits at the core of the Apple ecosystem, providing users with exhilarating options to explore their creativity. Thus, pairing your Apple Pencil with your device depends on the model of both the Pencil and the device. However, one thing's for sure - the compatibility factor delineates the investment-worthy nature of this indispensable tool. Having an Apple Pencil doesn't just imply owning a stylus, but holding a key to unleash boundless digital possibilities.
The Step-by-step Guide on Connecting Your Apple Pencil
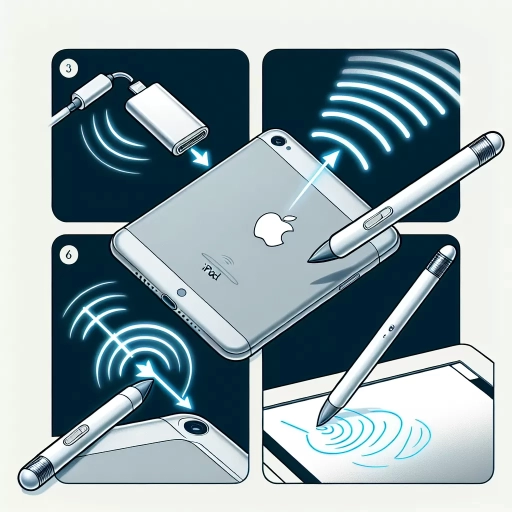
The digital age has introduced many innovative gadgets that have made our lives simpler and more productive. One of these phenomenal inventions is the Apple Pencil, a device that instantly magnifies the functionality of iPads, letting you draw, sketch, color, take notes, and much more with remarkable ease and precision. This article will be a comprehensive guide on leveraging this ingenious tool, focusing on three aspects: The initial setup and connectivity of Apple Pencil using Bluetooth, addressing common issues experienced during Apple Pencil connection, and elucidating the proper disconnection and ejection methods for user convenience. Each step is crucial in ensuring a seamless digital sketching experience, highlighting how potent this device can be when used optimally. Let's delve into the preliminary stage for any gadget's operation - the initial setup and Bluetooth connectivity. Ensuring your Apple Pencil is correctly connected to your iPad becomes the foundation for an unhindered sketching, drawing, or noting experience – a process we’ll demystify in the following segment.
The Initial Setup and Connectivity Of Apple Pencil Using Bluetooth
The initial set-up and connectivity of an Apple Pencil using Bluetooth is a remarkably straightforward process with notable implications for user convenience and functionality. Unlike manual writing instruments, the Apple Pencil integrates digital technology with traditional writing to offer a seamless experience. Upon purchase, one essential step is establishing a connection between the Apple Pencil and your iPad. This requires Bluetooth, a wireless technology that enables data transfer over short distances. The integration of Bluetooth technology in the Apple Pencil underscores the heightened focus on user experience in modern device design. Noticeably, the Bluetooth-enabled Apple Pencil eliminates the traditional hardships associated with wired connections. This includes clutter from numerous cables, limited movement, and potential damage to the hardware ports. Furthermore, the use of this short-range wireless communication technology fosters a user-friendly environment by facilitating easier connectivity, transferability, and convenience for the user. To connect your Apple Pencil to your iPad via Bluetooth, start by ensuring that the Bluetooth feature on your iPad is turned on. Then, take off the Apple Pencil's cap and connect it to the iPad using the lightning connector. A dialogue box will appear on the screen of the iPad, prompting you to pair the device with the Apple Pencil. By clicking ‘Pair,’ you establish a digital handshake between the two devices. Once connected, the iPad recognizes the Apple Pencil whenever it's within range, and you can start using the writing tool immediately. Interestingly, the Pencil's pressure and angle sensitivity allows for different line widths, making it a remarkably dynamic tool for artists and writers alike. With this connection, one also gets to enjoy features like palm rejection, thereby enhancing the overall writing or drawing experience. The Bluetooth technology also facilitates unique features in terms of charging and power. The Apple Pencil stands out from conventional styluses because you can charge it directly from the iPad. The efficacy and ease of this process reiterate Apple's resolve to streamline user experience while enhancing convenience and productivity. In conclusion, the Bluetooth-enabled Apple Pencil is a symbol of a transformative digital era. Its integration with mobile devices encapsulates the convenience of modern technology while upholding the importance of the user experience. The initial setup and connectivity process employs easy-to-follow procedures underscored by the power and magic of Bluetooth technology, setting the stage for exceptional digital writing and drawing experience.
Addressing Common Issues During Apple Pencil Connection
There are several common issues that you may encounter while attempting to connect your Apple Pencil, each with its own potential solution. Starting with the seemingly simple but often overlooked step - ensuring that your device is running on the most recent system software. Apple consistently pushes out updates that fix minor glitches and enhance compatibility. Therefore, consistently having the most updated software is a sure-shot way to alleviate some of your connection woes. Another frequent problem arises when you encounter difficulty in pairing your Apple Pencil with your device. This problem often stems from attempting to pair a first-generation pencil with a third-generation iPad Pro, or vice-versa. The compatibility between models is a critical aspect to consider when trying to establish a connection. The first-generation Apple Pencil pairs with the first and second generation iPad Pro 12.9 inch, iPad Pro 9.7 inch, iPad Pro 10.5 inch, iPad Air (3rd generation), iPad (6th and 7th generation), and iPad mini (5th generation). The second-generation pencil, alternatively, establishes a connection only with the third and fourth-generation iPad Pro, and the 4th generation iPad Air. To ensure a successful connection, verify that your Apple Pencil is compatible with your particular iPad model. Another significant issue emerges when the Apple Pencil fails to connect despite compatible devices. This issue frequently arises due to a drained Apple pencil battery. The battery life is crucial to monitor if you want to enjoy uninterrupted usage from your Apple Pencil. A fully charged Apple pencil offers up to 12 hours of writing time, meaning you can conveniently use it for an entire day’s work. The battery status is visible in the battery widget on the iPad; if the battery level falls below 20%, it's time to power up. One nice feature of the Apple Pencil is its fast charging capability; a mere 15-second charge provides 30 minutes of usage. These are among the common issues and solutions when connecting your Apple Pencil. However, be aware that as technology advances, there may be updates or changes that alternatively affect the connection process. Always stay informed about these updates, check Apple's online resources, forums, and guides regularly. Resolving these issues promptly and efficiently ensures that you continue to enjoy the versatility and precision that the Apple Pencil brings to your iPad experience.
Proper Disconnection and Ejection Methods for Apple Pencil
In your quest to master the art of connecting your Apple Pencil, understanding the proper disconnection and ejection methods is essential. This process is not just about pulling out the Pencil from your iPad; it involves a systematic approach guaranteed to protect your device's longevity. That said, the journey doesn't end once the initial connection between your Apple Pencil and the iPad is established. There's potential for misuse and incorrect handling that could lead to undesired outcomes such as damaging your Apple Pencil or even your iPad. Therefore, it's crucial to know the steps to safely disconnect your Apple Pencil when not in use. Start by going to the iPad’s settings, navigate to Bluetooth settings and find the Apple Pencil’s name. Click on the Information icon and then select “Disconnect.” Now, ejection is slightly different. Some may confuse it with the disconnection process, but such is not the case. Ejection refers to physically removing the Apple Pencil from your device or accessory. Simply pull lightly, but with a steady hand to eject the Apple Pencil from the device's port. Caution is crucial here. Overzealousness might cause physical harm to both the Pencil and the iPad’s port. Proper handling of the Apple Pencil also extends to times when the Apple Pencil is idle. Remember, to keep it safe and sound, always ensure it's stored in a secure place away from high traffic areas where it can get knocked around or exposed to elements that could damage it. Knowing how to disconnect and eject your Apple Pencil appropriately is not just about extending its lifespan but also about making your tech interactions seamless and queuing up less hassle for you in the long run. This knowledge will undoubtedly enhance your Apple Pencil connectivity experience. Practice these steps, and over time, they will become like second nature. By acquainting yourself with these proper disconnection and ejection methods, you will significantly benefit from preventing potential damage to your Apple devices. Care and precision result in performance and durability, giving you more value out of your Apple Pencil, and in turn, making it a more integral part of your Apple ecosystem.
Maximising Your Drawing Experience: Advanced Tips for Apple Pencil Users
Embracing the Apple Pencil as a tool for your creative journey can significantly enhance and transform your drawing experience. However, to truly maximise its potential, more sophisticated and advanced setups are required. This detailed guide covers three critical aspects for experienced Apple Pencil users to elevate their digital artistry. Primarily, we will delve into the benefits and methods of customising your Apple Pencil settings for an optimal drawing experience, as the right adjustments can mean the difference between producing good illustrations and fantastic ones. Second, the power of additional apps that can amplify your drawing and note-taking capabilities is explored - these extraordinary tools can push the aesthetic and technical boundaries of your work. Lastly, as with any digital equipment, understanding how to conserve your Apple Pencil's battery life and maintain the overall care of the tool will assure longevity and ongoing stellar performance. Let's begin this journey of advanced expertise by delving into how you can customise your Apple Pencil settings for a flawless and fluid drawing experience.
Customising Your Apple Pencil Settings for An Optimal Drawing Experience
Apple Pencil, a highly advanced tool for iPad users, holds an extraordinary feature-set that enables the creation of intricate artworks, simplifies mundane tasks and overall, enhances the efficiency of your brainstorming sessions. However, many users often fail to maximize the true potential of this smart tool, primarily due to inadequate knowledge about the wide array of user-centric preferences it provides. It is essential to customise your Apple Pencil settings to suit your personal needs so that you can draw, sketch, or doodle with precision and ease. The most fundamental aspect of customising pencil settings lies in adjusting the sensitivity of the pencil. Apple Pencil comes with a feature that allows you to control its sensitivity to different pressure levels, thereby allowing users to draw thin or thick lines based on the pressure exerted. By customising the 'Pressure Curve', you can significantly influence which strokes appear on your iPad's screen. Moreover, iPadOS also allows you to alter the "tilt" functionality associated with the Apple Pencil. The ability to adjust the angle and sensitivity can give you more control over shading effects, thereby making your artwork more refined and aesthetically pleasing. Experiment with different angles and observe how the tool responds to your physical movement, until you find the perfect balance that corresponds to your comfort and drawing style. To take your customization to the next level, venture into the realm of Apple Pencil's double-tap feature. This relic allows users to switch between tools to erase or draw, sample color, or even hide the drawing interface. You can find and adjust this function under the 'Apple Pencil' section in the iPad settings. As you get more comfortable with the standard settings, dive deeper into the 'Advanced Settings.' Here, you can fine-tune the 'Scribble' feature, adjust the navigation speed, and even disable the system-wide handwriting-to-text conversion when needed. Customising these features can truly elevate your drawing experience. Remember, the aim of these customizations is to tailor the Apple Pencil according to your comfort and needs. The only way to achieve an optimal drawing experience is by successfully understanding and manipulating the Apple Pencil settings. As a final tip, always ensure your Apple Pencil's firmware is updated to leverage the latest enhancements and bug fixes. By delving deep into these customisable settings, you are not just maximising your drawing experience, but essentially creating your own nuanced digital drawing language that embodies your unique artistic flair.
Additional Apps to Boost Your Drawing and Note-taking Capabilities
When it comes to maximizing your drawing experience, several additional applications can aid in boosting your drawing and note-taking capabilities as an Apple Pencil user. Procreate is a premier drawing app exclusive to the IOS platform that caters to professional artists’ needs. It gifts users with a plethora of tools such as layering abilities, autosave features, and custom brushes, not to mention its efficient hand gestures that make drawing a breeze. Adobe Fresco, on the other hand, is your go-to for digital painting. It mimics watercolors and oils realistically and offers a range of brushes as well as vector and raster tools that allow you to bring your vivid imaginations to life effortlessly. For meticulous note-takers, apps like Notability let you annotate, sketch, and scribble ideas seamlessly. Its audio recording tied to your notes is also a game-changer for auditory learners. Moreover, aspiring calligraphers gravitate towards apps like Calligrapher, teeming with customizable tools such as pens, nibs, inks, and papers, that make your penmanship stand out. Admittedly, Goodnotes 5 is another popular note-taking app with powerful OCR technology that enables you to search your handwritten notes, a feature very few apps offer. The ability to create customized page templates and flexible scrolling direction only add to its charm. Similarly, OneNote’s unique offering of freeform canvas aids in organizing and adding content on one page in any order you please! Ultimately, it is about discovering the app that aligns with your creative intentions and workflow. By experimenting with each of these apps, Apple Pencil users can truly enhance their drawing and note-taking experiences, thus tapping into the Pencil’s full potential. Whether you are doodling, illustrating, painting, or scribbling down thoughts during a cluttered day, the right app will undoubtedly accelerate your creative process and open avenues for digital expression like never before!
Conserve Your Apple Pencil’s Battery Life and Overall Equipment Care
When diving into the world of digital creativity with the Apple Pencil, understanding how to maximize and sustain its battery life is pivotal. Not only does it greatly amplify your usage time, but it also ensures the device's longevity. The device's battery life, depending largely on the usage frequency, usually lasts for around 10-12 hours. One simple way to conserve battery is by powering off when not in use. Though it has an auto-sleep mode after being idle for 20 minutes, manually turning it off saves more power. Charging is another crucial aspect to consider. Instead of frequent, partial charges, allow the Pencil to completely deplete its battery before recharging. This prevents what's known as the 'battery memory effect', improving overall battery longevity. Yet, remember to never let the lithium-ion battery sit too long at a zero charge as it could lead to a completely unresponsive device. Maintaining your Apple Pencil isn't just about battery life; its physical care is another important element. The Pencil nib, though designed for durability, is not invincible. Avoid using the device on rough paper textures as they gradually wear down the nib. Also, a light touch is recommended since hard pressure could damage the sensitive pressure sensors. While the Apple Pencil doesn’t offer replaceable batteries, it does offer replaceable tips to enhance performance longevity. Remember to twist them off and replace them every few months, especially with heavy usage. Gently cleaning the body, including the tip, with a slightly damp lint-free cloth, also helps avoid accumulated dirt and grime that could degrade performance. Incorporating such habits in your digital art regime can help ensure a great drawing experience with your Apple Pencil, maintaining its top-notch performance, while simultaneously conserving battery life and retaining device health.